![]() DIGITAL CAMERA
DIGITAL CAMERA
BL00005154-200
![]()
New Features Guide
Version 1.10}
Features added or changed as a result of firmware updates may no longer match the descriptions in the documentation supplied with this product. Visit our website for information on the updates available for different products:
https://fujifilm-x.com/support/download/firmware/cameras/
Contents
GFX100S firmware version 1.10 adds or updates the features listed below. For the latest manuals, visit the follow- ing website.
http://fujifilm-dsc.com/en/manual/
| No. | Description | GFX100S |
See |
Ver. |
| 1 | Changes to the functioning of custom modes have altered how custom settings banks are created and edited using H IMAGE QUALITY SETTING > EDIT/SAVE CUSTOM SETTING and B MOVIE SETTING > F EDIT/SAVE CUSTOM SETTING in the shooting menu. EDIT/SAVE CUSTOM SETTING and B MOVIE SETTING > F EDIT/SAVE CUSTOM SETTING in the shooting menu. |
74 | 1 | 1.10 |
| 2 | IQ IMAGE QUALITY SETTING > AUTO-UPDATE CUSTOM SETTING and  MOVIE SETTING > AUTO UPDATE CUSTOM SETTING items have been added to the shooting menu. MOVIE SETTING > AUTO UPDATE CUSTOM SETTING items have been added to the shooting menu. |
124
167 |
7 | |
| 3 | The APERTURE (PROGRAM SHIFT) options for BUTTON/DIAL SETTING > COMMAND DIAL SETTING > FRONT COMMAND DIAL 1 through FRONT COMMAND DIAL 3 and REAR COMMAND DIAL have been changed to APERTURE. | 231 | 8 |
C
Changes and additions are as follows.
GFX100S Owner’s Manual: 74
Custom Modes
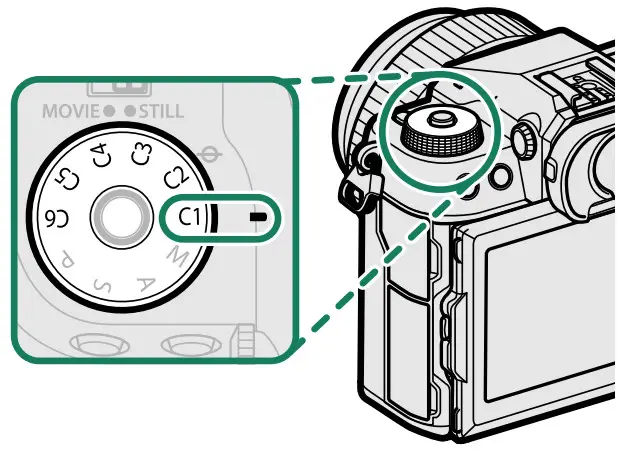
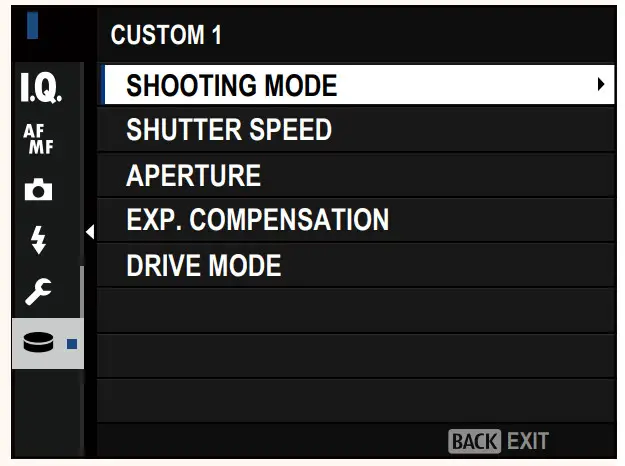
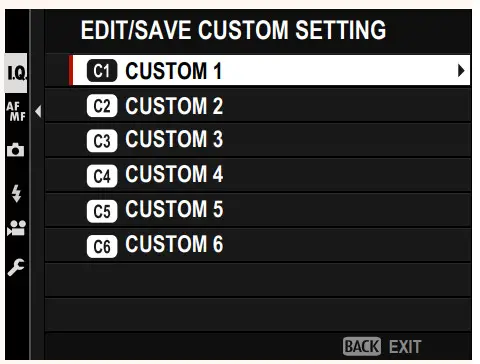
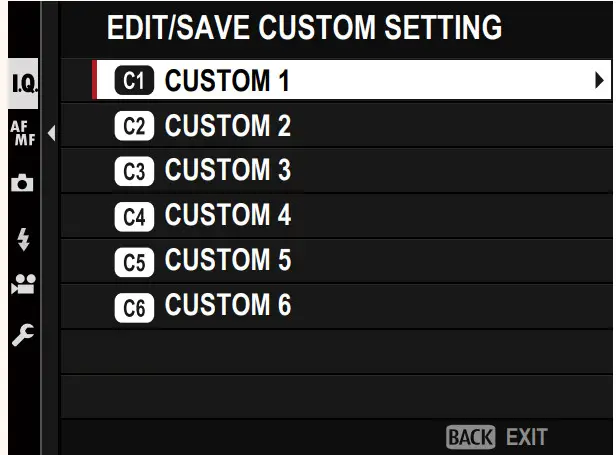
Rotate the mode dial to any of modes C1 (CUSTOM 1) through C6 (CUSTOM 6) to take pictures using previously-saved shooting menu settings. Settings can be saved or edited using H IMAGE QUALITY SETTING > EDIT/SAVE CUSTOM SETTING.
Saving Current Settings
Save current settings in a custom settings bank
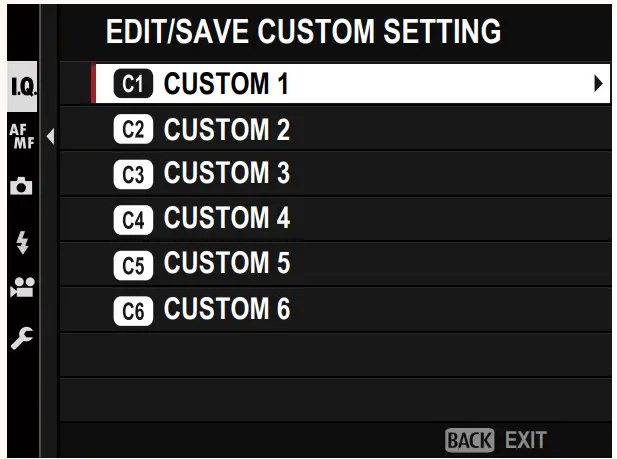
- Select H IMAGE QUALITY SETTING > EDIT/SAVE CUSTOM SETTING in the shooting menu and press MENU/OK.
- Highlight a destination bank for cur- rent settings (C1 through C6) and press MENU/OK.
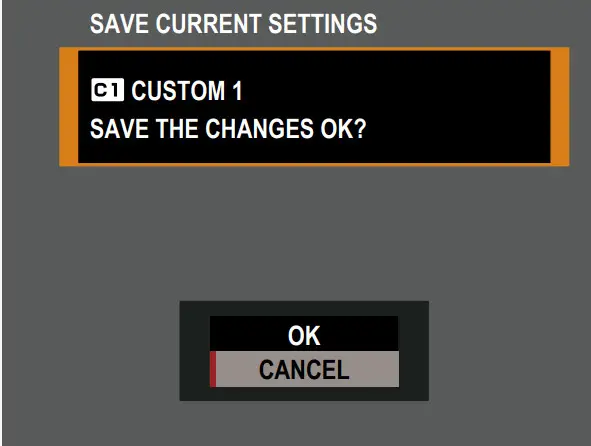
- Highlight SAVE CURRENT SETTINGS and press MENU/OK.
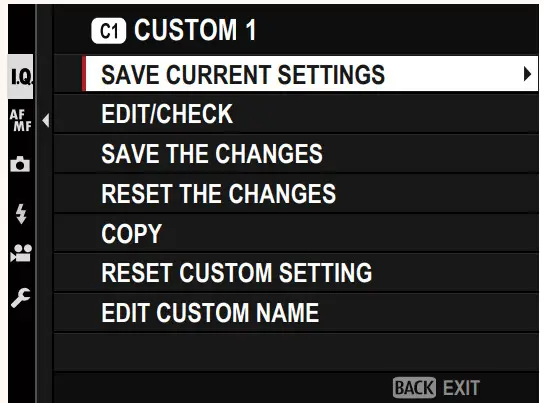
- Highlight OK and press MENU/OK. Current settings will be saved to the selected bank.
Editing Custom Settings
Edit existing custom settings banks.
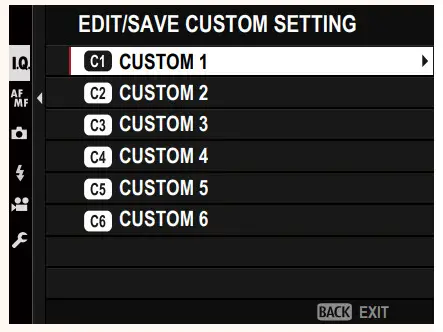
- Select H IMAGE QUALITY SETTING > EDIT/SAVE CUSTOM SETTING in the shooting menu and press MENU/OK.
- Highlight the desired custom settings bank and press MENU/OK.
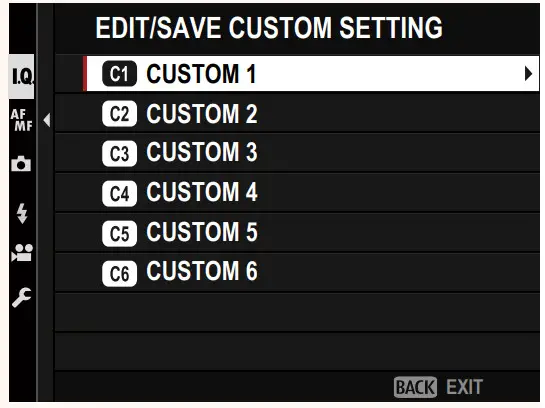
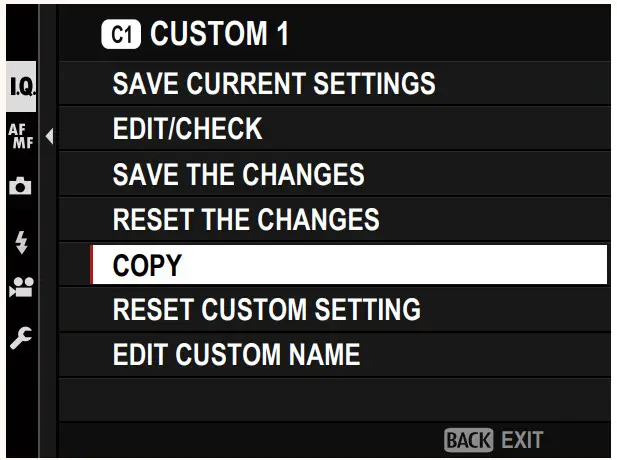
- Highlight EDIT/CHECK and press MENU/OK.
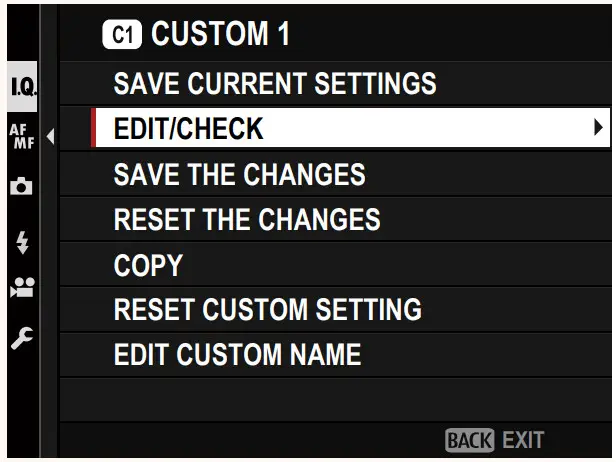
- The camera will display a list of the shoot- ing menu items; highlight an item you wish to edit and press MENU/OK. Adjust the selected item as desired.
- Press MENU/OK to save the changes and return to the shooting menu list.
Adjust additional items as desired.
 If DISABLE is selected for H IMAGE QUALITY SETTING > AUTO UPDATE CUSTOM SETTING, red dots will appear next to the edited items but the changes will not be saved automatically.
- To save the changes for selected items, highlight the items in the list and press Q.
- To save changes for all items, return to Step 3 and select SAVE THE CHANGES. To cancel all changes and restore the previous settings, select RESET THE
- If you copy an item marked by a red dot, the item will be copied with the changes intact.
Copying Custom Settings
Copy custom settings from one bank to another, overwriting the settings in the destination bank. If the source bank has been re- named, the name will also be copied to the destination bank.
- Select H IMAGE QUALITY SETTING > EDIT/SAVE CUSTOM SETTING in the shooting menu and press MENU/OK.
- Highlight the source bank and press MENU/OK.
- Highlight COPY and press MENU/OK.
- Highlight the destination bank (C1 through C6) and press MENU/OK.
A confirmation dialog will be displayed
Any changes to custom settings in the destination bank will be overwritten.
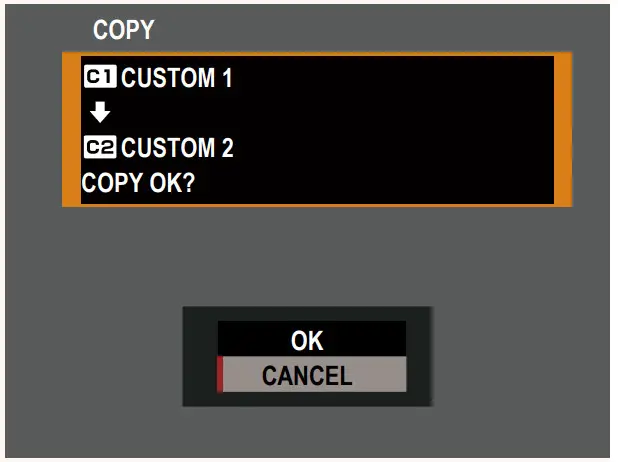
- Highlight OK and press MENU/OK. The selected settings will be copied to the destination bank, overwriting any existing settings.
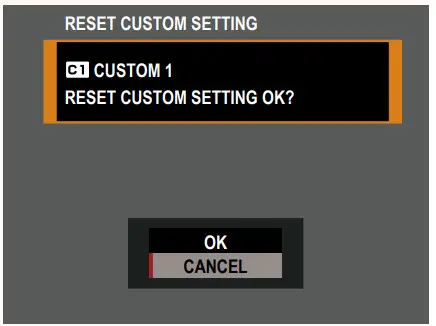
Resetting Custom Settings
Reset selected custom settings banks.
- Select D IMAGE QUALITY SETTING > EDIT/SAVE CUSTOM SETTING in the shooting menu and press MENU/OK.
- Highlight the desired custom settings bank and press MENU/OK.
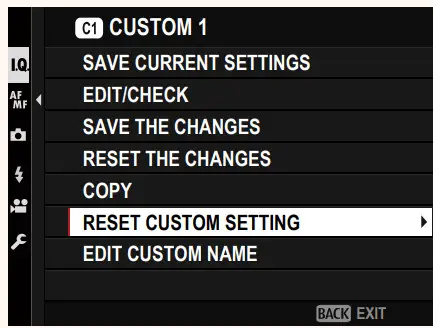
- Highlight RESET CUSTOM SETTING and press MENU/OK.
A confirmation dialog will be displayed.
- Highlight OK and press MENU/OK. The selected bank will be reset.
Renaming Custom Settings Banks
Rename selected custom settings banks.
- Select IMAGE QUALITY SETTING > EDIT/SAVE CUSTOM SETTING in the shooting menu and press MENU/OK.
- Highlight the desired custom settings bank and press MENU/OK.
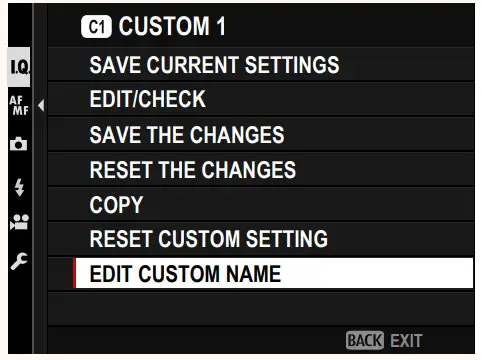
- Highlight EDIT CUSTOM NAME and press MENU/OK.

- Enter a new name for the custom settings bank and select SET.
The selected bank will be renamed.
GFX100S Owner’s Manual: P 124
AUTO-UPDATE CUSTOM SETTING
Choose whether changes to saved custom settings apply auto- matically.
| Option | Description |
| ENABLE | Changes to custom settings bank CUSTOM 1 through CUSTOM 6 apply automatically. |
| DISABLE | Changes do not apply automatically. Any changes to custom settings must be applied manually (P 2). |
GFX100S Owner’s Manual: 167
AUTO UPDATE CUSTOM SETTING
Options are the same as those for still photography, but settings must be adjusted separately.
GFX100S Owner’s Manual: 231
COMMAND DIAL SETTING
Choose the roles played by the command dials.
| Option | Description |
| FRONT COMMAND DIAL 1 |
Assign shutter speed (5.5. (PROGRAM SHIFT)) or aperture (APERTURE) ‘ to FRONT COMMAND DIAL 1. |
| FRONT COMMAND DIAL 2 |
Assign shutter speed (5.5. (PROGRAM SHIFT)), aperture (APERTURE) ‘, sensitivity (ISO), or no role (NONE) to FRONT COMMAND DIAL 2 or FRONT COMMAND DIAL 3. |
| FRONT COMMAND DIAL 3 |
|
| REAR COMMAND DIAL |
Assign shutter speed (S.S. (PROGRAM SHIFT)), aperture (APERTURE) ‘, sensitivity (ISO), or no role (NONE) to the rear command dial. |
| EXP. COMPENSATION ASSIGNMENT |
Exposure compensation can be adjusted using either or both of the front and rear command dials while the |
* Aperture ring rotated to A or C in mode A (aperture-priority AE) or M (manual).
• COMMAND DIAL SETTING can also be accessed by pressing and holding the center of the front command dial.
• You can also press the center of the front command dial to cycle through settings in the order FRONT COMMAND DIAL 1, FRONT COMMAND DIAL 2, and FRONT COMMAND DIAL 3.
NOTE
_____________________________
_____________________________
_____________________________
_____________________________
![]()
![]() Corporation
Corporation
7-3, AKASAKA 9-CHOME, MINATO-KU, TOKYO 107-0052, JAPAN
https://fujifilm-x.com
![]()