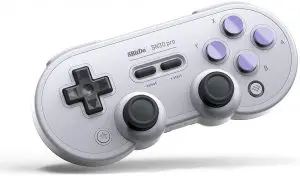
8Bitdo SN30 Pro Bluetooth GamePad User Manual

Product Name: 8Bitdo SN30 Pro v2 Bluetooth GamePad
Model: 80DI SF30ProV2
Basic operation
- Press START to turn on the controller
- Press and hold START for 3 seconds to turn off the controller
- Press and hold START for 8 seconds to force turn off the controller
Bluetooth connection
Switch
- Press START+Y to turn on the controller first, then press and hold PAIR for 3 seconds to enter pairing mode. LED will,LEDs will start to rotate from left to right.
- Go to your Switch Home Page to click on Controllers, then click on Change Grip/Order and wait for controller to sync up. LED will become solid when connection is successful.
- Controller will auto reconnect to your Switch with the press of START once it has been paired.
- STAR button = Switch screenshot button, Home button = Switch HOME button
Android
- Press START+B to turn on the controller, LED 1 will start to blink.
- Press and hold PAIR for 3 seconds to enter pairing mode. LED will rotate from left to right.
- Go to your Android device’s Bluetooth setting, pair with [8Bitdo SF30 Pro] or [8Bitdo SN30 Pro]. LED will become solid when connection is successful.
- Controller will auto reconnect to your Android device with the press of START once it has been paired.
USB Connection: connect the controller to your Android device via USB Cable after step 1.
Windows
- Press START+X to turn on the controller, LEDs 1, 2 will start to blink.
- Press and hold PAIR for 3 seconds to enter pairing mode. LEDs will rotate from left to right.
- Go to your Windows device’s Bluetooth setting, pair with [8Bitdo SF30 Pro] or [8Bitdo SN30 Pro]. LED will become solid when connection is successful.
- Controller will auto reconnect to your Windows device with the press of START once it has been paired
- USB Connection: connect the controller to your Windows device via USB Cable after step 1.
macOS
- Press and hold START+A for 1 second to power on the controller, LEDs 1,2,3 will start to blink.
- Press and hold PAIR for 3 seconds to enter pairing mode. LEDs will rotate from left to right.
- Go to your macOS device’s Bluetooth setting, pair with [Wireless Controller]. LED will become solid when connection is successful.
- Controller will auto reconnect to your Windows device with the press of START once it has been paired.
- USB Connection: connect the controller to your macOS device via USB Cable after step 1.
Turbo function
- Hold the button you would like to set turbo functionality to and then press the STAR button to activate turbo functionality.
- HOME LED will blink when turbo functionality has been applied successfully.
- All buttons with Turbo functionality activated will cause the HOME LED to blink, showing you that Turbo functionality is active on that button.
- To deactivate turbo function, hold the button with turbo functionality activated press the STAR button to deactivate turbo functionality. The HOME LED will no longer blink if you have successfully disabled turbo functionality.
- Analog sticks are not included.
- This does not apply to Switch.
Battery
| Status | LED Indicator |
| Low battery mode | POWER LED blinks |
| Battery charging | POWER LED stays solid |
| Battery fully charged | POWER LED turns off |
| Built-in 480 mAh Li-on with 16 hours of play time. | Rechargeable via its USB-C cable with 1 – 2 hour charging time. |
- Battery charging time might vary depending to the environment the controller is exposed to.
Power Saving
- Sleep mode – 1 minute with no Bluetooth connection.
- Sleep mode – 15 minutes with Bluetooth connection but no use.
- Press START to wake up your controller.
Support and firmware upgrade
Please visit support.8bitdo.com for further information and additional support.
FCC Statement
15.19
This device complies with Part 15 of the FCC Rules. Operation is subject to the following two conditions:
- This device may not cause harmful interference.
- This device must accept any interference received, including interference that may cause undesired operation.
15.21
Note: The grantee is not responsible for any changes or modifications not expressly approved by the party responsible for compliance. Such modifications could void the user’s authority to operate the equipment.
15.105(b)
NOTE: This equipment has been tested and found to comply with the limits for a Class B digital device, pursuant to part 15 of the FCC Rules. These limits are designed to provide reasonable protection against harmful interference in a residential installation. This equipment generates uses and can radiate radio frequency energy and, if not installed and used in accordance with the instructions, may cause harmful interference to radio communications.
However, there is no guarantee that interference will not occur in a particular installation. If this equipment does cause harmful interference to radio or television reception, which can be determined by turning the equipment off and on, the user is encouraged to try to correct the interference by one or more of the following measures:
- Reorient or relocate the receiving antenna.
- Increase the separation between the equipment and receiver.
- Connect the equipment into an outlet on a circuit different from that to which the receiver is connected.
- Consult the dealer or an experienced radio/TV technician for help
RF Exposure Statement
This equipment complies with FCC radiation exposure limits set forth for an uncontrolled environment. This equipment should be installed and operated with minimum distance of 5mm between the radiator and your body.