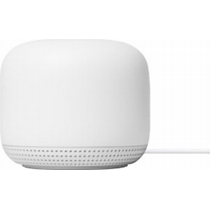
Google GA01426-US Nest Wi-Fi Router
Set up Google Nest Wifi
Google Nest Wifi is the newest mesh Wi-Fi system from Google. It replaces your existing Wi-Fi router and consists of a router and point(s). Google Nest Wifi points expand coverage within your home and also work as Google Assistant speakers. Previous versions of Google Wifi points can also be added to Google Nest Wifi to provide more coverage. To set up the original Google Wifi, check set up Google Wifi. If you already have a Google Wifi network set up, learn how to use Google Wifi points with Google Nest Wifi. OnHub routers are not compatible with Google Nest Wifi.
To get started, you’ll need:
- A Google Nest Wifi router.
- Any additional Wifi devices you would like to add (Google Nest Wifi points, Google Wifi points, or Google Nest Wifi router). This is optional to expand coverage.
- A Google Account.
- One of the following mobile devices:
- An Android phone running Android 6.0 or later
- An Android tablet running Android 6.0 or later
- An iPhone or iPad with iOS 12.0 or later
- The latest version of the Google Home app available on Android or iOS.
- Internet service.
- Some ISPs use VLAN tagging. You may need additional equipment for Google Wifi to work. Learn how to set up your network with an ISP that uses VLAN tagging.
- Modem (not provided).
Note: It’s strongly recommended to purchase Nest Wifi from the country where you’ll be using it. Since wireless regulations vary by country, you may experience compatibility issues if you move your Wifi device(s) to a different country and Google will be unable to offer support. If you’re setting up a mesh network, it’s recommended to purchase all of your Wifi points in the same country.
Set up your Nest Wifi router
Before you set up the Google Nest Wifi router, make sure your modem is working and connected to the Internet. The router is the unit with Ethernet ports on the bottom.
- Download the Google Home app on Android or iOS.
- If this is your first time using the Google Home app, set up a home.
- Choose a location for your router.
o Your router will need to be connected to a working modem that is connected to the Internet.
o For the strongest signal, place your router at eye level, in plain views, like on a shelf or TV stand.
o Learn more about where to place your router. - Connect the Ethernet cable to your Nest Wifi router’s WAN port another end to your modem.
- Plug your Nest Wifi router into a wall outlet. After about a minute, the light will pulse white to indicate that it’s on and ready for setup.
- On your phone or tablet, open the Google Home app
- Tap Add Set up device New device.
- Choose a home.
- Select your Nest Wifi router.
- Scan the QR code on the bottom of your device.
o Hold your phone about 5 inches (12 cm) away to scan. Learn more tips for scanning QR codes.
o If you’re unable to scan the QR code, tap Continue without scanning, then enter the setup key on the bottom of your device. - Select a room for your router or create a new one.
- Give your Wi-Fi network a name and a secure password.
- The router will now create your Wi-Fi network. This may take a few minutes.
- If you’d like to add another Wifi device, tap Yes in the app to continue or follow the steps below to add a point at a later time.
Add a point or an additional router
Google Nest Wifi devices and Google Wifi points can be added to the network you’ve created with your router. All additional Wifi devices added, including Google Nest Wifi routers, are considered points in the mesh network. Once you’ve decided where to place your point and plugged it in, use the Google Home app for setup.
- Open the Google Home app
- Tap Add Set up device New device.
- If prompted, choose a home.
- Select the device you would like to set up as a point
- Scan the QR code on the bottom of your device.
o Hold your phone about 5 inches (12 cm) away to scan. More tips for scanning QR codes.
o If you’re unable to scan the QR code, tap Continue without scanning, then enter the setup key on the bottom of your device. - Your point will now connect. For Nest Wifi points, when a sound plays from your speaker, tap Yes.
- Follow the in-app instructions to finish setup.
- If you’d like to add another point, tap Yes in the app when prompted or repeat these steps at a later time for additional points.
- Once you’ve added all of your Wifi devices, the app will perform a mesh test to confirm everything is working.
Troubleshooting setup
If setup didn’t work, try the following steps:
- Unplug your modem, router, and point, and plug them back in.
- Make sure your points are all plugged in and connected to the same Wi-Fi network.
- Factory reset your router or point.
- Contact support.