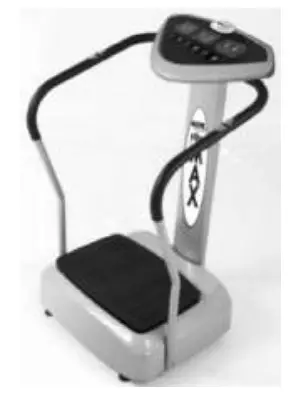
GYMFORM® Vibro Max Instruction Manual
Congratulations! You have bought the most advanced home vibration machine. In no time at all you will be toned and in perfect shape. Always consult the instructions and please retain for future use.
Set includes
1 x Gymform® Vibro Max unit.
1 x Pedometer with Radio
1 x Instruction and Construction guide.
1 x Advanced Workout Guide
1 x Structured Diet Plan
1 x Tape Measure
Advantages
Increases the basal metabolic rate, thereby burning calories.
Increases strength and body tone.
Helps improve circulation.
Reduces the appearance of cellulite.
Recommended for people with osteoporosis and osteoarthritis because it does not put pressure on joints.
Improves flexibility. Helps strengthen muscles. Vibration training favours the development of lean muscle tissue.
Helps improve basic muscles.
Favours lymphatic drainage and improved circulation considerably helps reduce fat
Safety warnings
Always read the instruction manual before operating the GYMFORM ® Vibro Max.
If you have any worry over your fitness level or have experienced previous illness always consult your doctor before using the GYMFORM ® Vibro Max.
If you have any respiratory dieses or asthma always consult your doctor before using the GYMFORM ® Vibro Max.
Always place the GYMFORM ® Vibro Max on a flat surface.
Do not let children operate the GYMFORM ® Vibro Max without an adults guidance.
Keep the GYMFORM ® Vibro Max away from water.
Do not use the GYMFORM ® Vibro Max with wet hands.
Turn off the power at the mains after use.
Not to be used by pregnant women.
Do not drink alcohol and use the machine.
Please drink water after use.
Maximum usage 4 times a day.
Machine features/operation
1 – 50 speeds.
5 specifically designed programs.
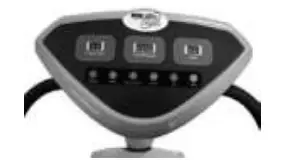
3 Digital LED screens. One indicates the program number (“Program selection”), the second shows time elapsed and Body Mass Index (BMI) (“time/BMI”) and the third shows the speed selected (“Speed”).

Screens:
- PROGRAM SELECTION
- TIME/BMI READY
- SPEED
Buttons:
ON/STOP
START
PROGRAM SELECT
CONFIRM
UP
DOWN
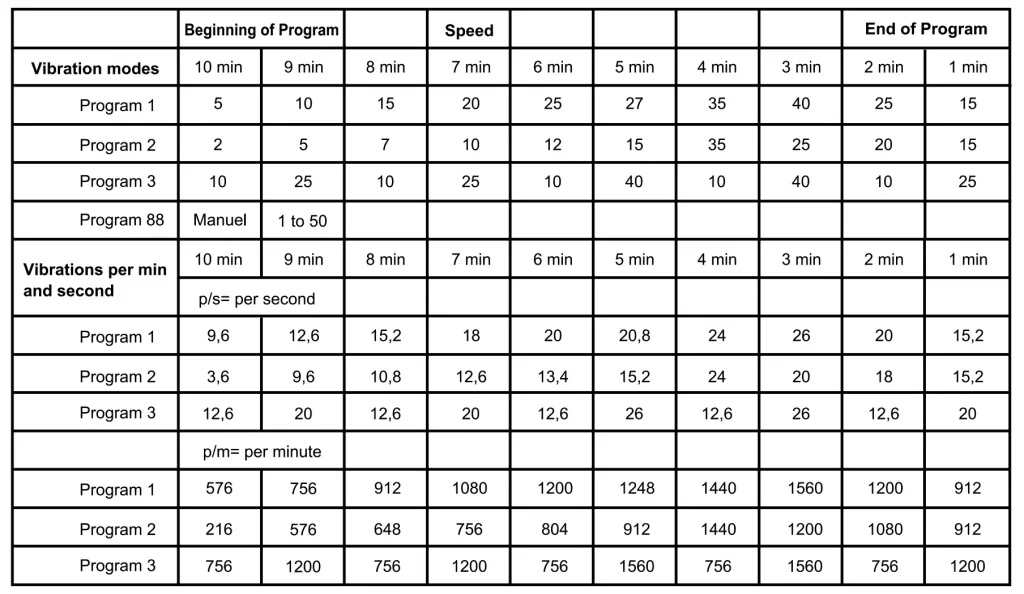
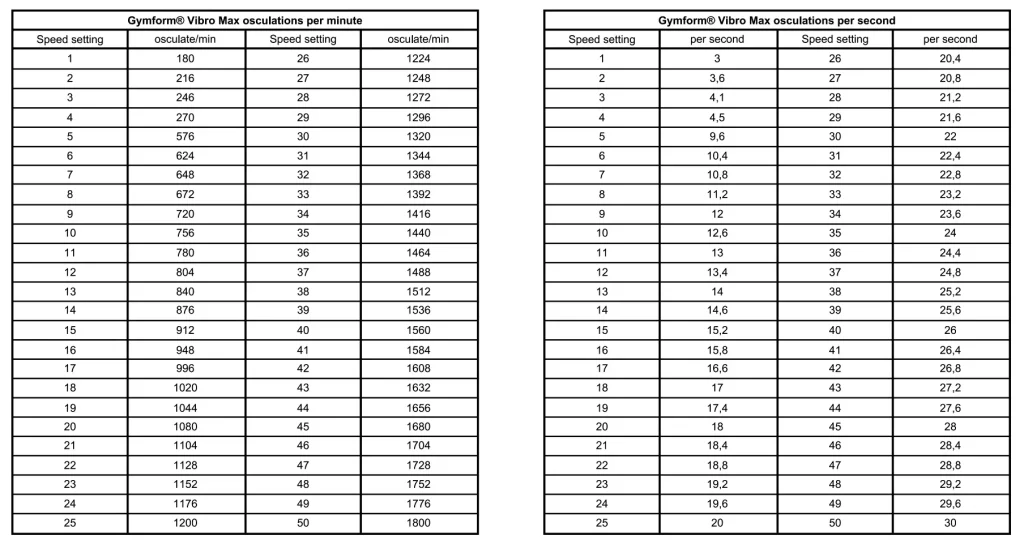
Please see attached graph for osculation’s per minute and seconds.
Constructing the Gymform® Vibro Max
Before starting please lay out all of the parts listed below. Additional to the components below you will also need some cello tape.
Equipment List
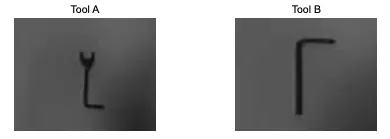
– Tools:
– Equipment
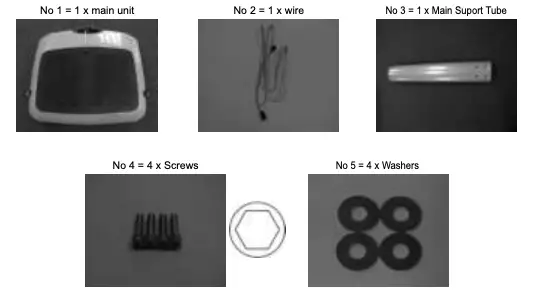
Please consult the equipment list.
Make sure the machine is in the O position (OFF).
- Lay the main unit (Nº1) on an even surface
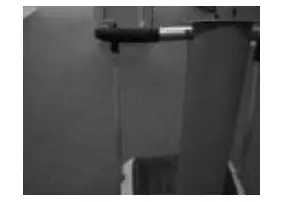
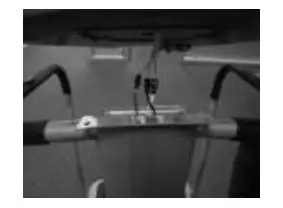
- Take wire Nº 2 and pass it down the middle of the suport tube Nº 3. Please pay attention to have the larger connector at the top. With some cello tape (not supplied) tape the larger connector of the wire Nº 2 onto the main suport tube Nº 3. Please see the photo below
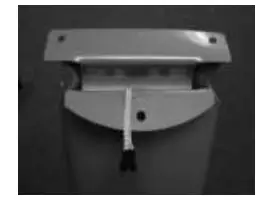
- When you assemble the main suport tube, make sure the wires remain connected.

- Connect the bottom connector of wire Nº 2 with the wire in the main unit. Please see the photo. Make sure the wires remain connected.
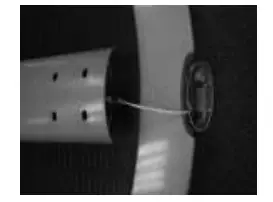
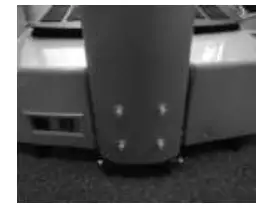
- Now slot the main suport tube Nº 3 into the main unit Nº 1.
Please see photo below
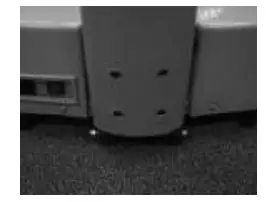
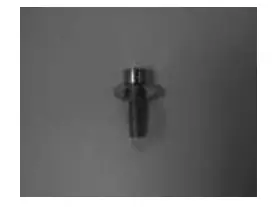
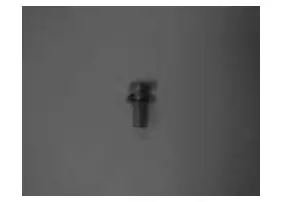
- Take screws Nº 4 and washers Nº 5 and put together.
- Please use tool A. At the bottom of the main suport tube Nº 3 use the screws Nº 4 and washers Nº 5 to attach the main suport tube Nº 3 and the main unit Nº 1.
The photograph below shows how the main suport tube should look like when connected and assembled.
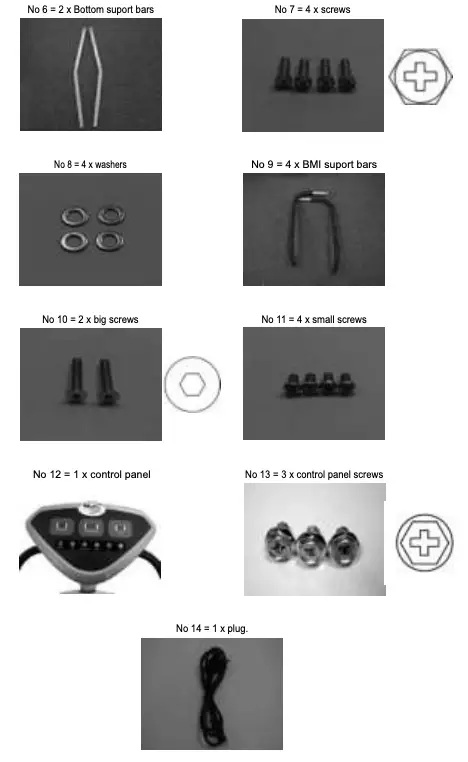
- Now take the 2 bottom suport bars no 6 and place into the main unit no 1 Please make sure the top of the bottom suport bars no 6 are angled away from the main unit.

- Now take screws no 7 and washers no 8 and put together.
- Take tool B and use screws 7 and washers 8 to secure the bottom suport bars 6 to the main unit 1. This should be done at the bottom of the main unit no 1.
Take the BMI suport bars Nº 9 and place on top of the bottom suport bars Nº 6. Pay attention that the top bars of the BMI suport bars Nº 9 fit into the main suport tube Nº 3.
- Please use the Tool B and take the big screws Nº 10 and secure the BMI suport bars Nº 9 to the main suport unit.
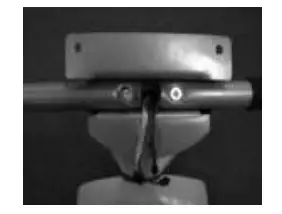
PHOTO NOTE – Please pay attention to keep all of the 3 wires outside of the suport tube Nº 3. - Next please use tool B and the small screws Nº 11 to secure the BMI suport bars Nº 9 to the bottom suport bars Nº 6.

- Now connect the wires of the control panel Nº 12 to the wires of the main suport tube Nº 3. NOTE – for the 2 BMI red wires it does not matter which way around they are. When you hear a clicking sound, it means the panel is attached.
- Place the control panel Nº 12 onto the main suport tube Nº 3 and feed the wires inside the main suport tube Nº 3.
- Now using screws Nº 13 at the bottom side of the control panel Nº 12 there are 3 holes. Use tool B to secure the control panel Nº 12 to the main suport tube Nº3.

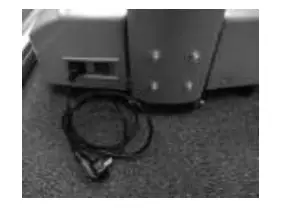
- Now connect plug Nº14 to main unit Nº1 and connect to an electricity supply.
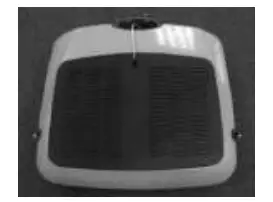
Well done you are now ready to use the Gymform® Vibro Max.
Operating Instructions
Programs of the Gymform® Vibro Max.
There are 5 specifically designed programs. Consult the following list to choose the program that best fits your needs.
88 – Manuel Mode – choose between intensity levels of 1 to 50, depending on the speed you want. Consult the attached graph for the relation between speed and oscillations per minute.
P1 – Strength and Power Conditioning Program.
Slowly increases your body’s heart rate and vibration resistance.
P2 – Fat Burning Program.
Keeps your heart rate in the fat burning zone.
P3 – Advanced Aerobic and Anaerobic Training Program. (Fartlek Training)
Fartlek training – concentrated on both speed and endurance training. For advanced athletes.
1 – Body Mass Index Program (BMI). This mode reads your BMI, so you can calculate your body’s fat rate and see it reduce.
All programs last for the recommended 10 minutes.
Operating the Machine
Maximum use of the Gymform® Vibro Max is 4 x 10 minute sessions per day. Please do not exceed this.
Turn the unit on by pressing the red on/stop button in the back of the main unit Nº1.
Press the P Program select button to find your desired program ie – P1, P2, P3, 88, 1.
When you have selected your desired program Press the purple start button to begin your workout.
If you would like to workout for a shorter time than 10 minutes please follow these instructions.
When a program is flashing in the program selection LCD you can press the blue confirm button to change the time. The time LCD screen will flash, by pressing either of the red and green up and down keys you can alter the time of your workout. Press the purple start button to begin your workout.
For BMI –
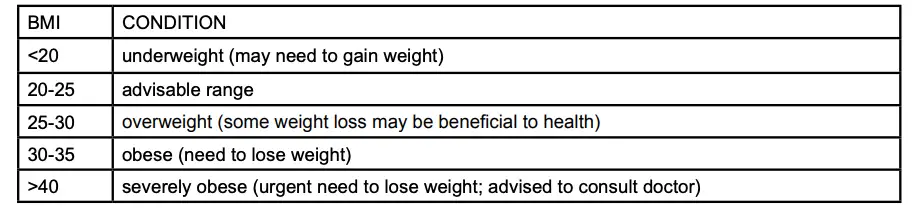
What is Body Max (BMI) Index?
Body Mass Index is a formula for measuring a person’s level of overweight or obesity using measurements of height and weight.
BMI Chart –
To calculate your BMI:
Please select program 1.
You must enter 4 different types of information for the Vibro 10 000 to read your Body Max Index (BMI)
The red and green keys (up and down) change the value. Once you have the correct value please press the blue c button to confirm. Then you can move on to selecting your next value.
1st value is – Gender Male is 1 Female is 2.
2nd Value is – Age,
3rd Value is – Height. Height is in cm. (FYI there are 30.48 cm in a foot)
4th Value is – Weight. Weight is in kg.
When the screen displays “—“ place your hands on the silver bits on the bars.
The Gymform® Vibro Max will now display your bodies BMI.
Pls take your BMI every week to see your progress!
The Gymform® Vibro Max is constructed according to the following regulations –
EMC Directive for EU:
CENELEC EN61000-3-2
CENELEC EN61000-3-3
CENELEC EN 55014-1
CENELEC EN 55014-2
LVD for EU:
CENELEC EN 60335-1
BSI BSEN 50366
Product Specification – 200W
AC 220 – 240 V
50Hz
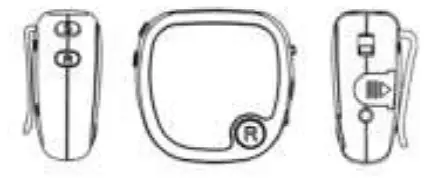
Instructions for the Pedometer with Radio
Features:
This pedometer counts every step you take in a well designed LCD screen. This exclusive pedometer also contains an FM radio.
Inserting the battery
Open the battery cover and place 1PCS AAA battery, insert with the polarity (+)facing up and(-)facing down ,then close the battery cover .
Operation of the Pedometer
Attach the pedometer to your waist band or belt and this will count the amount of steps that you take. If you would like to restart the pedometer to 00000 please press the large reset button “R” on top of the pedometer. Note – At the same time you may listen to the radio.
Operation of the Radio:
Plug the headphones into the headphone jack located at left-side of the pedometer and indicated with the symbol 
Turn on the receiver by moving the grey level on the left of the pedometer to either low or high. This is the Volume.
Press the smaller button “R” (Reset) once to ensure the frequency is at The low-end position.( FM88MHZ).
The smaller reset button “R” is at the right side of the pedometer below the scan button “S”.
Press “Scan” once, it will automatically search for broadcast stations.
Press “Scan” to select your desired station. You will notice when the radio reaches the highest radio station (FM108MHZ) because the scan will stop searching for stations. Please press the smaller reset button “R” to bring the radio back to the low-end position(FM88MHZ). Then you can select your desired broadcast station again by pressing scan “S”.
To turn off the radio, switch the grey button on the right side of the pedometer to “OFF”.
Note –
This device uses 1ps AAA battery (not included), please change the battery when the LCD screen is blank or it is not possible to hear the radio.