HAFELE AluSplash Matte Surface


Top Installation Tips
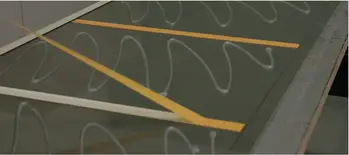
Always check the label on each package for the batch number when joining 2 or more panels next to one another. Panels from different batches may have a slight visual shade difference.
- ALWAYS remember the 1.5mm expansion gap and the use of packers.
Not leaving a sufficient expansion gap could cause the panel to bow, however this does not apply to joins. Once correctly joined the panels become one. - ALWAYS measure twice, cut once.

Double check your measurements! As you’re working on the back of the panel it can become confusing. - ALWAYS work on the back of the AluSplash Panel.
Working on the back of the panel will create “clean” cuts on the face. It will also prevent any surface scratching during fitting. - ALWAYS dry fit the panels and check the fit.
We always encourage “dry fitting”. This will allow you to clearly check your work before the final installation. - ALWAYS use the right kit & ensure you wear the correct PPE.
Using the correct tools will ensure a clean finish. Make sure you wear the correct PPE throughout the installation.
For a full installation video, please visit the Hafele YouTube Channel and click on the AluSplash Installation video. - Seamless Boxing
This section is only required if you are boxing around concealed pipework or wiring.
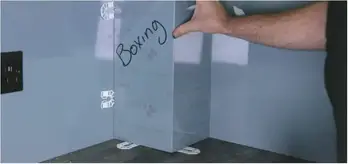
There are 2 different types of boxing you can create with AluSplash:- Seamless: Where you V-Groove the panel with a router to bend it around to create a seamless edge.
- Trimmed Boxing

- Trimmed: Where you see the color of the trim in your internal and external corner joins.
- Fitting Panel
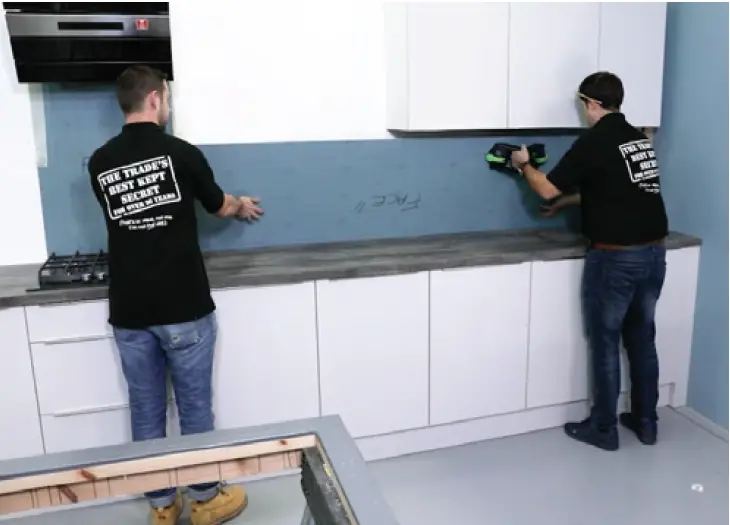
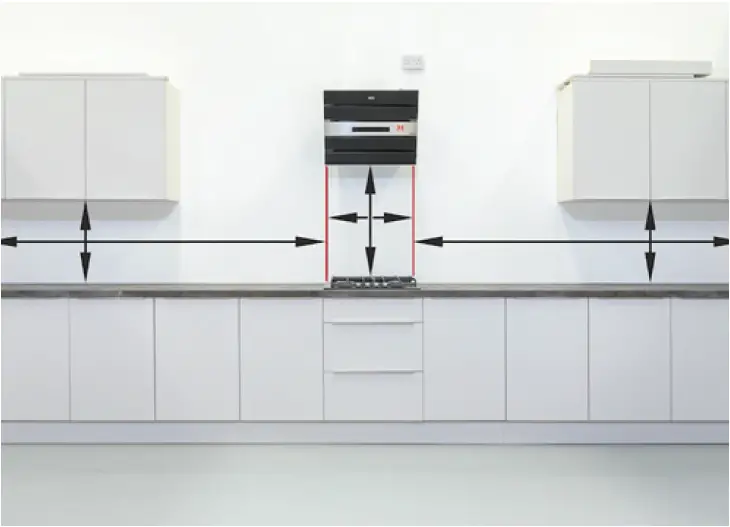
When fitting , ensure the wall is clean. Measure and mark a mm line on all visible edges, and then mark 400mm across the panel for where you will apply the double sided tape.
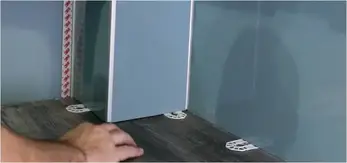
When setting the panel, always remember to use packers to allow for expansion.
- Fitting of Seamless & Trimmed boxing
This section is only required of you are boxing around concealed pipework or wiring.- Seamless: Make sure you apply tape to one side and silicone to the other. When setting the panel, remember to use packers to allow for expansion.
- Trimmed: Attach the panels to the external trim, silicone both sides of the boxing and slide the panels into place. When setting the panels, remember to use packers to allow for expansion.
- Completion
When the installation is complete, add any sockets back in place, remove the packers and clean the work surface. You can then apply the silicone.
To find out where you can buy AluSplash,
please visit www.alusplash.com
Care, Maintenance and Installation Guide (Matte Surface)
Care and Maintenance
AluSplash panels are vigorously tested for various aspects of functionality and durability. However, like most wall surfaces it is important that the panel is correctly cared for and maintained to ensure that the panel retains its aesthetic look, color and surface finish.
- Do not use acidic, caustic or abrasive cleaning detergents or materials to clean the panel surface.
- The panel surface must be cleaned regularly.
- Build up of grime, oil, food and beverage splashes on the panel surface should be wiped clean immediately.
- Use lukewarm water with a microfibre or non-abrasive cloth to clean the elements matte surface.
- Detergent with bleach or home remedy solutions like baking soda, or other stain removing gels, powders, liquids or materials should not be used on the panelsurface.
- Try not to clean the panel surface if it is hot! Wait for the surface to cool down to room temperature before cleaning.
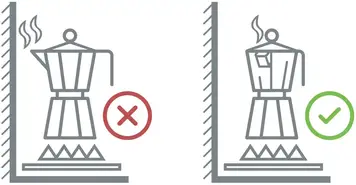
- Ensure that the spout of a boiling water kettle is not directly facing the panel surface. Hot steam, air and / or boiling water released from the spout can cause the surface of the panel to be stained or damaged.
- Always face the spout of the kettle away from the panel surface, as shown on above.

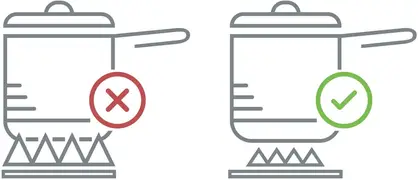
- Do not allow the flame from the gas hob to spread up the sides of the cooking pot or pan.
- Always place a lid on a pan when boiling any foods or liquids on the hob nearest to the panel surface.
- If using behind a cooking hob, ensure that a minimum distance of 30mm is maintained between the panel and the closest edge of the hob. When cooking with open flame hobs, do not allow the flame to be in direct contact with the panel surface.
- Avoid placing metallic or sharp objects like knives and other utensils against the panel surface as it may cause scratches on the panel’s surface.
- Allow for a 1.5 mm gap on each side of the installed panel and around the worktop to allow for expansion.
All electrical plumbing works must be performed by a licensed and certified electrician
How to Install
STEP 1. Preparation
Be careful when lifting the panel, heavy and can bend easily. Open with care and check both sides of the panel for imperfections.
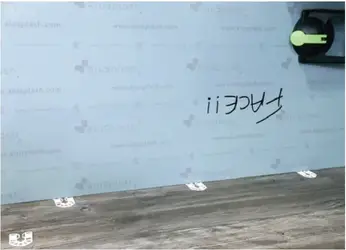
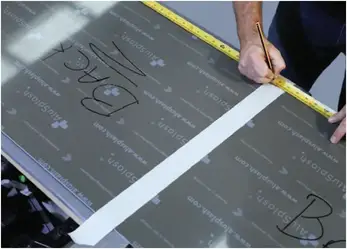
Mark “FACE” and “BACK” on the panel to avoid making mistakes.
STEP 2. Measuring
When measuring, you need to ensure that you measure ALL areas. Make sure you account for mm for expansion. Expansion gaps are NOT required when you have a join.
TOP TIP! Measure twice, cut once.
STEP 3. Cutting
When cutting, always cut on the BACK of the panel.
TOP TIP! Use an aluminum blade to ensure a precise clean cut.
STEP 4. Joining
Check that you are happy with the join of the panels against the wall. If you require a joining strip, there are 2 ways to joining the panels together. Either attach the joining strip to the panels when off the wall to create one panel, or attach it to the panel when off the wall and slide it behind the other once fitted.
STEP 5. Edge Profile
Edge profiles add a finishing touch to the panels. Make sure you remove the protective film and dry fit the profiles, marking your miters for a cut line.
Use a chop saw to cut the profile and dry fit before you attach.