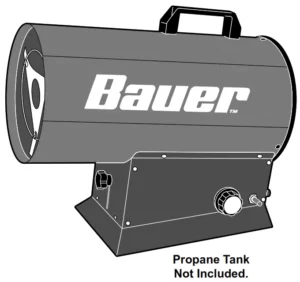
19161P-B
Owner’s Manual & Safety Instructions
Save This Manual Keep this manual for the safety warnings and precautions, assembly, operating, inspection, maintenance and cleaning procedures. Write the product’s serial number in the back of the manual near the assembly diagram (or month and year of purchase if product has no number).
Keep this manual and the receipt in a safe and dry place for future reference.
30K-60K BTU Forced Air Propane Portable Heater
Owner’s Manual
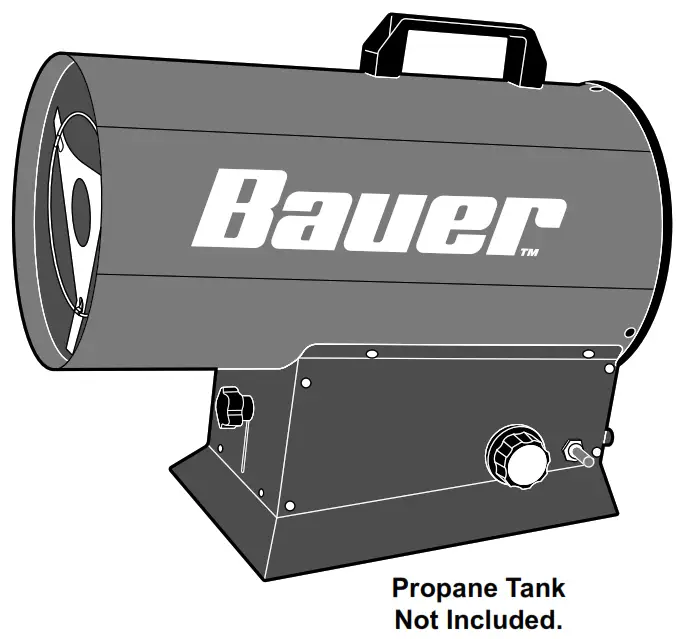
FOR YOUR SAFETY IF YOU SMELL GAS:
- Open windows.
- Don’t touch electrical switches.
- Extinguish any open flame.
- Immediately call your gas supplier.
WARNING: Improper installation, adjustment, alteration, service, or maintenance can cause injury or property damage. Refer to this manual. For assistance or additional information consult a qualified service technician, service agency, manufacturer, or the gas supplier.
FOR YOUR SAFETY
Do not store or use gasoline or other flammable vapors and liquids in the vicinity of this or any other.
Visit our website at: http://www.harborfreight.com
Email our technical support at: [email protected]
When unpacking, make sure that the product is intact and undamaged. If any parts are missing or broken, please call 1-888-866-5797 as soon as possible.
© Copyright 2020 by Harbor Freight Tools ® . All rights reserved. No portion of this manual or any artwork contained herein may be reproduced in any shape or form without the express written consent of Harbor Freight Tools. Diagrams within this manual may not be drawn proportionally. Due to continuing improvements, actual product may differ slightly from the product described herein. Tools required for assembly and service may not be included.
 WARNING
Read this material before using this product. Failure to do so can result in serious injury. SAVE THIS MANUAL.
Important Propane Safety Information for You and Your Family
 GENERAL HAZARD WARNING:
FAILURE TO COMPLY WITH THE PRECAUTIONS AND INSTRUCTIONS PROVIDED WITH THIS HEATER, CAN RESULT IN DEATH, SERIOUS BODILY INJURY AND PROPERTY LOSS OR DAMAGE FROM HAZARDS OF FIRE, EXPLOSION, BURN, ASPHYXIATION, CARBON MONOXIDE POISONING, AND/OR ELECTRICAL SHOCK.
ONLY PERSONS WHO CAN UNDERSTAND AND FOLLOW THE INSTRUCTIONS SHOULD USE OR SERVICE THIS HEATER.
IF YOU NEED ASSISTANCE OR HEATER INFORMATION SUCH AS AN INSTRUCTIONS MANUAL, LABELS, ETC. CONTACT THE MANUFACTURER.
 WARNING: FIRE, BURN, INHALATION, AND EXPLOSION HAZARD. KEEP SOLID COMBUSTIBLES, SUCH AS BUILDING MATERIALS, PAPER OR CARDBOARD, A SAFE DISTANCE AWAY FROM THE HEATER AS RECOMMENDED BY THE INSTRUCTIONS. NEVER USE THE HEATER IN SPACES WHICH DO OR MAY CONTAIN VOLATILE OR AIRBORNE COMBUSTIBLES, OR PRODUCTS SUCH AS GASOLINE, SOLVENTS, PAINT THINNER, DUST PARTICLES OR UNKNOWN CHEMICALS.
 WARNING:
NOT FOR HOME OR RECREATIONAL VEHICLE USE
This Heater is designed and approved for use as a construction heater under ANSI Z83.7.
The intended use is primarily the temporary heating of buildings under construction, alteration, or repair.
We cannot anticipate every use which may be made of our heaters.
CHECK WITH YOUR LOCAL FIRE SAFETY AUTHORITY IF YOU HAVE QUESTIONS ABOUT APPLICATIONS.
Other standards govern the use of fuel gases and heat producing products in specific applications. Your local authority can advise you about these.

- NO FLAMES OR SPARKS! Immediately put out all smoking materials and other open flames. Do not operate lights, appliances, telephones, or cell phones. Flames or sparks from these sources can trigger an explosion or a fire.
- LEAVE THE AREA IMMEDIATELY! Get everyone out of the building or area where you suspect gas is leaking.
- SHUT OFF THE GAS. Turn off the main gas supply valve on your propane tank if it is safe to do so. To close the valve, turn it to the right (clockwise).
- REPORT THE LEAK. From a neighbor’s home or other nearby building away from the gas leak, call your propane retailer right away. If you can’t reach your propane retailer, call 911 or your local fire department.
- DO NOT RETURN TO THE BUILDING OR AREA until your propane retailer, emergency responder, or qualified service technician determines that it is safe to do so.
- GET YOUR SYSTEM CHECKED. Before you attempt to use any of your propane appliances, your propane retailer or a qualified service technician must check your entire system to ensure that it is leak-free.
CAN YOU SMELL IT?
Propane smells like rotten eggs, a nk’s spray, or a dead animal. Some people may have difficulty smelling propane due to their age (older people may have a less sensitive sense of smell); a medical condition; or the effects of medication, alcohol, tobacco, or drugs.
ODOR LOSS. On rare occasions, propane can lose its odor. Several things can cause this including:
- The presence of air, water, or rust in a propane tank or cylinder
- The passage of leaking propane through the soil
 Since there is a possibility of odor loss or problems with your sense of smell, you should respond immediately to even a faint odor of gas.
PROPANE GAS DETECTORS
Under some circumstances, you may not smell a propane leak. Propane gas detectors sound an alarm if they sense propane in the air. They can provide an additional measure of security. You should consider the purchase of one or more detectors for your home.
GUIDELINES regarding propane gas detectors:
- Buy only units that are listed by Underwriters Laboratories (UL).
- Follow the manufacturer’s instructions regarding installation and maintenance.
- Never ignore the smell of propane, even if no detector is sounding an alarm.
APPLIANCE MAINTENANCE
LEAVE IT TO THE EXPERTS.
Only a qualified service technician has the training to install, inspect, service, maintain, and repair your appliances. Have your appliances and propane system inspected just before the start of each heating season.
DO NOT TRY TO MODIFY OR REPAIR
valves, regulators, connectors, controls, or other appliance and cylinder/tank parts. Doing so creates the risk of a gas leak that can result in property damage, serious injury, or death.
CO AND YOUR SAFETY
WHAT IS CARBON MONOXIDE (CO)?
You can’t taste or smell CO, but it is a very dangerous gas. High levels of CO can come from appliances that are not operating correctly, or from a venting system or chimney that becomes blocked.
CO CAN BE DEADLY!
High levels of CO can make you dizzy or sick. In extreme cases, CO can cause brain damage or death. Symptoms of CO poisoning include: headache, dizziness, fatigue, shortness of breath, and nausea.
 IF YOU SUSPECT CO IS PRESENT, ACT IMMEDIATELY!
- If you or a family member shows physical symptoms of CO poisoning, get everyone out of the building and call 911 or your local fire department.
- If it is safe to do so, open windows to allow entry of fresh air, and turn off any appliances you suspect may be releasing CO.
- If no one has symptoms, but you suspect that CO is present, call your propane retailer or a qualified service technician to check CO levels and your propane equipment.
CO DETECTORS CAN IMPROVE SAFETY.
For an extra measure of safety, consider installing a CO detector listed by UL on each level of your home.
TO HELP REDUCE THE RISK OF CO POISONING:
- Have a qualified service technician check your propane appliances and venting systems annually, preferably before the heating season.
- Install UL-listed CO detectors on every level of your home.
- Never use a gas oven or range-top burners to provide space heating.
- Never use portable heaters indoors unless they are designed and approved for indoor use.
- Never use a barbecue grill (propane or charcoal) indoors for cooking or heating.
- Regularly check your appliance exhaust vents for blockage.
RUNNING OUT OF GAS
 DON’T RUN OUT OF GAS. SERIOUS SAFETY HAZARDS, INCLUDING FIRE OR EXPLOSION, CAN RESULT.
- If an appliance valve or a gas line is left open, a leak could occur when the system is recharged with propane.
- If your propane tank runs out of gas, any pilot lights on your appliances will go out. This can be extremely dangerous.
- A LEAK CHECK IS REQUIRED.
In many states, a propane retailer or a qualified service technician must perform a leak check of your propane system before turning on the gas.
LIGHTING PILOT LIGHTS
IF A PILOT LIGHT REPEATEDLY GOES OUT or is very difficult to light, there may be a safety problem.
DO NOT try to fix the problem yourself. It is strongly recommended that only a QUALIFIED SERVICE TECHNICIAN light any pilot light that has gone out.
YOU ARE TAKING THE RISK of starting a fire or an explosion if you light a pilot light yourself. Carefully follow all of the manufacturer’s instructions and warnings concerning the appliance before attempting to light the pilot.
| WARNING SYMBOLS AND DEFINITIONS | |
 |
This is the safety alert symbol. It is used to alert you to potential personal injury hazards. Obey all safety messages that follow this symbol to avoid possible injury or death. |
 |
Indicates a hazardous situation which, if not avoided, will result in death or serious injury. |
 |
Indicates a hazardous situation which, if not avoided, could result in death or serious injury. |
 |
Indicates a hazardous situation which, if not avoided, could result in minor or moderate injury. |
  |
Addresses practices not related to personal injury. |
Symbol Definitions
| Symbol | Property or Statement |
 |
Warning marking concerning Risk of Burns. Wear flame retardant gloves during use. |
 |
WARNING marking concerning Risk of Eye Injury. Wear ANSI-approved safety goggles with side shields. |
 |
Read the manual before set-up and/or use. |
 |
WARNING marking concerning Risk of Respiratory Injury. Do not use this heater for heating human living quarters. |
 |
WARNING marking concerning Risk of Fire while handling propane. Do not smoke while handling gas. |
IMPORTANT SAFETY INFORMATION

Improper assembly, installation, adjustment, alteration, service, use, or maintenance can cause property damage, PERSONAL INJURY, or DEATH.
Read all safety warnings and all instructions.
Failure to follow the warnings and instructions may result in electric shock, fire and/or serious injury.
The warnings, precautions, and instructions discussed in this instruction manual cannot cover all possible conditions and situations that may occur. It must be understood by the operator that common sense and caution are factors which cannot be built into this product, but must be supplied by the operator.
Save all warnings and instructions for future reference.
Leaking Propane Gas
- If you smell gas:
a. Shut off gas to the Heater.
b. Extinguish any open flame.
c. Do not light a match or operate an electrical switch.
d. Evacuate the area at once.
e. Call for professional help. - Propane gas is a gas you cannot see or smell. Propane gas normally has an odorant added to aid detection. The odorant smells like “rotten eggs“. The odorant may fade over time, so leaking gas may not be detectable by smell alone.
- Propane gas is heavier than air and will collect in low areas.
Risk of Fire and/or Explosion
- Do not store extra propane tanks near the Heater.
- If gas is smelled during operation, immediately close the valve on the propane tank. Propane gas is odorless. An odor-making agent is added to propane/LP gas to enable you to smell the gas if it may be leaking.
- If the Heater shuts off during operation, close the valve on the propane tank. Check the amount of gas in the tank and wait 5 minutes for the gas to clear before restarting. If it continues to shut off during operation, have it serviced by a qualified technician.
- Do not use the Heater within 15 feet of flammable objects such as wood, trees, overhangs, and umbrellas.
- Do not store propane near high heat, open flames, pilot lights, direct sunlight, other ignition sources or where temperatures exceed 120°F.
- Do not use in spaces which may contain volatile or airborne combustibles, or products such as gasoline, solvents, paint thinner, dust particles or unknown chemicals.
- Operate with the propane tank in its vertical upright position, on a non-combustible surface. While in operation, do not tilt or lean the propane tank on its side. Do not turn the tank upside down, not even when it seems empty, as this may cause clogging of valves and components which could lead to dangerous flare-ups or fire.
- Do not install or remove the Propane tank while the Heater is lighted, near flames, pilot lights or other ignition sources or while the Heater is hot. Only do this in an outdoor, well-ventilated area.
- Position and operate Heater so that it is not exposed to water spray, rain, or dripping water.
- Remove all packing materials before using this product.
- Clothing or other flammable materials should not be hung from the Heater or placed on or near the Heater.
- Do not use below ground level.
- Read instructions provided with propane tank before connection or use.
Carbon Monoxide Hazard
Burning propane indoors CAN KILL YOU IN MINUTES.
Exhaust from propane-fueled equipment contains carbon monoxide.
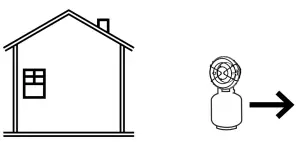
This is a poison you cannot see or smell.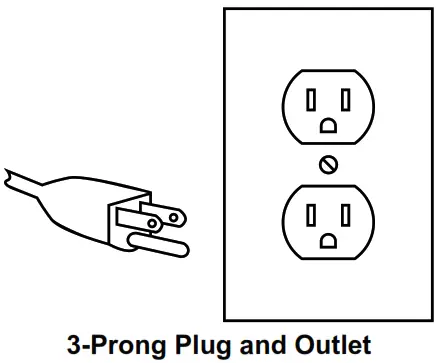
NEVER use inside a home, tent, camper, or garage, EVEN IF doors and windows are open.

Only use OUTSIDE and far away from windows, doors, and vents.
Early signs of carbon monoxide poisoning resemble the flu, with headaches, dizziness, or nausea.
If you have these signs, this item may not be working properly.
Get fresh air immediately.
DO NOT USE THIS ITEM FOR SPACE HEATING.
Risk of Burns – Product Gets Very Hot During Use
- Do not attempt to move the Heater while it is in operation. Turn it off and wait 30 minutes until it cools down before moving.
- Do not touch the burner or any other metal components while the Heater is lit. Before servicing, wait 30 minutes for it to cool down.
- Keep children away from the Heater.
Operation Precautions
- USE ONLY ON LEVEL, STABLE, FIREPROOF SURFACE OUT OF REACH OF CHILDREN.
- Inspect before each use; do not use if parts loose, leaking, or damaged. Connect, then check for leaks using soapy water. Do not use flame to check for leaks. Only qualified technician may repair product.
- Close Heater Regulator Knob before connection.
- Close Heater Regulator Knob after use and before leaving area. Do not leave unattended while lit.
- Set up and use according to manual instructions only.
- Wear ANSI-approved safety goggles with side shields during connection and lighting.
- This Heater must be used only with HD-5 propane gas. The propane tank should hold no more than 20 pounds of LP gas. Do not use bulk tanks of larger capacity. Do not use any other fuel. The Heater must be used only with a vapor withdrawal LP propane tank equipped with a POL valve. The tank must be constructed and marked in such a way as to comply with the specifications for LP gas tanks by the U.S. Department of Transportation (DOT).
- The use of this product must be in conformity with local codes or, in the absence of local codes, with the standard for storage and Handling of Liquefied Petroleum Gases, ANSI/NFPA 58.
- People with pacemakers should consult their physician(s) before use. Electromagnetic fields in close proximity to heart pacemaker could cause pacemaker interference or pacemaker failure.
- Keep children away. Children must never be allowed in the work area. Do not let them handle, move, or adjust this product.
- Store idle equipment. When not in use, this product must be stored in a dry location to inhibit rust. Lock up Heater and keep out of reach of children.
- Use as intended only. Do not alter product in any way, or use with any accessory not specifically designed for this product.
- Maintain product labels and nameplates. These carry important safety information. If unreadable or missing, contact Harbor Freight Tools for a replacement.
![]() WARNING
WARNING
Air Quality Hazard
- Do not use this heater for heating human living quarters.
- Use of direct-fired heaters in the construction environment can result in exposure to levels of CO, CO2, and NO2 considered to be hazardous to health and potentially life threatening.
- Do not use in unventilated areas
- Know the signs of CO and CO2 poisoning
- Headaches, stinging eyes
- Dizziness, disorientation
- Difficulty breathing, feels of being suffocated
- Proper ventilation air exchange (OSHA 29 CFR 1926.57) to support combustion and maintain acceptable air quality shall be provided in accordance with OSHA 29 CFR Part 1926.154, ANSI A10.10 Safety Requirements for Temporary and Portable Space Heating Devices and Equipment used in the Construction Industry or the Natural Gas and Propane Installation Codes CSA B149.1
- Periodically monitor levels of CO, CO2 and NO2 existing at the construction site – at the minimum at the start of the shift and after 4 hours.
- Provide ventilation air exchange, either natural or mechanical, as required to maintain acceptable indoor air quality
| USA 8-Hr Time weighted average (OSHA 29 CFR 1926.55 App A) |
Canada 8-hr time weighted average WorkSafe BC OHS Guidelines Part 5.1 and Ontario Workplaces Reg 833 | |
| CO | 50 ppm | 25 ppm |
| CO2 | 5000 ppm | 5000 ppm |
| NO2 | 3 ppm (Reg 833) | |
| USA – Ceiling Limit (Short Term Exposure Limit = 15 minutes) |
Canada STEL (15 minutes Reg 833/1 hour WSBC) WorkSafe BC OHS Guidelines Part 5.1 and Ontario Workplaces Reg 833 |
|
| CO | 100 ppm | |
| CO2 | 15000 ppm (WSBC) 30000 ppm (Reg 833) |
|
| NO2 | 5 ppm | 1.0 ppm (WorkSafeBC) 5.0 ppm (Reg 833) |
• Ensure that the flow of combustion and ventilation air exchange cannot become obstructed.
• As the building ‘tightens up’ during the construction phases ventilation may need to be increased.
![]() SAVE THESE INSTRUCTIONS.
SAVE THESE INSTRUCTIONS.
Grounded Tools: Tools with Three Prong Plugs

- Tools marked with “Grounding Required” have a three wire cord and three prong grounding plug. The plug must be connected to a properly grounded outlet. If the tool should electrically malfunction or break down, grounding provides a low resistance path to carry electricity away from the user, reducing the risk of electric shock. (See 3-Prong Plug and Outlet.)
- The grounding prong in the plug is connected through the green wire inside the cord to the grounding system in the tool. The green wire in the cord must be the only wire connected to the tool’s grounding system and must never be attached to an electrically “live” terminal. (See 3-Prong Plug and Outlet.)
- The tool must be plugged into an appropriate outlet, properly installed and grounded in accordance with all codes and ordinances. The plug and outlet should look like those in the preceding illustration. (See 3-Prong Plug and Outlet.)
Extension Cords
- Grounded tools require a three wire extension cord. Double Insulated tools can use either a two or three wire extension cord.
- As the distance from the supply outlet increases, you must use a heavier gauge extension cord. Using extension cords with inadequately sized wire causes a serious drop in voltage, resulting in loss of power and possible tool damage. (See Table A.)
- The smaller the gauge number of the wire, the greater the capacity of the cord. For example, a 14 gauge cord can carry a higher current than a 16 gauge cord. (See Table A.)
- When using more than one extension cord to make up the total length, make sure each cord contains at least the minimum wire size required. (See Table A.)
- If you are using one extension cord for more than one tool, add the nameplate amperes and use the sum to determine the required minimum cord size. (See Table A.)
- If you are using an extension cord outdoors, make sure it is marked with the suffix “W-A” (“W” in Canada) to indicate it is acceptable for outdoor use.
- Make sure the extension cord is properly wired and in good electrical condition. Always replace a damaged extension cord or have it repaired by a qualified electrician before using it.
- Protect the extension cords from sharp objects, excessive heat, and damp or wet areas.
| TABLE A: RECOMMENDED MINIMUM WIRE GAUGE FOR EXTENSION CORDS* (120/240 VOLT) | |||||
| NAMEPLATE AMPERES (at full load) |
EXTENSION CORD LENGTH | ||||
| 25′ | 50′ | 75′ | 100′ | 150′ | |
| 0 — 2.0 | 18 | 18 | 18 | 18 | 16 |
| 2.1 — 3.4 | 18 | 18 | 18 | 16 | 14 |
| 3.5 — 5.0 | 18 | 18 | 16 | 14 | 12 |
| 5.1 — 7.0 | 18 | 16 | 14 | 12 | 12 |
| 7.1 — 12.0 | 18 | 14 | 12 | 10 | – |
| 12.1 — 16.0 | 14 | 12 | 10 | – | |
| 16.1 — 20.0 | 12 | 10 | – | ||
| * Based on limiting the line voltage drop to five volts at 150% of the rated amperes. | |||||
Symbology
| V | Volts |
| ∼ | Alternating Current |
| A | Amperes |
 |
WARNING marking concerning Risk of Fire. Do not cover ventilation ducts. Keep flammable objects away. |
| WARNING marking concerning Risk of Electric Shock. Properly connect power cord to appropriate outlet. |
Specifications
| Input Rating | 39,000 – 64,000 btu/h |
| Manifold Pressure | 10 PSIG/277 inch w.c./0.69 bar |
| Minimum Ambient Temperature Rating |
14º F (-10º C) |
| Gas Type | Propane |
| Gas Supply Pressure | 25 – 250 PSI |

Setup – Before Use
![]() Read the ENTIRE IMPORTANT SAFETY INFORMATION section at the beginning of this manual including all text under subheadings therein before set up or use of this product.
Read the ENTIRE IMPORTANT SAFETY INFORMATION section at the beginning of this manual including all text under subheadings therein before set up or use of this product.
Note: For additional information regarding the parts listed in the following pages, refer to the Assembly Diagram near the end of this manual.
Components and Controls

Operation Instructions
![]() Read the ENTIRE IMPORTANT SAFETY INFORMATION section at the beginning of this document including all text under subheadings therein before set up or use of this product.
Read the ENTIRE IMPORTANT SAFETY INFORMATION section at the beginning of this document including all text under subheadings therein before set up or use of this product.
![]() WARNING
WARNING
TO PREVENT SERIOUS INJURY AND DEATH FROM FIRE:
Have multiple ABC class fire extinguishers nearby. Be familiar with fire extinguishing techniques before use of this item. Heater must be located at least 6′ away from any propane gas container. Heater must not be directed toward any propane-gas container within 20′.
Setup
- Locate the propane tank (not included) behind the Heater and at lease 6′ away from the Heateron the ground. Keep the Heater and propane tank away from flammable objects. Make sure the Heater and propane tank are level and stable.
- Adjust Height by loosening Height Adjustment Knob, moving it up or down, then tightening Knob.
Connect
- Close gas valve on propane tank. Connect Hose to propane tank.
- Close Gas Knob on Heater. Connect Hose to Heater.
- Hand tighten the fittings.
- Using the wrench supplied with the heater, tighten up to a quarter turn from hand tight on the flare fitting connections between the hose and heater gas inlet and the hose and the propane tank. Do not overtighten.
- Open gas valve on propane tank and check and smell for gas leaks. Perform a leak test:
a. Apply warm soapy water over every joint, regulator, fitting, and anywhere else there may be a possible leak.
b. Observe carefully to see if bubbles expand, indicating a leak. A large leak can blow the soapy solution away instead of forming bubbles.
c. If leaks are found, do not use the Heater until the leaks have been stopped.
d. Hand tighten the fittings.
e. Using the wrench supplied with the heater, tighten up to a quarter turn from hand tight on the flare fitting connections between the hose and heater gas inlet and the hose and the propane tank. Do not overtighten.
f. Repeat the soapy water leak test to confirm the fittings are tightened properly.
g. After testing, close gas valve on the propane tank and close Gas Knob on Heater.
Start/Stop
- Plug Power Cord into grounded 120VAC outlet.
- Turn Power Switch on. Let fan run for 30 seconds.
- Slowly open gas valve on propane tank, then open Gas Knob on Heater a quarter turn.
- Start Heater:
WARNING! TO PREVENT SERIOUS INJURY: Do not stand in front of Heater while lighting Burner.
WARNING! TO PREVENT SERIOUS INJURY: If Burner does not light within 30 seconds: Close Gas Knob on Heater. Allow at least five minutes for gas to dissipate, then repeat the lighting process.
a. Position yourself behind heater.
b. Push and hold Gas Valve on left side.
c. Push and hold Ignition Button on right side until Burner lights.
d. Release Ignition Button, hold Gas Valve for 5 seconds.
e. Release Gas Valve. - Adjust Gas Knob as necessary.
- Stop Heater:
a. Close gas valve on propane tank.
b. Close Gas Knob on Heater.
c. Let fan run for 2 minutes.
d. Turn Power Switch off and unplug Heater.
e. Disconnect Hose from Heater and propane tank. - Store Heater according to Inspection, Maintenance, and Cleaning on page 12.
 WARNING! TO PREVENT SERIOUS INJURY: Do not move the Heater while it is on or while it is hot. Do not touch the Burner Assembly or other metal components—serious burns will occur. Turn unit off and wait 30 minutes until it cools down before moving.
Inspection, Maintenance, and Cleaning
![]() Procedures not specifically explained in this manual must be performed only by a qualified technician.
Procedures not specifically explained in this manual must be performed only by a qualified technician.
Any guard or other protective device removed for servicing must be replaced before operation.
![]() WARNING
WARNING
TO PREVENT SERIOUS INJURY FROM ACCIDENTAL OPERATION:
Close the valve on the propane tank, allow the product to cool for at least 30 minutes, and disconnect the propane tank before performing any procedure in this section.
TO PREVENT SERIOUS INJURY FROM TOOL FAILURE:
Do not use damaged equipment. If abnormal noise or vibration occurs, have the problem corrected before further use.
- BEFORE EACH USE, inspect the general condition of the product. Check for:
• check all gas fittings for tightness
• damage to hose. If hose has excessive abrasion or wear, or the hose is cut, it shall be replace prior to the heater being put into operation.
• loose hardware
• misalignment or binding of moving parts
• cracked or broken parts
• any other condition that may affect its safe operation
• do a leak test using soapy water – refer to Connect on page 11 . - AFTER USE, wipe external surfaces of the tool with clean cloth.
- ONCE A YEAR, have Heater inspected by qualified technician.
- STORE the Heater in a safe, dry place, covered to protect it from dust and dirt and out of reach of children. If storing indoors, first shut off and remove the propane tank and store in an area where there is free air circulation, at least 10 ft from building openings (such as windows and doors), and at least 20 ft from air intakes of air conditioning and ventilating systems. Tightly install threaded valve plug (not included) into disconnected propane tank.
Do not store in spaces which may contain volatile or airborne combustibles, or products such as gasoline, solvents, paint thinner, dust particles or unknown chemicals.
PLEASE READ THE FOLLOWING CAREFULLY
THE MANUFACTURER AND/OR DISTRIBUTOR HAS PROVIDED THE PARTS LIST AND ASSEMBLY DIAGRAM IN THIS DOCUMENT AS A REFERENCE TOOL ONLY. NEITHER THE MANUFACTURER OR DISTRIBUTOR MAKES ANY REPRESENTATION OR WARRANTY OF ANY KIND TO THE BUYER THAT HE OR SHE IS QUALIFIED TO MAKE ANY REPAIRS TO THE PRODUCT, OR THAT HE OR SHE IS QUALIFIED TO REPLACE ANY PARTS OF THE PRODUCT. IN FACT, THE MANUFACTURER AND/OR DISTRIBUTOR EXPRESSLY STATES THAT ALL REPAIRS AND PARTS REPLACEMENTS SHOULD BE UNDERTAKEN BY CERTIFIED AND LICENSED TECHNICIANS, AND NOT BY THE BUYER. THE BUYER ASSUMES ALL RISK AND LIABILITY ARISING OUT OF HIS OR HER REPAIRS TO THE ORIGINAL PRODUCT OR REPLACEMENT PARTS THERETO, OR ARISING OUT OF HIS OR HER INSTALLATION OF REPLACEMENT PARTS THERETO.
Parts List and Diagram
| Part | Description | Qty | Part | Description | Qty |
| 1 | Inlet Grill | 1 | 12-7 | Joint | 1 |
| 2 | Motor Assembly | 1 | 12-8 | Elbow 1 | 1 |
| 3 | Fan | 1 | 12-9 | Elbow 2 | 1 |
| 4 | Main Housing | 1 | 12-10 | Nozzle | 1 |
| 5 | Handle | 1 | 12-11 | Adjustment Nut | 1 |
| 6 | Combustion Housing | 1 | 13 | Burner | 1 |
| 7 | Power Cord | 1 | 14 | Igniting Electrode | 1 |
| 8 | Power Cord Fastener | 1 | 15 | Thermostat | 1 |
| 9 | Power Cord Cable Clip | 1 | 16 | Front Panel | 1 |
| 10 | Cover | 1 | 17 | Knob | 1 |
| 11 | Thermo Element | 1 | 18 | Rear Panel | 1 |
| 12 | Safety Valve Assembly | 1 | 19 | Bracket | 1 |
| 12-1 | Nut | 1 | 20 | Pulse Igniter | 1 |
| 12-2 | Safety Valve | 1 | 21 | Screw | 2 |
| 12-3 | Solenoid Valve | 1 | 22 | Ignition Button | 1 |
| 12-4 | Knob | 1 | 23 | Power Switch | 1 |
| 12-5 | Nut | 2 | 24 | Base | 1 |
| 12-6 | Control Valve | 1 |

Record Serial Number Here:
Note: If product has no serial number, record month and year of purchase instead.
Note: Some parts are listed and shown for illustration purposes only, and are not available individually as replacement parts.
Limited 90 Day Warranty
Harbor Freight Tools Co. makes every effort to assure that its products meet high quality and durability standards, and warrants to the original purchaser that this product is free from defects in materials and workmanship for the period of 90 days from the date of purchase. This warranty does not apply to damage due directly or indirectly, to misuse, abuse, negligence or accidents, repairs or alterations outside our facilities, criminal activity, improper installation, normal wear and tear, or to lack of maintenance. We shall in no event be liable for death, injuries to persons or property, or for incidental, contingent, special or consequential damages arising from the use of our product. Some states do not allow the exclusion or limitation of incidental or consequential damages, so the above limitation of exclusion may not apply to you. THIS WARRANTY IS EXPRESSLY IN LIEU OF ALL OTHER WARRANTIES, EXPRESS OR IMPLIED, INCLUDING THE WARRANTIES OF MERCHANTABILITY AND FITNESS.
To take advantage of this warranty, the product or part must be returned to us with transportation charges prepaid. Proof of purchase date and an explanation of the complaint must accompany the merchandise. If our inspection verifies the defect, we will either repair or replace the product at our election or we may elect to refund the purchase price if we cannot readily and quickly provide you with a replacement. We will return repaired products at our expense, but if we determine there is no defect, or that the defect resulted from causes not within the scope of our warranty, then you must bear the cost of returning the product. This warranty gives you specific legal rights and you may also have other rights which vary from state to state.

26541 Agoura Road • Calabasas, CA 91302 • 1-888-866-5797
