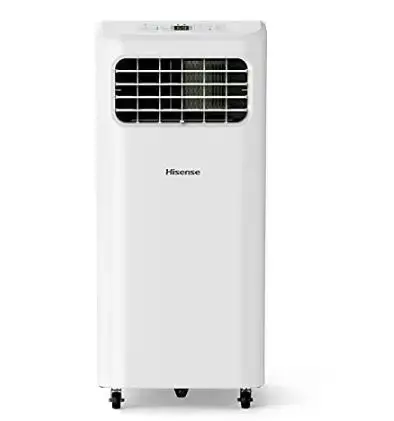
Hisense Portable Air Conditioner
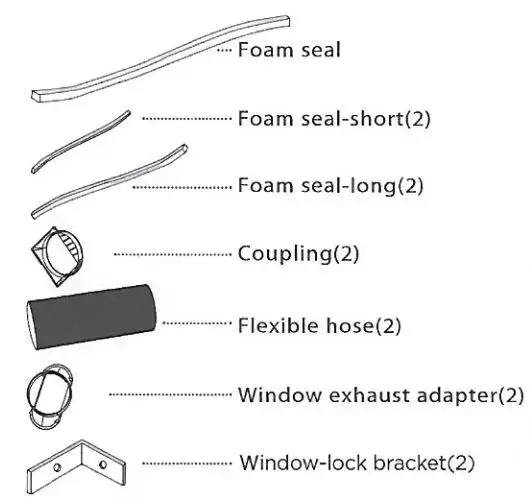
Parts Package
Before beginning, check that all parts are included in the parts package.
Tools needed
- Phillips screwdriver
- Pencil
- Scissors
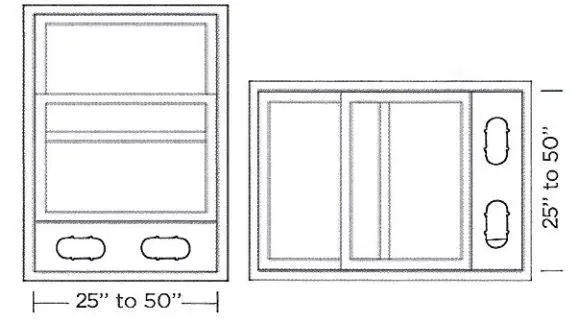
Suitable Windows
The window installation kit allows you to install the air conditioner in most vertical-sliding windows 25″ to 50″ wide, or horizontal-sliding windows from 25″ to 50″ high.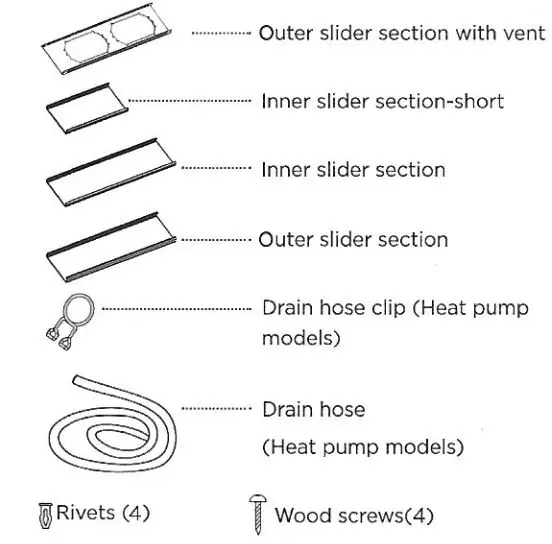

Window Installation
- Cut the adhesive foam seal to the proper length, and attach it to the window sash and frame.
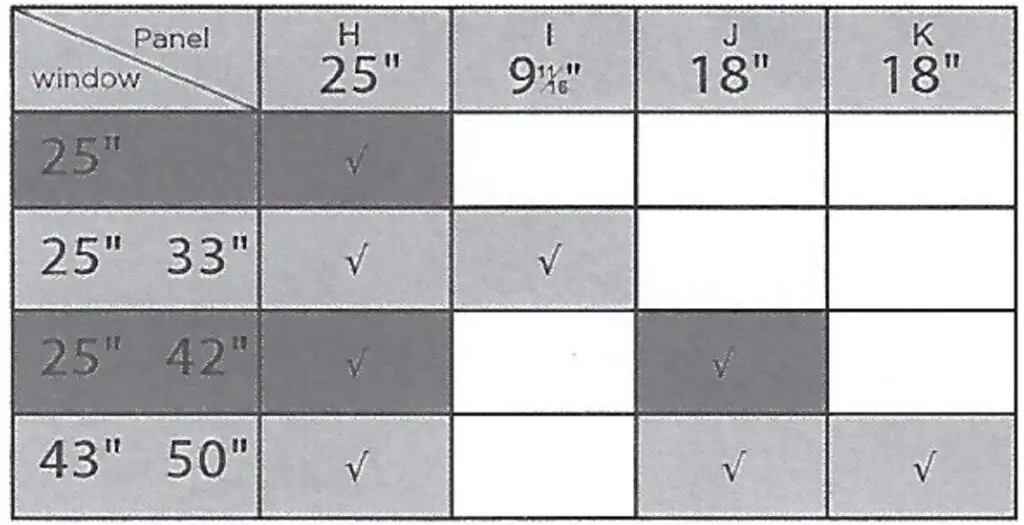
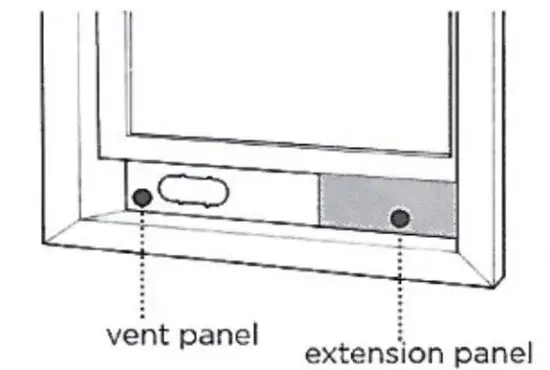
- Insert the vent panel assembly, including ex tension panels, if needed, into the window opening. Extend the extension panels, if used.
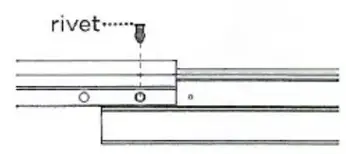
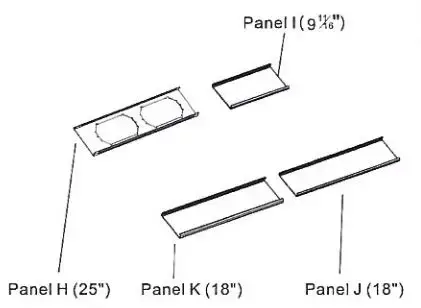 If your window length requires more than two panels, after adjusting the length, please secure the panels with rivets.
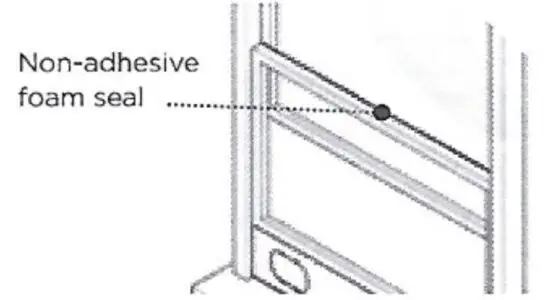
- Cut the Non-adhesive foam seal to the window width. Stuff the foam seal between the glass and the window to prevent air and insects from getting into the room.
- Install the Window-lock bracket with wood screws as shown, if you need.
Electrical shock Hazard
- Plug into a grounded 3 prong outlet
- Do not remove ground prong
- Do not use an adapter
- Do not use an extension cord Failure to follow these instructions can result in death, fire, or electrical shock.
Connect it together
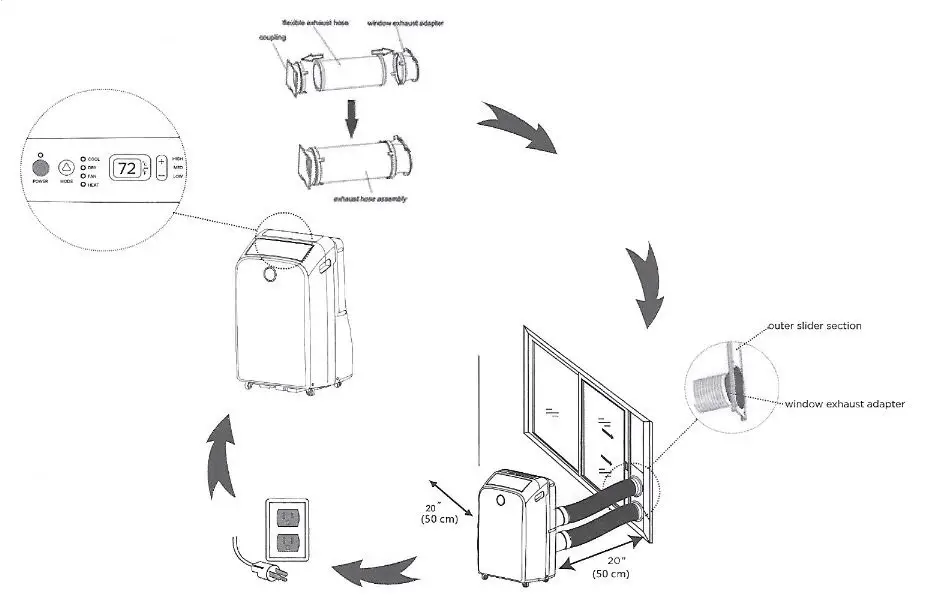
- Preparing the exhaust hose assembly:
Press the flexible exhaust hose into the coupling and the window exhaust adapter, Both the coupling and window exhaust adapter have integral clips that snap onto the hose. - Connect The Hose To The Air Conditioner
Slide the coupling into the slot on the back of the air conditioner to lock the hose on the unit.
- Connect The Hose To The Window
Roll the air conditioner to selected location. Attach the window exhaust adapter to the outer slider section (the piece with the large exhaust hole). - Plug In the Unit
Be sure to use a grounded 3 prong outlet. Do not use an extension cord. Plug in the unit. - Turn The Unit on
Turn the air conditioner on, and set the desired mode and temperature.
To ensure proper ventilation, keep a distance of least 20 in (50 CM) between the Portable AC and the window.
Waterless Design
- Waterless Design doesn’t require routine draining in cooling mode due to internal evaporation of condensate water.
- Code “E5” alerts you the internal tank has become full. Please drain the air conditioner according to the instructions in User Manual.
- Before moving the unit, place a pan on the floor beneath the drain cover and remove the drain cover to drain the water.
- Be sure to replace the drain cover when draining is complete.
Draining the Air Conditioner (Heat Pump models only)
- Uncover the primary drain port.
- Connect the drain hose to the primary drain hose. Make sure the connector does not have a water leak.
- Place the other end of drain hose into a drain. Check to see that the hose lies flat and is in the drain. Make sure the hose end that goes to the drain is on a lower level than the hose end that connects to the unit. The hose should not be kinked or pinched.
- A. Primary drain hole
- B. Drain hose
- C. Primary drain port
See the user manual for detailed instruction on installation and using the features and settings of the air conditioner and remote control.
For questions about features, operation/performance, parts or service,
Call: 1-877-465-3566
Monday to Friday: 9:00 a.m.- 6:00 p.m. (EST) or Visit: www.hisense-usa.com
The figures in this manual are based on the external view of a standard model. They may differ from that of the air conditioner you have selected.