ET6 Wireless Earbuds Bluetooth headphones
User Guide

Wireless Headphones ET6
User Guide
Package Accessories
- *HolyHigh Earbuds
- 1*Charging Case
- 1*Type-C Charging Cable
- 1*User Manual
- 4*Pairs of Ear Tips
Product Introduction
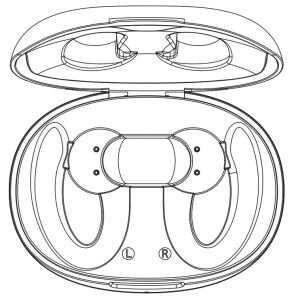
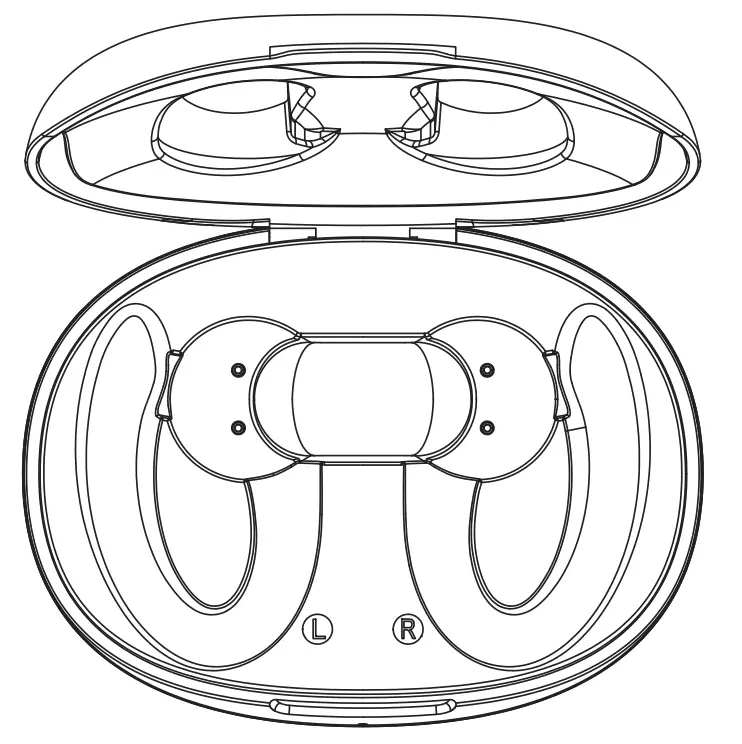
- Multifunctional Button
- LED Indicator of Earbud
- Charging Pins on Earbud
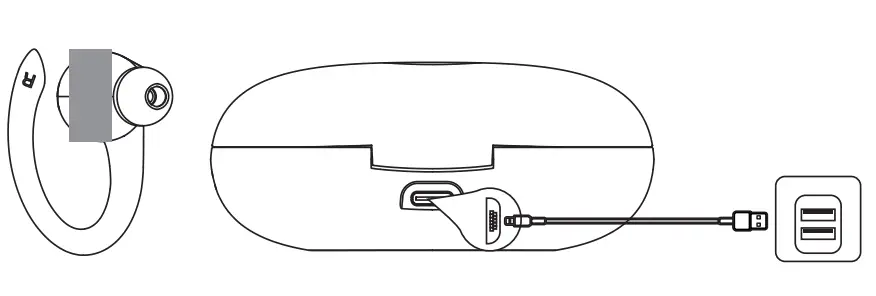
- Type-C Charging Port
- LED Indicator of Charging Cas
- Charging Pins on Charging Case
Usage Instructions
- After you open the package for the first time use, please tear off the insulation film on the earbuds, then charge the earbuds and charging case via charging cable for at least 10 minutes; do not take out the earbuds during this period.

- The earbuds are installed with a pair of medium-sized ear tips by default. Please select a suitable size for a secure fit.
- How to pair
a) Binaural mode instructions: Open the charging case and take out the earbuds or press and hold the Multifunctional Buttons (MFB) for 2 seconds in the power-off state to turn them on, the left and right earbuds will enter TWS pairing mode automatically.
After the pairing is successful, the indicator of the main earbud will flash red and blue light alternately and the indicator of the secondary earbud will flash blue light every 3 seconds, and a voice prompt”Pairing” will follow from the main earbud. At this time, turn on the Bluetooth function of your phone, search”HolyHigh ET6″ and click to pair. After the pairing is successful, the earbuds will prompt you with”Connected”. When you take out the earbuds for use, the indicators of earbuds will go out.
b) Mono mode instructions:
Open the charging case and take out a single earbud or press and hold the MFB for 2 seconds in the power-off state to turn it on. At this time, please double click the MFB on the earbud, then a voice prompt”Pairing” will follow and the indicator of the earbud will flash red and blue light alternately. Turn on the Bluetooth function of your phone, search “HolyHigh ET6″ and click to pair. After the pairing is successful, the earbud will prompt you with”Connected”.
Note: If you are using one earbud in mono mode but you need to switch to binaural mode, and the charging case still has battery power, please open the charging case and take out the other earbud for use. - How to reset
1) Delete the pairing name”HolyHigh ET6″on your mobile phone and turn off the Bluetooth function.
2) Turn off the earbuds then press and hold the MFB for 7 seconds in power-off state, release the MFB after the red and blue LED indicators rapidly flash three times at the same time, then let the earbuds stay still for 5 seconds.
3) Put the earbuds back into the charging case and close the charging case.
4) Take out the earbuds from the charging case and they enter pairing mode. That means the earbuds have been reset successfully. 5) If the reset fails, please repeat the above steps. - How to control
| Turn on | Open the charging case and take out earbuds/press and hold the MFB for 2s in power-off state |
| Turn off | Put back into the charging case/press and hold the MFB for 5s in a non-playing state |
| Play | Double click the MFB on the L/R earbud |
| Pause | Double click the MFB on the L/R earbud |
| Previous song | Press and hold the MFB on L earbud for 2s (with a prompt tone) Note: In mono mode, long-press the MFB on L earbud for 2s will skip to the next song. |
| Next song | Press and hold the MFB on R earbud for 2s (with a prompt tone) |
| Volume down (in calling state) | Press and hold the MFB on L earbud for 2s (Volume can be turned down continuously if you keep the MFB pressed) Note: In mono mode, this function is unavailable. |
| Volume down (in music- playing state) |
Click the MFB on L earbud to decrease the volume by one level. Note: Do not click too fast, otherwise the music may be paused due to misoperation. This function is unavailable in mono mode. |
| Volume up (in calling state) |
Press and hold the MFB on R earbud for 2s (Volume can be turned up continuously if you keep the MFB pressed) Note: In mono mode, this function is unavailable. |
| Volume up (in music- playing state) |
Click the MFB on R earbud to increase the volume by one level. Note: Do not click too fast, otherwise the music may be paused due to misoperation. This function is unavailable in mono mode. |
| Answer a call | Double click the MFB on the L/R earbud |
| Hang up a call | Double click the MFB on the L/R earbud |
| Reject a call | Press and hold the MFB on the L/R earbud for 2s |
| Activate voice assistant | Click the MFB on the L/R earbud 3 times |
Product parameters
| Version | 5.0 |
| Support protocol | HFP, HSP,A2DP,AVRCP |
| Working distance | 10M (barrier-free) |
| Working time | Up to 6 hours (Varies by volume level and audio contents) |
| Single earbud/charging case battery capacity | 50mAh/600mAh |
| Charging times | Up to 5 times |
| Input current | 5V/lA |
| Charging time of earbuds | 1.5 hours |
| Charging time of charging case | 2 hours |
7. LED indicator
| Status | Description | Voice prompt |
| Turn on | Blue light for about 2s | “Power on” |
| Turn off | Red light for about 3s | “Power off” |
| Pairing | The main earbud flashes red and blue light alternately and the secondary earbud flashes blue light every 3s | -Pairing” |
| Successful connection | Indicators of both earbuds go out | -Connected” |
| Earbuds are being charged | Red breathing light | / |
| Earbuds are fully charged | The light of Indicators go out | / |
| The charging case is being charged | Flash white light | / |
| The charging case is fully charged | White light constantly on | / |
| When earbuds are being charged by the charging case, the indicator of the charging case | Flash white light | / |
FAQ
- The charging case still has battery power, but why the earbuds can not be charged?
A. For the first time use, please confirm whether the insulation film of the earbuds is removed or not.
B. Please confirm that the earbuds are correctly placed in the charging case. Otherwise, the earbuds can not be charged if the charging pins of the earbuds and charging case don’t contact fully.
C. Wipe the pins (golden part) of the earbuds and the charging case with a clean cotton cloth to ensure that there are no foreign objects. - Why is there jamming when using the earbuds? Due to the characteristics of Bluetooth earbuds, the electromagnetic wave interference in the area may cause temporary jamming.
- Can the left and right earbuds be connected separately to two different devices? No.
AFTER-SALE SERVICE
Our customer service is friendly and hassle-free, please contact us if you need our help as follows:
– Technical Support
– The package is Not in Perfect Condition.
– Orders beyond the deadline of the Amazon Return
Window are also accepted.
Email: [email protected]
EU Conformity Statement
 This product and – if applicable – the supplied accessories too are marked with “CE” and comply therefore with the applicable harmonized European standards listed under the EMC Directive 2004/108/EC, the RoHS Directive 2011/65/EU.
![]() 2012/19/EU (WEEE directive): Products marked with this symbol cannot be disposed of as unsorted municipal waste in the European Union. For proper recycling, return this product to your local supplier upon the purchase of equivalent new equipment, or dispose of it at designated collection points. For more information see: www.recyclethis.info
2012/19/EU (WEEE directive): Products marked with this symbol cannot be disposed of as unsorted municipal waste in the European Union. For proper recycling, return this product to your local supplier upon the purchase of equivalent new equipment, or dispose of it at designated collection points. For more information see: www.recyclethis.info
 |
 |
| http://qr31.cn/AwW0LN | http://qr31.cn/EG4DLP |
Any changes or modifications not expressly approved by the party responsible for compliance could void the user’s authority to operate the equipment.
This device complies with part 15 of the FCC Rules. Operation is subject to the following two conditions: (1) This device may not cause harmful interference, and (2) this device must accept any interference received, including interference that may cause undesired operation.
Note: This equipment has been tested and found to comply with the limits for a Class B digital device, pursuant to part 15 of the FCC Rules. These limits are designed to provide reasonable protection against harmful interference in a residential installation. This equipment generates, uses, and can radiate radio frequency energy and, if not installed and used in accordance with the instructions, may cause harmful interference to radio communications. However, there is no guarantee that interference will not occur in a particular installation. If this equipment does cause harmful interference to radio or television reception, which can be determined by turning the equipment off and on, the user is encouraged to try to correct the interference by one or more of the following measures:
– Reorient or relocate the receiving antenna.
– Increase the separation between the equipment and receiver.
– Connect the equipment into an outlet on a circuit different from that to which the receiver is connected.
– Consult the dealer or an experienced radio/TV technician for help.
FCC Radiation Exposure Statement: This equipment complies with FCC radiation exposure limits set forth for an uncontrolled environment. This transmitter must not be co-located or operating in conjunction with any other antenna or transmitter.

