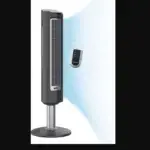
 HY254E Oscillating Tower Fan with Remote Control
Instruction Manual
IMPORTANT SAFETY INSTRUCTIONS
Read through all the instructions before starting to use the appliance. Keep this manual in a safe place for future reference.
- This appliance must only be operated as instructed in this user manual.
- This appliance can be used by children aged 8 years and above and persons with reduced physical, sensory or mental capabilities or lack of experience and knowledge if they have been given supervision or instruction concerning the use of the appliance safely and understand the hazards involved. Children shall not play with the appliance. Cleaning and user maintenance shall not be made by children without supervision.
- Do not touch the rotating fan blades with any part of the body. This can cause personal injury and damage.
- Clean the appliance regularly by following the “Cleaning Instructions”.
- This appliance is only designed for indoor use.
- Always switch the appliance off when not in use, during cleaning or transport.
- If the supply cord is damaged, it must be replaced by the manufacturer, its service agent, or similarly qualified persons in order to avoid a hazard.
- Do not use this appliance if it is damaged or shows any signs of possible damage, or if it is not functioning properly. Disconnect the power plug from the power socket.
- If you are not going to use the remote control for long periods (4 weeks or more), take the batteries out of the battery compartment.
- When you change the batteries, use only new AAA batteries. Dispose of the used batteries for recycling according to your local regulations.
COMPONENTS

- Air Outlet
- Air Inlet
- Base
- Power Cord
- Remote Control Holder
- Remote Control
- Control Panel
CONTROL PANEL

I. On/Off ( )
)
II. Oscillation ( ![]() )
)
III. Fan Speed Control ( )
)
V. Timer (  )
)
IV. Fan Setting Display (Fig. 1)
VI. LED Display
FIRST TIME OF USE
Unpack the fan and remove all the packaging materials and dispose of them for recycling.
ASSEMBLY INSTRUCTIONS

PEDESTAL ASSEMBLY
- Place the power cord in the middle then line up the left and right pedestal assembly and firmly snap it together (Fig. 3).

BASE ASSEMBLY
- Align the two portions of the circular base and snap them together by gently pushing the 4 extrusions into the adjacent circles of the connecting piece (Fig. 4).

SECURING THE PEDESTAL TO THE BASE
- Align the 3 screw holes on the bottom of the pedestal with the 3 holes in the base such that the power cord holder is at the rear of the unit (Fig. 5).

- Secure the base assembly to the pedestal by inserting and tightening the 3 screws in the 3 holes located on the bottom of the base (Fig. 6).

SECURING THE TOWER FAN TO THE PEDESTAL
- Carefully turn the fan on its side and place it on a table. Place the power cord through the center of the pedestal and base assembly.
- Align the pedestal with the tower fan so that the one locking screw hole on the pedestal body is aligned with the rear of the tower fan unit. Firmly hold the base steady and rotate the pedestal assembly clockwise to lock the tower fan to the pedestal assembly (Fig. 7).

- Secure the pedestal to the tower fan by inserting and tightening 1 screw in the opening located near the top rear of the pedestal assembly.
SECURING THE CORD TO THE BASE
- With the fan still on its side, locate the cord holding bracket on the bottom of the base.
- Gently pull any slack out of the power cord, place the power cord securely in the holding bracket, and secure the power cord bracket over the power cord (Fig. 8).

- Return the tower fan to its upright position.
Note: Do not operate the tower fan unless it is in its proper, upright position.
REMOTE CONTROL BATTERY INSTALLATION/ REPLACEMENT INSTRUCTIONS
- Remove the battery door by sliding downward in direction of the arrow (Fig. 2).

- Insert 2 AAA batteries into the remote following the directional guides in the recessed slots. Batteries are included.
- Replace the battery door by sliding upward until the door snaps in place.
INSTRUCTIONS FOR USE
ON/OFF
To turn the fan on, press the Power button ( ).
).
SPEED CONTROL
The fan will automatically start at “1” speed when initially turned on. To adjust the speed up or down, press the Fan Speed button ( ) repeatedly to increase the level.
OSCILLATION
To activate the Oscillation feature, press the Oscillation button (![]() ) once.
) once.
Press the Oscillation button again to turn the Oscillation feature off.
TIMER
Choose from 1, 2, 4, or 8-hour settings by performing the following function:
- 1 hour: Press the Timer button (
 ) once.
 - 2 hours: Press the Timer button twice.
- 4 hours: Press the Timer button a third time.
- 8 hours: Press the Timer button a fourth time.
Press the Timer button a fifth time to turn the Timer feature off.
REMOTE CONTROL STORAGE (See page 3)

The remote control may be stored in the recessed area located behind the controls when it is not in use.
CLEANING, STORAGE, AND DISPOSAL
CLEANING
- Switch the appliance off and remove the power plug from the socket.
- Clean the outer surfaces of the appliance with a soft, damp cloth.
Do not use petroleum, thinners, or any other chemicals. Use your vacuum cleaner with the brush attachment to clean the grids. - Do not plunge the appliance into water or any other liquids and do not pour water or any other liquids over the appliance.
STORAGE
- If you do not wish to use the appliance for a longer period, clean it as described above.
- Store the appliance in a cool, dry location. Cover it up to protect it from dust.
DISPOSAL
Only discard empty batteries. They should not be disposed of in the household waste, but at appropriate collection sites or at your retailer.
Please do not dispose of this product in the household waste at the end of its useful life. The disposal can take place at your local retailer or at appropriate collection points provided.
WARRANTY/CONDITION OF PURCHASE
As a condition of sale, the purchaser assumes responsibility for the proper use and care of this appliance in accordance with these printed instructions. The purchaser or user must judge himself or herself when to use the appliance and the length of use.
Please keep your receipt (or invoice) as your proof of purchase.
The receipt must be always presented when making a claim under the warranty period. You may also be asked for providing the LOT number which gives you the production date of your product.
The LOT number is located on the product and on the packaging.
The first 3 numeric digits after the LOT number represent the day of the year of manufacture.
The next 2 numeric digits represent the last two numbers of the calendar year of manufacture and the letter(s) at the end designate the manufacturer of the product.
(E.g.: LOT No.: 12313 ABC this product was made on the day 123, the year 2013 at the manufacturer code ABC)
NOTE: IN THE UNLIKELY EVENT YOU EXPERIENCE A PROBLEM WITH THIS PRODUCT PLEASE FOLLOW WARRANTY INSTRUCTIONS. PLEASE DO NOT ATTEMPT TO REPAIR THIS PRODUCT YOURSELF. DOING SO WILL VOID THE WARRANTY AND COULD CAUSE PROPERTY DAMAGES OR PERSONAL INJURY.
Technical modifications reserved.
HY254E
220–240 V~
50Hz 35W
 The Honeywell trademark is used by Kaz, Inc. under license from Honeywell International Inc.
Honeywell International Inc. makes no representation or warranties with respect to this product.
HY254E
© 2013 Kaz Europe SA
Made in China
P/N: 31IMY254190
22FEB13
 Kaz Europe SA,
Place Chauderon 18
CH – 1003 Lausanne
Switzerland
www.hot-europe.com
Downloaded from www.Manualslib.com manuals search engine
