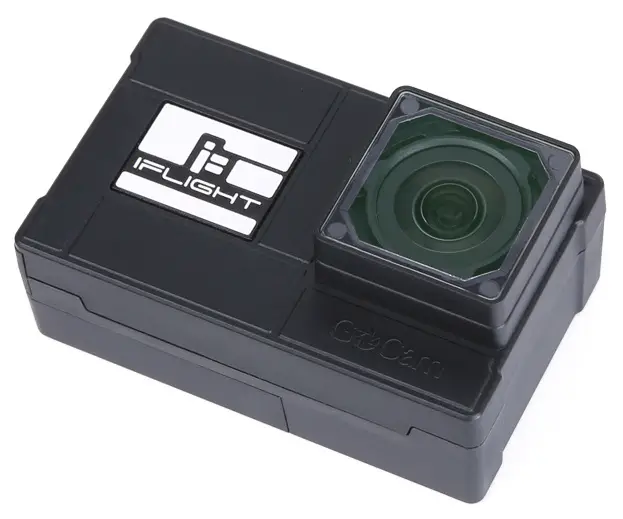
IFLIGHT GOCam PM GR User Manual
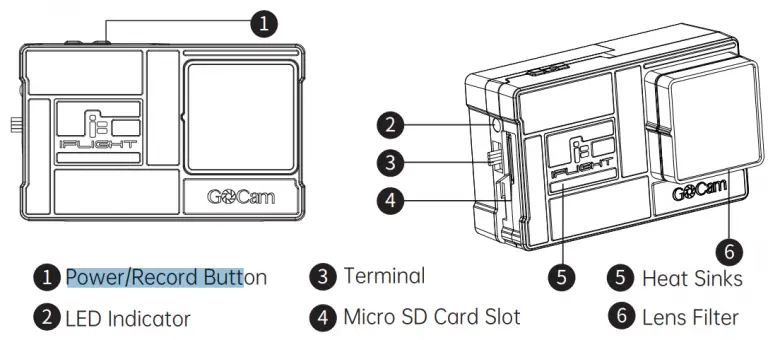
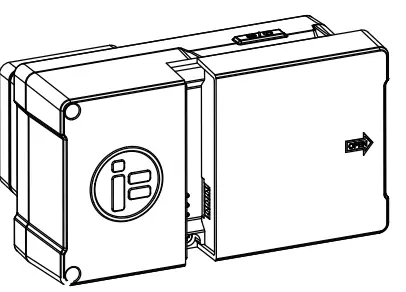
Name of Parts

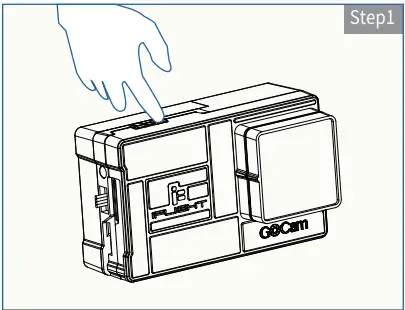
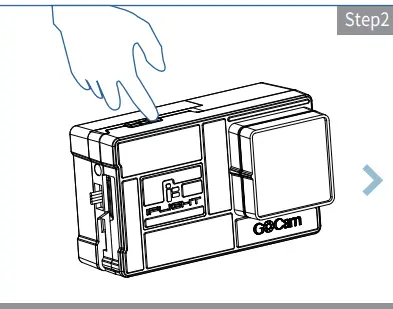
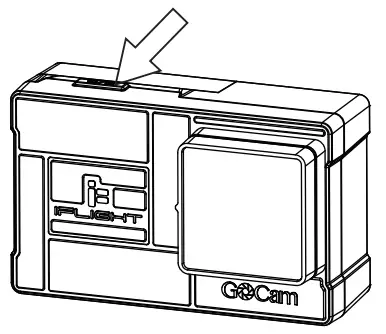
Install Camera
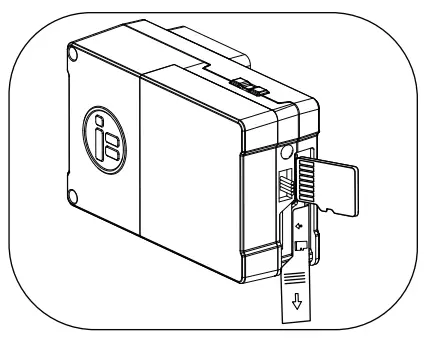
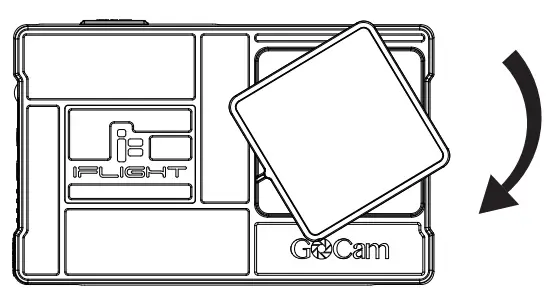
Install Micro SD Card
You will need a Micro SD card (sold separately) to save videos and photos, please choose the SD Card brands which can meet the following requirements.
-
- Micro SD, Micro SDHC or Micro SD xc
- Class 10 or UHS-3
- Storage up to 256GB
Note: Always wash and dry your hands before handling the SD card. Check the manufacture’s manual, learn about the acceptable temperature range for memory cards and other important information.
Professional Tip: It is recommended to periodically format the SD card regularly to keep it in good condition. This will erase all media files, be sure to save the files first. Install battery or adaptor
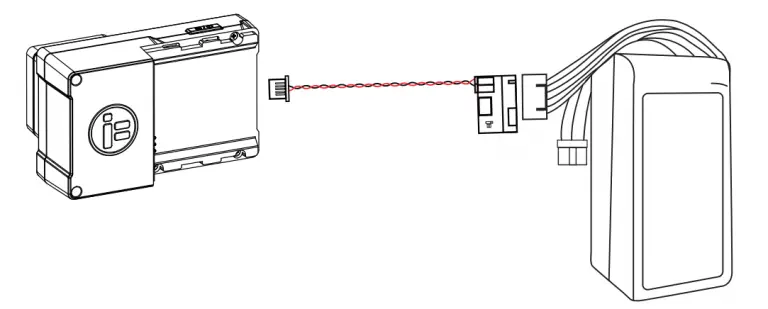
Professional Tip: Ensure that the camera battery is fully charged beforeusing. GOCam PM GR special charger can charge 3 batteries at the sametime, takes about an hour to fully charge and the LED light will become solid green. Besides being powered by the camera battery, it can be also power by the BEC adapter cable, which supports 2-6S voltage input.
Install Filter
Professional Tip: Please select the appropriate filter for your environment. It comes with 4 filteres.(UV filter, ND8, ND16, ND32).
Camera ting
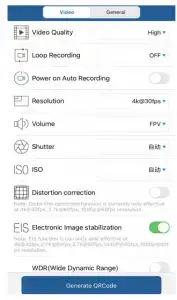
GOCam PM GR using QRCode to adjust parameters.
App install: https://www.runcam.com/download/GOCamPMGR
GOCam PM GR
QRCode Configuration
Scan the following QR code in GOMCam R! setting mode to apply the configuration.

Step1: Long press the Record Button to power on the camera and ensure insert the micro SD card.

Step2: Double press the Record Button to parameters mode(indicator light changes to solid green)
Step3: Scan the QRcode, when it configure the appication succesfully, it will beep 2 times.
Step4: Green light on, setup successfully.
Camera Operation
Turn on Press “Mode” 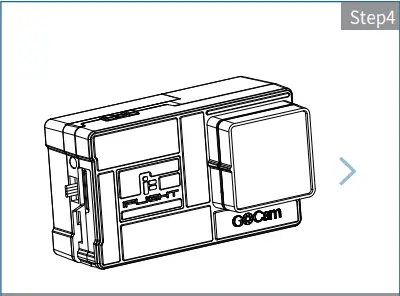 button, GOCam PM GR will turn on.
Turn off Press “Mode” button for 3 seconds.

| Turn on/off | Press the Record Button for 3 seconds, enters standby mode, red light on |
| Start/stop recording | In standby mode, single press Record Button then starts recording, red light flashing. Then single press Record Button again, stop recording, red light stop flashing |
| Enter QRCode Mode | In standby mode, double press Record Button, enters QRCode mode, green light on. After scanning successfully then turns to standby mode with red light on. |
Remote Control Instruction
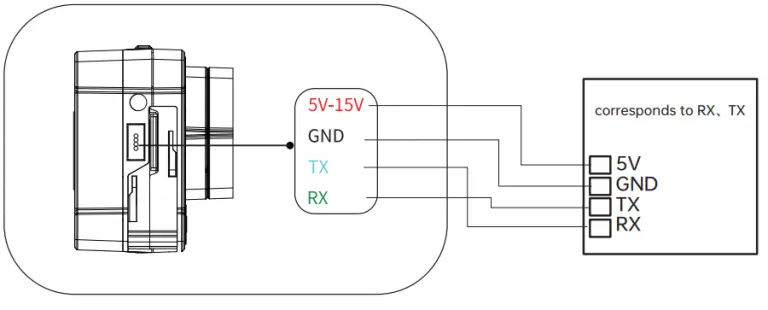
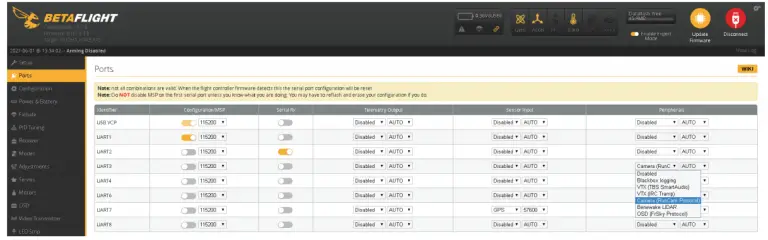
Connect camera and FC to extra UART ( corresponds to RX、TX). 
For instance, connect camera to UART3( corresponds to R3, T3): connect FC to your PC, open parameter adjustment configurator ( choose the corresponding software according to the type of FC firmware, such as CleanFlight Configurator or BetaFlight Configurator). Then choose RunCam Device at Peripherals in UART3 and click Save And Reboot.
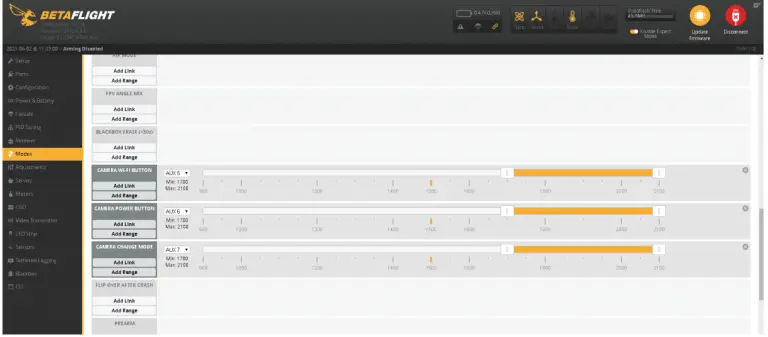
Binding Camera Control Function With Channel
Enter Mode page, at the bottom of the page, you’ll see CAMERA WI-FI, CAMERA POWER, CAMERA CHANGE MODE. CAMERA POWER: Start and stop recording. Select the next in OSD mode. CAMERA CHANGE MODE: Switching between Recording and OSD mode. Exit the page in OSD setting .Bind the functions you need to any available channels.
Binding Remote Controller With Channel
Select your Model on remote controller, enter MIXER, bind to the specific channel. Take the opentx 2.2.0, bind SA, SB, SD to CH5, CH6 and CH7 respectively.
Testing
Charge FC and camera Toggle SA to the bottom, camera will start/stop recording. Toggle SD to the bottom, camera will switching between Recording and OSD mode. In OSD mode, toggle SD can toggle the option, toggle SD can access to sub-menus or confirm the settings.
Technical Specification
Video bit rates and encoding methods
| Resolution | Video Quality | Encoding | ||
| High Medium Low | ||||
| 4K@30fps | 60Mbp s | 50Mbp s | 40Mbps | H.264 |
| 2.7K@60fps | 60Mbp s | 50Mbp s | 40Mbps | |
| 2.7K@50fps | 60Mbp s | 50Mbp s | 40Mbps | |
| 1440P@60fps | 40Mbp s | 30Mbp s | 20Mbps | |
| 1080P@120fps | 60Mbp s | 50Mbp s | 40Mbps | |
| 1080P@60fps | 45Mbp s | 30Mbp s | 22Mbps | |
Camera Parameters
| Image Sensor | Sonyimx57712MP 1/2.3” |
| Video Resolution | 4K@30fps/2.7K@60fps/2.7K@50fps/ |
| 1440P@60fps/1080P@120fps/1080P@60fps | |
| FOV | 155° |
| Video Format | MP4 |
| ISO | 100/200/400/800/1600 |
| Operation Temperature | -10℃~45℃ |
| Lens Aperture | F2.8 |
| Video Mode | HDR suppor(on by default) |
| Communication Interface | UART |
| icroSD Card | Up to 256GB |
| U3 recommended (2.7K50/2.7K60 1080P120 | |
| requires U3 or above. Other resolutions require U1 or above). | |
| Please ensure that the file format of the SD card is FAT32/exFAT, otherwise it may cause abnormal work. | |
| Shutter | 1~1/500s |
| Battery Capacity | 3.7V 450mAh |
| Power Dissipation | maximum 620mA @5V |
| Size | 64.7*45*31.3mm |
| Weight | 37G without battery, 52g with fuselage battery |
| Power-on function | On by default |
| Parameter Adjustment | Using QRCode in RUNCAM APP via mobile. |
Technical Support
https://iflightrc.freshdesk.com
Reminder
- Make sure the battery is fully charged before using
- Do not touch the camera’s heat sink directly.
- If you shoot high resolution or high frame rate video when the temperature is high outside, it will cause the camera to heat up and consume more power.
- Please do understand that we are not responsible for the camera damages that caused by disassemble.
Included
- GOCam PM GR
- UV Filter *
- ND16 Filter *1
- Manual *1
- BEC Adaptor *1
- ND8 Filter *1
- ND32 Filter *
- Camera Mount *