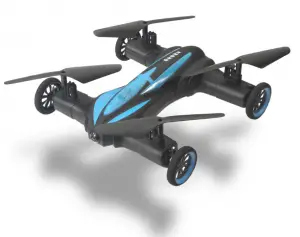
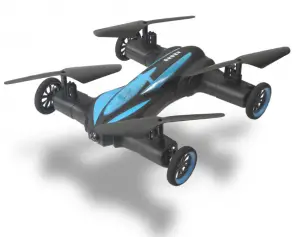
imperii LH-X21 4 axis Aerocraft
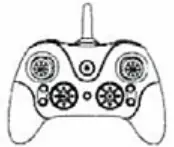
Remote Control Overview

FUNCTION KEYS and NAME DESCRIPTION
| Serial Number | Function keys Names | Function/Effect |
| 1 | Speed control key | Adjust the aircraft left/ right/ forward/ backward/ left/ right side fly speed. |
| 2 | Flip key | The ley to turning the function key, control aircraft implement flip operation. |
| 3 | Power Indicator | 1. Indicating lamp intermittent flicker: said remote controller has not started, to the throttle stick to push to the top end, and the low-end before they can start remote controller. 2. Indicating lamp keep fast flash: said remote controller in on code state, with the receiver for code. 3. Indicator light: remote controller in flight control state |
| 4 | Power switch | Remote controls power, press the remote-control power supply is turned on, press off the power |
| 5 | Left joystick | Up/down, Left/right |
| 6 | Right joystick | Forward/backward, left/right |
| 7 | Left right turn trimming key | In the vehicle to the left/right rotation, to the right (left) light press this key can make the vehicle stable. |
| 8 | Forward and backward trimming key | In the vehicle to theto the forward (backward) movers the backward (forward) light, press this key can make the vehicle stable |
| 9 | Left/right sideways trimming key | In the vehicle to the left (right) movers to the right (left) light, press this key can make the vehicle stable. |
| 10 | Headless mode/One key return | Tap into the headless mode, press 3 seconds to enter a return key, and then touch Cancel function. |
| 11 | Photo | Tap into the photo mode, and then touch Cancel function. |
| 12 | Video | Tap into video mode, and then touch Cancel function. |
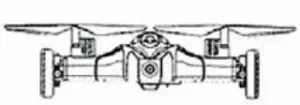
ALL PARTS NAME
 |
 |
 |
 |
 |
| Drone | Remote Control | Charger | Li-Polymer battery | Main blade |
REMOTE CONTROL BATTERY INSTALLATION
- Remove the batter cover from the back of controller (Fig. A}
- Install 2 “M”batterle5lntothecontroller,makf!surieto install batteries to their com, correct (Fig. B)
Do not mix old and new batteries or battery types - Replace the battery cover.

THE INSTRUCTION OF LITHIUM BATTERY CHARGING
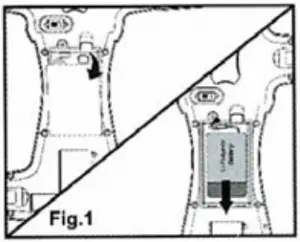
- Open battery cover of drone. Take out lithium battery of drone from battery case (FIG. 1)
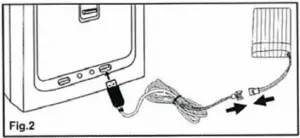
- Insert USB Into power supply, the red With of USB keeps In bright state, and then connect lithium battery, LED light would go out during charging. If LED light becomes red, the charging is completed. Charging time is about 60–80 minutes.(FIG.2).
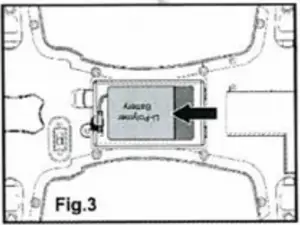
- Connect the battery plug with the circuit board plug after charging. Please pay attention to the correct polarity. There is no on / off switch on the drone, just connect/ disconnect the plugs to tum it on / off. After connecting the dronie lights flash slowly, it is the prompt of drone searching frequency. {FIG. 3)
- Close battery cover of drone
Attention
- Make sure the voltage of the USB charger fits the local electricity supply.
- The Charging plug will overheat if overcharged. Please stop charging immediately as it may cause damage to the battery.
- Do not leave the battery aside when charging.
- Do not use other chargers other than the supplied in consideration of safety.
- Recharge the battery 30 minutes later after flying, because the battery temperature could be loo high when fluting and charging immediately could damage the battery.
- Do not leave the battery in the fire in consideration of safety.
- Do not short circuit the battery. Do not leave the battery together with tiny medal parts In consideration of safety.
PREPARATION FOR FLIGHT
- Please operate in spacious indoor or out door without rain or snow, and wind power should de de low 4 grade, be away from people, animals and obstacle.
- Make sure the battery of the quadcopter is well installation and connected. Turn on the switch of the quadcopter, the Indication light of the quadcopter Is flashing, then put It on the flat place and wait for the frequency adjustment
- Turn on the switch of the transmitter, pull the throttle stick to the highest position, and then pull the throttle nick down to the lowest position. There indication light of the quadcopter is on,. that means the frequency adjustment is connected completely and it is for flight.
NOTICE: If drone Is rotating ln the air uncontrollably, adjust the rudder trimming buttons until the drone is stable.


SWITCH CAR MODE
Pull the remote control left to the lowest position, so that the air craft completely landed on the ground, then push the right control lever, you can switch to the car mode and control.

NOTICE: You c.an switch back to Airplane mode by pushing the left lever while driving.
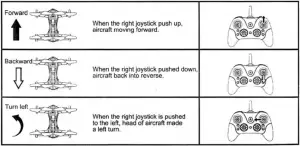

COMMON PROBLEM AND SOLUTION INSTRUCTION
| THE PROBLEM | REASON | COUNTERMEASURES |
| The indication of the quadcopter is flashing and without reaction when operated. |
|
|
| The quadcopter is blades turn around but the quadcopter cannot take off |
|
|
| The quadcopter shakes hardly. | The blade distorted | Replace the blades |
| The fine-tuning button are all on but the quadcopter still couldn’t keep balance |
|
|
| The quadcopter becomes of control after crashing | Three-axis accelerations sensor lose its balance after crashing. | Put the quadcopter on the ground for 5·10 seconds. |
PRECAUTIONS
- The remote controlled distance will be shorten when the power (aero craft or transmitter) is insufficient.
- It is difficult to take off or fly not high when aero craft’s power is insufficient
- When the aero craft Is damaged, please repair It In time and stop operating, or it may lead to Injury
- If you do not use the transmitter for long time, please remove the battery to avoid the
- Do not drop the transmitter from the high altitude or crash it badly, otherwise, it will shorten the transmitter’s using life
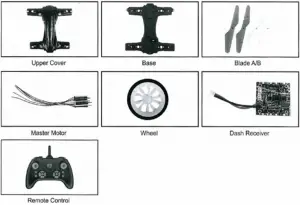
SPARE PARTS
TECHNICAL SERVICE : http://imperiielectronics.com/index.php?controller=contact

