![]()
Quick Setup Guide
Stereo Receiver with Bluetooth | NS-STR514
Congratulations on your purchase of a high-quality Insignia product. Your NS-STR514 represents the state-of-the-art in stereo receiver design and is designed for reliable and trouble-free performance.
Package contents
- Receiver
- Indoor AM and FM antennas
- Remote control
- ser Guide
- AAA batteries (2)
- Quick Setup Guide
Setting up your receiver
- Install your receiver on a stable flat surface. Position your receiver so that it has a direct line of sight to the remote control.
- Do not expose your receiver to extreme temperature or humidity.
- Avoid placing your receiver on a hot surface such as on top of other hot-running equipment. Make sure that there is adequate ventilation to your receiver.
Connecting the antennas
- Assemble the AM antenna.
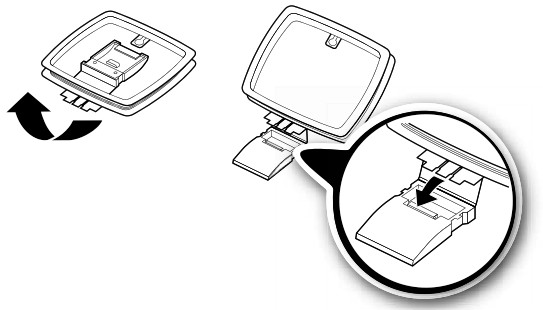
- To connect the indoor AM antenna, press the GND and AM Loop levers, insert the ends of the wires, then release the levers. Make sure that only the bare, stripped wire is inserted in the jack. GND and AM Loop levers insert the ends
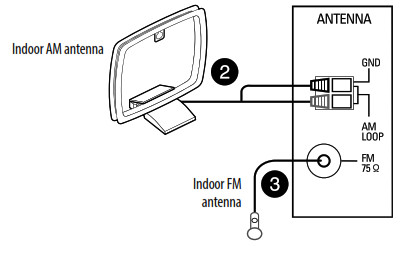
- Connect the indoor FM antenna to the FM jack on the back of the receiver.
- Later, move the antennas until you get the best reception of your favorite AM and FM stations.


Before using your new product, please read these instructions to prevent any damage.
Connecting audio-only devices

Connecting devices with video
- Connect the cable from the Audio Out jack on the audio device to the L/R AUX IN (1 or 2) jacks on the receiver.
- Connect the video cable(s) (component, composite, HDMI, or coaxial) from the output jack on the video device to the appropriate input jack on your TV.
NOTE: For more information on connecting a recording device, such as a VCR or tape deck, refer to the User Guide.


Connecting speakers
NOTE: If you have only one pair of speakers, connect them to the SPEAKER A terminals.
- Turn the terminal cap to loosen it.
- Insert the bare wire into the terminal and tighten the terminal cap to securely connect it. Make sure that you strip the wire adequately so that none of the wire insulation is under the terminal.
- Make sure cables are secure by lightly pulling on them.
NOTE: Connect speakers by matching the channel (left and right) and polarity (+ and -).
If the sound is unnatural and lacks bass, the speaker’s polarity is incorrect.

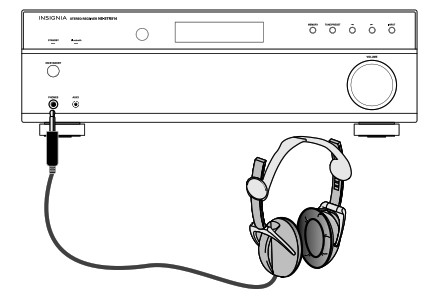
Connecting headphones
- Insert a 1/4″ headphone plug into the headphone jack on the front of the receiver. H appears on the display, and sound can be heard from the headphones.
NOTE: When you plug headphones into the receiver, the external speakers are turned off.

Connecting the power
- Plug the power cord into an AC outlet.

Using your receiver
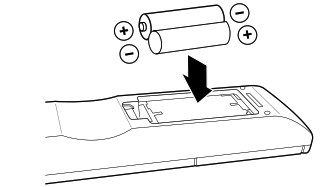
- Install the remote control batteries.
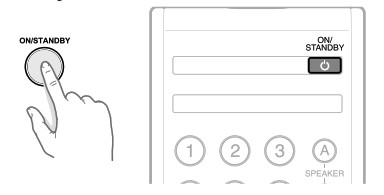
- Press ON/STANDBY on the remote control or the receiver to turn the receiver on.
The STANDBY indicator is off. Press again to put the receiver into standby mode and the STANDBY indicator lights red.
- Turn on the devices connected to the receiver.
- If you connected a video device, such as a DVD or Blu-ray player:
• Select that device’s input on the TV.
• Turn your TV speakers off if you only want the audio to come from your receiver. - Press the INPUT button on the receiver or press one of the input buttons on the remote control for the input source you want. Each time you press the button on the receiver, the display changes to reflect the input selected.
- Start playback on the device you selected.
- Press SPEAKER A or SPEAKER B on the remote to turn the corresponding speakers on.
SPK A, SPK B, SPK AB, or SPK OFF appears on the display and sound can be heard from the speakers. - Turn the VOLUME dial on the receiver or press the VOLUME +/- buttons on the remote to adjust the sound level.
-OR
Press MUTE on the remote to turn the sound off. MUTE flashes on the display.
Press MUTE again to turn the sound back on.


Connecting Bluetooth
- Select BT AUDIO as the input source by pressing the BLUETOOTH button on the remote control or the INPUT button on the receiver repeatedly until BT AUDIO appears. PAIRING will be shown on the display and the Bluetooth indicator will blink.
- Navigate to your device’s Bluetooth settings, turn on Bluetooth, then search for available devices.
a. For iPad/iPhone/iPod touch:
i. From the home page, touch Settings > General >Bluetooth.
b. For Android Phone/Tablet:
i. From your smartphone/tablet home page, touch Settings >Wireless and networks.
ii. Touch to activate Bluetooth, then touch Bluetooth settings.
c. For a PC or Mac, you can find these instructions in the documentation that came with your computer or operating system. - On your Bluetooth device, select “NS-STR514” from the device list.
- If a PIN code is requested, enter “0000.”
- When pairing is completed, “CONNECTED” is shown on your receiver display and the Bluetooth indicator turns on.
NOTE: To control playback, use the Bluetooth playback buttons on your remote control.
For additional information on using your receiver, refer to the User Guide.
Features


Remote control


One-year limited warranty
Visit www.insigniaproducts.com for details.
Contact Insignia:
For customer service, call 1-877-467-4289 (U.S. and Canada) or 01-800-926-3000 (Mexico) www.insigniaproducts.com
INSIGNIA is a trademark of Best Buy and its affiliated companies.
Registered in some countries.
Distributed by Best Buy Purchasing, LLC
7601 Penn Ave South, Richfield, MN 55423 U.S.A.
©2014 Best Buy. All rights reserved.
Made in China
V1 ENGLISH 14-0120