User Manual
2 in 1 Wireless Dog Fence and Training Collar The newest Version Second-generation
2 in 1 Wireless Training System combines the functions of wireless dog fence and training collar. Our system adopts the most advanced technology with 2.4G signal source which is much more accurate and stable than any other old versions in the market.
Please read the instructions carefully before use.
Please use this device in an open area, the controller should be placed 3 feet. above ground at least to avoid barriers which will disturb radio signal.
Not recommended for aggressive dogs. DO NOT use this device if your dog is behaving aggressively.
If you are not sure that if this device is right for your dog, please talk to your veterinarian or a certified dog trainer.
No more than 12 hours per day to wear the receiver collar.
If a rash or sore is found, stop using the collar until the skin is healed.
Always keep dog’s neck clean.
Keep this device away from children.
This device is intended to use for dogs only.

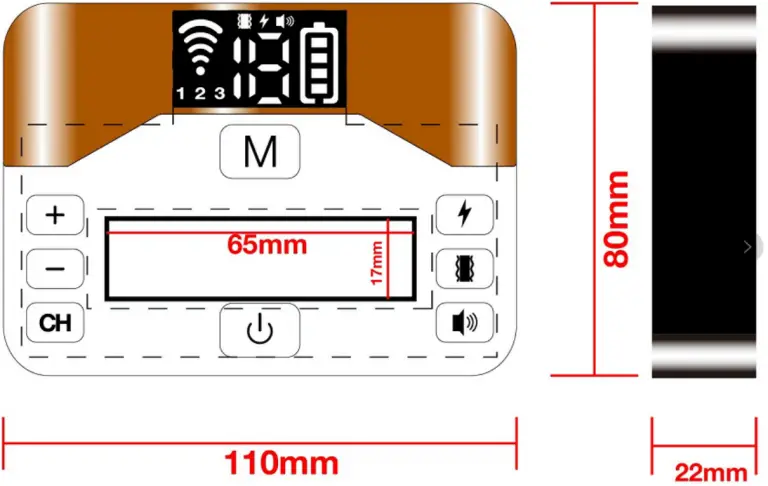
- Controller
1.1 LED color Screen
1.2 Increase
1.3 Decrease
1.4 CH(Choose 123 and match the code)
1.5 ON/OFF
1.6 Sound Button
1.7 Vibration Button
1.8 Shock Button
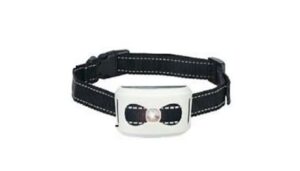
1.9 Mode Shift Button - Waterproof Receiver
- Adjustable Reflective Fabric Collar
- USB Cable
- Conductive Safe Silicone Cap * 2pcs
- Test Tool
quick start
Press the ON/OFF button to turn on the device.
Press the Mode button to toggle between wireless fence Mode and remote training Model.
There are 16 different gear setting ranges: gear 1 is approximately equal to 30 feet, gear 2 gear is approximately equal to 100feet…. gear 16 is approximately equal to 800 feet.(adjust the gear depend on practical situation)
The measured maximum setting range is 16 gear is about 800 feet from the controller and receiver under open circumstance.
When the signal symbol flashes on the screen, it means the device is in a wireless status, and the setting range is displayed in the screen.
When the screen shows 1/2/3, it means the device is in remote training mode, and the digit shows the number of channel in use currently(up to 3 dogs).
The mode can only shift when the receiver is power on.
Working Principle
In wireless fence mode, you will see 1/2/3…../16 on the LED color screen, Indicates that the setting range is about 30feet/100feet/…./800feet, you can adjust by pressing the “+” and “-” buttons to set the range accord to practical situation.
No pairing is required between the controller and receiver. This combination can work.
After turning on the power. One remote can control up to 3 dogs at the same time Set a range on the controller, then put the receiver collar around the dog’s neck as tight as possible to let the conductive silicone point contact the skin of the dog.
The receive collar will send any punishments when the dog is within the set range.
When the dog is out of the set range, the receiving collar will work as follows:
- The first sound + electric shock for 2 seconds (synchronized work), the receiver flash with a red LED light.
- After the first electric shock interval of 2 seconds, the sound + electric shock for 3 seconds (synchronized work), the receiver flash with a red LED light .
- After the third electric shock interval of 2 seconds, the sound + electric shock for 4 seconds (synchronized work), the receiver lights up Red LED indicator until dog Return to the set range, the receiver will stop working. When the receiver is not working for 5 minutes, it will automatically switch to standby mode , and the indicator light will flash every 3 seconds during standby.once
How to Pair Controller with Receiver
- Turn on both controller and receiver.
- Under Remote Training Mode, choose dog number.
- Long press Mode button on transmitter for 3 seconds, until the dog number flflashing on the screen and a beep at the same time.
- At this time, the receiver will beep continuously, long press ON/OFF button on the receiver, until it stops beeping.
- When the dog number displays on the transmitter screen and stops flflashing, it means successfully paired!
Pre-test:
- Dog training mode test Please use the test light (included in the package) to test the shock function, put the It’s on 2 silicone posts and the light in the tool comes on when the shock works.
- Receiver Collar Testing:
1. The first sound + electric shock for 2 seconds (synchronized work), the receiver lights up with a red LED indicator
2. After the second electric shock interval of 2 seconds, the sound + electric shock for 3 seconds (synchronized work), the receiver lights up with a red LED indicator . 2 wireless fen mode test;;;;………………………… - After the third electric shock interval of 2 seconds, the sound + electric shock for 4 seconds (synchronized work), the receiver lights up Red LED indicator until dog Return to the set range, the receiver will stop working. When the receiver is not working, it will automatically switch to standby mode for 5 minutes, and the indicator light will flash every 3 seconds during standby.
Controller:
USB charging DC 5V, 3.7V lithium battery 2000mah, battery icon on the LED screen will flash. when charging. the last red section will flash when battery is low. Full charge takes 4-5 hours for controller
Receiver
DC 5V, 3.7V lithium battery 400mah. LED light will flash when the battery is low. It will need 2 hours for fully charge.
FCC Caution
This device complies with part 15 of the FCC Rules. Operation is subject to the following two conditions: (1) This device may not cause harmful interference, and (2) this device must accept any interference received, including interference that may cause undesired operation.
Any Changes or modifications not expressly approved by the party responsible for compliance could void the user’s authority to operate the equipment.
Note: This equipment has been tested and found to comply with the limits for a Class B digital device, pursuant to part 15 of the FCC Rules. These limits are designed to provide reasonable protection against harmful interference in a residential installation. This equipment generates uses and can radiate radio frequency energy and, if not installed and used in accordance with the instructions, may cause harmful interference to radio communications. However, there is no guarantee that interference will not occur in a particular installation. If this equipment does cause harmful interference to radio or television reception, which can be determined by turning the equipment off and on, the user is encouraged to try to correct the interference by one or more of the following measures:
-Reorient or relocate the receiving antenna.
-Increase the separation between the equipment and receiver.
-Connect the equipment into an outlet on a circuit different from that to which the receiver is connected.
-Consult the dealer or an experienced radio/TV technician for help.
This equipment complies with FCC radiation exposure limits set forth for an uncontrolled environment.