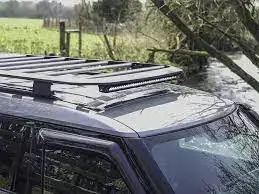
Defender 2020 Plus Expedition Roof Rack Mounting Kit

Product Information
- Product Name: Defender 2020+ Expedition Roof Rack Mounting Kit
- Difficulty Level: Moderate
Included Tools
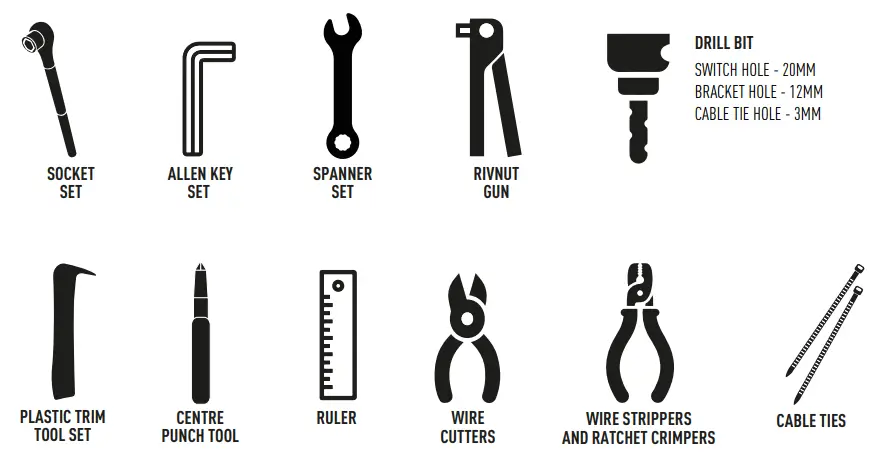
- Socket Set
- Allen Key Set
- Spanner Set
- Rivnut Gun
- Drill Bit
- Switch Hole – 20mm
- Bracket Hole – 12mm
- Cable Tie Hole – 3mm
- Plastic Trim Tool Set
- Centre Punch Tool
- Ruler
- Wire Cutters
- Wire Strippers and Ratchet Crimpers
- Cable Ties
Product Usage Instructions
Pre-installation Checks
- Ensure the vehicle’s battery is disconnected
Templates
Left-Hand Side Template and Right-Hand Side Template are provided at the end of the instructions for drilling and marking purposes.
WHAT’S INCLUDED
- 2x Linear Side Mounting Bracket (LH/RH)
- 2x M8 Rivnuts
- 2x M8 Bolts
ALSO REQUIRED
- 1x Linear-36
- 1x One-Lamp Harness (1L-LP-220)
- 1x Extension Kit (8213-2C)
DIFFICULTY LEVEL

TOOLS REQUIRED

PRE-INSTALLATION CHECKS
Ensure battery is disconnected.
INSTALLATION
- Step 1
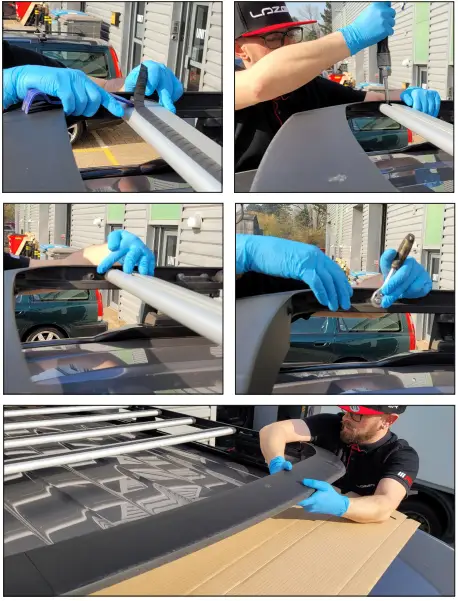
- Remove the rubber trim to reveal the T30 security bolts. Remove these T30 bolts (x1 left-hand side and x1 right-hand side).
- Step 2
- Slide the slat back to reveal the 8mm bolts. Remove these 8mm bolts (x1 left-hand side and x1 right-hand side).
- Step 3
- Slide the front of the rack off carefully.
- Slide the front of the rack off carefully.
- Step 4
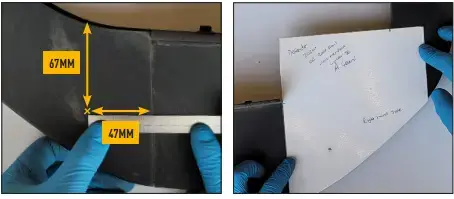
- Mark where to drill (both sides of the roof rack) using the measurements shown or the paper templates provided at the end of the instructions (please ensure Page Sizing / Scaling is set to Actual Size or 100% scale).
- Mark where to drill (both sides of the roof rack) using the measurements shown or the paper templates provided at the end of the instructions (please ensure Page Sizing / Scaling is set to Actual Size or 100% scale).
- Step 5
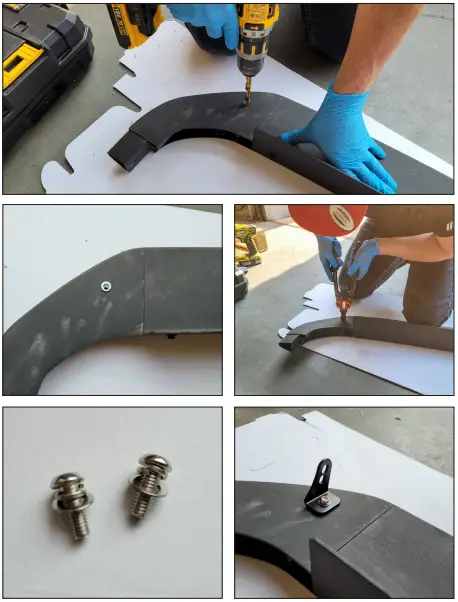
- Drill a 12mm hole where you have marked on both left and right sides of the roof rack.
- Step 6
- Install the supplied M8 rivnut into the drilled holes and tighten with a rivnut gun.
- Step 7
- Assemble the linear side bracket and bolts as shown (Bolt, spring washer, washer) and install onto the roof rack.
- Assemble the linear side bracket and bolts as shown (Bolt, spring washer, washer) and install onto the roof rack.
- Step 8
- Install the lamp onto the roof rack using the security bolts included with the lamp.
- Step 9
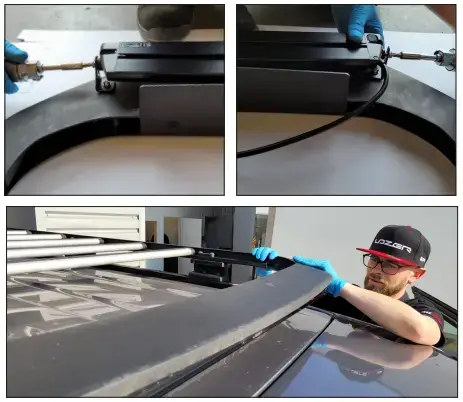
- Install the front of the roof rack back onto the car and bolt into place.
- Install the front of the roof rack back onto the car and bolt into place.
- Step 10
- Plug the 3m extension cable into the lamp and run the cable down to the vehicle roof.
- Step 11
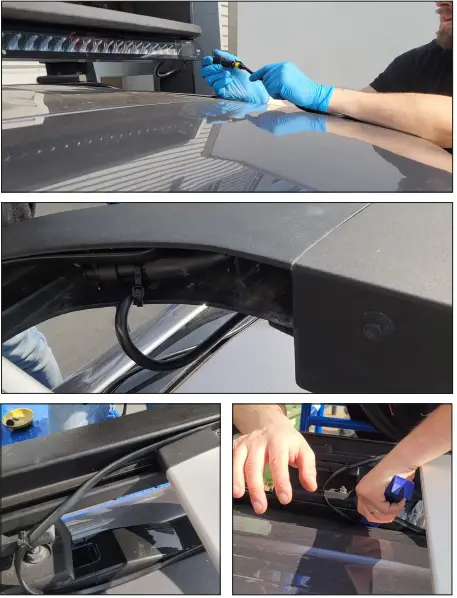
- Tidy the lamp plug by drilling a 3mm hole to cable tie the lamp plug.
- Step 12
- Re-install the roof rack slat and run the cable in between the roof rail and the roof ditch.
- Re-install the roof rack slat and run the cable in between the roof rail and the roof ditch.
- Step 13
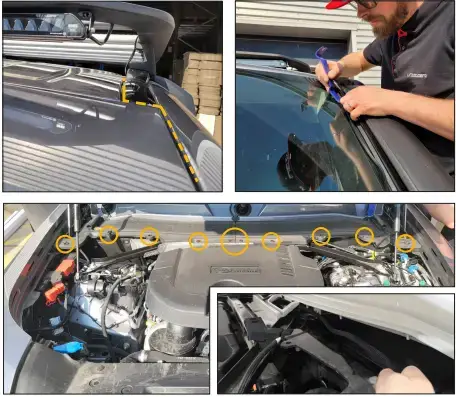
- Run the extension cable down to the engine bay by tucking the cable inside of the ‘A’ pillar trim.
- Step 14
- Remove all the screws holding the scuttle panel trim. Then, run the extension cable across the scuttle.
- Remove all the screws holding the scuttle panel trim. Then, run the extension cable across the scuttle.
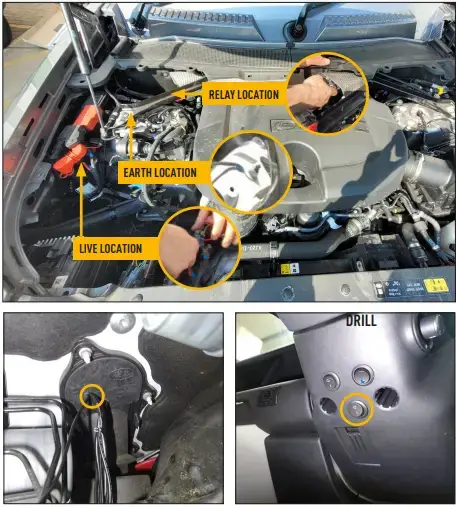
- Step 15 – Relay Location
- Mount the relay and connect the live and earth connections.
- Step 15 – Wiring with Switch
- Run the switch cable through the factory grommet. Drill a 20mm hole and install the switch.
 LAZER-Defender-2020-Plus-Expedition-Roof-Rack-Mounting-Kit-fig-10
- Run the switch cable through the factory grommet. Drill a 20mm hole and install the switch.
- Step 15 – Wiring with Splice
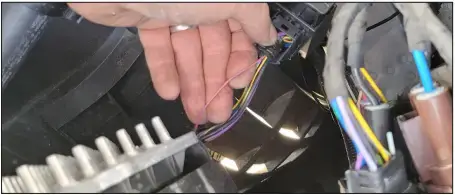
- High beam trigger can be found on some models at the right-hand side headlight plug (Purple/Red wire). Please test the wires for a 12V signal beforehand.
- High beam trigger can be found on some models at the right-hand side headlight plug (Purple/Red wire). Please test the wires for a 12V signal beforehand.
Can Information
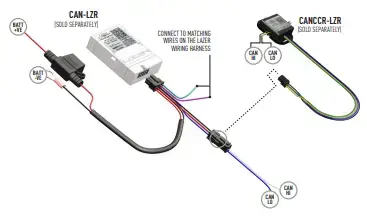
Where the vehicle has the LED Matrix headlight system as standard, it may not be possible to detect a 12V high beam signal. In these instances, it will be necessary to complete the electrical installation using a Lazer CAN Interface. For vehicle-specific CAN instructions, please download the CANM8 Cannect App.
CONTACT
- Address: Lazer Lamps Ltd, Units 1&2 Harlow Mill Business Centre, Riverway, Harlow, Essex. CM20 2FD. United Kingdom
- Tell +44 (0)1992 677374E
- Web: WWW.LAZERLAMPS.COM
- E-Mail: [email protected]