![]()
LED Motion Security Light
User Manua’
READ ALL WARNINGS AND INSTRUCTIONS BEFORE INSTALLING THIS
PRODUCT TO ENSURE SAFETY AND PROPER OPERATION, KEEP THIS
MANUAL GUIDE FOR FUTURE REFERENCE
WARNING
- Failure to install and wire fixture in accordance with the National Electrical Codes (NEC), all applicable Federal, State, and Local electrical codes, as well as specific U.L. safety standards for the intended working environment (location/application), may cause serious personal injury, death and/or property damage.
- Risk of fire or electric shock, installation of the device requires knowledge of the luminaries’ electrical systems. If not qualified, do not attempt installation. Contact a qualified electrician.
- Do not alter, relocate or remove the wiring, lamp holder, power supply or any other electrical components.
- To prevent wiring damage or abrasion, do not expose wiring to edges of sheet metal or other sharp objects.
- Do not operate the device if there’s any visible damage to the device.
- Do not operate the device if there are any signs of smoke, steam, over-heating or crackling noise that can be heard from the device.
- The manufacturer will not be deemed liable or held responsible for any damage caused by faults or manufacturing defects that may be present in any of its products or the misuse or incorrect installation of the device.
- TURN OFF POWER FROM THE MAIN CIRCUIT BEFORE INSTALLING THE FIXTURE. Make sure the fixture is grounded per National Electrical Codes (NEC).
INSTALLATION
- Tools needed: Philip’s and Flathead screwdrivers, adjustable wrench, wire nuts, electrical tape, and silicone caulk.
- Exercise caution and care when handling fixtures to avoid cuts and abrasions, it is recommended to use rubber sole shoes to avoid the chance of electric shocks.
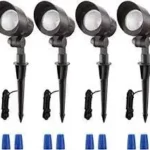
- Carefully unpack and check the contents of the box to be sure everything is included.
- Turn OFF the power at the circuit breaker box.
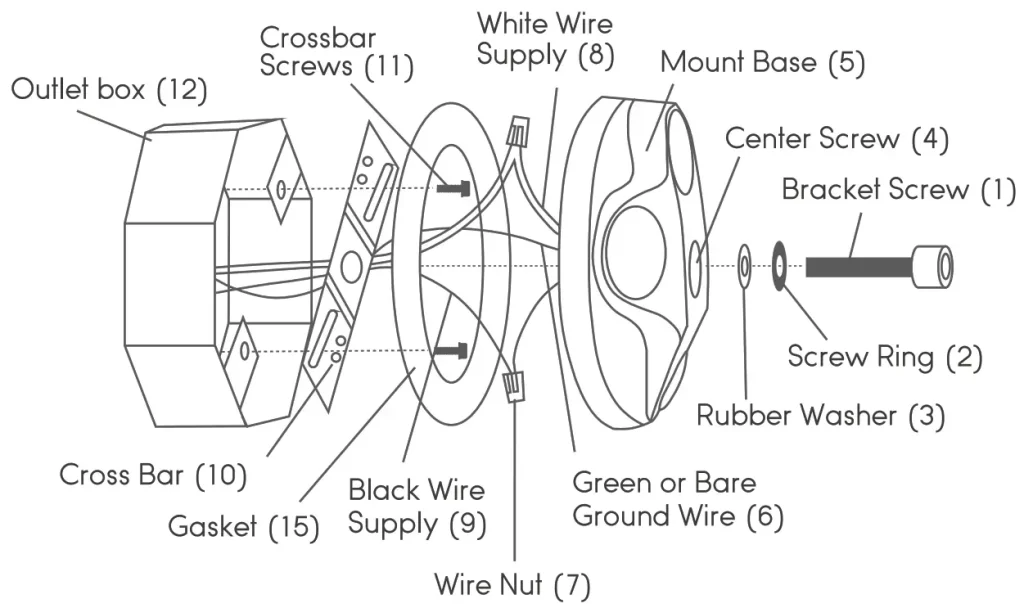
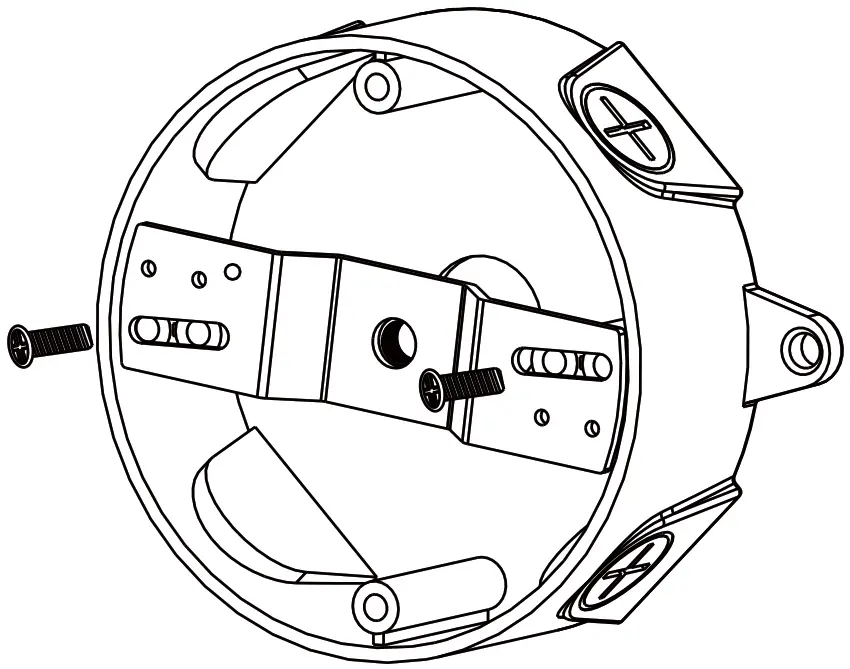
- Install Cross Bar (10) to the junction box using two 3/4″ screws (11).
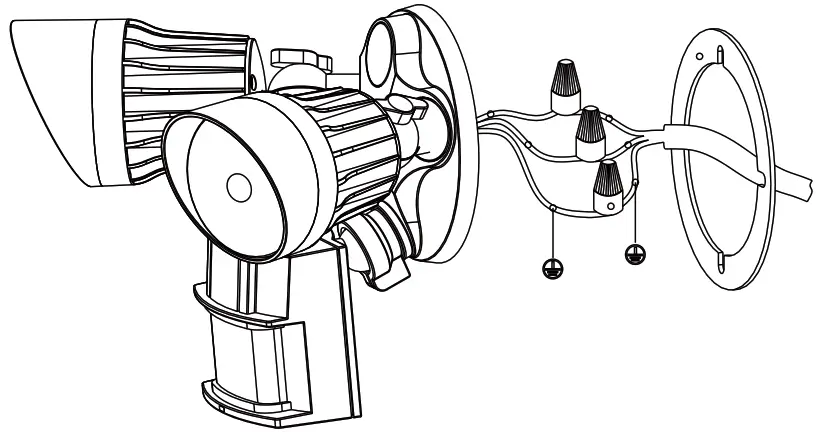
- Electrical Connections: Make sure the supply and ground wires go through the Gasket (15). Attach the green or bare copper wire and the green ground wire of the fixture (6) to the crossbar (10) using the groundnut. (Ground wire must be properly attached or unit may not work). Connect the white supply wire to the white fixture wire (8), then cover them with a wire nut (7) or twist together and cover really well with electrical tape. Repeat this with the black supply and black fixture wires (9). Push the connected wires back into the electrical box.
- Install Bracket Screw (1) into the center hole of Fixture Back Mount base (5). Align Fixture over J-box with the Gasket (15) between it and the Canopy. Secure the unit to the Cross Bar by tightening Center Bracket Screw. Loosen the adjustment knobs (13) and aim the lamp heads (14).
- Turn on electricity at fuse or circuit breaker box and Test Unit success of the installation. (see the motion)
- Place a small streak of silicone caulk on the edge of the fixture bracket, except at the lower edge. Place the bracket of the fixture so the bracket connecting screw protrudes out of the hole in the fixture bracket. Make sure the fixture is set right side up on the mounting surface. Check that the caulking sealant is completely around the edge of the bracket where it meets the wall’s surface (there should not be caulking at the lower edge). Use the securing nut with a rubber washer (3) to tighten up the bracket to the wall. Adjust the two nuts in the bracket connecting screw if the fixture bracket is not tight against the wall. Make sure the unit is tight and secure.
MOUNTING BRACKET
WIRING THE LIGHT FIXTURE
MOUNTING THE LIGHT FIXTURE

CAULKING AROUND THE LIGHT FIXTURE

OPERATION GUIDE
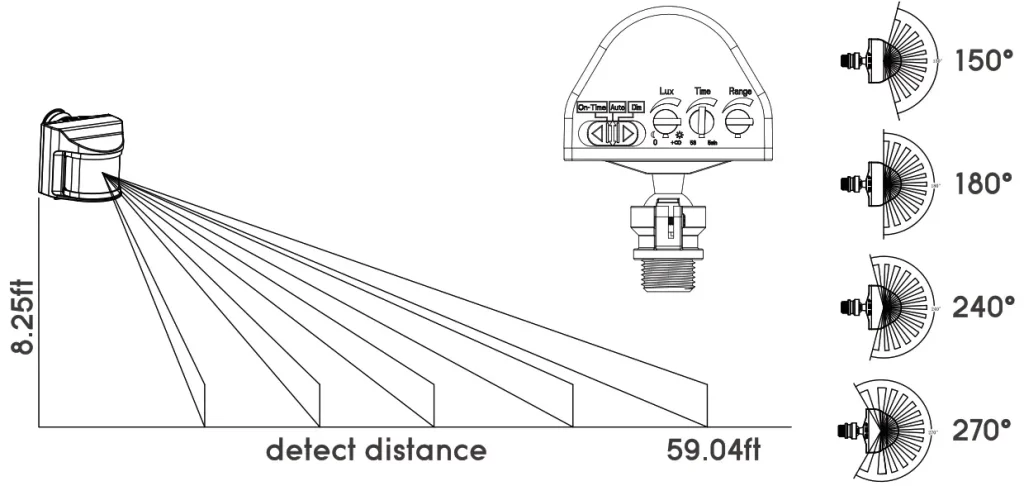
3 Knobs:
By turning the 3 knobs on the right side, 3 kinds of settings can be adjusted as follows:
Lux Knob: The sensitivity of the Photosensor is changeable , turn the first knob clockwise, the light intensity will rise and vice versa.
Time Knob: Lasting time of the lighting is changeable (5secs – 5mins), turning the second knob clockwise raises the delay time and vice versa.
Range: The max distance of the motion sensor is changeable (6.56 – 22.97yds.), turn the third knob clockwise and the detection distance will increase and vice versa.
3 Modes: 3 lighting modes are available by slipping the arrow of the 3-way switch on the left side.
ON-TIME Mode – The light would be on after you switch it on like normal light bulbs.
AUTO Mode – Turn the Lux knob counterclockwise until max. This light will stay off during the day and will turn on at night when motion is detected. After acertain amount of time set by you, the light will turn off when no motion is detected.
Please note that by turning the Lux Knob clockwise, the sensor will detect motion. earlier in the day. At the max setting, it will turn on when motion is detected, even during the day.
Dusk-to-Dawn Mode – Turn the three knobs counterclockwise until the lowest setting and then slip the switch to D2D mode, this puts the light into dusk-to-dawn mode. At night, the light will turn itself on during this mode and then off during the day.
Please note that turning the Lux knob clockwise will lower the photocell sensitivity and if it goes past max, the light will stay on no matter what time of day it is.
WARRANTY
LeonLite warrants that this product is free from defects in materials and workmanship for a period of 5 years from the day of purchase. This warranty does not apply if the product has been damaged through misuse, abuse, accident, modifications, alterations, neglect or mishandling.