![]()
OPERATION
Before Use
Checklist
Clean the refrigerator.
Clean the refrigerator thoroughly and wipe off all dust that accumulated during shipping.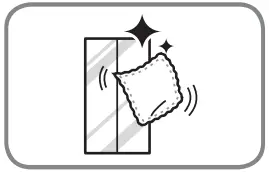
Clean the refrigerator.
Clean the refrigerator thoroughly and wipe off all dust that accumulated during shipping.
![]() CAUTION
CAUTION
- Do not scratch the refrigerator with a sharp object or use a detergent that contains alcohol, a flammable liquid, or an abrasive when removing any tape or adhesive from the refrigerator. Remove adhesive residue by wiping it off with your thumb or dish detergent.
- Do not peel off the model or serial number label or the technical information on the rear surface of the refrigerator.
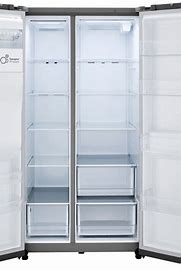
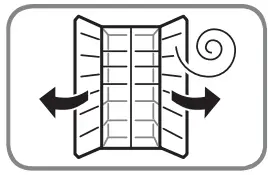
Open doors and drawers to ventilate the interior.
The inside of the refrigerator may smell like plastic at first. Remove any adhesive tape from inside the refrigerator and open the refrigerator doors and drawers for ventilation.
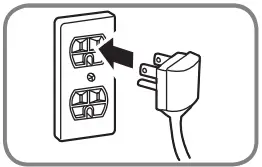
Connect the power supply.
Check if the power supply is connected before use.
 Turn off the icemaker.
Turn off the icemaker if the refrigerator is not yet connected to the water supply.
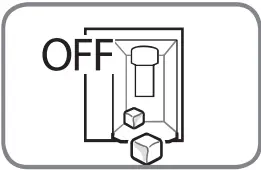 NOTE
NOTE
The ice maker water valve may buzz if the ice maker is turned on while the refrigerator is not connected to the water supply.
Wait for the refrigerator to cool.
Allow the refrigerator to run for at least two to three hours before putting food in it. Check the flow of cold air in the freezer compartment to ensure proper cooling.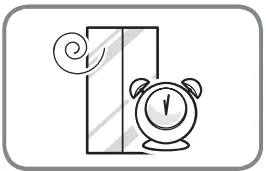
![]() CAUTION
CAUTION
Putting food in the refrigerator before It has cooled could cause the food to spoil, or a bad odor to remain inside the refrigerator.
The refrigerator makes a loud noise after the initial operation.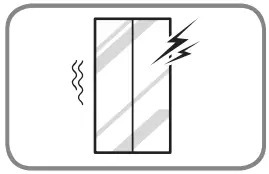 This is normal. The volume will decrease as the temperature decreases.
Control Panel
Depending on the model, some of the following functions may not be available. The actual control panel may differ from model to model.
Control Panel Features
Refrigerator Control Panel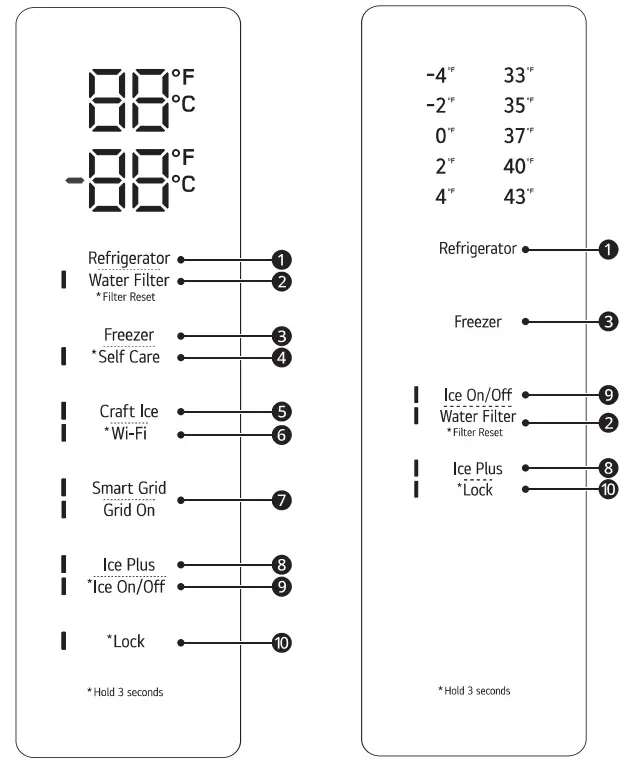
Refrigerator
Indicates the set temperature of the refrigerator compartment in Celsius (°C) or Fahrenheit (°F). The default refrigerator temperature is 37 °F (3 °C). Press the Refrigerator button repeatedly to select a new set temperature from 33 °F to 43 °F (1 °C to 7 °C).
NOTE
- To change the temperature mode from °F to °C (or vice versa) press and hold the Refrigerator and Freezer buttons simultaneously for approximately five seconds. The temperature indicator on the display window switches between Celsius and Fahrenheit.
- The displayed temperature is the target temperature and not the actual temperature of the refrigerator. The actual refrigerator temperature depends on the food inside the refrigerator.
OPERATION
Water Filter
Filter Replace the water filter when the Replace Filter icon turns on. After replacing the water filter, press and hold the Water Filter button for three seconds to turn the icon light off. Replace the water filter approximately every six months.
Freezer
Indicates the set temperature of the freezer compartment in Celsius (°C) or Fahrenheit (°F). The default freezer temperature is 0 °F (-18 °C). Press the Freezer button repeatedly to select a new set temperature from – 7 °F to 5 °F (-23 °C to -15 °C) or – 4 °F to 4 °F.
Self-Caret
UV light is used to keep the water outlet clean. UV clean function runs automatically for 10 minutes every hour or can be manually activated at any time. Press and hold this button for 3 seconds to activate it manually.
NOTE
- During operation, the function stops if the Water button is pressed. It resumes automatically after 1 hour.
- The function runs automatically for 10 minutes every hour without requiring you to press the Self Care button.
- Cipriano is a compound word derived from the words IN and its unit, a nanometer.
Craft It
- Press the Craft Ice button repeatedly to toggle between the 3 ICE, 6 ICE, and OFF modes. After 5 seconds of idle time, the last mode will be saved, and the display will return to normal.
- To turn off the Craft Icemaker, select the OFF mode.
- To turn on the Craft Icemaker, select the 3 ICE or 6 ICE mode.
NOTE
- For more ice, select the 6 ICE mode. For clearer ice, select the 3 ICE mode.
Wi-Fit
The Wi-Fi button, when used with the LG ThinQ app, allows the refrigerator to connect to a home Wi-Fi network. Refer to Smart Functions for information on the initial setup of the application. The Wi-Fi indicator shows the status of the refrigerator’s network connection. The indicator illuminates when the refrigerator is connected to the Wi-Fi network.
Press and hold the Wi-Fi button for 3 seconds to connect to the network. The indicator blinks while the connection is being made and then turns on once the connection is successfully made.
Smart Grid
Press the Smart Grid button to turn the function On/Off. When the function is on, the indicator illuminates. The function automatically turns on when the refrigerator is connected to the Wi-Fi network. The Smart Grid function is only available if your electric utility company supports the function. When the refrigerator is responding to a Demand Response (DR) message from the electric company, the Grid On indicator illuminates.
Ice Plus
This function increases both ice making and freezing capabilities.
- Press the Ice Plus button to illuminate the icon and activate the function for 24 hours. The function automatically shuts off after 24 hours.
- Stop the function manually by pressing the button once more.
NOTE
Display Mode (For Store Use Only)
– The Display Mode disables all cooling in the refrigerator and freezer sections to conserve energy while on display in a retail store. When activated, OFF is displayed on the control panel.
– To deactivate/activate:
With either refrigerator door opened, press the Ice Plus button 3 times consecutively while pressing the Refrigerator button. The control panel beeps and the temperature settings display to confirm that Display Mode is deactivated. Use the same procedure to activate Display Mode.
Dispenser Control Panel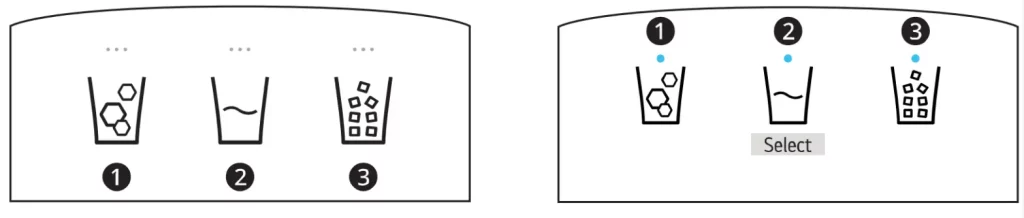 Water & Ice Type
Select the desired dispenser mode from the buttons on the dispenser control panel. From left to right, the icons indicate cubed ice a, water b, and crushed ice c. Press the dispenser switch with a glass or other container to dispense cubed ice, water or crushed ice.
NOTE
When the refrigerator is in the Power Saving Mode, the display remains off until a door is opened or a button is pressed. Once on, the display remains on for 20 seconds.
Sabbath Mode
This feature is only available on some models.
Using the Sabbath Mode
Sabbath Mode is used on the Jewish Sabbath and Holidays.
- To turn Sabbath mode on, touch the display to activate it, then press and hold the Freezer and Wi-Fi buttons for 3 seconds until SID appears in the display.
- To turn Sabbath mode off manually, press and hold the Freezer and Wi-Fi buttons for 3 seconds.
NOTE
- Sabbath mode automatically turns off after 96 hours.
- Once turned on, Sabbath mode is maintained even after a power outage.
- Selecting Sabbath mode automatically turns off the alarm functions.
- The dispenser and InstaView are disabled in Sabbath mode, on applicable models.
Ice and Water Dispenser
Before Using the Ice and Water Dispenser
![]() CAUTION
CAUTION
- Keep children away from the dispenser. Children may play with or damage the controls.
- Throw away the first bin full of ice (about 140-160 cubes) after installation. The first ice and water dispensed may include particles or odor from the water supply line or the water tank. This is also necessary if the refrigerator has not been used for a long time.
- Dispense and throw away 2.5 gallons of water (flush for approximately 5 minutes) after installation. Do not dispense the entire 2.5-gallon amount continuously. Press and release the dispenser pad for cycles of 30 seconds ON and 60 seconds OFF. This is also necessary if the refrigerator has not been used for a long time.
- If ice or water dispenses unexpectedly, turn off the water supply and contact an LG Electronics Customer Information Center.
- Never use a glass that is exceptionally narrow or deep. Ice may jam in the ice passage and refrigerator performance may be affected.
- When dispensing ice from the dispenser, do not use a fragile container.
- Do not hang on to or place heavy objects on the dispenser of the refrigerator.
NOTE
- The dispenser will not operate when either of the refrigerator doors is open.
- If discolored ice is dispensed, check the water filter and water supply. If the problem continues, contact an LG Electronics Customer Information Center. Do not use the water or ice until the problem is corrected.
- Dispense ice into a glass before filling it with water or other beverages. Splashing may occur if ice is dispensed into a glass that already contains liquid.
- Some dripping may occur after dispensing. Hold the cup beneath the dispenser for a few seconds after dispensing to catch all of the drops.
- Keep containers at an appropriate distance from the dispensers. Tall, narrow glasses should be held far enough from the ice outlet to prevent ice from jamming in the ice chute. A container with a very small opening should be held as close to the dispenser as possible to avoid spilling.
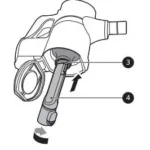
Using the Ice and Water Dispenser
- Press the icon for the desired dispenser mode 0. The LED over the selected icon turns on.
- Press the dispenser paddle 0 with a glass or other container to dispense cubed ice, water or crushed ire.
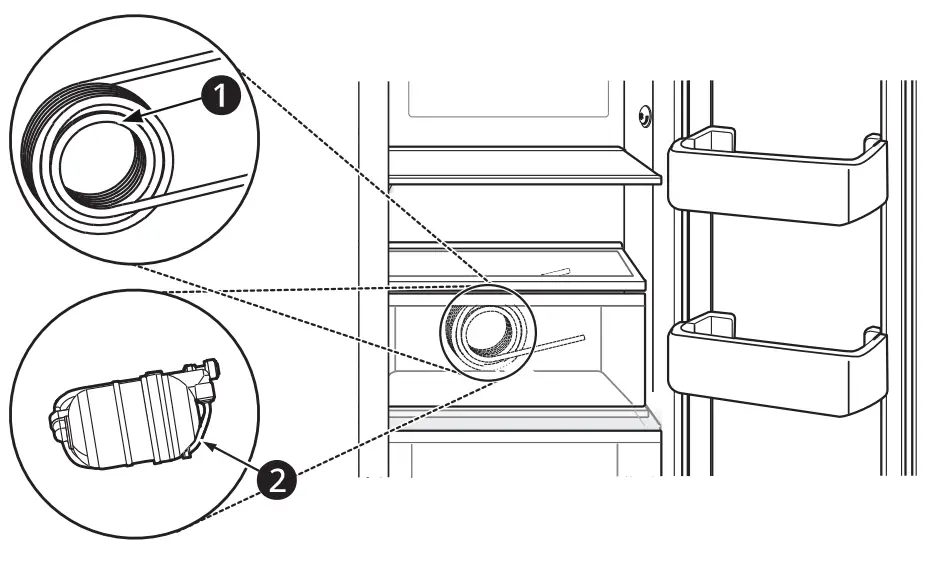
Cleaning the Dispenser
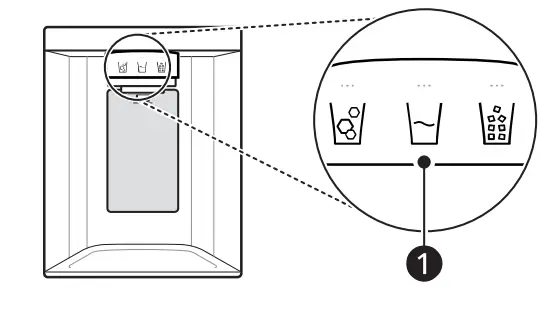
Cleaning the Ice and Water Outlet Wipe the water outlet 0 or ice outlet 0 frequently with a clean cloth as it may get dirty easily.
NOTE
- Lint from a cloth may adhere to the outlets.
- The UV clean function runs automatically for 10 minutes every hour to clean the dispenser outlet. Press and hold the Self Care button for 3 seconds to manually activate it.
Cleaning the Dispenser Tray
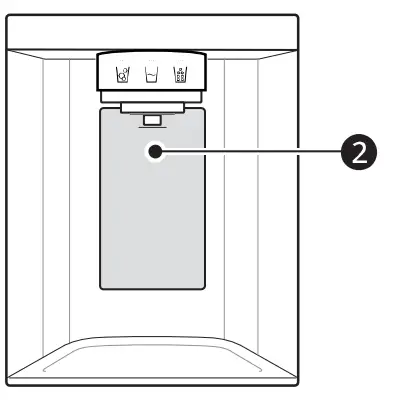
Wipe the entire area with a damp cloth. The dispenser tray may become wet easily due to spilled ice or water.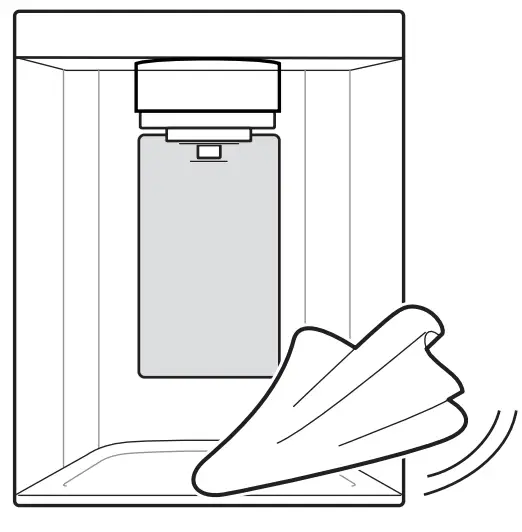
Locking the Ice and Water Dispenser
Press and hold the Lock button for three seconds to lock the dispenser and all the control panel functions. Follow the same instructions to unlock.
In-Door Ice Bin
Before Using the In-Door Ice Bin
The ice maker stops producing ice when the in-door ice bin is full. To make room for additional ice, empty the ice bin into another location in the freezer compartment. During use, the ice may stack unevenly in the bin, causing the icemaker to misread the number of ice cubes and stop producing ice. Shaking the ice bin to level the ice within it can reduce this problem.
![]() CAUTION
CAUTION
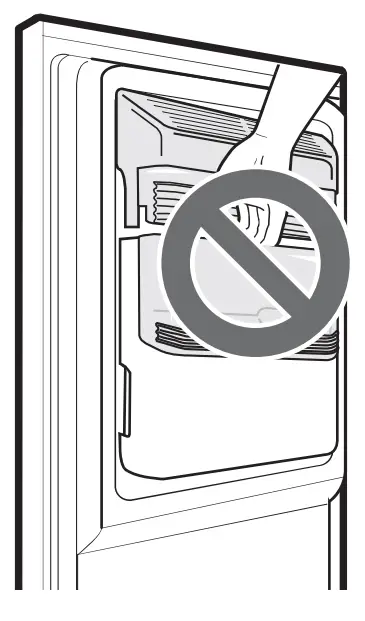
Keep hands and tools out of the in-door ice bin and dispenser chute. Failure to do so may result in damage or personal injury.
- When handling the Ice bin, keep hands away from the icemaker tray area to avoid personal injury.
- Storing cans or other items in the ice bin will damage the icemaker.
- Never use thin crystal glasses or containers to collect ice. Such containers may chip or break resulting in glass fragments in the ice.
To prevent ice cubes from melting and leaking from the dispenser, ALWAYS empty the ice bin when the ice maker is turned OFF for more than a few hours.
The ice passage may become blocked with frost if only crushed ice is used. Remove the frost that accumulates by removing the ice bin and clearing the passage with a rubber spatula. Dispensing cubed ice can also help prevent frost buildup.
Detaching/Assembling the In-Door Ice Bin
![]() CAUTION
CAUTION
- Only qualified service personnel from an LG Electronics service center should disassemble or repair the icemaker.
- When handling the ice bin, keep hands away from the icemaker tray area to avoid personal injury.
- Avoid touching the auto-shutoff (feeler arm) when replacing the ice bin.
1 To detach, lift the ice storage bin slightly and pull it out as shown in the figure.
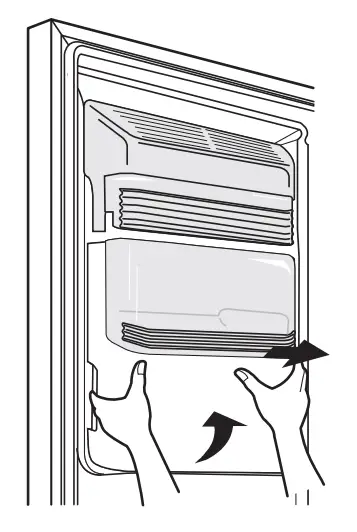 NOTE • Use both hands to remove the ice bin to avoid dropping it.
To assemble, carefully insert the in-door ice bin, slanting the top slightly to fit it under the icemaker. 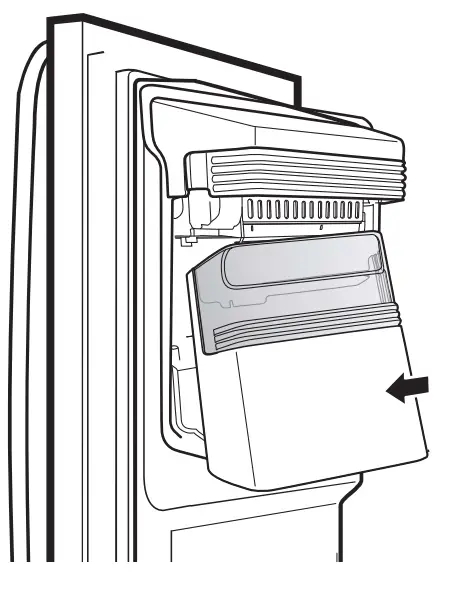
Automatic Icemaker
![]() WARNING
WARNING
- DO NOT place fingers in the automatic icemaker when the refrigerator is plugged in.
- Avoid contact with any moving parts of the ejector mechanism or with the heater that releases the ice cubes.
Before Using the In-Door Icemaker
NOTE
- Ice is made in the automatic In-door ice maker and sent to the dispenser. The ice maker produces 70 – 182 cubes in a 24-hour period, depending on freezer compartment temperature, room temperature, number of door openings, and other operating conditions.
- It takes about 12 to 24 hours for a newly installed refrigerator to begin making ice.
- Ice-making stops when the in-door ice bin is full. When full, the in-door ice bin holds approximately 6 to 8 (12-16 oz.) glasses of ice.
- Foreign substances or frost on the ice-detecting sensor can interrupt ice production. Make sure the sensor area is clean at all times for proper operation
- To increase ice production, use the Ice Plus function. The function increases both ice-making and freezing capabilities.
In-Door Icemaker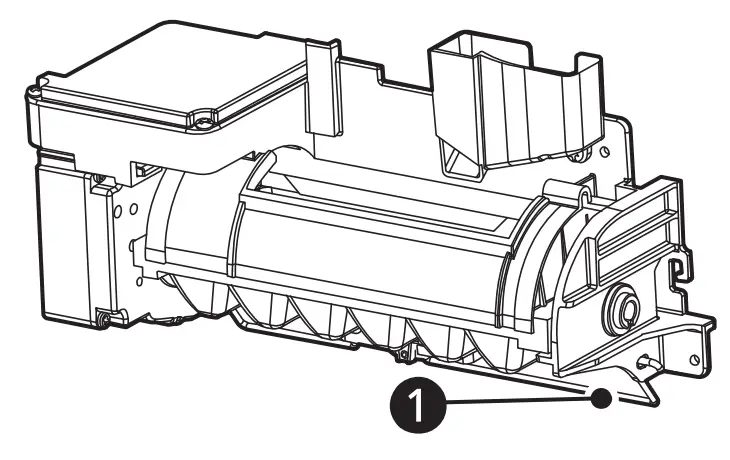
Auto Shutoff (feeler arm)
Before Using the Freezer Icemaker This feature is only available on some models. The feature may vary depending on model purchased.
NOTE
- Throw away the first bin full of ice after installation. This is also necessary if the refrigerator has not been used for a long time.
- The icemaker begins producing ice approximately 48 hours after the appliance is initially instated.
- The sound of ice dropping into the ice bin is normal.
- If the ice bin is completely filled with ice, ice production will stop
- The amount and shape of ice may vary according to the environment (ambient temperature around the appliance. frequency of the door being opened. amount of food stored in the appliance. water pressure, etc.).
- In the event of a power outage, throw away the ice stored in the ice bin.
Freezer Icemaker (Craft IceTM)
This feature is only available on some models.
 Feeder Arm
![]() CAUTION
CAUTION
Do not insert round Ice into the in-door ice bin, as it can damage the ice and water dispenser.
NOTE
- The icemaker begins producing ice approximately 48 hours after the appliance is initially installed. The first batches of ice may not be round and clear.
- Following Installation or water filter replacement, the first few batches of ice may be semicircular or contain air bubbles.
- If the water pressure Is less than 20 psi (138 kPa) or a reverse osmosis system is used. the shape of the ice may vary.
- The ice may look dowdy depending on the water quality in the installation location and the operating conditions.
- Throw away any shards of Ice you may find In the ice bin, as they may stick to the ice stored in the ice bin.
- After a short-term power outage, it will take longer to make the first batch of ice, and the ice may not be round. If the power will be out for a longer period, throw away the ice stored in the ice bin.
- The Craft Ice icemaker produces I batch of round ice (3 pieces) at a time.
- In 3 ICE mode, the Craft Ice icemaker produces 1 batch of round ice (3 pieces) about every 24 hours. In 6 ICE mode, the Craft Ice icemaker produces 2 batches of round ice (6 pieces total) in the same period.
- For more Ice, select the 6 ICE mode. For dearer ice. select the 3 ICE mode.
- The time needed to make lee may vary according to operating conditions.
- The ice bin stores 20 – 30 pieces of round ice.
Turning the Icemaker On/Off
To turn icemakers On/Off. refer to Control Panel in the Operation section.
Normal Sounds You May Hear
- keeping the power turned on to the Icemaker before the water line is connected can damage the icemaker.
- You will hear the sound of Ice dropping Into the bin and water running WI the pipes as the icemaker refills.
- The kemaker water valve buzzes as the icemakers fill with water. If the icemakers are turned on, they will buzz even if they have not yet been hooked up to water. To stop the buzzing: Tum icemakers off by referring to Control Panel in the Operation section.
Preparing for Vacation
Turn icemakers off and shut off the water supply to the refrigerator. To turn the icemakers off, refer to Control Panel in the Operation section.
NOTE
The Ice bin should be emptied any time icemakers are turned Off.
If the ambient temperature will drop below freezing, have a qualified technician drain the water supply system to prevent serious property damage due to flooding caused by ruptured water lines or connections.
Storing Food
NOTE
- If you are leaving home for a short period, like a short vacation an. the refrigerator should be left on. Refrigerated foods that are able to be frozen will stay preserved longer if stored in the freezer.
- If you are leaving the refrigerator turned off for an extended period, remove all food and unplug the power cord. Clean the interior, and leave the door open to prevent fungi from growing in the refrigerator.
- If doors are opened or closed too often, warm air may penetrate the refrigerator and raise its temperature. This can increase the running costs of the unit.
Food Storage Tips Wrap or store food in the refrigerator in airtight and moisture. proof material unless otherwise noted. This prevents food odor and taste transfer throughout the refrigerator. For dated products. check date code to ensure freshness.
![]() CAUTION
CAUTION
- Do not overfill or pack items too tightly into door bins. Doing so may cause damage to the bin or personal injury if items are removed with excessive force.
- DO not store glass containers in the freezer. Contents may expand when frozen, break the container and cause injury.
How to Store Food
- Butter or Margarine Keep opened butter in a covered dish or closed compartment. When storing an extra supply. wrap in freezer packaging and freeze.
- Cheese Store in the original wrapping until used. Once opened. rewrap tightly in plastic wrap or aluminum foil.
- Milk – Wipe mak cartons. For coldest milk place containers on an interior shelf.
- Eggs – Store in original carton on interior shelf, not on door shelf.
- Fruit – Do not wash or hull fruit until it is ready to be used. Sort and keep fruit in original container in a crisper, or store in a completely closed paper bag on a refrigerator shelf.
- Leafy Vegetables Remove store wrapping, trim or tear off bruised and discolored areas, wash in cold water, and drain. Place in a plastic bag or plastic container and store in crisper.
- Vegetables with skins (carrots, peppers) – Place in plastic bags or plastic containers and store in crisper.
- Fish
– Freeze fresh fish and shellfish if they are not being eaten the same day purchased. Eating fresh fish and shellfish the same day purchased is recommended. - Leftovers – Cover leftovers with plastic wrap or aluminum foil, or store in plastic containers with tight lids.
- NOTE
- Do not store food with high moisture content towards the top of the refrigerator. The moisture could come into direct contact with the cold air and freeze.
- Wash food before storing It In the refrigerator. Vegetables should be washed. and food packaging should be wiped down to prevent adjacent foods from being contaminated.
- If the refrigerator is kept in a hot and humid place. frequent opening of the door or storing a lot of vegetables in the refrigerator may cause condensation to form. Wipe off the condensation with a clean cloth or a paper towel.
Storing Frozen Food
Check a freezer guide or a reliable cookbook for further information about preparing food for freezing or food storage times.
Freezing
Your freezer will not quick-freeze a large quantity of food. Do not put more unfrozen food into the freezer than will freeze within 24 hours (no more than 2 to 3 pounds of food per cubic foot of freezer space). Leave enough space in the freezer for air to circulate around packages. Be careful to leave enough room at the front so the door can close tightly. Storage times will vary according to the quality and type of food, the type of packaging or wrap used (how airtight and moisture-proof) and the storage temperature. Ice crystals inside a sealed package are normal. This simply means that moisture in the food and air inside the package have condensed, creating ice crystals.
NOTE
- Allow hot foods to cool at room temperature for 30 minutes, and then package and freeze. Cooling hot foods before freezing saves energy.
Packaging Successful freezing depends on correct packaging. When you close and seal the package. it must not aliens air or moisture in or out. If it does. you could have food odor and taste transfer throughout the refrigerator and could also dry out frozen food.
Packaging Recommendations
- Rigid plastic containers with tight-fitting lids
- Straight-sided canning/freezing jars
- Heavy-duty aluminum foil
- Plastic-coated paper
- Non-permeable plastic wraps
- Specified freezer-grade self-sealing plastic bags
- Follow package or container instructions for proper freezing methods.
- Do not use
- Bread wrappers
- Non-polyethylene plastic containers
- Containers without tight lids
- Wax paper or wax-coated freezer wrap
- Thin, semi-permeable wrap
Drawers
Removing/Assembling Drawers
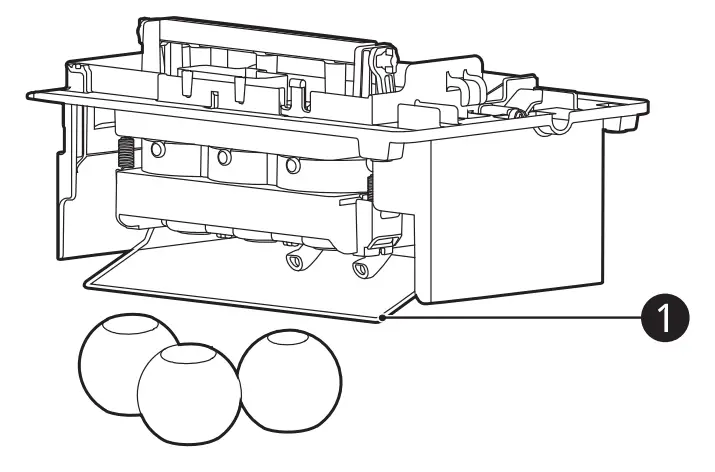
1 To remove drawers. pull them out to full extension, lift the front. and pull straight out.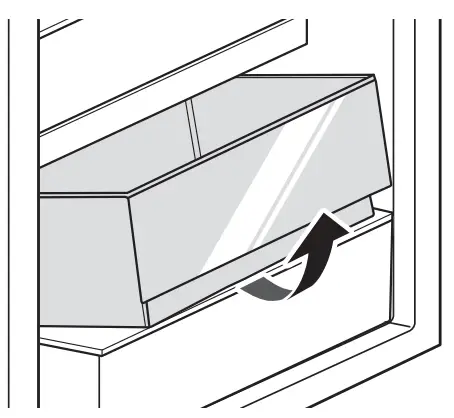
NOTE
When removing or Installing the drawer, lift the cover to help remove or insert the drawer.
2 To assemble drawers. slightly tilt up the front. insert into the frame and push back into place.
![]() CAUTION
CAUTION
- Use both hands to remove and assemble drawers. The compartment is heavy when filled with food and may cause injury if dropped.
- Open refrigerator doors fully when removing or assembling drawers.
- You will see the water tank while removing the Fresh Zone drawer. Do not remove the water tank or water leakage may occur. The water tank is not a removable part.
- water tank (Type A)
- 9 Water tank (Type B)
Refrigerator Shelves
- The shelves in the refrigerator are adjustable to meet individual storage needs. Adjusting the shelves to fit items of different heights will make finding the exact item you want easier.
Detaching/Assembling Shelves
![]() CAUTION
CAUTION
Do not clean glass shelves with warm water while they are cold. Shelves may break if exposed to sudden temperature changes or impact.
- To detach, remove all items from the shelf. Lift the back of the shelf slightly to disengage the rail stops.
- Holding the shelf with both hands, tilt the shelf and pull it out.
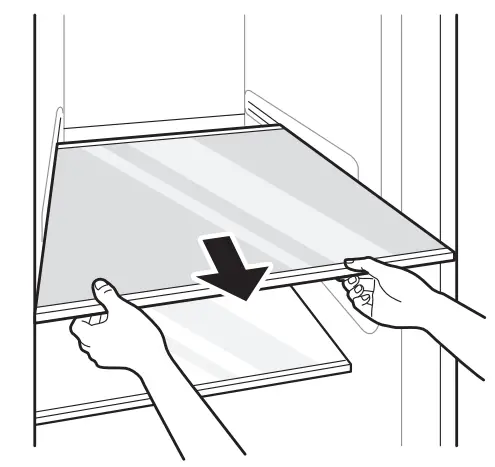
- To assemble, tilt the front of the shelf up and guide the shelf into the slots at the desired height, keeping the shelf holder down.
- Slide the shelf in, then lower the front of the shelf.
![]() CAUTION
CAUTION
- Make sure that shelves are level from one side to the other. Failure to do so may result in the shelf falling or spilled food.
InstaView
This feature is only available on some models.
InstaView Door-in-Door
Knock twice on the glass to turn the LED light inside the InstaView on or off. The LED light turns off automatically after 10 seconds.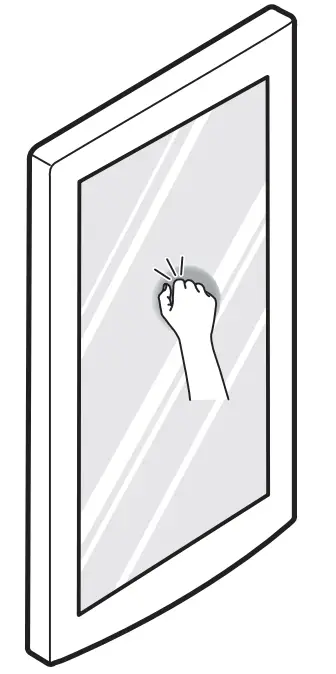
NOTE
- The LED light does not turn on if either door Is open.
- The InstaView function will not activate for two seconds after closing the door.
- The InstaView function is disabled when the ice dispenser is in use.
Door-in-Door
This feature is only available on some models. i the Door-in. The door compartment allows for easy access to commonly used food items.
Door-in-Door Compartment
To access the Door. in-Door compartment. pull the lever at the bottom of the door upwards until the Door. in-Door opens. Door Bins
Detaching/Assembling Door Bins
The door bins are removable for easy cleaning and adjustment.
1 To remove the bin, simply lift the bin up and pull it straight out.
 2 To assemble the bin. slide it in above the desired support and push down until it snaps into place.
![]() CAUTION
CAUTION
- Regularly detach and wash the storage bins and shelves: they can become easily contaminated by food.
- Do not apply excessive force while detaching or assembling the storage bins.
- Do not use the dishwasher to clean the storage bins and shelves.