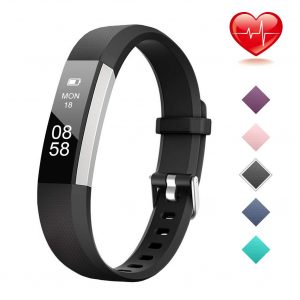
Lintelek Fitness Tracker Manual [ID115Plus]


NOT A TOY: Children under 14 years old should use this product under adult supervision.
NOT A MEDICAL USE: This product is not a medical device, and is not intended to diagnose, treat, cure, or prevent any disease. The accuracy of our devices is not intended to match medical devices or scientific measurement devices, but is intended to give you the best infonnation available in a wearable activity tracker.
USB Charging
Please charge your new device for at least 10 minutes to have it activated before initial use.
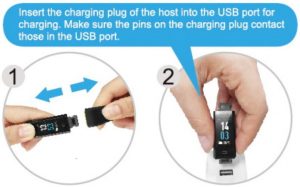
In case that device is under low battery, connect the device host to an adapter for charging. Device will automatically boot up once fully charged. Remove the device host from the power supply once fully charged.
USB charger requirement: DC USB port (5V-500mA)
Install and Wear Your Device
Install: Plug the host into the slots of each strap.
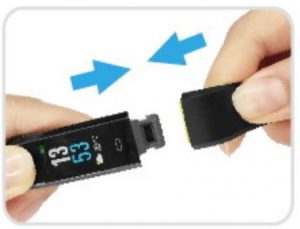
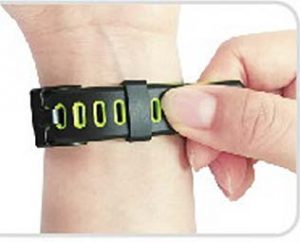
Wear: Wear the device on your wrist horizontally, about 2cm to carpal, the same way as wearing a watch.

Smart Phone System Requirement
- iOS 7.1 & above
- Android 4.4 & above
- Bluetooth 4.0 & above
Download the APP
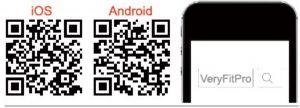
Download “VeryFitPro” APP for Android and iOS devices.
Option 1: Search for “VeryFitPro” in APP store or Google Play and download to your smartphone.
Notes:
- This fitness tracker requires iOS 7.1 & above or Android 4.4 & above system.
- “VeryFitPro” APP is only compatible with smartphones.
Option 2: Searching the QR code, scan and download APP. Use the QR code Scan tool to scan the following QR code, open the link and follow the instructions to download APP.
Tip: In case of problems when opening the link, copy the link and open it in a browser.
Pair the Device
- Enable Bluetooth before binding the device.
- Open ”VeryFitPro” APP on your smartphone and tap on “Device”-“Bind device”, then your smartphone starts searching devices.
- Select “ID115Plus Color HR” in the list of found devices, tap on “ID115Plus Color HR” to connect the device to your smartphone.
(If failed searching the device, please tap on the touch key to wake the device (screen lights on), then start searching with your smartphone one more time.)
Notes:
- After first successful searching and binding, if you enable the Bluetooth function of the smartphone afterwards, the device will automatically search and link back to the smartphone it has bound.
- If the device is unbound under Bluetooth connected state, the APP will set the settings back to default. Al I data on the device will be cleared. If the device is unbound under Bluetooth disconnected state, the APP will set the settings back to default, but the data on the device will not be cleared.
- The device can only link to one smartphone at a time. During connecting please confirm there is no other smartphones nearby.

Touch Key
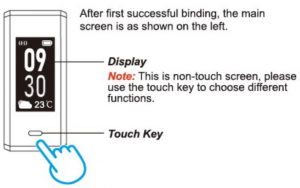
Waking a Dimmed Screen
When you’re not using ID115Plus Color HR, the display is off.
To wake it up:
- Turn your wrist towards you, the screen will display time and weather (weather forecast can be turned off in “Device”‘→”More → “Weather forecast” in the APP.)

Note:
The screen brightness can be adjusted from Level 1 to Level 5 in “Device”→”More”→”Bracelet brightness” in the APP and Level 5 is the brightest. Remember to click ” √ ” to save your settings.
- Tap on the touch key, and the device will display the main screen.
Main Functions
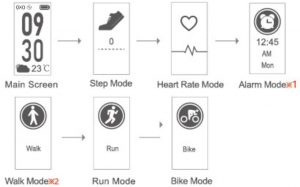
- “Alarm Mode” is displayed on the device screen only when “Alarm Alert” is ON in the APP.
- “Walk Mode”, ‘Run Mode” and “Bike Mode” are displayed on the device screen by default. You can set up to 3 different sports modes from 14 sports modes to display on the device screen (Go to “VeryFitPro” APP “→”Device”→”More’-> ‘Activity display”).
Function Introduction
1. Step Mode
- Long press the touch key for 2s to view detailed step data.
- Single tap on the touch key to flip through detailed step data.
- Single tap on the touch key to go to the next mode: Heart Rate Mode.

Note:
You can go to the APP to set you sports target (“User”→”Target Setting”). When you reach your sport target, the device vibrates and the screen displays:

Tap on the touch key to go back to the main screen.
2. Heart Rate Mode
After entering the heart rate interface for 1 s, the device will start monitoring the heart rate automatically. Before the correct data is detected, the device shows ” 
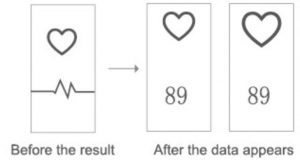
Single tap on the touch key to go to the next mode: Alarm Mode.
3. Alarm Mode
- Long press the touch key for 2s to tum on/ off the alarm function.
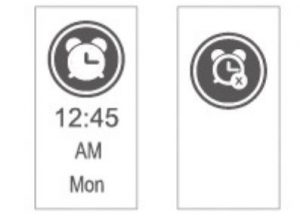
Notes:
- Alarm Mode is available only when alarm(s) isfare added and enabled (turn on the switch to enable the alarm) in “Alarm alert” in the APP.
- Tap on the alarm, you can add and set the alarm types, repeat type and time. (When alarm(s) is fare added and enabled, please click” √ ” to save your settings.)

- Single tap on the touch key to go to the next mode: Walk Mode.
4. Walk Mode
- Long press the touch key for 2s to start the walk mode.
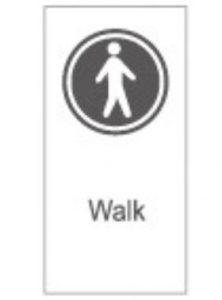
During exercise, tap on the touch key to flip through the exercise data.
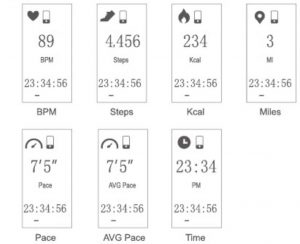
- Long press the touch key for 2s to quit the walk mode.
The following data is displayed after the exercise is ended:
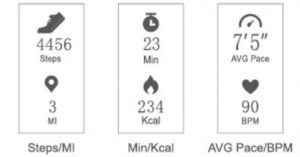
Single tap on the touch key to flip through the exercise data.
- Single tap on the touch key to go to the next mode: Run Mode
Note:
Data of exercises less than 1 minute will not be saved.
5. Run Mode
- Long press the touch key for 2s to start the run mode.
During exercise, tap on the touch key to flip through the exercise data.
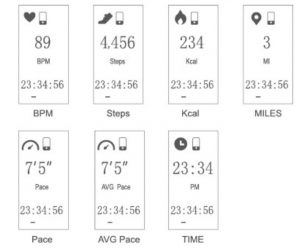
- Long press the touch key for 2s to quit the run mode.
The following data is displayed after the exercise is ended:

Single tap on the touch key to flip through the exercise data.
- Single tap on the touch key to go to the next mode: Bike Mode.
6. Bike Mode
- Long press the touch key for 2s to start the bike mode.
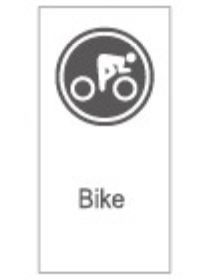
During exercise, tap on the touch key to fl ip through the exercise data.
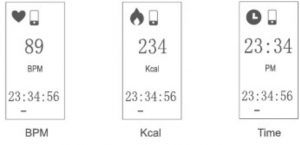
- Long press the touch key for 2s to quit the bike mode.
The following data is displayed after the exercise is ended:

Single tap on the touch key to flip through the exercise data.
- Single tap on the touch key to go to the main screen.
Note:
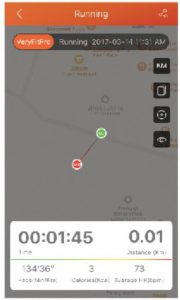

After starting the running mode, the APP will track and map your run distance; after the exercise, you can effortless ly check your workout data.
6.1 Abnormal Situations During Exercise
- Inactive Exit Prompt

- Device will automatically exit the sport mode if no action is taken in 15 minutes.
- Device will be forced to exit the sport mode if you don’t tap on the waiting prompt within 15 seconds.
Single tap on the touch key to cancel the Automatic Exit Sport mode prompt, then the sport mode can work as normal.
2. The prompt of being forced to exit the sport mode when memory is full
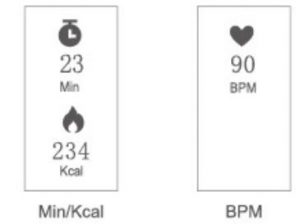
Single tap on the touch key to confirm the prompt if the devi ce is force to exit the sport mode when memory is full, then exit the sport mode and exercise data is displayed.
Notes:
- The sport mode lasts for up to 6 hours.
- When the memory is full, it will prompt that the sport mode is forced to e xit.
3. The prompt being forced to exit sport mode when battery is low
Single tap on the touch key to confirm the prompt if the device is force to exit sport mode when battery is low , then exit the sport mode and exercise data is displayed.

6.2 Abnormal Operation Situation During Exercise
When the APP and the device are disconnected, the screen will appear a prompt o f waiting: Single tap on the touch key to exit the interface of waiting prompt.

7. Other Functions
- Call Alert
When there is an incoming call, the device displays:

Notes:
- Long press the touch key to reject the call; single tap on the touch key to return to the main screen.
- Only when “Call Alert” is ON in the APP, calls will be notified. (When turning on/off the Call Alert function, please click “√ ” to save your settings.)
2) SNS Alert
When SNS messages (including: SMS, Facebook, WhatsApp, Twitter, lnstagram, Facebook Messenger, Linkedln, Email, Mail, and Calendar) come in, the devi ce displays the message content:

Notes:
- Only when “SNS Alert” (tap on “Device” → ‘SNS Alert”→”A llow notification”) is ON in the APP, SNS messages will be notified. (When turning on/off the Call Alert function, please click “√ ” to save your settings.)
- When “Do not disturb” function is enabled in the APP (“Device” → “More” →”Do not disturb” ), messages will not be notified on the device during the set do-not-disturb period.
3. Take Photos
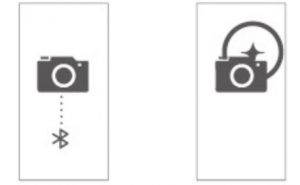
Open the “VeryFitPro” APP, and tap on “Device”→ “Camera”, then the device screen shows the camera interface. Single tap on the touch key of the device to control the camera of your smart phone to shoot photos.
4. Sedentary Alert
Open the “VeryFitPro” APP. Tap o n “Device” → “Sedentary Alert” to switch on the Sedentary A lert function and set the alert time. The device will vibrate and display the following interface to remind you to move after the set sedentary alert period passed.
5. Device Error Notification
Note:
When the device has an exception, the interface is displayed every time when the device is turned on.
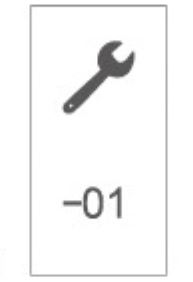
Status code:
- 01 indicates acceleration sensor abnormality;
- 02 indicates the heart rate sensor is abnormal;
- 03 indicates touch ic is abnormal;
- 04 indicates the flash is abnormal.
Basic Specifications
- Model No.: ID115Plus Color HR
- Battery Capacity: 65mAh
- Working Voltage: 3. 7V
- Host weight: about 24 .8g
- Sync: Bluetooth 4.0
- Working Temperature: -20 C – 40 C
- Waterproof Rating: I P68-01
- Working Time: 5 days (with Automatic HR Monitoring ON), 8 days (with Automatic HR Monitoring OFF).
Electronic Information Products
Poisonous and Harmful Statement
This product meets the EU ROHS standards

Refer to IEC 62321 and EU RoHS
Directive 2011/65 / EU and its revision instructions
FAQs
Failed to bind the device with APP
- Make sure the Bluetooth of your smartphone is ON. (Do not pair the tracker with your phone’s Bluetooth on your phone, but in “VeryFitPro” APP (Step 5). If you have already paired the tracker with your phone’s Bluetooth, click to forget the device and bind the tracker to your phone in “VeryFitPro” APP).
- Make sure the distance between your smartphone and the device i s within O .5 meter.
- Make sure the “VeryFitPro” APP is trusted by your smartphone by going to your smartphone system Settings, finding “VeryFitPro” APP and enabling the Location and all Notifications. (Specific setting methods may vary according to different smartphones.
- Make sure the fitness tracker is under unbind status before pairing.
- Open “VeryFitPro” APP on your smartphone and tap on ‘Device” → “Bind device”, then your smartphone starts searching devices. Select “ID115Plus Color HR’ in the list of found devices, and tap on “ID115Plus Color HR” to connect the device to your smartphone.
- If you failed search the device, reboot your smartphone and Bluetooth to search it again.
Note:
For iOS smartphones, if you failed to find “ID115Plus Color HR” in the APP, take the following steps:
- Go to your smartphone “Settings”→ “Bluetooth”. Under “MY DEVICES”, find “ID115Plus Color HR”. tap on ”

- Reboot smartphone and open the “VeryFitPro” APP. When asked whether to turn on the Blue tooth switch, click OK to search and bind your device.
Failed to charge the device
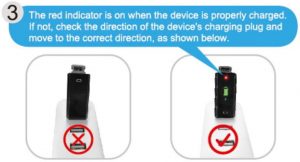
Make sure the direction of the device’s USB plug is correct when plugging into the USB port for charging. For correct charging. the device’s red indicator turns on and will be off when the device has been fully charged. Please remove the device host from the power supply once fully charged. Pro longed charging may shorten the battery’s life.
Failed to receive SMS/Ca/fs notifications
Calls/SMS notification function works when the deviceconnects to your smartphone via APP. Please kindly refer to the following tips:
- Go to your smartphone system Settings, find “VeryFitPro” APP and enabl e the Locatio n and all Notificati ons. (Specific setting methods may vary according to different smartphones.
- Turn Bluetooth on and go to the “VeryFitPro” APP to bind the device.
- Switch “Call/SNS Alert” function on, and click”√” to save your settings.
Failed to count steps accurately
Regarding the step counting, this fitness tracker has a built-in 3D sensor. It registers your steps when you swing your arm. Sometimes the data on device may displayed a little delayed. And it will reset itself if you walk continuously less than 40 steps. To test the accuracy of the pedometer, please walk casually and continuously up to 100 steps or more.
Failed to measure heart rate
Make sure the wrist band sit neatly on your wrist before use. Tap on the touch key to go to the heart rate mode and wait for 10-20s to detect the heart rate.
Failed to connect to the smartphone
The device will disconnect from your smartphone in the following cases:
- Smartphone Bluetooth was off or exceed normal Bluetooth connection distance range (The normal Bluetooth connection distance is within 1O meters. it can easily be reduced by walls or furniture, etc.
- The “VeryFitPro” APP was ended in phone background process.
To reconnect the device to your smartphone, please kindly refer to the following tips:
- Go to your smartphone system Settings, find “VeryFitPro” APP and enable the Location and all Notifications. (Spec ific setting methods may vary according to different smartphones.
- Clear all running/background processes in your smartphone, go to “VeryFilPro” APP, and swipe down Mainpage, then the device will reconnect to your smartphone and refresh data. You can also restart you smartphone and Bluetooth, then rebind the device on APP.
Failed to sync your tracker data to APP
To sync your tracker data to “VeryFitPro” APP, go to “VeryFitPro” APP and swipe down Mainpage under connection state.
