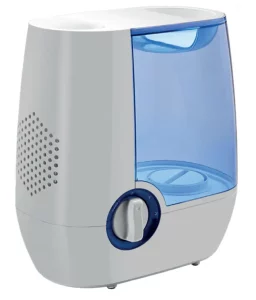
MAINSTAYS HF3102A-UL Warm Mist Humidifier
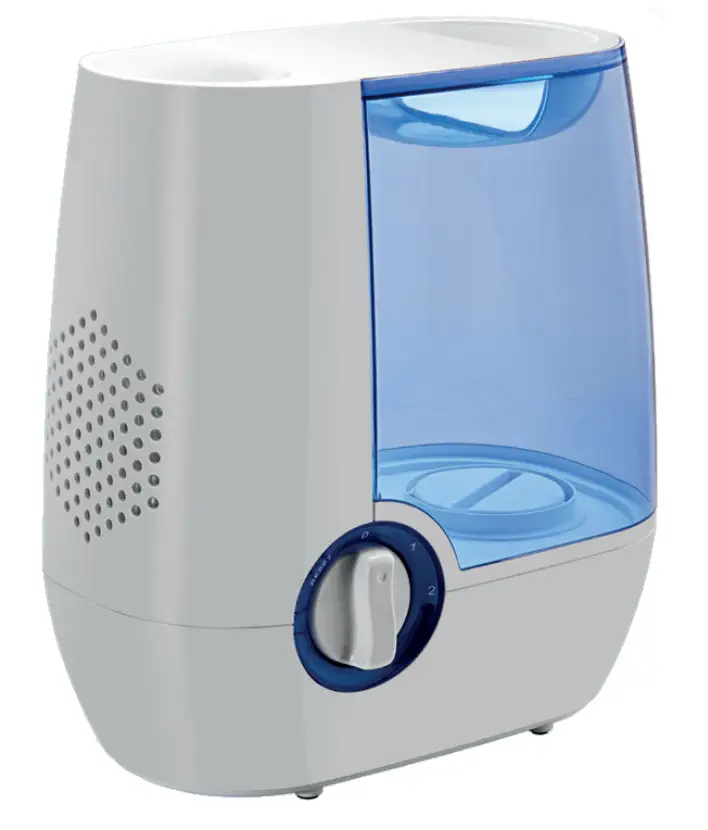

Package contents
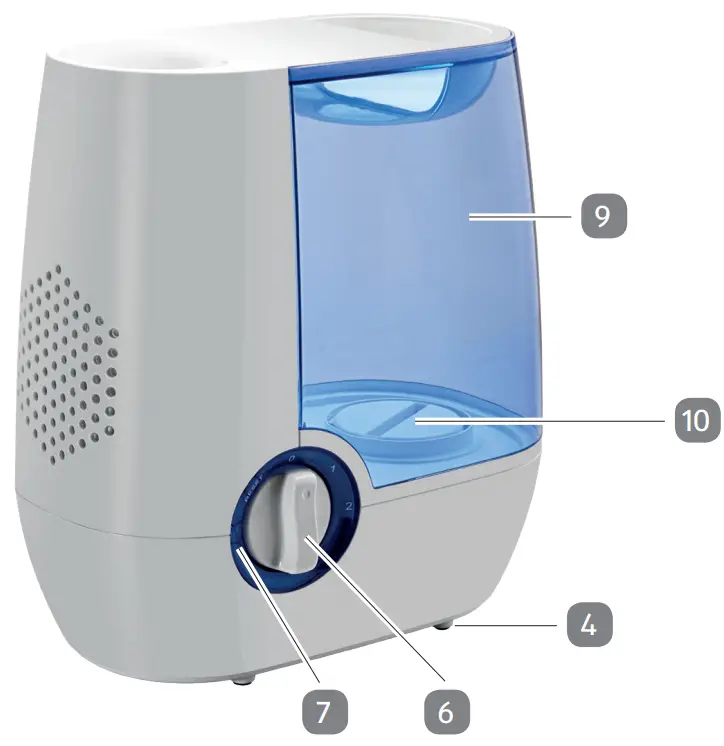
Components
- Mist chamber
- Humidifier base
- Safety lock
- Anti-slip feet
- Heating element
- Control knob
- Indicator light
- Medicine cup
- Water tank
- Water tank cap
- Mist channel
- Vapor pad
General information
READ AND SAVE THESE INSTRUCTIONS
 These instructions are for this warm mist humidifier(referred to as “humidifier” below). They contain important information on setup and handling.
Before using the humidifier, read the instructions for use carefully. This particularly applies to the safety instructions. Failure to do so may result in serious injury or damage to the humidifier. Store these instructions for any further use. Make sure to include these instructions when passing the humidifier on to third parties.
Proper use
The humidifier is designed exclusively to be used in indoor areas.It is only intended for personal use and is not suitable for commercial use.
Only use the humidifier as described in the instructions. Any other use is considered improper and can result in material damage or even in harm to persons. The humidifier is not a toy.
The manufacturer or retailer assumes no liability for damage resulting from improper or incorrect use.
Explanation of symbols
The following symbols are used in these instructions, on the product or on the packaging.
 This symbol gives you useful additional information concerning operation.
 FCC PART 15
This device complies with Part 15 of the FCC Rules. Operation is subject to the following two conditions: (1) this device may cause harmful interference, and (2) this device must accept any interference received, including interferences that may cause undesired operation.
Warning: Changes or modifications to this unit not expressly approved by the party responsible for compliance could void the user’s authority to operate the equipment. NOTE: This equipment has been tested and found to comply with the limits for a Class B ISM equipment, pursuant to Part 15 of the FCC Rules. These limits are designed to provide reasonable protection against harmful interference in a residential installation. This equipment generates, uses and can radiate radio frequency energy and, if not installed and used in accordance with the instructions, may cause harmful interference to radio communications.
However, there is no guarantee that interference will not occur in a particular
installatio n. If this equipment does cause harmful interference to radio or televisionreception, which can be determined by turning the equipment off and on, the user is encouraged to try to correct the interference by one or more of the following measures:
- Reorient or relocate the receiving antenna.
- Increase the separation between the equipment and receiver.
- Connect the equipment into an outlet on a circuit different from that to which the receiver is connected.
- Consult the dealer or an experience radio/TV technician for help.
Safety
Explanation of instructions
The following symbols and signal words are used in these instructions.
 |
This signal symbol/word refers to a hazard with a medium level of risk that, if not avoided, may result in death or serious injury. |
 |
This signal symbol/word refers to a hazard with a low level of risk that, if not avoided, may result in minor or moderate injury. |
 |
This signal word warns of possible material damage. |
General safety information

Risk of electric shock!
Faulty installation of electronics or an excessively high supply voltage may result in electric shock.
- Use only a 110-120V AC outlet. ALWAYS plug and unplug humidifier with dry hands.
- Only plug the humidifier into an easily accessible outlet. You can quickly disconnect the plug from the power grid in the event of an incident.
- Do not operate the humidifier if it is visibly damaged or if the power plug is defective.
- Do not open the housing. Contact a specialist workshop, for repairs. If you perform repairs on your own, improperly plug in the humidifier or incorrectly operate it, any liability and warranty claims will be deemed invalid.
- In the case of repairs, only parts that correspond to the original device data may be used. This humidifier contains electrical and mechanical parts that are essential to ensuring protection againstsources of danger.
- Do not submerge the humidifier or the power plug in water or other liquids. − Do not position the humidifier above tubs, sinks or other objects filled with water.
- Never try to pick up an electronic device connected to the grid if it has fallen into water. If this happens, immediately unplug the power plug from the outlet. Never handle the power plug with wet hands.
- Do not abuse the power cord. Never carry the humidifier by the power cord or pull the power cord to disconnect the outlet plug from an outlet; instead grasp the outlet plug and pull to disconnect.
- Keep the humidifier and the power plug away from open flames and hot surfaces.
- Do not bend the power cord or lay it over sharp edges.
- If you would like to clean the humidifier or a malfunction occurs, always switch off the humidifier and unplug it from the grid.
- Keep the humidifier, the power cord, and the power plug away from children.
- Never operate the humidifier with a damaged power supply cord or plug.

Risks to children and people with reduced physical, sensory or mental capabilities (for example, partially disabled people, older people with limited physical and mental capabilities) or a lack of experience and knowledge.
- This humidifier can be used by children aged eight and older as well as by people with reduced physical, sensory or mental capabilities or a lack of experience and knowledge if they are supervised or have been instructed in the safe use of the humidifier and understand the dangers that result from said use. Children may not play with the humidifier. Cleaning and user maintenance may not be done by children without supervision.
- Keep children younger than eight years of age away from the humidifier and the connecting line.
- Do not let children play with the packaging film. Children may get caught in it and suffocate if they play with it.

Explosion and fire hazard!
Improperly handling the humidifier may cause an explosion or a fire.
- Keep the humidifier away from water, other liquids, open flames, and hot surfaces.
- Do not cover the humidifier or the power plug with items or clothing.
- Maintain a distance of at least 2 inches from highly flammable materials.
- Do not expose the humidifier to excessive heat, such as direct sunlight, fire or the like.
- Only use the humidifier using the supplied accessories

Risk of damage!
Improperly handling the humidifier may cause it to become damaged.
- DO NOT carry water tank by handle when it is filled with water. It is advisable to carry filled water tank with two hands.
- DO NOT operate outdoors. This humidifier is intended for indoor use only. Always have water in the tank when operating the unit.
- Use only clean, cool tap water to fill the tank. Filtered or distilled water is recommended to avoid white dust if tap water is too hard. DO NOT use hot water.
- DO NOT pour water in any openings other than the water tank.
- Be sure that the water tank cap is firmly tightened. Always have the mist direction nozzle and the mist chamber in place while the unit is operating. Rotate the mist direction nozzle so it aims away from children, walls, furniture, and electrical appliances.
- Unplug the humidifier when not in use and whenever you clean or move the humidifier.
- Always place the humidifier on a smooth, flat, lint free, nonmetallic, waterproof, level surface, and away from direct sunlight. Keep the power cord away from heated surfaces and areas where it could be walked on or tripped over. DO NOT let the cord hang over the edge of a table or counter.
- DO NOT add medication of any type into the nozzle, base or water tank. Do not cover any openings on the humidifier or insert objects into any openings.
- The humidifier should not be left unattended in a closed room as the air could become saturated and leave condensation on walls or furniture. Leave room door partly open.
- The humidifier requires daily and weekly cleaning to operate appropriately. Refer to cleaning instructions.
- When cleaning the inside of the unit keep water away from the air outlet fan vent. The exterior may be wiped with a damp cloth, except the electrical controls, only when the unit is off and unplugged.
- NEVER use detergents, gasoline, glass cleaner, furniture polish, paint thinner or other household solvents to clean any part of the humidifier. Always use a few drops of bleach with water to clean humidifier. Detergent film dissolved in the water supply can interfere with the output of the unit.
- Do not tilt or tip the unit or attempt to empty or fill it while it is in operation.− Do not touch hot surfaces. Use handles or knobs.
- Use the humidifier only as described in this manual. The use of accessory attachments not recommended by the manufacturer may cause damage to the humidifier or personal injuries.
- Do not overfill the water tank.
- Always fill water tank first, then plug the cord into the wall outlet.To disconnect, always turn OFF first, then unplug from wall outlet.
- Do not let cord hang over edge of counter or touch hot surfaces.
First use

Risk of damage!
Read and understand all instructions. Failure to follow all instructions listed below may result in electric shock, fire or serious personal injury. The warnings, cautions, and instruction discussed in this instruction manual cannot cover all possible conditions and situations that may occur. It must be understood by the operator that common sense and caution are a factor which cannot be built into this product, but must be supplied by the operator.

Risk of damage!
A short power supply cord is provided to reduce the risk of personal injury resulting from becoming entangled in or tripping over a longer cord. Extension cords are available from local hardware stores and ma be used if care is exercised. If an extension cord is required, special care and caution is necessary. Also the cord must be: (1) marked with an electrical rating of 125V, and at least 13 A., 1625 W., and (2) the cord must be arranged so that it will not drape over the countertop or tabletop where it can be pulled on by children or tripped over accidentally.
Polarized plug
This product has a polarized plug (one blade is wider than the other). To reduce the risk of electric shock, this plug is intended to fit into a polarized outlet only one way. If the plug does not fit fully into the outlet, reverse the plug. If it still does not fit, contact a qualifiedelectrician. Do not attempt to modify the plug in any way.
Electric power
If the electric circuit is overloaded with other appliances, your humidifier may not operate properly. The humidifier should be operated on a separate electrical circuit from other operating appliances.
Checking the humidifier and the package contents

Risk of damage!
If you open the packaging carelessly using a sharp knife or other sharp objects, the humidifier may quickly become damaged.
- Remove the humidifier from the packaging
- Check the package for completeness (see Fig. A).
- Check whether the humidifier or the individual parts are damaged. If this is the case, do not use the humidifier. Contact the manufacturer via the service address indicated on the warranty card.

Risk of damage!
Although your warm mist humidifier is easy to operate, for your safety, the warnings below must be followed:
- Do not place the warm mist humidifiernear a heat source.
- Never leave the warm mist humidifier unattended while connected to the electrical outlet.
- Use the warm mist humidifieron a stable surface away from water.
- Do not unplug the warm mist humidifier by pulling on the power supply cord.
- The Warm mist humidifiermust be unplugged:
A. Before any cleaning or maintenance.
B. Before either filling or emptying.
C. After use.
D. If it appears to be faulty.
User instructions

Before each use
CHECK HUMIDIFIER PLACEMENT – Place the Humidifier on a nonmetallic, lint free, waterproof, level surface for best performance. This is to help disperse the mist in the air and prevent it from being knocked or tipped over.

DO NOT operate the humidifier without water in the water tank.
DO NOT plug in the power supply cord with wet hands; electric shock could happen.
- Be sure the humidifier is turned OFF and the humidifier is unplugged from the electrical outlet.
- Select a location for your humidifier on a flat surface approximately 4 inches away from a wall.
- DO NOT place the humidifier on a finished floor or near furniture which can be damaged by moisture or water. Place on a water resistant surface.
- DO NOT place humidifier on top of a towel, or a carpeted surface. This may cause the humidifier to overheat.
- DO NOT place humidifier on a wood surface.
- A short power supply cord is provided to reduce the risk of personal injury resulting from becoming entangled in or tripping over a longer cord.
- To avoid a circuit overload when using this humidifier, do not operate another high-wattage product on the same electrical circuit.
- Avoid the use of an extension cord because the extension cord may overheat and cause a risk of fire. However, if you have to use an extension cord, the extension cord should be rated for 13 amps, 125V, 1625 watts.
- The power supply cord must be arranged so that it will not drape over the countertop or tabletop where it can be pulled on by children or tripped over accidentally.

Operation
- Lift water tank (p. 3, fig. A
 ) off of base holding bottom of tank with both hands.
 - NOTE: DO NOT hold water tank by handle when empty or full.
- Turn tank upside down and unscrew water tank cap (p. 3, fig. A
 ) by turning it counterclockwise.
 - Fill water tank with cold water. Do not fill all the way to the rim.
- NOTE: If you have hard water, it is recommended to use filtered or distilled water. While using the humidifier, if you see a film of white dust, it is because of hard water.
- DO NOT add any medication or other additives into the water tank itself. For use of essential oils, see page 17.
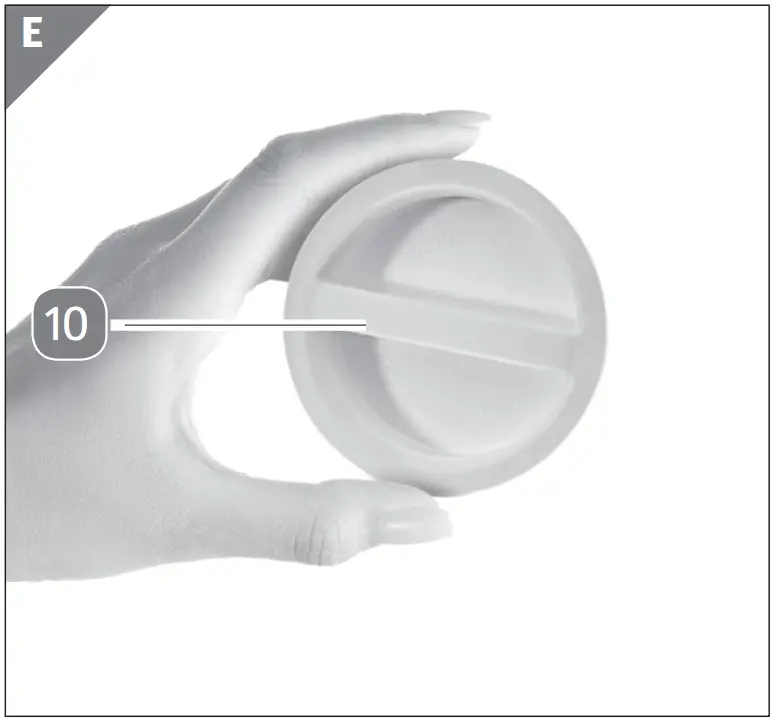
- Screw water tank cap (p. 4, fig. E
 ) back onto tank by turning clockwise.
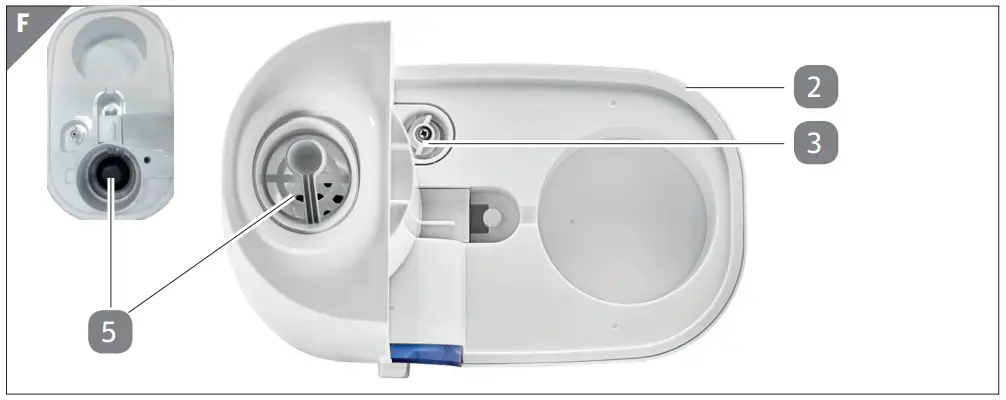
 - Place tank onto the base (p. 4, fig. F
 ). Make sure it is laying flush into the base. There should not be a space between the tank and base.
 - Place mist lid on top of water tank.
- NOTE: DO NOT move humidifier while water tank is on base. Water may leak into the base causing a malfunction.
- Plug the power cord into an electrical outlet. DO NOT use an extension cord.
- Turn power on by turning the control knob (p. 3, fig. A
 ) clockwise (to the right). You will hear a minor clicking noise when turning unit on and off. The green power indicator light (p. 3, fig. A
  ) will turn on.
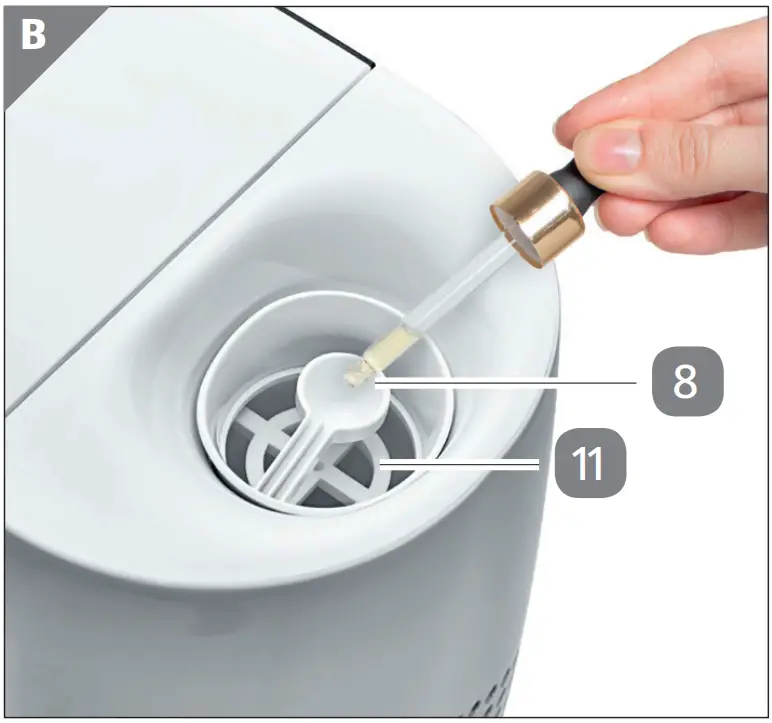
 - In a few moments, the mist will start coming through the mist channel (p. 4, fig. B
 ) . Use the control knob (p. 3, fig. A
  ) to adjust the intensity of the mist output. Turning the knob clockwise will increase the moisture output, turning the knob counterclockwise will reduce the moisture output.
 - Note: When at maximum level, it is normal to hear a faint dripping sound.
- When the humidifier runs out of water, the indicator light (p. 3, fig. A
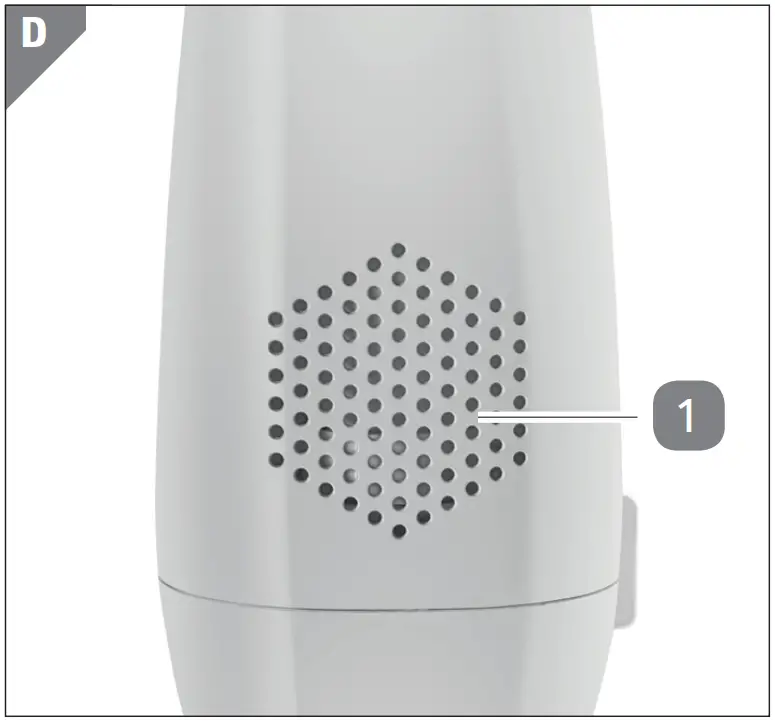
 ) will turn red, and the mist output will stop. This is a safety feature to prevent the humidifier from possibly overheating and damaging the mist chamber (p. 4, fig. D
  ).
). - Turn the control knob to reset and refill the water tank. In a few moments, the green indicator light will turn on. Turn the control knob to “0” position for 2 minutes and then turn power on by turning the control knob clockwise (to the right).
Setting the correct humidity output
Adjust the mist control so that the mist rises up and gets absorbed by the room
air. Do not turn on too high an output as the mist cannot be absorbed by the air and accumulates on the surface around the humidifier. If the humidifier is placed near a fan or air conditioning outlet, the mist may be forced down by the foreign air stream. Change the location of the humidifier or reduce the output of the other room conditioning appliances.
Using essential oils
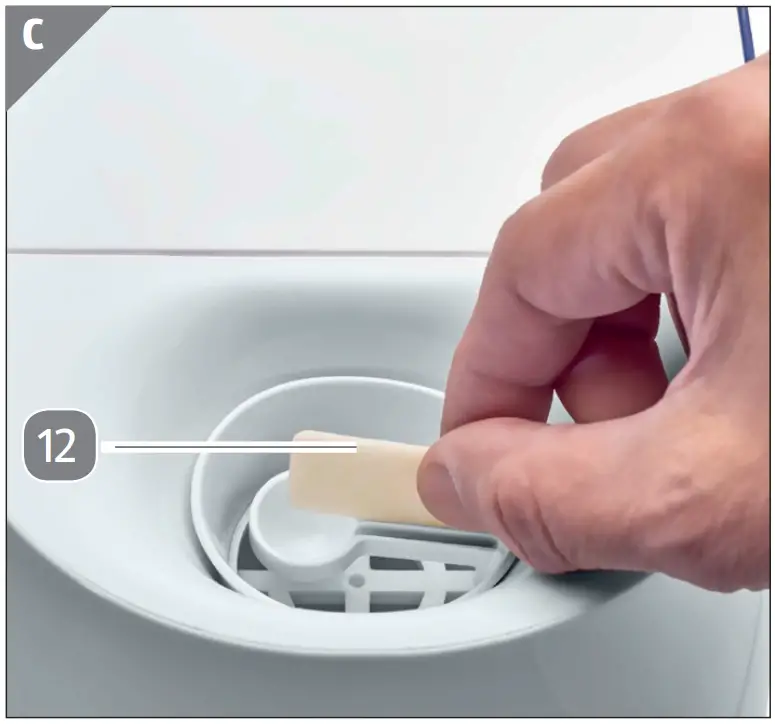
Essential oils can be used on the aroma pad located in the aroma tray on the top of the mist channel (p. 4, fig. B  ). You can mix and match any oil scents you would like.
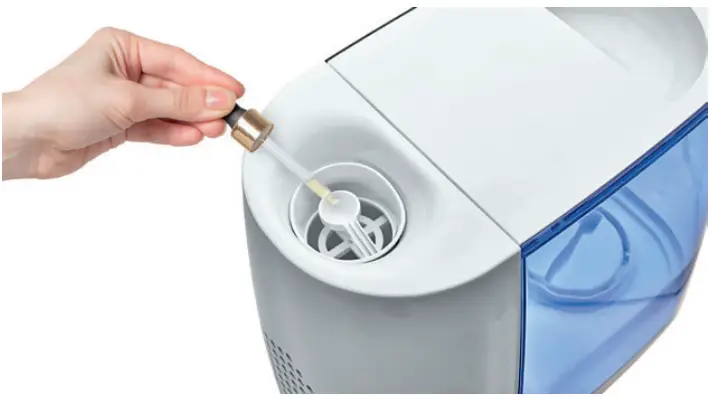
- Place about 3 drops of desired scent on the aroma pad located in the aroma tray (p. 4, fig. C
 ).
). - Push the aroma pad into the medicine cup, (p. 4, fig. B
 ) .
) . - Each pad should only be used per desired scent.
- Before attempting to reuse aroma pad with a different scent, clean the aroma pad by lightly hand washing it in warm water and letting it thoroughly air dry.
Helpful hints
- It is best to keep the humidity level at about 30-50 percent of relative humidity.
- The comfort level of humidity will vary from room to room and with changing room conditions.
- In cold weather, windows and even some walls may fog or develop frost from excessive indoor humidity. If this occurs, reduce the mist intensity setting to avoid damage from condensed water dripping on windowsills.
- Too much humidity in the room may allow moisture to accumulate on surfaces where bacteria and fungi can grow. Moisture that gathers may also damage furniture and walls, especially wallpaper.
- To eliminate excessive humidity, especially in small rooms, leave the room door open and adjust the mist intensity control setting.
- Note: To avoid possible white dust due to hard water, it is recommended to use filtered or distilled water.
- DO NOT use hot water. Use cool tap water.
- DO NOT add any medication or other additives to the water.
- DO NOT pour water into Vapor Outlet Channel (p. 4, fig. B
 ).
). - Note: Do not attempt to move humidifier while water tank is placed on the water basin. Doing so may cause leakage of water. Also, do not place humidifier on the floor. Place humidifier on an elevated surface.
Troubleshooting

DO NOT attempt to repair the motor or nebulizer yourself. If the humidifier continues to not operate, please call customer service.
| Problem | Solution |
| If humidifier does not have any power: |
|
| Condensation forms around humidifier and windows: |
|
| If humidifier has stopped, both Green light and Red light are on when the control knob is at position 1 or 2: |
|
| If there is a strange odor: |
|
| The power indicator light is green, but there is no mist being emitted: |
|
If humidifier has stopped with both conditions
|
|
Cleaning and maintenance
Portable humidifiers require regular cleaning in order to reduce the risk of bacterial growth and also to remove any scale residue to maintain good operational performance. Follow the procedures below for healthy maintenance of your Warm mist humidifier.

NEVER PLUG OR UNPLUG HUMIDIFIER WITH WET HANDS.
Always be sure that the humidifier is unplugged and switched OFF before cleaning or attempting to clean or store the item.
DO NOT leave water in water tank (p. 3, fig. A  ) or water basin when unit is not in use as it may result in the buildup of mineral deposits and bacteria that can inhibit the output efficiency of the humidifier. PLEASE NOTE that if water remains in the water tank for more than a day or two, bacterial growth is possible.
NOTE: When removing water tank, water may accumulate under vapor lid and on the bottom of the water tank. It is recommended to have a dry cloth ready to dry wet surfaces.
Disinfecting the water tank and water basin
- 1Turn switch to off (O) and unplug from the wall outlet.
- Be sure the unit has cooled for at least 15 minutes. Lift the water tank
 fromthe base and place in a sink or tub.
 - Fill water tank with ½ cup water and 1 tablespoon of vinegar.
- Let it stand twenty minutes, shaking vigorously with two hands every few minutes.
- Carefully empty the tank after 20 minutes, and rinse with warm water until you can no longer detect a vinegar smell.
NOTE: It is recommended to clean humidifier with the water and white vinegar solution as stated above after using the humidifier about once a week or if cleaning seems necessar.
IMPORTANT: Failure to keep this humidifier clean from mineral deposits normally contained in any water supply will affect the efficiency of the operation. Customer failure to follow these instructions may void the warranty.
How to clean the heating element in the base
- To remove the mist chamber, slide the mist chamber latch to the left and carefully lift the mist chamber off the water basin.
- Fill the heating element with undiluted white vinegar.
- Let it stand for 20 minutes. Dampen soft, clean cloth or sponge with undiluted white vinegar and wipe out heating element to remove scale. DO NOT use soap, detergents or abrasive cleaners.
- Rinse heating element using clean, warm water, being careful not to submerge the base in the water. Dry thoroughly. DO NOT IMMERSE WATER BASIN IN WATER.
- Soak the removable mist chamber in a solution of equal parts white vinegar and water for 20 minutes. Rinse thoroughly and then wipe dry with a soft, clean cloth.
- To attach the mist chamber, slide the mist chamber latch to the left and place the mist chamber onto the water basin. Release the latch to secure the mist chamber to the water basin.
How to clean humidifier exteriors
- DO NOT IMMERSE THE BASE IN WATER OR ANY OTHER LIQUID. An electric shock may result, or the humidifier may be damaged.
- Wipe all exterior surfaces of the base with a soft, dry cloth.
Daily maintenance
- Turn switch to off (O) and unplug from the wall outlet.
- Be sure the unit has cooled for at least 15 minutes. Lift the water tank from base and place in sink or tub.
- Carry the humidifier base to the sink and drain any remaining water. Wipe clean and dry with a clean cloth.
- Drain water from the water tank. Wipe clean, and dry with a clean cloth. Let the water tank air dry when not in use.
Weekly maintenance (Removing scale)
NOTE: We recommend cleaning the humidifier WEEKLY or more often if you have hard water or notice a build-up of impurities or detect unpleasant odors.
Repeat steps 1-4 above.
End of season maintenance and storing
- Follow above weekly cleaning procedure at the end of the humidification season, or when the humidifier will not be used for several days, being sure to dry all parts. Allow the water tank to thoroughly air dry before storage. DO NOT store with water inside any part of the humidifier.
- Leave tank cap partially loosened during storage to prevent tank cap and gasket from sticking together. This will prolong the life of the gasket.
- Save original box for easy storage. Store humidifier in a cool, dry location. Do not place any heavy items on top of humidifier during storage as this may result in possible damage of humidifier.
CAUTION:
Always be sure that the humidifier is unplugged and switched OFF before cleaning or attempting to store the humidifier. NEVER PLUG OR UNPLUG HUMIDIFIER WITH WET HANDS.
DO NOT leave water in the water tank or water basin when the humidifier is not in use. If water remains in the water tank for more than a day or two, bacterial growth is possible.
Storage
Allow the humidifier to dry completely before storing. Store the humidifier in a dry location. Do not place any heavy items on top of humidifier during storage as this may result in possible damage of the appliance. Always check the plug before use to assure metal items have not become attached.
- Save the box for off-season storage.
- Make sure the tank, water basin and water tank cap are dried thoroughly before storing.
- If water is left in the unit during storage, it may evaporate completely and leave deposits that can prevent the unit from operating properly.
- Leave the water tank cap loose to prevent the water cap and gasket from sticking together. This will prolong the life of the gasket.
Technical specifications
Model Number HF3102A-UL
Rating Voltage 120V / 60Hz
Rated Wattage 325W
Disposal
Disposing of packaging
Please dispose of package in an environmentally friendly way
Disposing of the pr oduct
 If the product should no longer work at all, please make sure that it is disposed of in an environmentally friendly way and according to local regulations.
