![]() CANDLE MAKING KIT
CANDLE MAKING KIT
INSTRUCTION
All-in-One Candle Kit Includes Everything You Need to Create
 |
8 x Candle Tins |  |
1 x Melting Pot |
 |
4 x Beeswax |  |
1 x Mixing Spoon |
 |
4 x Fragrance Oil |  |
100 x Cotton Wicks |
 |
4 x Bow Tie Clips |  |
10 x Warning Labels |
 |
8 x Color Dry Blocks |  |
112 x Glue Dots |
 |
1 x Digital Thermometer |  |
1 x User’s Manual |
Please Note Many times some of the equipment used for making candles can be everyday kitchen items like mixing spoons, melting pot, digital thermometer, etc. It is important to know that once your candle-making equipment has come into contact with fragrance oils or candle dyes, those items should strictly be used for candle-making purposes only. Not only can fragrance oils eat through (melt) certain plastics, but once an item has been used for candle making, it should not be used for food again. Please read the below instructions before you start.
Cleaning Tips: After pouring the wax, clean the melting pot immediately. Wipe away all excess wax. Washpot with warm soapy water.
How to make Homemade Scented Candles
Scented Candles
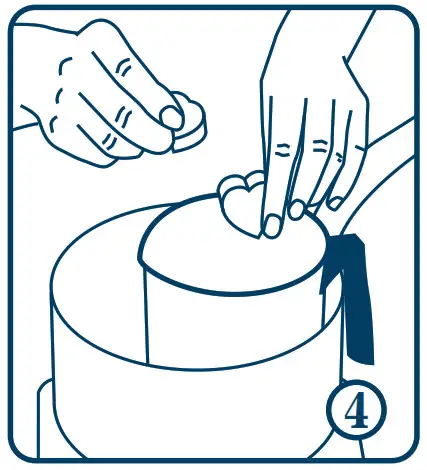
Grab on one glue dot and place the bottom of the white cotton wick on the sticky side, peel off another side of glue dots, revealing an adhesive piece, and stick that directly on the inside, bottom center of the candle tin. This will anchor your wick inside the container. Finally, stab- 1 lizing cotton wick with a bow tie clip.

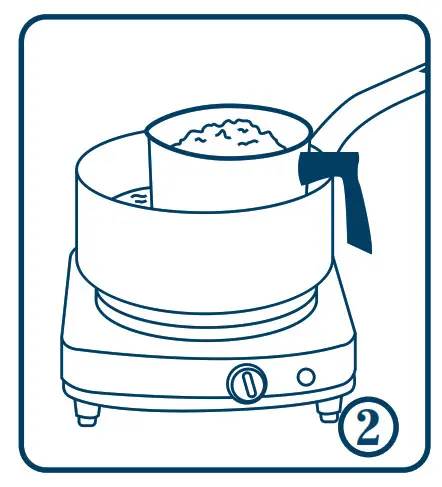
When melting any wax type, the double boiler process is always recommended. This process will ensure that your wax melts properly at an even rate. This process also allows for a thermometer in order to best monitor your wax temperature. Firstly, weigh out 2.65oz bees- 2 wax for each candle tin, and pour the wax into the melting pot, and place within a large pot, add 1-2″ inches of water to the large pot, then place on the stovetops at a medium heat setting.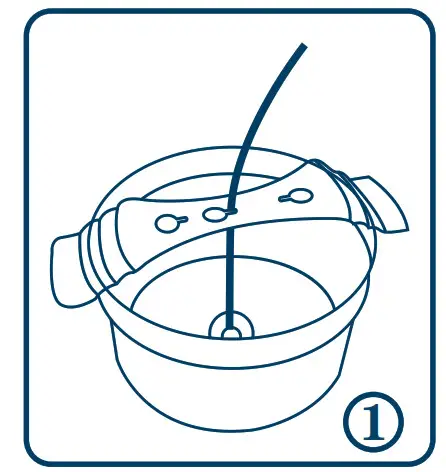
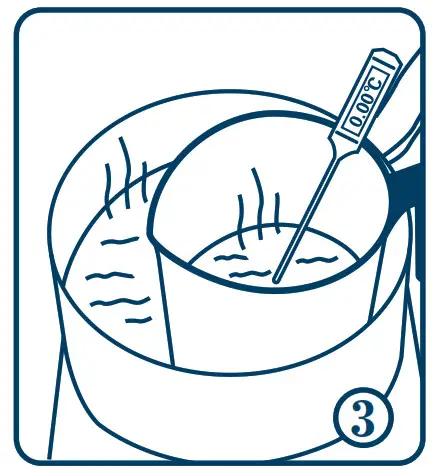
Once you notice that your wax is starting to melt, place the digital thermometer into the melting pot. This is the best way to monitor your wax temperature. Occasionally stir the wax as it melts. Do not heat the wax above 200°F, if the wax is held at a higher temperature for long periods of time it will discolor. Always use a thermometer when melting the wax and never leave your heated wax unattended.
Check on wax and keep stir, the goal is to have your wax smooth, and clear liquid color. Check the temperature of the wax, once it hit 185 degrees Fahrenheit, use the knife to shave pieces of the dye block into the melted wax. and stir well but not vigorously as this will cause air bubbles. Keep stir until the liquid appears to be uniform in color. Remove the double boiler from heat.
 Then, add the fragrance oils to melted wax in the melting pot. You can use a single scent or layer in multiple scents. Depending on how fragrant you want your candle, you can add a bit less, or a bit more. Lift your mixing spoon out of the mixture to smell the strength and/or combination of scents. Keep in mind that melted wax has a stronger scent level and when it cures, the scent level will tone down until you light the candle.
Make sure to stir the wax completely to ensure that the fragrances and dyes are completely mixed in. Check the temperature of the wax. When the temperature is around 130~160 degrees Fahrenheit, it will be safe to pour. Give your wax one final stir before pouring. Some people feel that wax sets up better when poured at a lower temperature. If your candle tops are not smooth when pouring at 160°F try pouring lower. If candle tops are not smooth you can use a hairdryer or heat gun on the top.
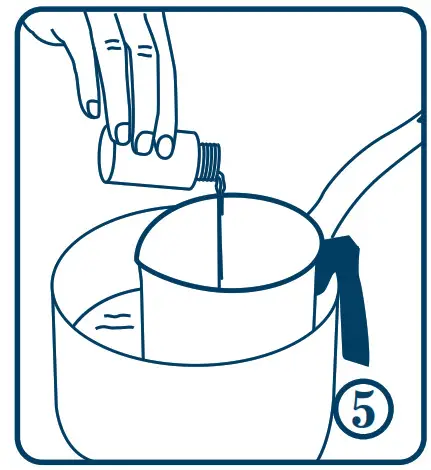
 Stir once more, find a flat surface, then slowly pour your wax into each candle tin to a quarter of an inch from the top, hold the wick tip-up. After pouring wax do not disturb the containers until the wax is completely set up. Make sure candles cure for 24-48 hours and always store them at room temperature. Melting pot can be wiped out with a paper towel and ready for the next set of candles.
 Once wax fully hardens, you can now trim the wick. Trim cotton wicks to only 1/4” inches above the surface of the candle. Place your warning label on the bottom of the containers. Your soy wax candle is now finished and ready to burn. Enjoy!
 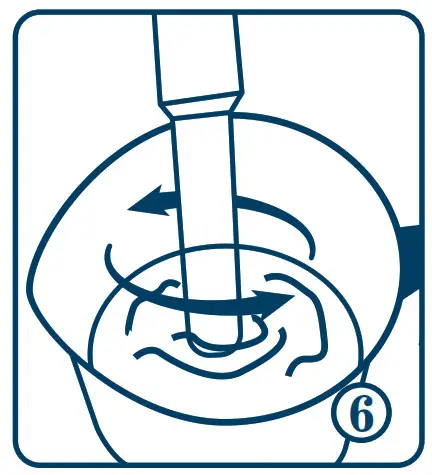 Note:
Note:
- Do not overfill, could keep your candle perfect when cover.
- Do not put in the fridge or freezer in an attempt to speed up the process.
- Creating your own candles can be a messy activity. Be sure to cover your workspace to ensure an easy clean-up when you are done.
- To ensure the perfect and top quality of candles, It’s highly recommended that you best make one scent/color candle at a time.
- As for placement, do not place your burning candle anywhere there are fans or drafts, this will prevent your candle from burning properly and evenly, as well as possibly cause your wick to move and smoke as it burns.
![]() Thank you for choosing MKOM product!
Thank you for choosing MKOM product!
We make a great effort to keep our customers happy.
Meet any product questions, please feel free to
contact us
Email: [email protected]
Website: www.mkomvip.com