MANUAL CONTROL
- Steer Left

- Steer Right
- Prop On/Off
- Speed Down
- Speed Up
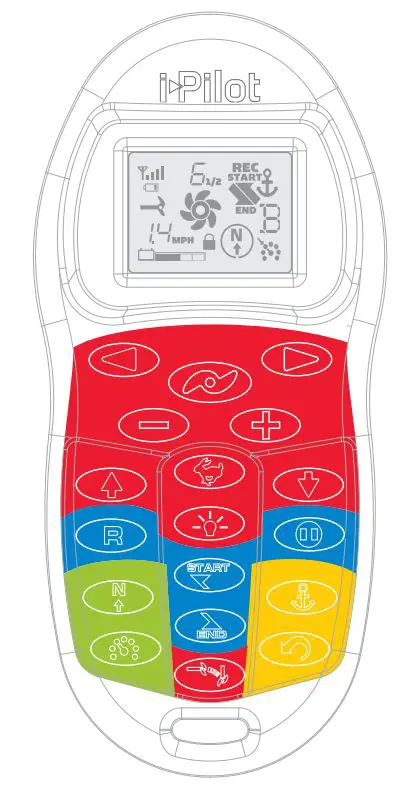
- Trim Up
- Trim Down

- High-Speed Bypass Toggles the motor speed between its current setting and speed 10.
- Backlight
Turns the remote LCD backlighting on for six seconds.
- Keypad Lock/Unlock To lock or unlock the keypad, press and hold the backlight button for 3 seconds.
- Stow/Deploy Motor

TRACKS
- Track to End
Navigates to the nearest location on a previously recorded track and follows it to its end.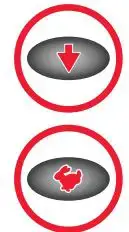
- Track to Start
Navigates to the nearest location on a previously recorded track and follows it to its start. - Track Record
Starts and ends the recording of a track to a selected memory location.
- Record Pause/Escape Pauses the recording of a track and then resumes the recording when pressed again.
SPOT-LOCK
- Spot-Lock
Turns Spot-Lock on and records it to a memory location.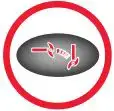
- Spot-Lock Recall Recalls a Spot-Lock from memory and turns spot lock on.
CRUISE CONTROL/AUTOPILOT
- Advanced AutoPilot and AutoPilot
Turns Advanced AutoPilot on
and off when pressed once. Turns AutoPilot on when held for two seconds.
- Cruise Control

Turns cruise control on and off using the current GPS speed as the target speed.

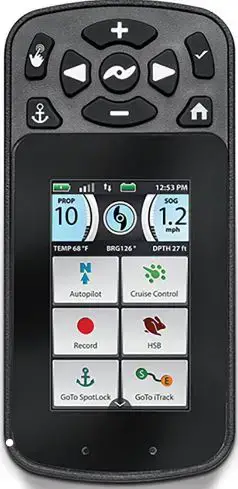
- Motor Speed
- GPS Signal strength
- Remote Battery
- Low Stow/Deploy
- Prop On/Off
- GPS Speed
- Motor Battery Status
- Keypad Lock
- Track Record On
- Track to Start On
- Spot-Lock On
- Track to End On
- Memory Location
- Cruise Control On
- AutoPilot/Advanced AutoPilot On
DEPLOYING THE MOTOR
- Double press the stow/deploy button on the remote.
- The stow/deploy icon will flash on the remote LCD until motor is fully deployed.
TRIMMING THE MOTOR
With the motor deployed, press the trim up/down button on the remote to trim motor in the desired direction.
STOWING THE MOTOR
- Press the stow/deploy button on the remote.
- The stow/deploy icon will flash on the remote LCD until motor is fully stowed.
ENGAGING SPOT-LOCK
- Press the Spot-Lock button on the remote.
- The Memory Location icon will flash on the remote LCD for three seconds, allowing you to choose a memory location by pressing the Speed Up or Speed Down buttons. Pressing the Spot-Lock button again or waiting for three seconds accepts the memory location.
DISENGAGING SPOT-LOCK
To disengage Spot-Lock press any of these buttons: Prop On/ Off, Steer Right, Steer Left, Speed Up, Speed Down or Spot-Lock.
RE-ENGAGE A SAVED SPOT-LOCK LOCATION
- Manually navigate the boat to within a quarter mile of the saved Spot-Lock location. Due to safety reasons, i-Pilot will not re-engage a saved Spot-Lock location greater than a quarter mile away.
- Press the Spot-Lock Recall button on the remote.
- The Memory Location icon will flash on the remote LCD for three seconds allowing you to choose a memory location by pressing the Speed Up or Speed Down buttons. Pressing the Spot-Lock Recall button again or waiting for three seconds accepts the memory location.
SPOT-LOCK ESCAPE
If the Spot-Lock button is accidentally hit, press the Record Pause/Escape button or any manual navigation button within three seconds to cancel the command.
ENGAGING CRUISE CONTROL
- Press the Cruise Control button on the remote.
- The current GPS speed will flash, displaying your current speed as the target GPS speed on the remote LCD for three seconds.
- Press the Speed Up or Speed Down buttons to increase or decrease the target speed or press the Cruise Control button again to engage Cruise Control immediately.
DISENGAGE CRUISE CONTROL
Pressing the Cruise Control button will disengage Cruise Control.
ADJUSTING TARGET SPEED WITH CRUISE CONTROL ENGAGED
With Cruise Control engaged press the Speed Up or Speed Down buttons to adjust the target speed by 0.1 MPH increments.
ENGAGING ADVANCED AUTOPILOT AND AUTOPILOT
- To engage Advanced AutoPilot, press the AutoPilot button once. To engage AutoPilot, press and hold the AutoPilot button for two seconds.
- The Advanced AutoPilot or AutoPilot icon will be displayed on the remote LCD.
- To adjust desired heading, manually steer motor to new heading.
- Pilot will lock onto new heading.
RECORDING A TRACK
- Press the Record button on the remote.
- The Memory Location icon will flash on the remote LCD for three seconds, allowing you to choose a memory location by pressing the Speed Up or Speed Down buttons. Pressing the Record button again or waiting for three seconds accepts the memory location.
- The REC icon will be displayed on the remote LCD. Remember this will be the start point on the track.
- Navigate the boat along the desired path or course. AutoPilot and/or Cruise Control can be used while recording a track.
- Press the Record button on the remote again to stop the recording. The recording will end automatically if the two-mile distance limit is reached for the track or if one of the following buttons are pressed: Spot-Lock, Spot-Lock Recall, Track to End or Track to Start.
PAUSE AND RESUME A RECORDING
- While recording a track press the Record Pause/Escape button.
- The record icon will flash on the remote LCD.
- i-Pilot has now paused the recording of the track.
- If the boat moves farther than a quarter mile from where the Record Pause/Escape button was pressed, the recorded track will be ended and saved to the memory location previously selected.
- When ready to resume recording, navigate the boat just ahead of where the Record Pause/Escape button was pushed. Failure to do this may cause erratic play back of a track.
- Push the Record Pause/Escape button.
- The record icon will stop flashing on the remote LCD.
- i-Pilot is now recording again and adding to the track that was paused.
REPLAYING A TRACK (TRACK TO START / TRACK TO END)
- Manually navigate the boat to within a quarter mile of the saved track. Due to safety reasons, i-Pilot will not re-engage a saved track greater than a quarter mile away.
- Press the Track to Start or Track to End button on the remote.
- The Memory Location icon will flash on the remote LCD for three seconds, allowing you to choose a memory location by pressing the Speed Up or Speed Down button. Pressing the button pressed in step 2 again or waiting for three seconds accepts the memory location.
- Adjust motor speed to desired setting to engage and navigate track automatically.
RECORD, TRACK TO END AND TRACK TO START/ESCAPE
If the Record, Track to Start or Track to End button is accidentally hit, press Record Pause/Escape button within three seconds on the remote to cancel the command.