![]()
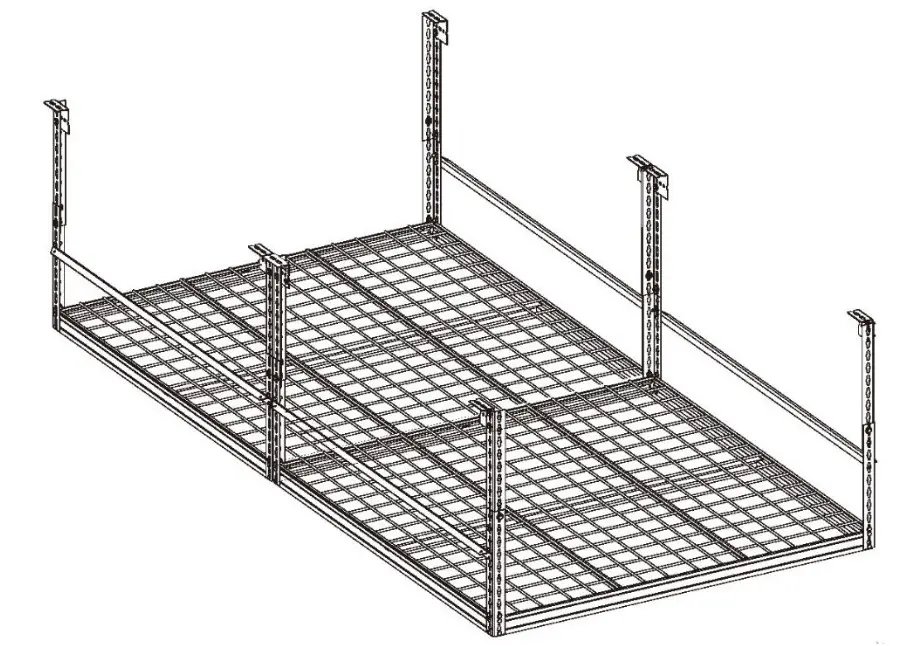
ITEM: LR4896-SV
Adjustable Overhead Storage Rack
 Warning: Excessive weight hazard!
Use two or more people to move, assemble or install overhead rack to avoid back or another injury. Do not leave children unattended near the overhead rack. High risk of Injury If Installed Incorrectly: Follow instructions carefully and routinely inspect your system to ensure all components are fastened securely.
Edsal Manufacturing Company
4400 South Packers Avenue Chicago, IL 60609
Edsal Manufacturing Co., Inc. Chicago, IL
Should you have any comments, damage, missing parts, or problems with the assembly of this unit please feel free to contact our manufacturing facility at, (773) 475-3137 for customer service. To obtain replacement parts, please provide the following information :
– Model # – Part # & Description – Location Purchased – Date Purchased
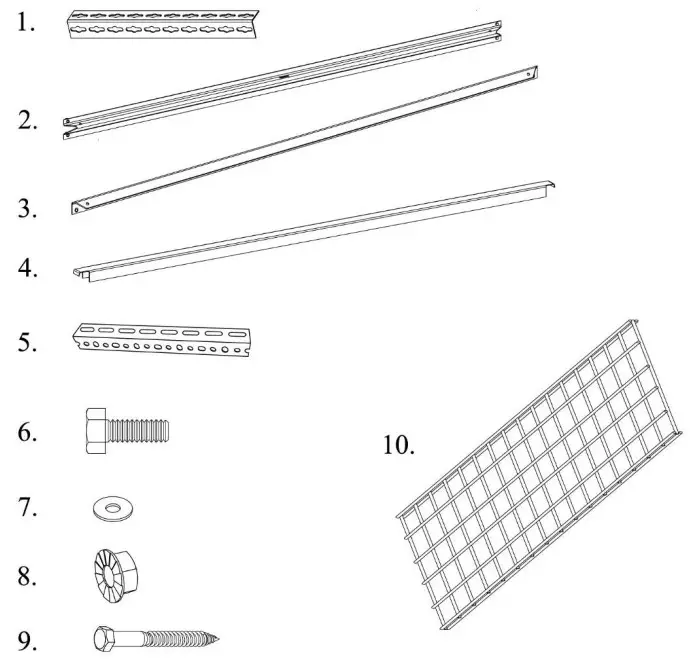
PARTS LIST
| ITEM | QTY | PART NO. | DESCRIPTION |
| 1 | 16 | URAPTLL1.25 | ANGLE POST ELITE KEY RACK SLOT |
| 2 | 8 | ZBS-48 | DOUBLE RIVET “Z” BEAM 48″ |
| 3 | 4 | SRBTLL48 | SINGLE RIVET BEAM TRIMLINE |
| 4 | 2 | ZTS-48 | TIE SUPPORT FOR “Z” BEAM |
| 5 | 6 | 300-3 | SLOTTED ANGLE CLEAT,3″ |
| 6 | 56 | F-BOLT-44 | HEX HEAD BOLT |
| 7 | 64 | F-NUT-24 | FENDER WASHER |
| 8 | 56 | F-NUT-24 | WHIZ NUT |
| 9 | 16 | F-BOLT-120 | HEX HEAD LAG SCREW ZINC |
| 10 | 6 | _ | 48″x16: WIRE DECKING |
INSTALLATION OVERVIEW
A. Plan your rack location
 B. Install ceiling mounting angles.
C. Determine the height and install the vertical posts.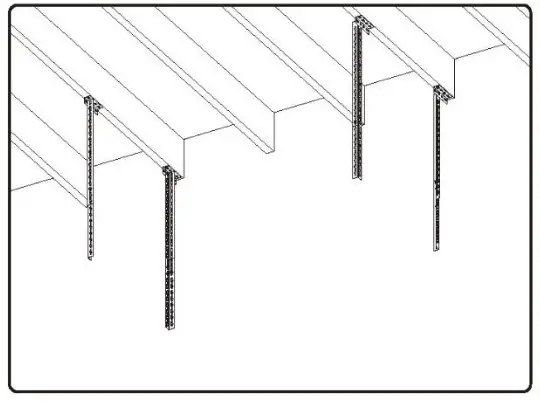
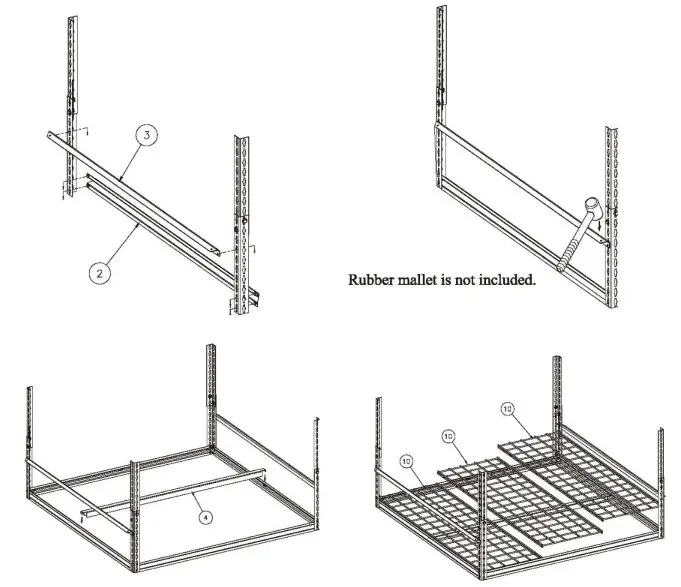
D. Assemble and install perimeter beams. 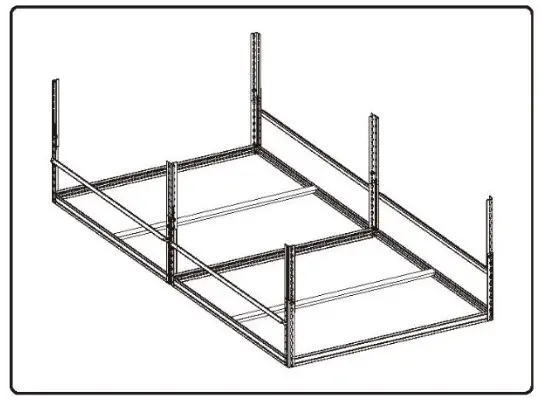 E. Install wire deck.
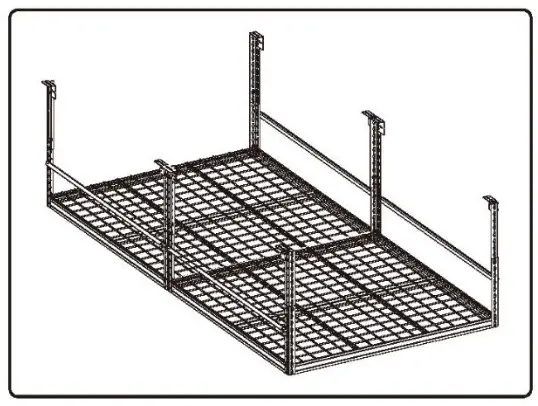 Note: It is recommended that you read through the entire installation instruction manual first before beginning your rack installation
Plan the Installation Location
1.Determine the location of the Rack
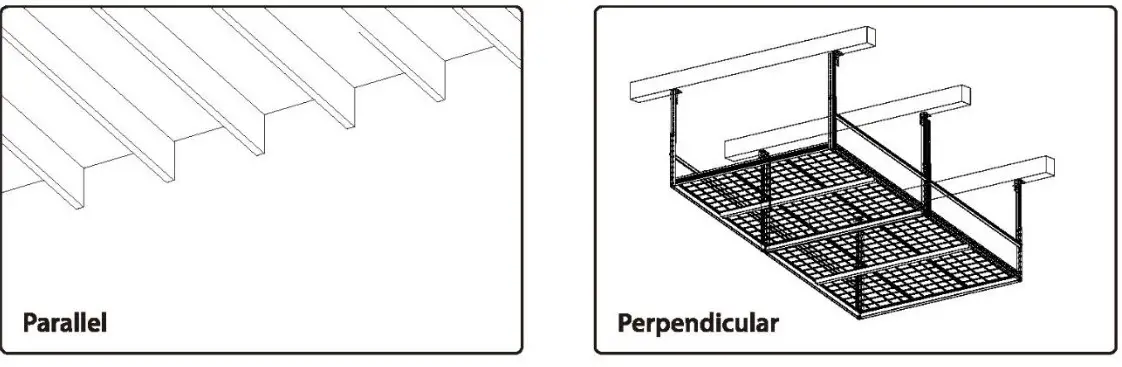
2.Check the spacing of your ceiling joists to ensure that they will work for the size and direction of your Rack Install. If the spacing of your joists is 24″ there should be ceiling joists located in the necessary position.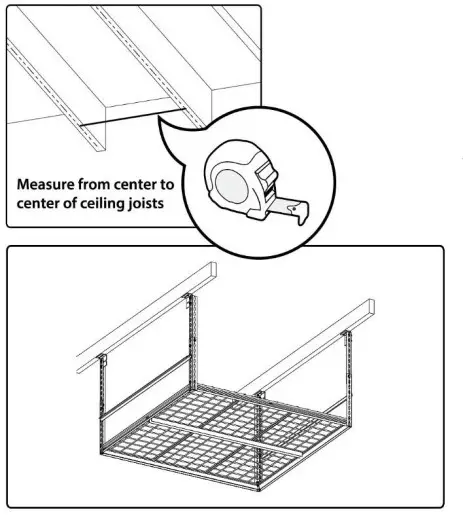 Note: If the spacing of your ceiling joists does not match the preferred assembled size and direction of your rack installation, you will need to install a joist in the correct position If you are installing in wood joist be sure there is no termite damage and wood is solid.
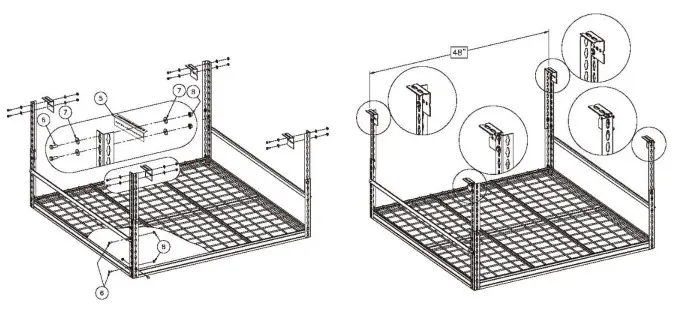
For a parallel installation ensure that the ceiling joists are 48″ apart.
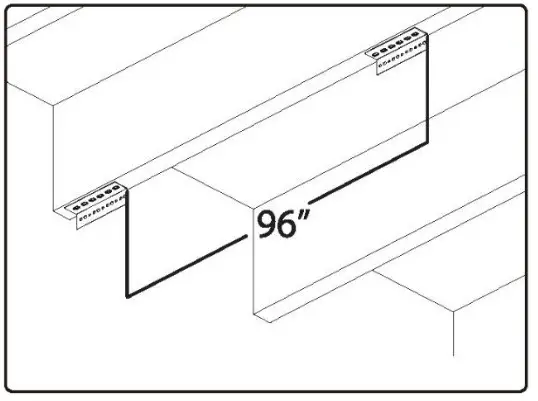
Install Ceiling Mounting Angles
3. Locate and mark the center of the ceiling joist. Use a stud finder to locate the joists if the ceiling is finished with drywall.

4. Align the center of keyhole slots on the ceiling mounting angle with the centerline of the ceiling joist and mark the holes on both ends.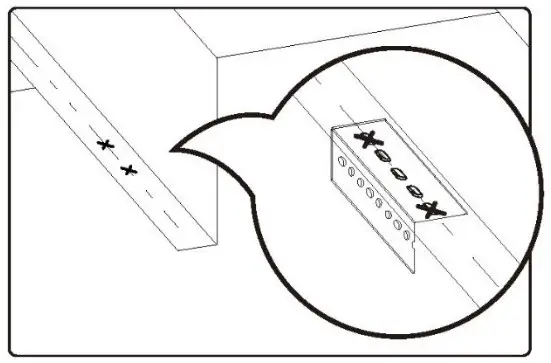
5. Drill pilot holes using a drill bit.
6. Install ceiling mounting angle into joist using two lag bolts, two washers, and live a socket.

Note: Make sure the lag bolts are tight against the joist but DO NOT over-tighten the lag bolts. If lag bolts are over-tightened, the bolt could snap or the hole may be stripped.
Install vertical Angle posts
7. Determine the desired height of the rack from the ceiling to the bottom of the overhead rack.

8. Bolt vertical angle posts to ceiling angle brackets with the large end of the key lot on top using a bolt, a nut, and two washers for each post.
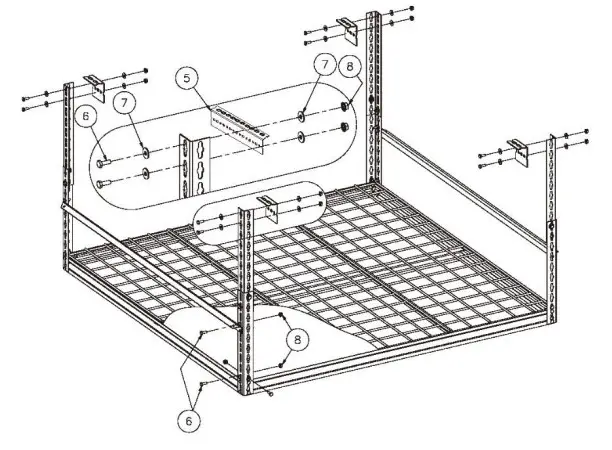
Assemble and install perimeter beams