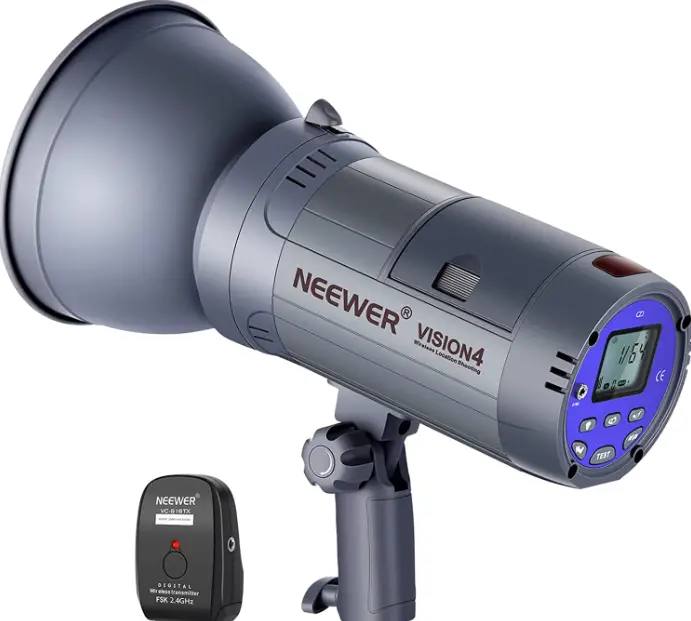
NEEWER VISION4 Studio Flash

Document Information
2021 Shenzhen Neewer Technology Co., Ltd. All Rights Reserved.
This document is the sole property of Shenzhen Neewer Technology Co., Ltd and shall not be, reproduced, transmitted, transcribed, stored in a retrieval system or translated in any form, by any means, without prior written permission from Shenzhen Neewer Technology Co., Ltd. Shenzhen Neewer Technology Co., Lto reserves the right to change content in this instruction manual at any time and without prior notice.
Version Control
| 2021.12.31 | VISION4 Studio flash Manual |
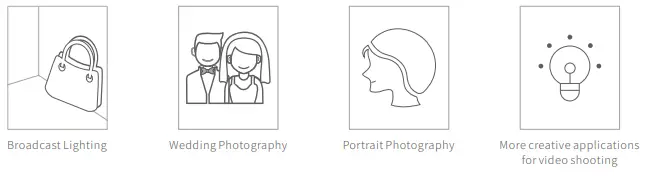
Applications
Safety Notes
Flash Light Controls
Charging Indicator: The 100-240V charger has a built-in charge indicator. The LED light is red while charging, and turns to green when fully charged. The charge will cut off charging intelligently after the battery is fully charged.
How to Care for Flash Capacitor
One of the most important components of an electronic flash is the capacitor. Following the preventative maintenance below will
increase the service life and the reliability of your flash.
If the unit is left unused for a few months or predominantly used at low power settings, it is recommended that the power be increased
to maximum and the unit left switched on (modeling lamp OFF)occasionally for at least 30 minutes to help preserve the life of the
capacitors.
How to Care for Lithium Battery
Charging timed and numbers of ftlashes may very according to the condition of the battery.
Charge the battery fully before using the unit for the first time.
After you finished use the studio flash, or before you store the studio flash,switch off the unit.
If the battery stored for long time,it will become exhausted.Always charge every month.
Do not drop the batteries onto hard surfaces, as this could expose the corrosive materials inside the battery case.
Do not attempt to incinerate Lithium batteries or expose them to excessive heat. Batteries can explode if you toss them into a fire or place them near other extreme heat sources.
Release Protective Cap
To remove protective cap, push the latch knob back towards the rear of the unit and rotate the protective cap anti-clockwise. Put the protective cap aside.
CAUTION: To avoid deformation of plastic protective cap, a lways cool down flash unit before fitting protective cap.
Installing Reflector
Mount the reflector where the protective cap is normally positioned, Align the three struts on the reflector with the three slots, press the reflector in and rotate clockwise until it locks in place.Always switch off the unit before fitting and changing reflectors.
Take care not to damage flash tube when fitting or removing reflectors or soft boxes. The flash tube is very delicate.
Warning: Do not touch the lamp with your bare hands. Oil residue from your fingers can cause the surface of the lamp to heat unevenly and explode. Use white cotton gloves or a clean cloth.
Charging Battery and Charging indicator
- AC charge: Insert one end with 5.5mm plug into the charging socket on Lithium battery, and the other end of the charger into a grounded outlet. ISION4 studio flash battery charger is developed for international use within the range of Ac100-240v. A fully drained battery reaches full power after 5 hours of charging. Depending on the battery condition, charging times may differ.
- Charging Indicator: The 100-240V charger has a built-in charge indicator. The LED light is red while charging, and turns to green when fully charged. The charger will automatically stop charging once the battery is fully charged.
Three Kinds of Menu Modes
- Switch on the unit, you will see the FIRST MENU with power output setting, flash duration setting,continuous flashes setting, and flash frequency setting.
- After press the function button (
 )for 4 seconds, you will enter into the SECOND MENU with preflash setting, 2. 4G radio channel setting, group function setting.
 - After press the function button ( )for 8 seconds, you will enter into the THIRD MENU with preflash special settings.
Note: The display will automatically quit from the second menu or third menu to the first menu if no button is pressed in 20 seconds, or press function button ()for 3 seconds.
Flash Light Output Power
The max. output power is 300ws Output power is variable over a 6 f-stops range(7 f-stop points)from full to 1/64. It is represented by full stop increments: 1/1, 1/2, 1/4, 1/8, 1/16,1/32 1/64. Pressing the adjustment
( ) button will change the output power.
FP extremely short flash duration
The flash duration range is variable from F1 (1/1000s),F2 (1/2000s), F3 (1/3000s),F4 (1/4000s),F5 (1/5000s),F6 (1/6000),F7 (1/7000s), F8 (1/8000s),F9 (1/9000s)toFP(1/10000s).
In the first menu, pressing the function button (![]() ) once will switch to the flash duration page”Fx”. Press the adjustment button ( ) to select correct flash duration.FP extremely short flash duration is used to shoot fast-moving objects at a closer distance.
) once will switch to the flash duration page”Fx”. Press the adjustment button ( ) to select correct flash duration.FP extremely short flash duration is used to shoot fast-moving objects at a closer distance.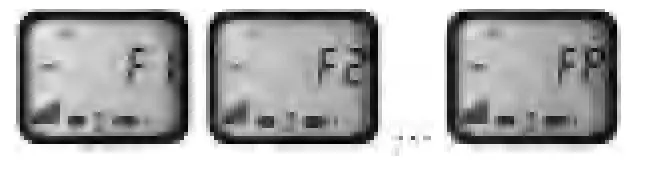
Stroboscopic Flashes
- In the first menu, press function button ( ) a second time, which switches to frequency “FREQ” page. Press adjustment button ( ) to select correct frequency. The flash frequency is variable from 1
flash/second(1HZ), 3 flashes/ second (3HZ), 5 flashes/second (5HZ), 10 flashes/ second (10HZ), 15 flashes/second (15HZ), 20 flashes/ second(20HZ).
- In the first menu, press function button ( ) a third time, which switches to “Multi x”page. Press adjustment button ( ) to select correct continuous flash frequency. Continuous flash frequency is variable from 3 times,5 times, 7 times, 10 times, 12 times, and 15 times.

- According to one shutter signal, the unit will generate a series of fast flashes. This allows multiple images integrated into one picture. This function is good for photographing the trajectory of a moving object. In order to ensure shooting effect, you may calculate the shutter speed that you need according to flash frequency. For example, when the display shows 10HZ, 15 Multi, then the shutter speed is 1. 5s.
Photocell
- Press the photocell button to turn”ON”or”OFF”photocell.
- The photocell is active when the”eye”symbol is displayed on screen.
- The unit will be triggered when it detects appropriate pre-flashes from master flashes or other nearby flash units. This is a convenient way to wirelessly trigger your flash.
- In order to enhance triggering accuracy and strengthen anti-jamming capabilities, the number of pre-flashes can be adjusted according to your demands for different photography purposes. It is variable from 1 time, 2 times, 3 times, 4 times,5 times.,6 times, and 7 times.
- The Photocell is located behind the red transparent cover on the top and at the back of the unit. The photocell is very sensitive but some experimentation with positioning may be necessary to ensure a reliable trigger, particularly if the cell is not in the direct line of sight of the triggering flash unit. Avoid directly illuminating the photocell from a continuous light source(such as ceiling lights or windows)since this can prevent correct operation. Very high ceilings can also affect the operation of the photocell.
Setting Pre-flashes
Press the function button (![]() ) 4 seconds, entering to the second page. the first page is pre-flash setting”Cx”.”x” is the number of pre-flashes plus main flash ranging from 1 to 7 times. Set the number of pre-flashes plus main flash by pressing the adjustment button ().
) 4 seconds, entering to the second page. the first page is pre-flash setting”Cx”.”x” is the number of pre-flashes plus main flash ranging from 1 to 7 times. Set the number of pre-flashes plus main flash by pressing the adjustment button ().
- Photo Cell “0”
Circle with adjustment button to”C0″automatic recognition mode. Use the camera -on flash and release a test exposure. The photocell detects the number of flashes the camera released and memorizes the value automatically. - Photo Cell”1″
If you have selected”C1″ in the procedure above, the unit will autoflash immediately when another flash is activated in the same area. - Photo Cell”2″
If you have selected “2 “in” To Set the Photocell above, the unit will auto-flash on the second flash. The photocell detects and will ignore the first pre-flash. - Photo Cell”3″
If you have selected”3″, the unit will autoflash on the third flash detected by the photocell. - Photo Cell”4″
if you have selected “4”,the unit will autoflash on the fourth flash detected by the photocell. - Photo Cell”5″
If you have selected”5″, the unit will autoflash on the fifth flash detected by the photocell. - Photo Cell”6″
If you have selected”6″, the unit will autoflash on the sixth flash detected by the photocell. - Photo Cell”7″
If you have selected”7″,the unit will autoflash on the seventh flash detected by the photocell.

2.4G Built-in Radio Receiver
- The unit features a built-in 2.4G radio receiver with 16 optional channels. In the second menu, press function button ( ) once to “Ch x”page. Press adjustment button ( ) to set to correct channel.
- Studio flash is only triggered when transmitter and built-in receiver are set at the same channel.
- In order to avoid mutual interference, please pair different groups of radio receivers and transmitters with different channels.
- To use 2.4G radio receiver function, you need to purchase separately a VC-816TX radio trigger Set the studio flash and VC-816TX radio trigger at the same channel. The studio flash can now be triggered.
The following picture shows how to match code between radio transmitter and receiver correctly.
On the radio transmitter, the code from left to right is 1, 2, 3, 4. When the button “on” is pushed, each code shown represents a value: channel 1 represents digit 1 , channel 2 represents digit 2, channel 3 represents digit 4, channel 4 represents digit 8. When the tab is set at the same side as the number., the digit is 0. You can calculate the total value according to the position of the tabs.For example, when all the 4 tabs are set to”ON”side, the total value is 1+2+4+8=15.” 15″ is the resulting channel code.
Operating the Modeling Lamp
- The unit contains a 13W LED modeling lamp. Press the modeling lamp button to turn the light “ON” and” OFF”.
- To reduce energy consumption the modeling lamp will automatically go out after 60s
Setting Preflashes Time Frame
Press function button(![]() ) for 8 seconds, enter into the third menu. The first page is total time of pre-flashes setting”tx”. ”t” is the total time of all released pre-flashes plus main flash. It is variable from 1 second to 5 seconds. You can advance from one preset to the next by pressing adjustment button(). Default setting is”t2″(means 2 second). The flash light will only be triggered when all the preflashes are fired in your setting timeframe. Set the value”t” between 1-5 to ensure all preflashes plus the main flash are within the time frame.
) for 8 seconds, enter into the third menu. The first page is total time of pre-flashes setting”tx”. ”t” is the total time of all released pre-flashes plus main flash. It is variable from 1 second to 5 seconds. You can advance from one preset to the next by pressing adjustment button(). Default setting is”t2″(means 2 second). The flash light will only be triggered when all the preflashes are fired in your setting timeframe. Set the value”t” between 1-5 to ensure all preflashes plus the main flash are within the time frame.
Setting Preflashes Block time
In third menu, press function key ( ![]() ) once switch to the”bx”page to set block time between two adjacent pre-flashes. Pre-flashes block
) once switch to the”bx”page to set block time between two adjacent pre-flashes. Pre-flashes block
time is to set the minimum delay between each pre-flash. Set the value from1 to 9 by pressing the adjustment button ( ). Default setting is b5. 
Low Power Indicator
Low power indicator will only appear on screen when lithium battery voltage is lower than 8.6V. It is an indicator reminding end users to
charge the battery as soon as possible.
Protection Features
Low Power Protection
Before battery power is completely run down, the studio flash will automatically produce an audible alarm, warning users to charge battery as soon as possible. If the users don’t charge in time, the flash light will cut off output power automatically when the battery is lower than 8.5V. The screen will go out at the same time.
Overheating Protection
Continuous rapid firing of unit for extended periods of time may cause the unit to overheat, and trip the heat protection circuit. When the studio flash is overheating, it will automatically trigger an alarm. When this happens, cool down the unit to a safe level to resume normal operation.
Installing Umbrella
An umbrella with a handle diameter of 8 mm can be firmly secured in the umbrella holder.Firmly press the umbrella shaft through the holder, the locking knob is located on the side. Do not over tighten to avoid damaging the shaft of the umbrella.When the standard reflector is used, fit the umbrella in the hole of the reflector.
Changing Flash Tube
Discharge the Flash Unit
The flash unit must be discharged before removing the flash tube. To discharge the Flash unit:
- Make sure the Flash unit is ON.
- Push the red”TEST”button on the rear panel of the Flash.
- Immediately turn off the power switch on the rear panel of the Flash. Do not allow more than 1/2 second between pressing the”TEST” button and turning the flash off.
- Remove battery from power source before removing the ash tube. It is recommended to wait at least 30 minutes before touching/removing the flash tube.
Note: Use white cotton gloves or a clean cloth to prevent fingers from touching the flash tube.
Remove Old Flash Tube
First. remove the reflector. You will need to remove the retention spring wrapped around the top of the flash tube With needle-nose pliers, unhook the retention spring loop. Grip the base of the flash tube on each side.Carefully pull the flash tube from the flash unit.
Install New Flash Tube
- Align the pins on the flash tube with the pin receptacles, Push the pins into the receptacles using firm, even pressure at the base of the flashtube(Fig.1).
- Wrap wire on hook(Fig. 2).
- Wrap wire around flash tube for one circle(Fig.3).
- Wrap wire on hook again.With needle-nose pliers,gently pull the wore upward until tightened(Fig.4).
- With needle-nose pliers,cover retention spring over the wire,and hook the retention spring loop at the top of the flash tube (Fig5&6).

How to Care for Flash Capacitor
One of the most important components of an electronic flash is the capacitor. Following the preventative maintenance below will increase the life and the reliability of your flash.
If the unit is left unused for a few months or predominantly used at low power settings,it is recommended that the power be increased to maximum and the unit left switched on (modeling lamp OFF)occasionally for at least 30 minutes to help preserve the life of the capacitors.
Specifications of Flash Light
| Item number | VISION4 |
| Power output | 300WS |
| GOuuitdpeunt puomwbeerrrGaNng(2m, Iso 100)1/60 Reflector SF-610 | 60 |
| Recycling time at Max.output power | Full power to 1/64 |
| Recycling time at Min.output power | 2.5s |
| Flash duration Full power 1/1 | 0.4s |
| 1/200s | |
| Successive flashes | 3shots;5shots;7shots;10shots;12shots;15shots |
| Flash frequency | 1Hz;3Hz;5Hz;10Hz; 15Hz;20Hz |
| Selective Flash duration | FF61 11//61000000ss;;FF72 11//72000000ss;;FF83 11//83000000ss;;FF4911//49000000ss;;FFP5 11//51000000s0;s |
| Modeling lamp | LED 13W, 1370lumen(energy saving) |
| Color temperature | 5500K±200K |
| Trigger voltage
Triggering frequency |
with inner 2.4GHz rem 5V Low voltage trigger ve distance in open air
ote control, 20m effecti |
| Trigger methods | Sync cord; Photo cell; radio trigger; Test button. |
| Flash tube | “Plug-in”tube (user replaceable) |
| Flash light dimension | diameter 125mm x length 220mm |
| Flash light weight | 1.8kg |
| Number of flashes at full power per charge | 700 shots |
| Power source | Lithium battery |
| Battery capacity | 7800mAH, 10.8V |
| Charging way | Battery plug-in charging type |
| Charging voltage | AC100-240V |
| Charging time | 5hrs |
| Flash light protection | Overheating protection; Low voltage automatic power cut-off system |
| Charging time and number of flashes may vary according to the condition of the battery | |
Shenzhen Neewer Technology Co.,Ltd.
Room 1903, Block A, Lu Shan Building No. 3023
Chunfeng Rd Luo Hu District, Shenzhen
Guangdong 518001, China
Lingteng Electronic (UK) Ltd
International House, 10 Churchill Way, Cardiff, CF10 2HE,
United Kingdom
EC REP
NW Formations GmbH(for authorities only)
Hoferstrasse 98, 71636 Ludwigsburg, Germany