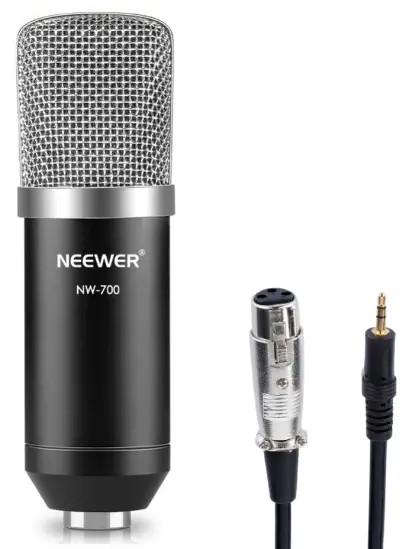
NEEWER NW-700 Broadcasting Condenser Microphone Instruction Manual

Package Contents
Please check the package content carefully. Please feel free to contact us if there is any missing or damaged items.
Accessories
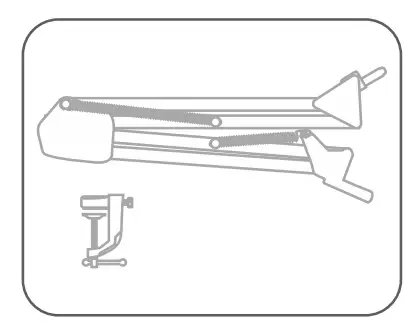
- Scissor Arm Stand and Table Mounting Clamp
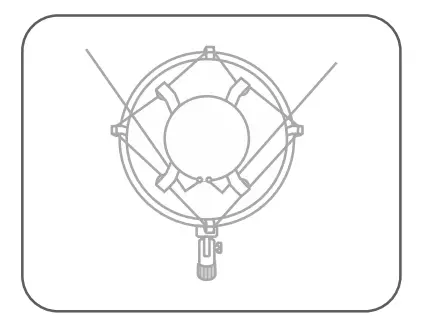
- Shock Mount
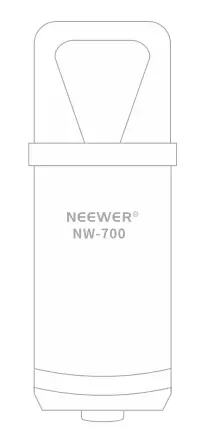
- Foam Wind Cap

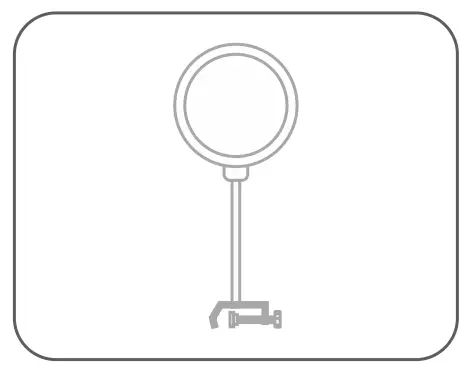
- Pop Screen Filter
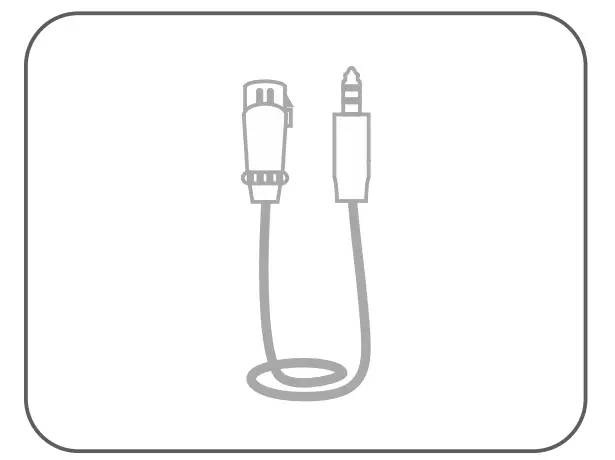
- XLR to 3.5mm Cable
- Power Adapter

Setup of 48V Phantom Power
 The 48V phantom power is NOT included in the package contents.
Installation Procedure
Installation of table mounting clamp and scissor arm stand
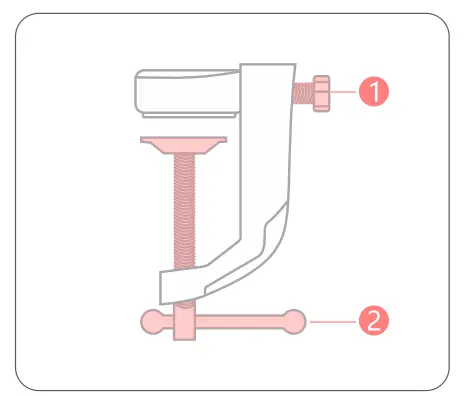
- Arm Stand tightening knob
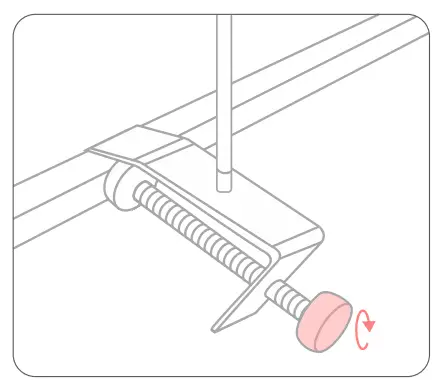
- Desk Clamp tightener
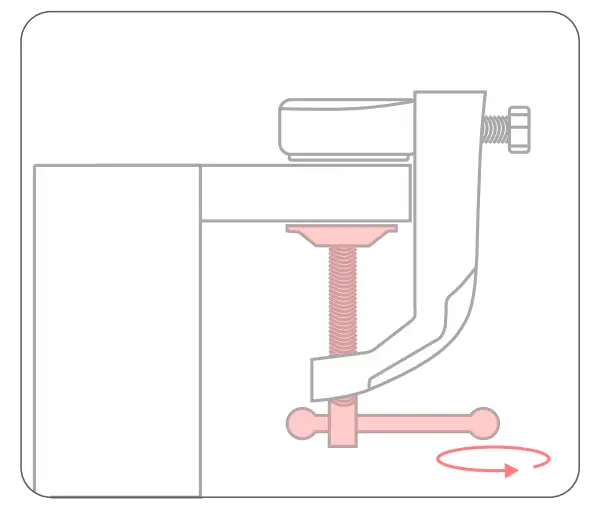
Turn the desk clamp tightener 2 clockwise to securely clamp it to the desk.
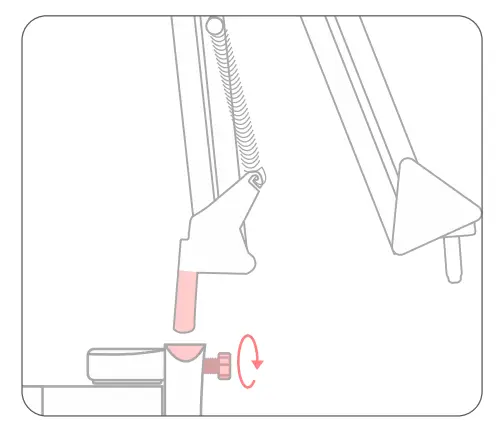
Make sure the Arm Stand Tightening Knob 1 is loosened by turning the knob counter clockwise. Insert the base of the Scissor Arm Stand into the Table Mounting Clamp as pictured, then secure it by turning the Arm Stand Tightening Knob 1 in a clockwise direction.
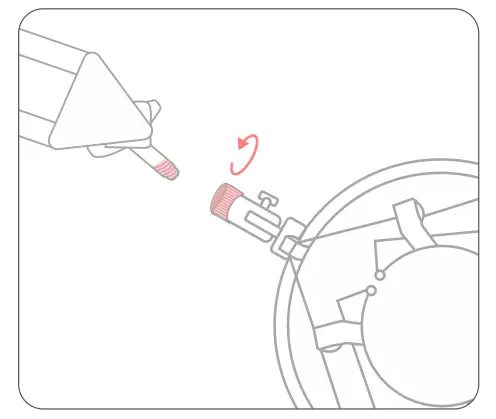
Attach the shock mount to the other end of the boom stand by threading the two pieces together and turning it in a clockwise rotation until it is securely fastened.
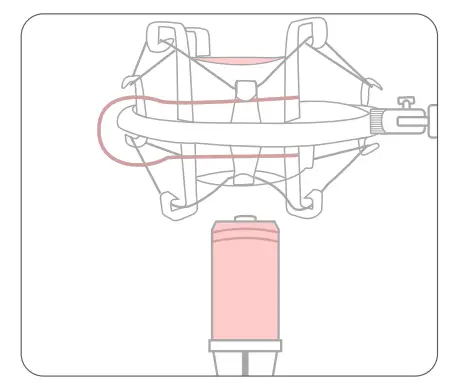
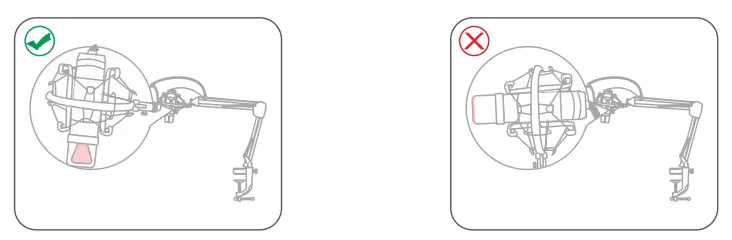
Installation of Shock Mount
Squeeze the two tabs together on the microphone shock mount to expand the opening, slide the microphone in then release the tabs. This will clamp the microphone securely in the shock mount
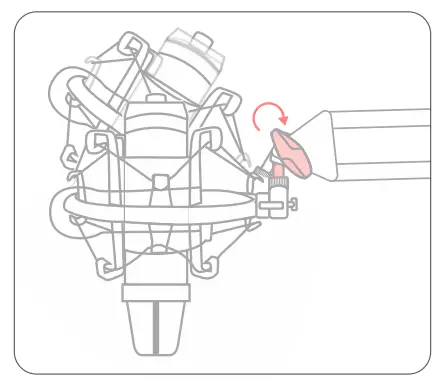
Adjust the angle of the microphone as desired by counter-clockwise loosening the screw on the shock mount bracket. Once it is in the desired position tighten the screw again.
Secure the pop screen filter to the arm stand near the end with the microphone on it; then tighten the pop filter by clockwise turning its rotating knob..
Use the gooseneck to position the pop filter in the desired location where it is comfortable to speak through.

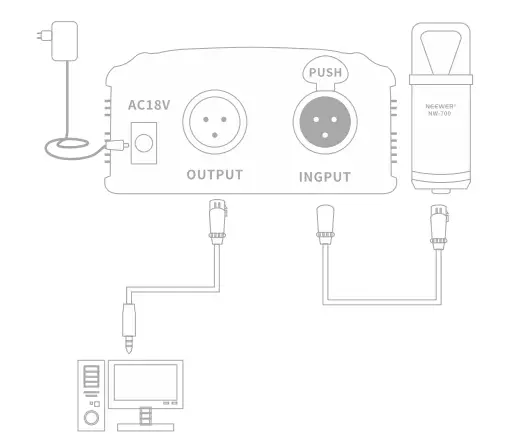
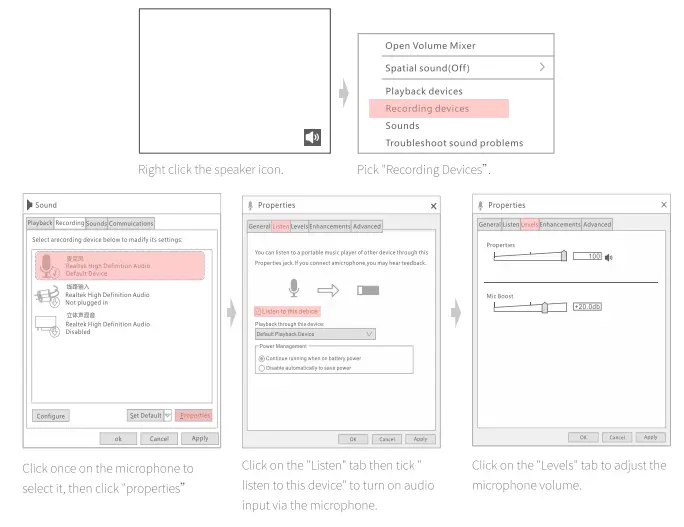
Recording Setting on Computer
How to conduct a recording setting without independent sound card and amplifier?
Take the Recording Setting for Windows 10 as an example:
How to Position the Microphone
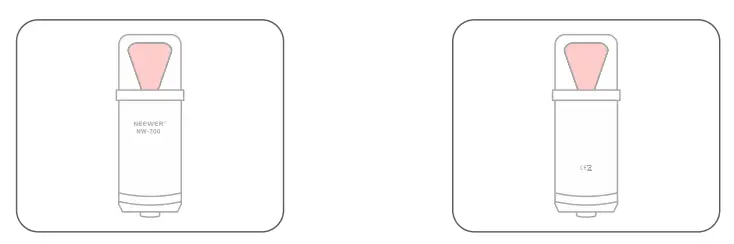
Position the microphone so that audio is being directly applied to one of the red locations in the diagram above.
The Microphone can only pick up sound on two FLAT SIDES, not from 360 degrees around them.
Q and A for Customer
- Why is the audio recorded by the microphone so quiet?
This could be due to improper microphone positioning (make sure to speak into one of the red areas illustrated above) or it could be a low quality sound card in your computer. If the problem is determined to be with the computer’s sound card, we recommend using an external sound card or amplifier so that the audio can be precisely tuned as desired. - Why is there a buzzing or other background noise on my recording?
This is caused by electronic interference within your computer due to fans and other electronics in close proximity to your internal sound card. To reduce and eliminate this sound we recommend an external sound card. - Why is there a loud noise as soon as the microphone is plugged in?
This is feedback created by computer speakers being too close to the microphone. These three steps can be used to eliminate squealing noise:- Lower the speaker volume.
- Move the speakers and the microphone further apart.
- Use headphones instead of speakers. Professional studio monitor headphone is recommended.
- Why does this microphone only pick up my voice and not other sounds around me like my guitar or other instruments?
This microphone is designed to pick up vocals, to add further instruments or sounds to your recording we recommend using a mixer to combine the various audio inputs and fine tune the volume of each input to your specification.
Notes
- For the best recording quality reduce background noise as much as possible. Keep the microphone clean by wiping it with a damp cloth. Do not spray anything directly into the microphone or it will damage the audio pickups.
- Do not tap or blow into the microphone. Use a normal voice to check the microphone instead.
- Keep the microphone away from speakers to avoid squealing noise.
- Record at a distance of 5-10cm for the best sound quality.
- Do not pull, drag or twist the microphone cable, this can quickly cause damage to the cable or to the microphone connection.
- Store the microphone in a cool dry place and away from heat sources or strong magnets.
- When using the microphone speak directly into one of the flat sides for the best audio quality.
- When using the microphone speak directly into one of the flat sides for the best audio quality.
Specifications
| Product Name | NW-700 Condenser Microphone |
| Frequency Response | 20Hz-20KHz |
| Sensitivity | -32dB±3dB |
| Output Impedance | (1000 |
| Load Impedance | 10000 |
| Power Supply Method | 48V Phantom Power |
| Dimension | 47x 15.5mm (Diameter x Length) |
Shenzhen Neewer Technology Co.,Ltd. Room 1903, Block A, Lu Shan Building No. 3023 Chunfeng Rd Luo Hu District, Shenzhen Guangdong 518001, China
 Lingfeng Electronic (UK) Ltd International House, 10 Churchill Way, Cardiff, CF10 2HE, United Kingdom
 NW Formations GmbH(for authorities only) Hoferstrasse 9B, 71636 Ludwigsburg, Germany
Document Information
© 2022 Shenzhen Neewer Technology Co., Ltd. All Rights Reserved. This document is the sole property of Shenzhen Neewer Technology Co., Ltd and shall not be, reproduced, transmitted, transcribed, stored in a retrieval system or translated in any form, by any means, without prior written permission from Shenzhen Neewer Technology Co., Ltd. Shenzhen Neewer Technology Co., Ltd reserves the right to change content in this instruction manual at any time and without prior notice.
Version Control
Date: 02/14/2022
Version number: 1.0
Description :NW-700 Condenser Microphone Instruction Manual
Issued by :NEEWER