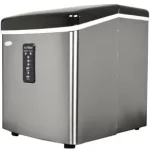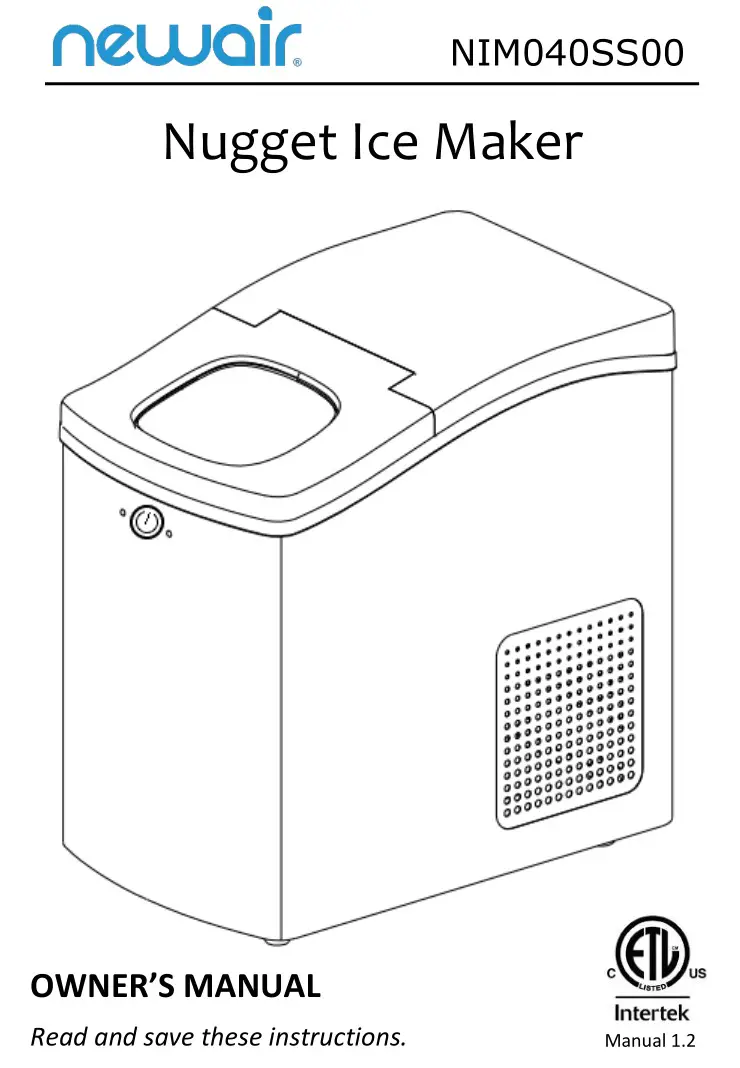
Nugget Ice Maker NIM040SS00 User Manual

A Name You Can Trust
Trust should be earned, and we intend to earn yours. Customer happiness is the focus of our business.
From the factory to the warehouse, from the sales floor to your home, the whole NewAir family promises to provide you with innovative products, exceptional service, and support when you need it the most.
Count on NewAir.
As a proud NewAir owner, welcome to our family. There are no robots here; real people shipped your product and real people are here to help you.
Contact Us:
For questions regarding your product, please contact us at:
Call: 1-855-963-9247
Email: [email protected]
Online: www.newair.com
Connect with Us:
SPECIFICATIONS
MODEL NO.: NIM040SS00
VOLTAGE : 120V
CURRENT : 2.3A
FREQUENCY : 60Hz
REFRIGERANT : R134a/1.23 oz
DIMENSIONS : 16.50”D x 10.6”W x 16.3”H
CERTIFICATIONS : cETL/ETL/FDA/BPA Free
REGISTER YOUR PRODUCT ONLINE
Register Your Product Online Today!
Take advantage of all the benefits product registration has to offer:
![]()
Service and Support
Diagnose troubleshooting and service issues faster and more accurately
![]()
Recall Notifications
Stay up to date on safety, system updates, and recall notifications
![]()
Special Promotions
Opt-in for NewAir promotions and offers
Registering your product information online is safe & secure and takes less than 2 minutes to complete: newair.com/register
Alternatively, we recommend you attach a copy of your sales receipt below and record the following information, located on the manufacturer’s nameplate on the rear of the unit. You will need this information if it becomes necessary to contact the manufacturer for service inquiries.
Date of Purchase: ___________________________________________
Serial Number: _____________________________________________
Model Number: ____________________________________________
SAFETY INFORMATION and WARNINGS
Please read the following instructions carefully before using this ice maker and keep this user manual for future reference. Safety precautions must be followed in order to prevent any hazards. Failure to obey the safety precautions may result in bodily harm and void of the manufacturer’s warranty.
![]()
WHEN USING ELECTRICAL APPLIANCES, BASIC SAFETY PRECAUTIONS SHOULD BE FOLLOWED TO REDUCE THE RISK OF FIRE, ELECTRIC SHOCK, AND HARM TO THE USER AND/OR PROPERTY.
This appliance is not intended for use by people (including children) with reduced physical, sensory or mental capabilities, lack of experience or knowledge of its operation, unless well instructed or under supervision of a person responsible for their safety with clear understanding of the hazards involved. Same applies to cleaning and maintenance of appliance. This product is NOT a toy.
- Do not place hands or objects on or near the ice maker’s evaporator when it is in operation.
- Do not operate the appliance if the cord is damaged. If the supply cord is damaged, it must be replaced by the manufacturer in order to avoid hazard.
- Connect ice maker to proper outlets only. There should be no other appliance plugged into the same outlet. Be sure that the plug is fully inserted into the outlet.
- Do not run the cord over carpeting or other heat insulators. Do not cover the cord. Keep cord away from traffic areas and do not submerge in water.
- Unplug ice maker before cleaning or making repairs.
- Close supervision is required if appliance is being used near children or pets.
- Do not clean your ice maker with flammable or corrosive fluids, fumes can create a fire hazard or explosion.
- Do not tip over.
- If unit is stored in a very cold environment, allow it to warm to room temperature before use.
- Only fill the appliance with water that is safe to drink.
- Do not place anything in the interior when not in use. The appliance is not designed to store other items.
- Appliance is intended to be used in household and similar applications, such as staff kitchen areas in shops, offices, and other working environments; farm houses and by clients in hotels, motels, and other residential type environments; bed and breakfast type environments; catering and similar non-retail applications.
- To use this product, place it on a flat surface.
- After unpack the ice maker, DO NOT turn on the Ice Maker. Wait 24 hours to stabilize the refrigerant inside the ice maker before first time use.
- Please make sure that the rear drain is firmly plugged before adding water to the water tank.
- The ice cubes produced will be relatively small at first. Do not be concerned as this is not a defect. The unit will take a few cycles to produce the intended size.
- Do not use near heat or excessive dust.
- Do not immerse machine in water, use it in bathrooms or places where it may be splashed with water.
- Do not dismantle or modify machine.
- If a problem occurs, stop using the machine immediately.
- Avoid touching any parts involved in ice making, and leave the lid closed while running ice production cycle.
- To unplug appliance do so by holding the head of the plug. Never pull by the cord.
- Periodically clean any accumulated dust off the plug head.
- Do not plug in the unit’s power cord if hands are wet.
- Disconnect the power supply and drain out the remaining water from the rear drain if ice maker will not be used for an extended period.
- We suggest using an ice maker cleaning agent or citric acid to clean appliance before first use to avoid resulting ice from having dirt and/or odor due to machine components being manipulated during assembly. If not cleaned before use resulting ice may have dirt and/or odor that will disappear after several cycles. DO NOT consume any ice with dirt and/or an odor. This is not a defect.
- Do not alter cooling circuit (piping).
- Do not tamper with the power cord or power plug.
- Do not use damaged power plugs or loose sockets.
- If the supplied power cord is damaged, please contact customer service. Allow damaged supply cords to be replaced by the manufacturer, service agent or a similarly qualified person to avoid hazard to yourself.
GETTING TO KNOW YOUR ICE MAKER

- Ice Basket and Scoop: used for storing and serving the ice.
- Ice Window: allows you to check how much ice has been produced without having to open the top and letting warm air in.
- Air Vents: Located on the back and sides of the unit, these vents help prevent the unit from overheating. Please leave at least six inches of space all around the unit for proper ventilation.
- Water Drain: allows you to empty the water from the tank easily.
- Max Fill Line: Inside the water tank below the ice tray is a line marking labeled “MAX.” Do not fill the water tank above this line.
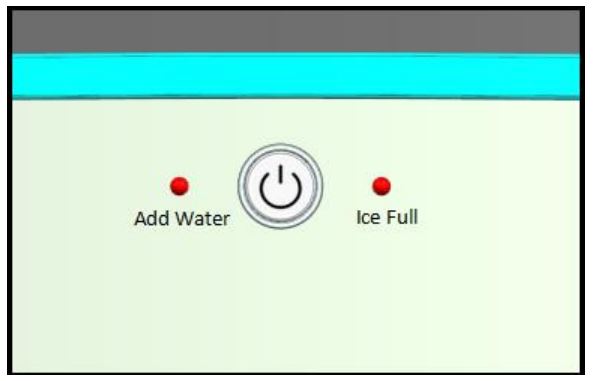
- Controls/Indicator Lights:
- STANDBY MODE: Once you plug in your ice maker, a red LED ring will light up to indicate the unit is waiting to produce ice. It will not make batches until the unit has been activated with the power button.
- POWER BUTTON: Press the power button once to turn on your ice maker. Once on, a blue LED ring will light up and the unit will begin to make ice. To turn the unit OFF, hold the power button for 3 seconds. The red LED ring will light up and the ice maker will go back to standby mode.
- ICE FULL: There is an infrared sensor that helps detect when the ice tray is full. When the tray is full, ice production will stop, the unit will turn off, and the “Ice Full” indicator will light up. To restart the ice production process, empty the ice basket, and press the power button twice. The first press of the button will put the ice maker in standby mode, the second will turn the unit on and it will start to make ice again.
- ADD WATER: When the “Add Water” indicator lights up, the unit will turn off and you will need to pour more water into the water tray below the ice basket. After you have refilled the water tray, press the power button twice to restart the ice production process. The unit will continuously produce ice if there is water in the tank and the ice tray is not full.

OPERATING PROCEDURES
UNPACKING YOUR ICE MAKER
- Remove all exterior and interior packaging. Make sure that ice basket and ice scoop are included. If any part or accessory is missing, please contact customer service.
- Clean the interior with lukewarm water and a soft cloth. Remove the ice basket and wash it in warm water.
- While the unit is still not plugged in, clean the evaporator rods using a water/vinegar solution.
- Find a location for your ice maker that is protected from direct sunlight and allows for six inches of space between the back and sides of the ice maker and the wall.
CONNECTING YOUR ICE MAKER
![]()
Improper use of the grounded plug can result in the risk of electrical shock. If the power cord is damaged, please do not attempt to use the unit, contact customer service for assistance.
- This unit should be properly grounded for your safety.
- Plug the appliance directly into an appropriate 120V AC outlet that is properly installed and grounded in accordance with all local codes and ordinances.
USING YOUR ICE MAKER
- Press the power button a single time after plugging in the ice maker and it will begin to run.
- Open the cover, remove the ice basket, and pour water into the tank. Make sure it does not surpass the maximum water level. Place the ice basket back into the unit and close the lid.
- While the ice maker is on, check the water level indicator periodically. If there is not enough water in the tank to produce ice, the ice maker will stop automatically, and the “Add Water” indicator will light up. Fill water up to the “MAX” line, press the power button to enter standby mode and press the power button again to resume ice production.
- The ice maker automatically turns off when the ice basket is full and the “Ice Full” indicator will light up. To restart ice production, remove the ice from the tray, press the power button to enter standby mode and press the power button again to resume ice production.
- Change the water in the tank every 24 hours to ensure a reasonable hygiene level. If the unit is not in use for a few days, drain all the water in the tank reservoir and refill before operating again.
CLEANING and MAINTENANCE
This ice maker comes with a self-cleaning function and it is strongly recommended that you use the function to clean your unit before you use it for the first time.
Operating the self-cleaning function:
- Plug in the unit and keep it in standby mode (a red LED ring will light up).
- Hold the power button for 3 seconds to start the self-cleaning process. A blue and purple LED ring will start flashing.
- Let the cleaning process run for at least 30 seconds.
- Hold the power button for 3 seconds to stop the self-cleaning process.
Cleaning the exterior and interior:
- Remove the ice basket.
- Turn the drain cap to drain out any water left in the tank.
- Clean the interior with diluted detergent, warm water, and a soft cloth.
- The outside of the ice maker should be cleaned regularly with a diluted detergent and warm water.
- Dry the interior and exterior with a soft cloth.
- Close the drain cap.
To maintain the integrity of your ice maker, run the self-cleaning process before each new use. Clean the interior and exterior frequently to remove any built-up debris or dust particles from storage.
ELECTRICAL SCHEMATIC DIAGRAM

TROUBLESHOOTING

NOTE: Certain noises are normal when operating this ice maker: a clicking sound when the machine is turned on or off, a bubbling, gurgling, or knocking sound when refrigerant is circulating through the pipes, or a loud clink sound when ice cubes are dropped into the basket.
LIMITED MANUFACTURER’S WARRANTY
This appliance is covered by a limited manufacturer’s warranty. For one year from the original date of purchase, the manufacturer will repair or replace any parts of this appliance that prove to be defective in materials and workmanship, provided the appliance has been used under normal operating conditions as intended by the manufacturer.
Warranty Terms:
During the first year, any components of this appliance found to be defective due to materials or workmanship will be repaired or replaced, at the manufacturer’s discretion, at no charge to the original purchaser. The purchaser will be responsible for any removal or transportation costs.
Warranty Exclusions:
The warranty will not apply if damage is caused by any of the following:
- Power failure
- Damage in transit or when moving the appliance
- Improper power supply such as low voltage, defective household wiring or inadequate fuses
- Accident, alteration, misuse or abuse of the appliance such as using non-approved accessories, inadequate air circulation in the room or abnormal operating conditions (extreme temperatures)
- Use in commercial or industrial applications
- Fire, water damage, theft, war, riot, hostility or acts of God such as hurricanes, floods, etc.
- Use of force or damage caused by external influences
- Partially or completely dismantled appliances
- Excess wear and tear by the user
Obtaining Service:
When making a warranty claim, please have the original bill of purchase with purchase date available. Once confirmed that your appliance is eligible for warranty service, all repairs will be performed by a NewAir™ authorized repair facility. The purchaser will be responsible for any removal or transportation costs. Replacement parts and/or units will be new, remanufactured or refurbished and is subject to the manufacturer’s discretion. For technical support and warranty service, please email [email protected]