
![]()
One-Stop Shop for LED Strip Lights
User Manual
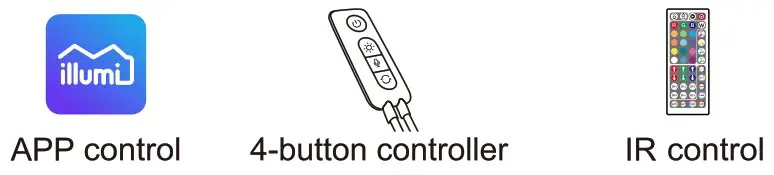
APP+IR 44Keys RGB LED Strip
Customer Support: Please Contact us through the Shopping App Where You Placed Orders for Troubleshooting, Replacement, or Refund.
Controller Button Function
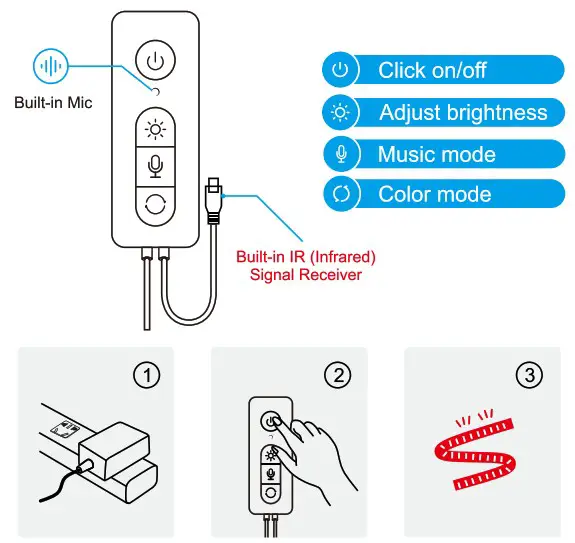
- Connect the power supply;
- Short press the “
 ” button on the controller
 - Light up the light strip
Safety Notification
Under some rare extreme working environment, the circuit may get short and the high temperature may melt the power adapter or lights controller, please do not leave them near inflammable material, moderate or repair the LED lights by yourself, or use under high-temperature environment without ventilation of heat, we have built protection devices into the UL-safety-standard fireproof power adapter and lights controller that will shut down the power immediately to avoid visible flame that may cause further damage. If you, unfortunately, encountered the case, please contact us via [email protected]
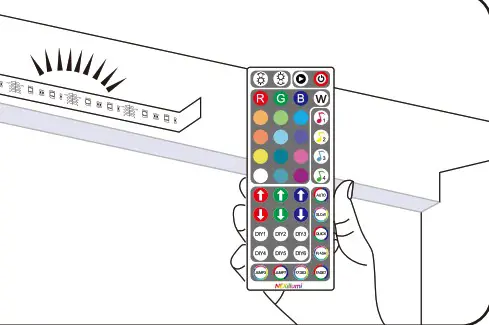
IR REMOTE INSTRUCTION
- 44-Key Music Remote
| 1. LED brightness adjustment button (up): 7 grades. | 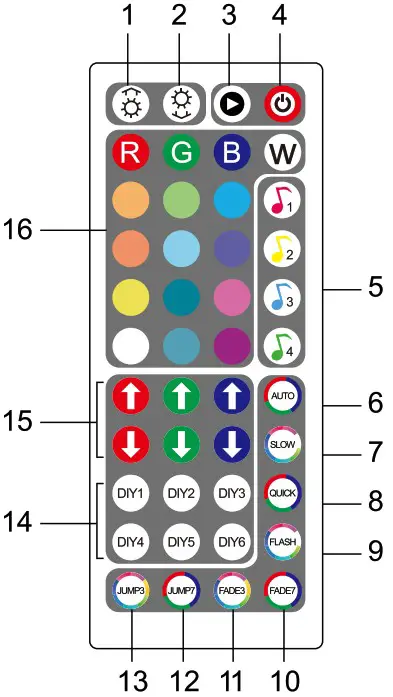 |
| 2. LED brightness adjustment button (down): 7 grades. | |
| 3. Pause/Run button. | |
| 4. ON/OFF button. | |
| 5. Music mode. | |
| 6. Auto button: Automatically change colors under Jump3, Jump7, Fade3. Fade7 and Flash modes. | |
| 7. Slow button: Speed down color changing under Jump3, Jump7, Fade3. Fade7 and Flash modes. | |
| 8. Quick button: Speed up color changing under Jump3, Jump7, Fade3, Fade7 and Flash modes. | |
| 9. Flash button: Flash on and off. | |
| 10. Fade 7 button: Gradually 7 colors fade change. | |
| 11. Fade 3 button: Gradually 3 colors fade change. | |
| 12. Jump 7 button: Gradually 7 colors jumpy change. | |
| 13. Jump 3 button: Gradually 3 colors jumpy change. | |
| 14. DIY buttons: 6 DIY buttons remember colors you set. | |
| 15. Adjust buttons: Increase! Decrease red, green, and blue colors. | |
| 16. LED color buttons (16 colors): Static red! Static green/ Static blue! Static white Static orange/ Static light green! Static dark blue Static milk white! Static dark yellow/ Static cyan Static lyons blue! Static white pink! Static yellow Static light blue! Static purple/ Static green white Static light yellow/ Static sky blue! Static brown Static blue white. |
 |
ensure that the battery is powered properly. |
distance. The angle of the IR receiver is 120° and the sensing distance is 25ft. Please remote ely control within the sensing range. |
 |
Installation
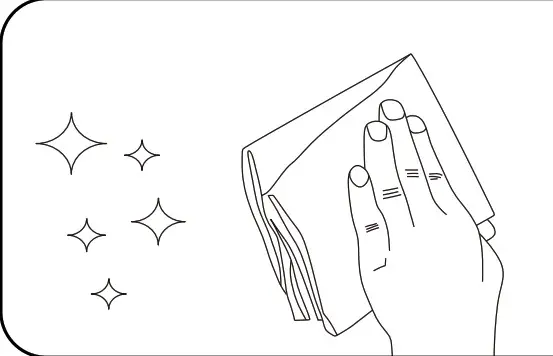 |
STEP1: Clean and dry the installation place.
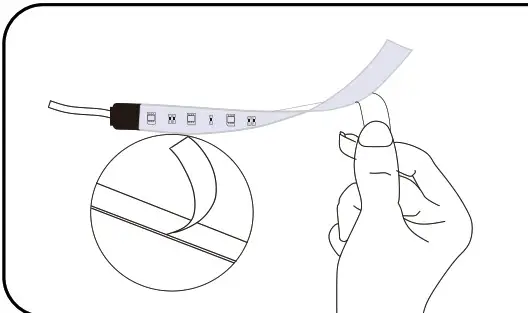 |
STEP2: Tear off the plastic on the adhesive tape and stick the strip to any smooth, clean and dry places.
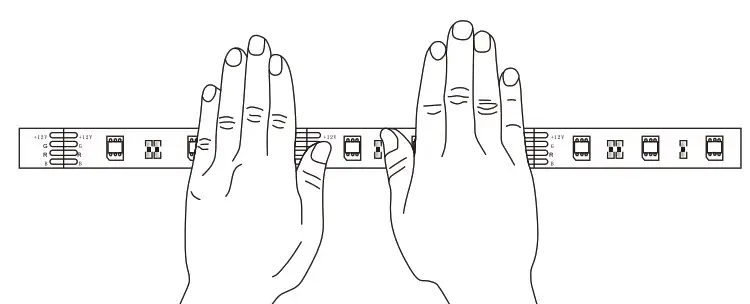
STEP3: Stick the LED strip and press with force, and then press the whole LED strip repeatedly.
 |
STEP4: Installation finished. Use the IR remote to turn on and operate the lights.
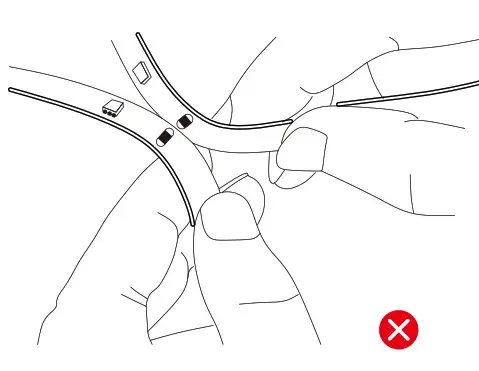
warning
 |
 |
 |
 |
while the lights are on, the short circuit may damage the lights. |
Troubleshooting
| Strip can’t light on after the installation. | •Check the power adapter’s indicator light is on, if not you are expected to receive a new one by contacting customer support [email protected]. •Check whether the joint is connected correctly. •Check whether the plastic sheet at the bottom of the IR remote is removed. •Check whether the button battery of the IR remote is out of power. |
| Lights are not bright or some LED lights different from the others. |
Unplug the power adapter from the outlet and replug again. You may get the LED strip with specification of “54 LEDs lights per 10ft” rather than the old version, but the brightness are the same. If you still want the old version, please contact us via “[email protected]” for replacement. .When some LED lights are different from the others, please contact us via e-mail for a new roll. |
| Power adapter has whining noise? | • These LED strips are not designed extendable, please do not add more LED strips to the product, the adapter cannot power any longer strips. • It’s normal when power adapter has small noise that can only be heard close to it while working at maximum power output in white color, you can also contact customer support for a bigger transformer if you think the noise is too loud. You can rest assured that all the power adapters are safe with no risks. |
| Strip can’t light on after you cut the LED strips. | • You need to have LED strip connectors or a new power supply to make the cut strips light on. • Please precisely cut the LED strip along the line marks among every 3 LED units. • Check if the LED strip connectors are closed tightly and they have a good connection. |
Download the illumi Home app
- For Android systems, download illumi Home app from the Android market.
- For iOS systems, download illumi Home app from the App Store.
![]()
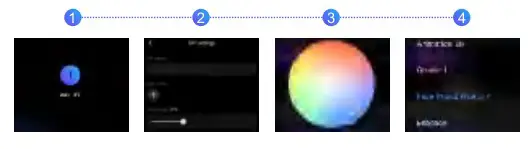
App Overview
illumi Home is a phone app to control LED strip lights. This app enables you to control your LED strips by changing colors, adjust brightness, set routine timers On/Off of the lights. It also comes with multiple dynamic color-changing modes, music mode, microphone mode that lights will change colors and brightness with environmental music and sounds through your cell phone’s mic.
Open the app, there is a pop-up message showing” illumi home” wants to turn on wireless connection, click”Allow”
- The app will automatically search for the LED Strip Controller and shows the LED strip in the My Device list. If automatic search failed, please drop down the device list box, and refresh manually.
- Click the device that needs to be connected, waiting for connection state changing from connecting
 to connected
  If shows
  means connection failed. If connection problem occurs, please drop down the refresh to connect the device. There can be rare issues that your phone has wireless connection incompatibility, please contact us for a new replacement or a refund.
 - The app requires your location permission while you control the lights, please rest assured we never collect personal info, its wireless connection needs your devices locations for communicating. And turn on your storage permission for the app to read your non-encrypted music files stored in your phone.
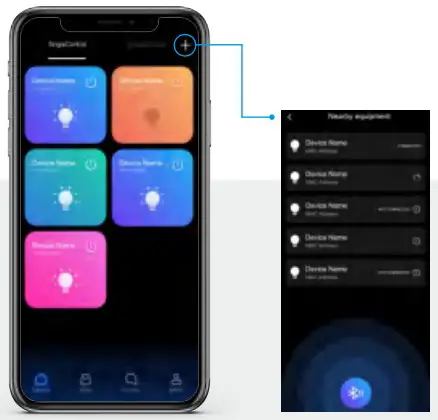
Add a device (Single Control)
Connect your light to the power outlet or USB port, open the illumi home device interface, and “+” in the upper right corner of the Bluetooth search to add a device.
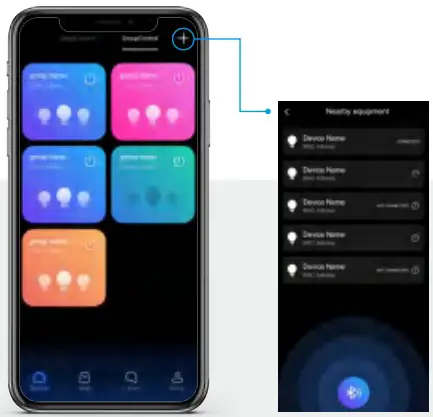
Add a device (Group Control)
You can add multiple LED light strips and control them at the same time, and divide the LED light strips into different goups to achieve group control
of these lights. Pelase note you may need to delete and add the device again when the LED lights are not in control.
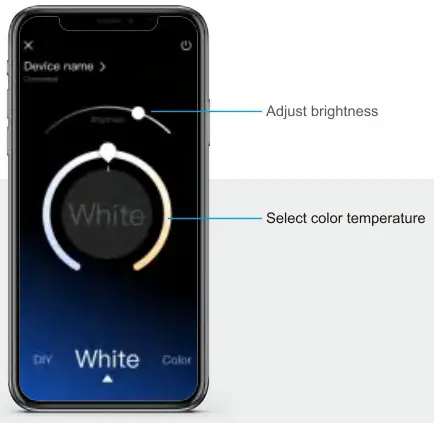
White Mode
Adjust the color temperature and brightness of the white color with this feature, please note some 5050 RGB mixed lights do not display pure white color.
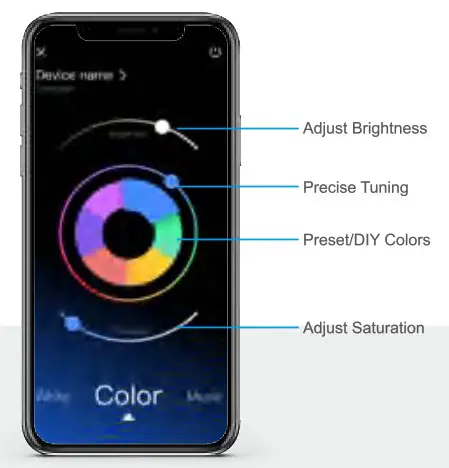
Color Mode
Music Mode
You need to give storage permission of your devices to enable the music mode feature, the app can read unencrpted audio files(like .mp3 files and recording audio files) and purchased music files on iTunes. Please note the app cannot read encrypted files from Spotify, Apple Music, or Pandora.

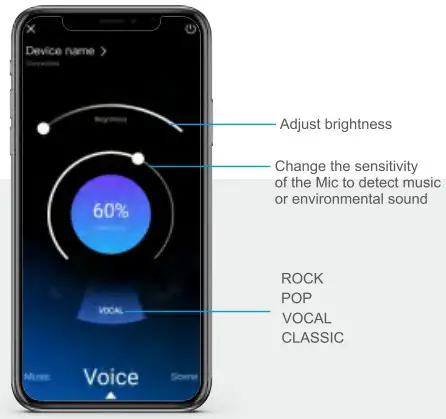
Voice Mode
The Microphone Mode enables your phone mic to detect ambient sound and music, then the lights will change colors and brightness to the beats.
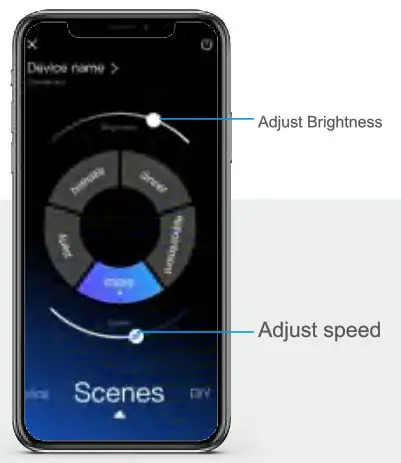
Scenes Mode
You can enjoy the lights changing ambience according to your mood with the scene modes.
DIY Mode
You can customize different color-changing sequences and changing speeds with this DIY feature. Following in steps below:
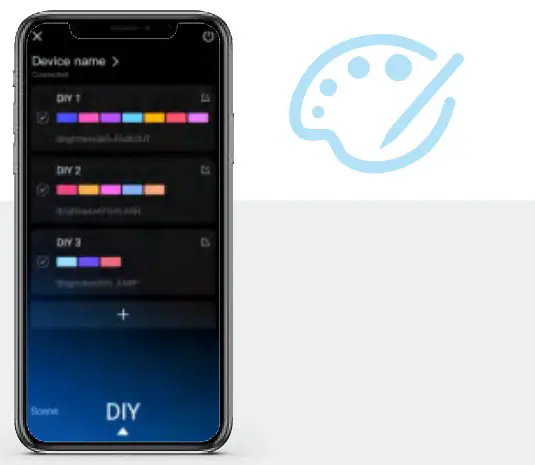
| 1. Click “Add a DIY” 2. Input the name of the mode, set brightness, and other settings. |
3. Add colors in sequence with the color palette. 4. Choose the color-changing mode, then it’s done. |
Timing mode

HAVE OTHER ISSUES THE MANUAL DOES NOT MENTION?
Please Contact us through the Shopping App Where You Placed Orders for Troubleshooting, Replacement, or Refund.
![]() Note
Note
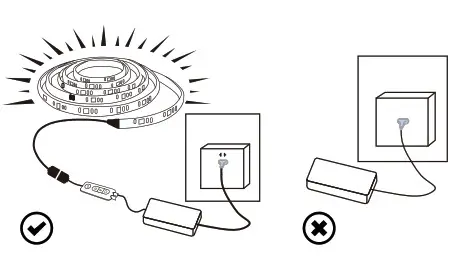
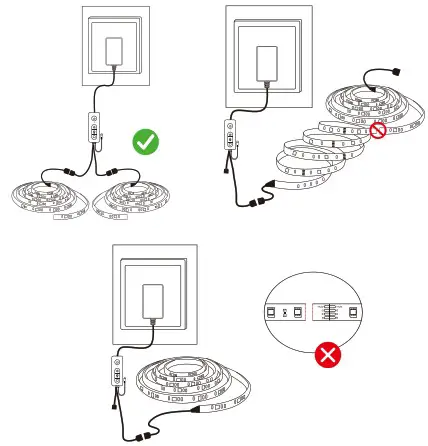
- Please ensure the power is off before unspooling the strips from the reels. And if the power adapter fails to work with no indicator light, contact us via Customer Support for a new replacement.
- Power supply voltage of this product is low voltage DC powered, never connect to higher voltage than the strips are designed to be.
- Never connect two different LED strips together for a longer one, because different LED strips are powered with different adapters.
- The LED strips are designed to the specific length, they can be cut shorter, and reconnect together with LED strip connectors, but we do not recommend link two LED strips for a longer one, the adapter cannot provide sufficient power for the extra LED strips.
- To ensure the LED strip working normally, please use the voltage indicated on the LED strips.
- If the power supply is damaged, do not attempt to repair it yourself. We can replace a new one for you within 365 days since your purchase.
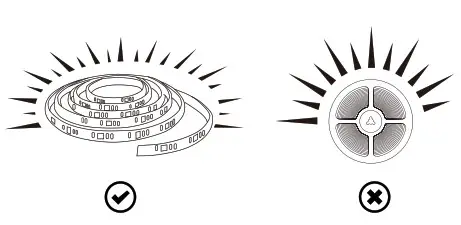
- Please don’t light the strip on for over 5s when they are rolled on the plastic reel.
- Please do not use this product near inflammable materials, and for non-waterproof LED strips do not use them under humid environment.
- Do avoid any damage to the strip, or twisting the led strip with too much force, please do not use chemical solvent during routine maintenance.
Warranty info
You are expected to get a brand-new replacement without returning back the old one when your lights break down during routine use within 365 days since your purchase date, contacting us via [email protected]
This device complies with Part 15 of the FCC Rules. Operation is subject to the following two conditions: (1) this device may not cause harmful interference, and (2) this device must accept any interference received, including interference that may cause undesired operation
NOTE: This equipment has been tested and found to comply with the limits for a Class B digital device, pursuant to Part 15 of the FCC Rules. These limits are designed to provide reasonable protection against harmful interference in a residential installation. This equipment generates, uses, and can radiate radio frequency energy and, if not installed and used in accordance with the instructions, may cause harmful interference to radio communications. However, there is no guarantee that interference will not occur in a particular installation. If this equipment does cause harmful interference to radio or television reception, which can be determined by turning the equipment off and on, the user is encouraged to try to correct the interference by one or more of the following measures:
- Reorient or relocate the receiving antenna.
- Increase the separation between the equipment and receiver.
- Connect the equipment into an outlet on a circuit different from that to which the receiver is connected.
- Consult the dealer or an experienced radio/TV technician for help.
Warning: changes or modifications not expressly approved by the party responsible for compliance could void the user’s authority to operate the equipment
The devices has been evaluated to meet general RF exposure requirement the device can be used in portable exposure condition without description