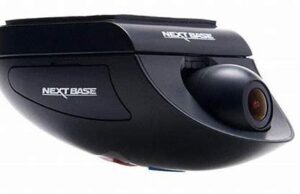
NEXTBASE NBDVR380GW 380GW Dash Camera
Apply mount to windscreen
Lightly press the mount against the windscreen and double check that the image as seen upon the smartphone / tablet is correct. Make any adjustments if required, prior to pressing the Dash Cam firmly against the windscreen to ensure that the 3M tape is securely attached.
Adjust lens position as required
If any final adjustments to the lens position are required, then gently move the ball of the lens to the desired position using finger pressure, taking care not to touch the glass element of the lens itself.
Please read and follow the notes below for the safe operation of your Dash Cam within your vehicle.
- As per the installation instructions, you must install the camera so it does NOT obstruct the drivers view of the road, preferably behind the rear view mirror.
- Whilst the camera clearly needs to view through the windscreen in an area swept by the windscreen wipers, the camera should be installed so as not to intrude significantly within the wiped area.
- A 40mm intrusion into the green wiped area is the maximum permitted by law.

- Do NOT mount the Dash Cam in front of the driver directly, as depicted by the red area in the above illustration.
- When installing the Dash Cam in a vehicle, always place the device securely against the windscreen and where possible conceal the power cable under trim. Make sure that the Dash Cam power cable does not interfere with the drivers operating controls, such as the steering wheel, pedals or gear levers.
- Do NOT mount the Dash Cam in front of an airbag field of deployment or in a position to obscure any mirrors.
- Clean the windscreen at the point of location, prior to fitting the Dash Cam, to ensure absolute adhesion.
- It is recommended NOT to operate the Dash Cam whilst driving.
- The automatic Start-Stop technology incorporated within the device negates any need to operate the controls whilst driving.
Note:- Adjust any settings or review recordings using the Cam Viewer APP, whilst stationery, not whilst driving.
- Only use your smartphone / tablet whilst stationery, not whilst driving.
ANTI-TAMPER SECURITY INSTALLATION
This allows the Dash Cam to be setup for ‘Authorised use only’, therefore preventing un-authorised operation, or removal of the camera. Three elements of anti-tamper security are available, which can be used individually or all together, as required.
This is a three stage process, using the supplied Security Pack:
2x Locking covers
![]()
2x Anti-tamper screws (machined screws for use with the locking covers)
![]()
1x Anti-tamper screw (self-tapping screw for use with cable lock)
![]()
2x Dust caps
![]()
Security screwdriver
- Cable lock
The cable lock can be secured to the mount. This prevents the car adaptor or hardwire kit power plug from being disconnected from the mount and hence stopping the recording.
Once the car adaptor or hardwire kit have been connected to the mount and the cable lock has been located correctly, use 1x anti-tamper screw (self-tapping screw) to secure the cable lock to the mount. Tighten the screw until the head is flush with the top surface and do NOT overtighten.
- Camera to Mount locking screw
The camera can be secured to the mount to prevent un-authorised removal.
Remove the two side covers to gain access to the ‘camera to mount’ locking screws, these are found on both sides of the camera.
With the camera attached to the mount and using the supplied security screwdriver, loosen the two anti-tamper screws, taking care NOT to remove them fully.
Slide the anti-tamper screws down into the ‘locked’ position and then re-tighten.
- Locking covers
Replace the normal side covers with the two locking covers and secure them to the camera using the anti-tamper screws (machined screws).
Carefully insert the supplied rubber dust caps, covering the heads of the anti-tampers screws.
Note:
To prevent unauthorised user’s from accessing the camera via the Cam Viewer App, remember to change the Wi-Fi Password within the Setup menu.
CAM VIEWER – INTRODUCTION
Nextbase Cam Viewer is a an APP specifically designed for use with the Nextbase range of Dash Cams and works with Android & iOS for use on Smartphones and tablets alike.
See the Product Specification section for minimum Operating System requirements.
The APP allows you to watch the live view from your Dash Cam, make recordings, watch previous recordings and then download selected recordings accordingly. The recordings can then be used as evidence for any situation/incident or accident witnessed and can be shared accordingly. The APP also allows you to make any changes required to the settings within the Dash Cam. Nextbase Cam Viewer APP is available freely to Download from your applicable APP store, as shown below:-
Please download, install and then run the APP, before continuing further with these instructions.
CAM VIEWER – CONNECT YOUR DEVICE
Connecting your mobile device to your Dash Cam
Once you have downloaded Nextbase Cam Viewer for your mobile device, you will need to turn on the Wi-Fi function on your Dash Cam.
With the dash Cam powered on, press and hold the ![]() button until it starts to flash blue. The flashing indicates that the Wi-Fi function is turned on and awaiting a connection.
button until it starts to flash blue. The flashing indicates that the Wi-Fi function is turned on and awaiting a connection.
The Dash Cam will appear as NEXTBASE 380GWA xxx, within the available networks seen on your mobile device.
When you launch Nextbase Cam Viewer you will see the Welcome Screen as shown below:-
Tap the CONNECT TO DASH CAM Button and Nextbase Cam Viewer will then open your Settings screen for your mobile device.
Connecting to the Dash Cam is the same process as you would use to connect your mobile device to any Wi-Fi ‘network’.
Select ‘NEXTBASE 380GW xxx’ from within the list of available networks and if prompted enter the default password ‘12345678’.
CAM VIEWER – MAIN SCREEN
Main screen
Once your mobile device is connected Cam Viewer will display the Main screen and you will see a live image from your Dash Cam as shown below:-
From within the Main screen you can select Live View, view recordings stored on your Dash Cam or recordings that have previously been downloaded to your mobile device. You can also access the Nextbase Cam Viewer Menu options.
- Menu
Tap here to access the Nextbase Cam Viewer Menu options, these include Dash Cam Settings. - Live View
This window displays a live image from your Dash Cam. Tapping the Live View window will display the Live View full screen and allow you to stop and start recording - View Dash Cam Videos
Tap here to view videos that are stored on your Dash Cam. You can then stream the videos directly from your Dash Cam or download them to your mobile device. - View Downloaded Videos
Tap here to view videos that have been downloaded from your Dash Cam to your mobile device.
You can then play the files on your mobile device or share them online
CAM VIEWER – DOWNLOADING RECORDINGS
Downloading Videos from your Dash Cam (iOS)
To download files from your Dash Cam to your mobile device first tap on the View Dash Cam Videos button on the Main screen.
Nextbase Cam Viewer will then display a list of videos stored on your Dash Cam as shown below:-
There are three buttons located at the bottom of the screen:-
Tap the download files button and check boxes will appear next to each video, tap the videos that
you wish to download and a tick will appear next to each selected video.
You can tap a video a second time to deselect it.
When you have selected all of the files that you wish to download tap the Done button in the top right corner of the screen.
When you tap the Done button Nextbase Cam Viewer will display the progress of your video downloads on screen, you can tap the progress indicator at any time to cancel the current downloads.
Once videos have finished downloading they will appear in the Downloaded Videos screen which can be accessed from the Main Screen
CAM VIEWER – DOWNLOADING RECORDINGS
Downloading Videos from your Dash Cam (Android)
To download files from your Dash Cam to your mobile device first tap on the View Dash Cam Videos button on the Main screen.
Nextbase Cam Viewer will then display a list of videos stored on your Dash Cam as shown below:-
Tap and hold on one of the videos that you wish to download and check boxes will appear.
Tap the videos that you wish to download and a tick will appear next to each selected video. You can tap a video a second time to deselect it.
Three buttons will also have appeared at the top of the screen.
When all of the videos that you wish to download are selected tap the Download Videos button. When you tap the Download Videos button Nextbase Cam Viewer will display the progress of your video downloads
You can tap the Cancel button on the progress indicator at any time to cancel the current downloads.
Once videos have finished downloading they will appear in the Downloaded Videos screen which can be accessed from the Main Screen
CAM VIEWER – SHARING RECORDINGS
Sharing recordings
Once you have downloaded videos from your Dash Cam to your mobile device it is then possible to share your videos online. In order to do this, you will need to disconnect your mobile device from your Dash Cam Wi-Fi connection and connect to your usual Wi-Fi connection with internet access.
You should then tap on the View Downloaded Videos button on the Nextbase Cam Viewer Main screen.
The Downloaded Videos screen shows all videos that you have downloaded from your Dash Cam and functions in the same way as the View Dash Cam Videos screen, however, the Download button is replaced with a Share button, see below:-
Tapping the Share button when files are selected will display the sharing options available on your device. This will include social media applications if installed on your device such as Facebook, YouTube or Twitter as well as the option to use Nextbase Private Share. Nextbase Private Share will allow you to upload your videos to the Nextbase Servers and when upload is completed you will be given a link which you can then send to friends or your insurance company allowing them to watch your video online.
Note:
– The link will expire after 30 days and the video will be deleted from the Nextbase Servers.

