![]()
ALTOS CYCLING SHOE
Instruction Manual

The information in this guide may not reflect recent updates as we continue to improve our product. Please see onepeloton.com/manuals for the latest version.
SETUP
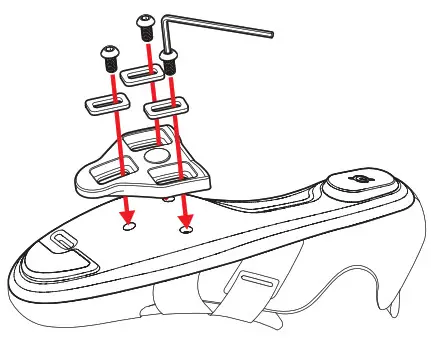
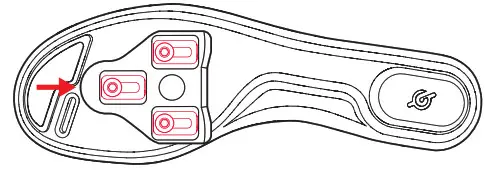
Loosely attach the cleat and move it to your preferred position.
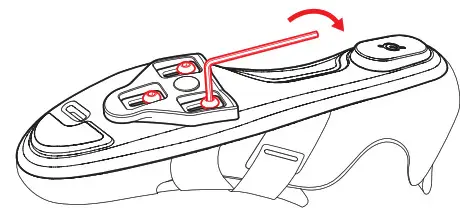
Then fully tighten the bolts.
See support.onepeloton.com for more information.
CAUTION: Make sure that your cleats are properly positioned and all bolts are fully tightened before clipping in. Check for and tighten loose pedals on a regular basis. Riding with loose cleats or pedals could lead to serious injury.
USE
CLIPPING IN
Point your toes down to fit the cleat into the front of the pedal. Push down through your heel.

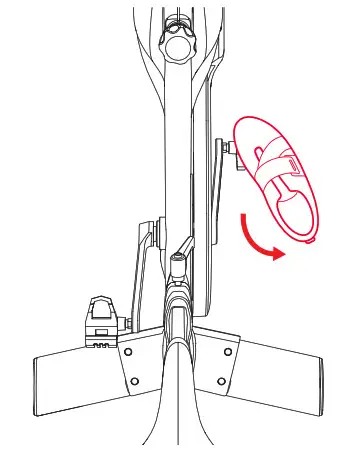
CLIPPING OUT
Kick your heel away from the bike.
LIMITED WARRANTY
For customers who reside and purchase a Peloton accessory in the United States, Canada, Germany, or the United Kingdom, Peloton warrants the components and all original parts against defects in workmanship and materials for a period of 12 months from the date of delivery, or for any additional period that is required by applicable law.
This voluntary Limited Home Use Warranty does not affect your statutory warranty rights but applies in addition to them.
For the complete Limited Warranty, visit onepeloton.com/warranty.
MANUFACTURED FOR
Peloton Interactive, Inc.
441 9th Ave, 6th Floor
New York, NY 10001
USA
BS03-01UB | 00041-4.0
©Peloton 2022, Peloton Interactive, Inc.
All rights reserved.
onepeloton.com | onepeloton.ca