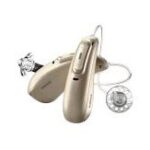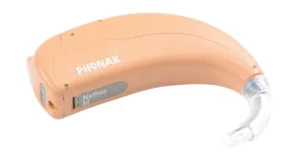
Nathos Auto M Hearing Aids
User Manual
Adult Audiology
The Lauriston Building Level 1,
39 Lauriston Place Edinburgh EH3 9HA
Tel: 0131 536 1637
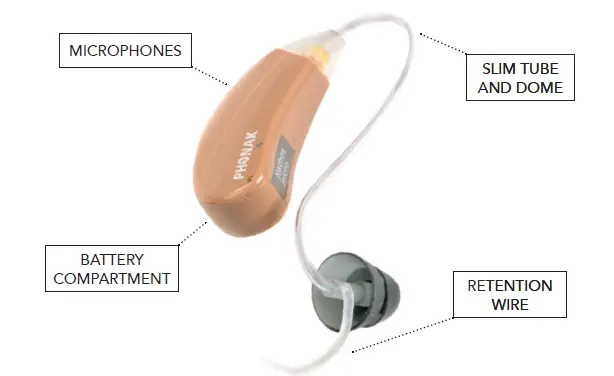
TYPES OF HEARING AIDS AID WITH SLIM TUBES
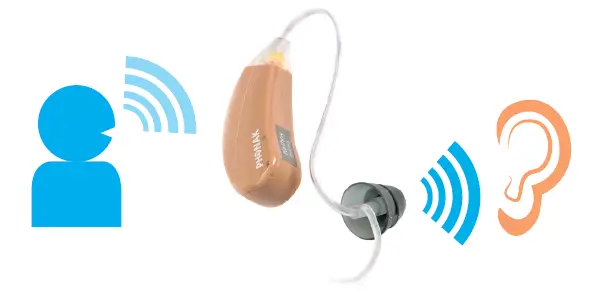
HOW IT WORKS…
Sound comes in via the microphones, is amplified by the hearing aid (powered by the battery) and travels through the tubing and dome into the person’s ear.
Hearing aid is ON when a battery is in place and the battery compartment is closed and is OFF when the compartment is open.
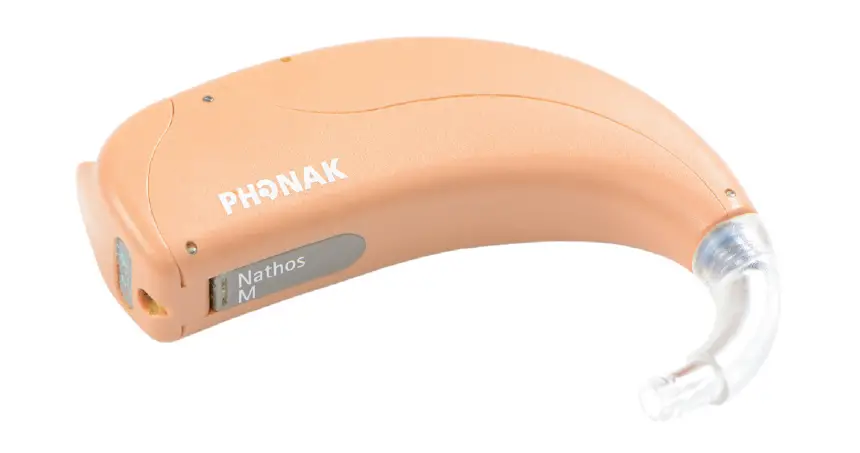
AID WITH EARMOULD
HOW IT WORKS…
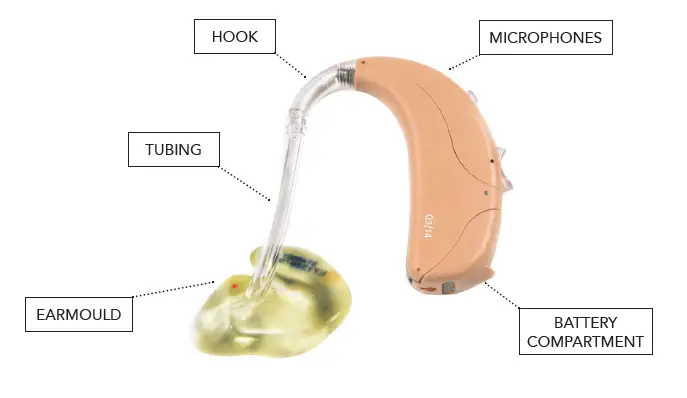
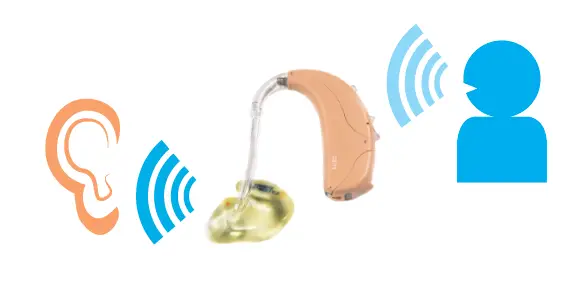
Sound comes in via the microphones, is amplified by the hearing aid (powered by the battery) and travels through the hook, tubing and mould into the person’s ear. The hearing aid is ON when a battery is in place and the battery compartment is closed and is OFF when the compartment is open (older aids have a switch: 0 = off and M = on).
IS THE HEARING AID WORKING?
Turn the hearing aid on and cup it between your hands. If your hearing is OK, you should hear it whistle.
Newer aids usually play a little tune a few seconds after starting – turn the aid on and hold it near your ear (but not too close!) –if you hear the tune, the aid is probably working.
WHAT GOES WRONG – WHEN AID DOES NOT WORK AT ALL – COMMONEST PROBLEMS
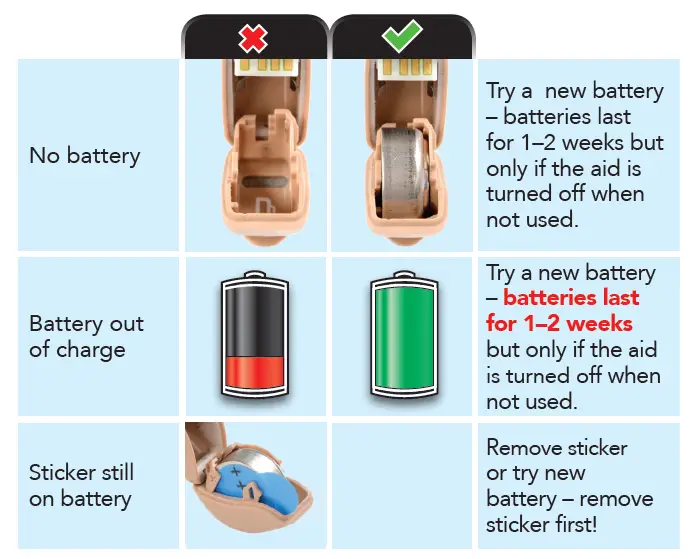
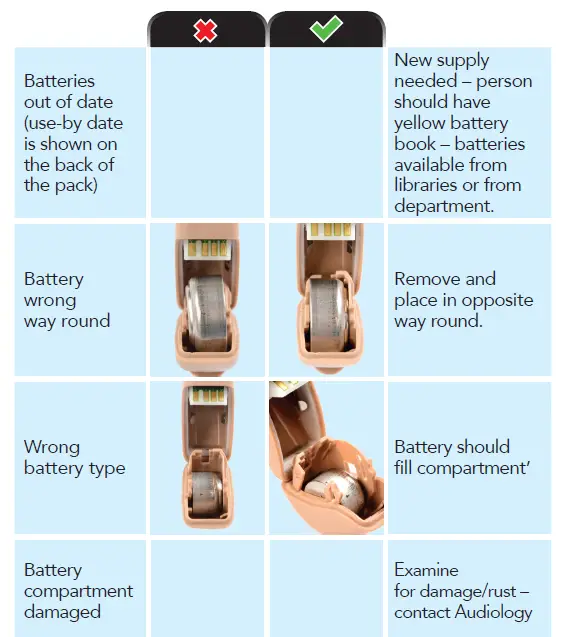
NO POWER
SOUND PATH BLOCKED
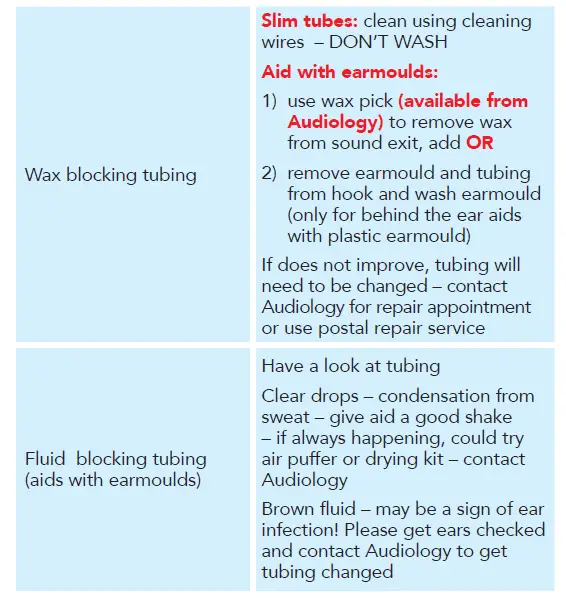
When the sound path is blocked, the hearing aid is working and sound is coming in and being amplified, but it is not coming out. Usually the blockage is in the tubing, dome or earmould.
How to check: turn the aid on and (if you can) detach tubing from the body of the aid – if the blockage is in the tubing, you will hear the aid working.
OTHER PROBLEMS
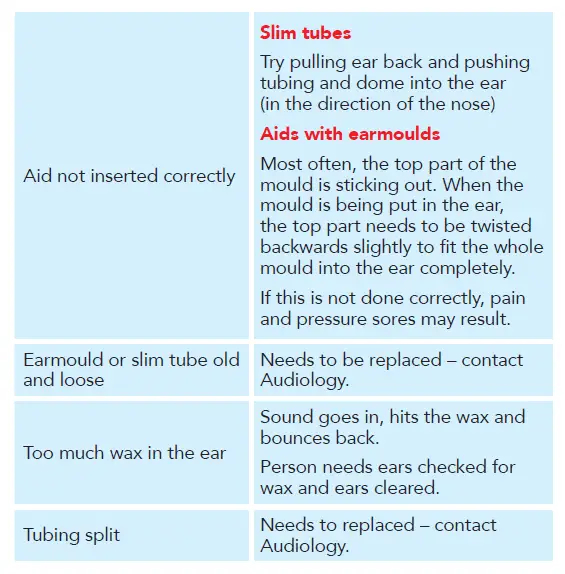
THE HEARING AID WHISTLES WHEN IT IS IN THE PERSON’S EAR
This is called ‘feedback’ – sound escapes from the person’s ear and is picked up by the hearing aid microphone and is amplified, so more sound leaks out and more sound is amplified and so on.
HEARING AID STILL NOT WORKING AT ALL!
If it is not the battery or a blockage in the tubing, it is harder to fix!
HEARING AID IS WORKING BUT THE PERSON IS NOT HEARING WELL
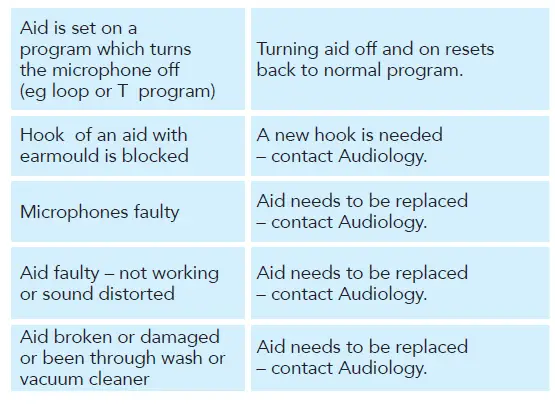
Most hearing aids also have a program button and/or a volume control but both of these have to be activated by the audiologist – so may not be working even if the buttons and switches are there. If in doubt, contact the department.
Hearing aids are colour-coded! Right is marked RED and left is marked BLUE.
Information and Guidance on Earmould washing and retubing reproduced with permission of University Hospital Leicester NHS Trust.
HEARING AID BATTERIES
To use a battery:
- remove the sticker
- open the battery compartment which is usually near the bottom of the aid. Pull down the small catch to open the compartment. Some older aids have a push button instead
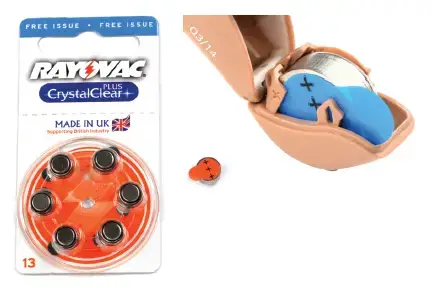
- batteries have a positive and a negative terminal marked on the battery and they must be put in the correct way round.
Batteries
- are supplied by the Audiology Department
- are available from the Audiology Department (in person or using the postal service), from some community health centres and GPs and from local libraries. The person (or their friend or relative) just needs to take along their yellow battery record book
- supplied in packs of 6 – must be used before the use-by date (printed on the pack)
- are air-activated: to activate them, the sticker needs to be removed before use. Once the sticker is removed, the battery will start to run down and will run out of charge within a few weeks, even if not used. Remove batteries from unused aids
- usually need to be changed about every 1 – 2 weeks (but more often if hearing aid is not being turned off at night)
Take care to keep batteries away from children and pets.
Used batteries can be recycled with other household batteries – most large supermarkets have battery recycling cans.
RETUBING YOUR EARMOULD
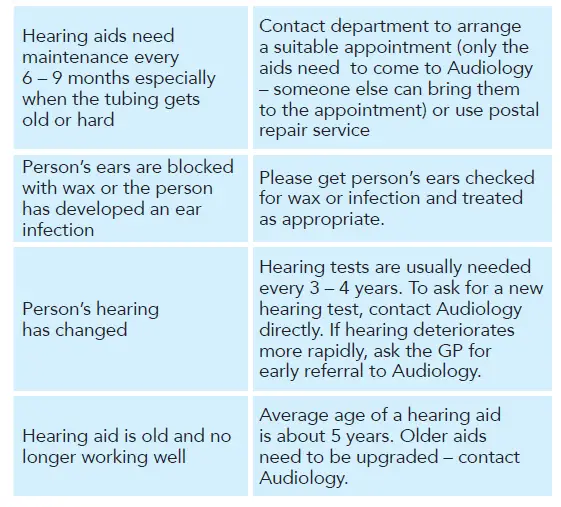
You should replace the plastic tube inside your earmould approximately every 6-9 months, or when the tube becomes discoloured and hard.
This will help to maintain good sound quality and comfort.
If the tube becomes too hard it can snap and get stuck inside the mould. If this happens you will not be able to wear the hearing aid until the broken tube is removed and replaced.
Replacement tubing is available from the Audiology department
Please follow these simple instructions on how to replace
the tube. If you find it difficult to handle small objects or have eyesight problems and cannot replace the tube yourself, then please ask a friend or relative to help, or book a repair appointment and we will do it for you.
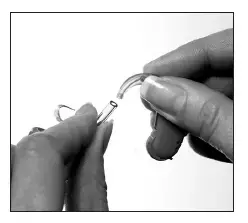
Hold the tube in one hand and the hearing aid hook in the other, twist and pull firmly apart.
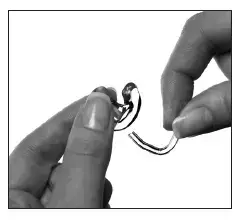
Pull the old piece of tubing out of the mould. KEEP THIS PIECE OF TUBING
Cut the new piece of tubing to a long thin point.
Insert the pointed end into the mould as shown. If there are two holes in the mould you should use the top one.
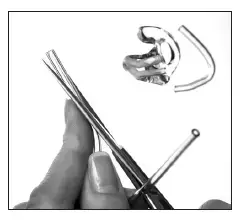
Pull the tubing through until it reaches the bend.
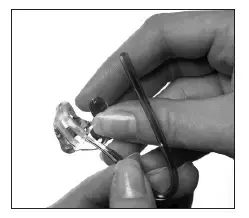
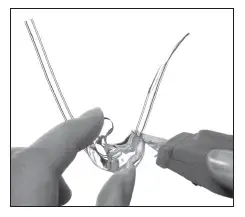
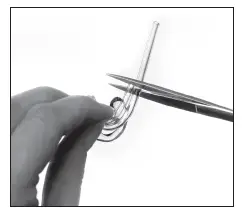
Cut off the point ‘flush’ with the mould using a sharp pair of scissors.
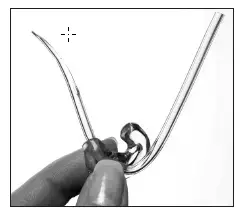
Alternatively, using a sharp knife can create a closer cut. Place the mould down on a hard surface if using a knife.
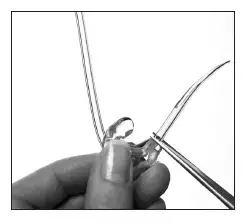
Use the old piece of tube as a measure for the new piece.
If the hearing aid is loose over the top of the ear, try shortening the tube a little as the old piece may have stretched upon removal.
If the old piece of tube has been lost or damaged, place the mould in the ear and the hearing aid behind. Ask someone to mark with a pen where the two meet.
Remember to allow a little extra as the tube pushes over the end of the hearing aid.
Push the end of the hearing aid hook firmly inside the new piece of tubing.
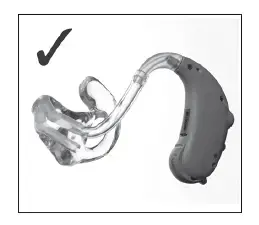
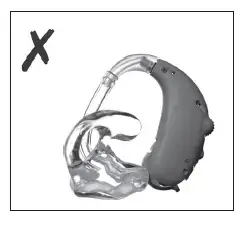
The mould should point away from the hearing aid as shown in the picture.
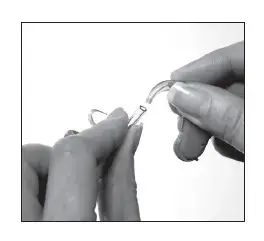
Remember that the mould should face away from the hearing aid and not towards it as shown in the picture.
CLEANING SLIM TUBES
You need a plastic cleaning wire. If you don’t have one of these, please contact the Audiology department and ask for one to be sent to you.
If you have 2 hearing aids, clean one at a time to avoid confusing left (marked blue) and right (marked red) aids.
Remove the tube from the main part of the hearing aid:
- by unscrewing the top of the tube anticlockwise or
- by turning the tubing to 9 o’clock or 3 o’clock and then pulling it away from the hearing aid (for aids with a bayonet-type fitting).
Thread the cleaning wire through the tubing like a pipe cleaner, starting from the end that was attached to the hearing aid, to push any wax or debris out of the tubing. Push the wire all the way through.
Re-attach the tubing back on to the hearing aid:
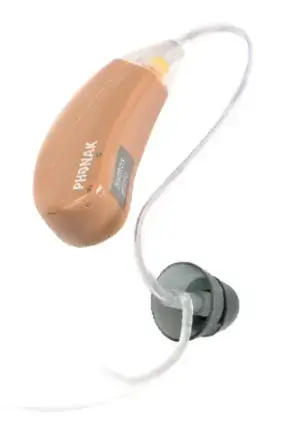
- by screwing on clockwise
- by pushing straight back on to the hearing aid.
Check that the tubing is securely attached to the aid.
Never wash this type of tubing in water to clean it, as the water will get stuck in the tubing and will block any sound getting through.
Wipe the outside of the plastic dome with a damp cloth; something like a baby wipe is ideal.
WHOSE HEARING AID IS IT?
WEARING THE WRONG HEARING AID CAN HARM!
The hearing aid case shows the manufacturer and model of the hearing aid:
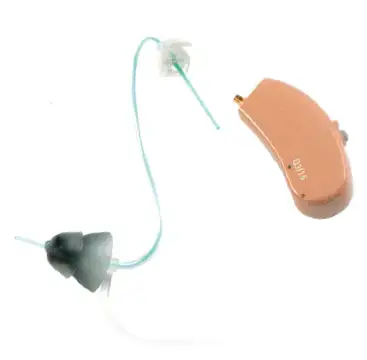
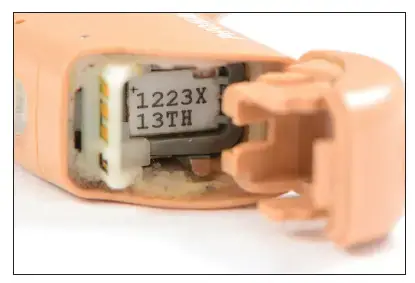
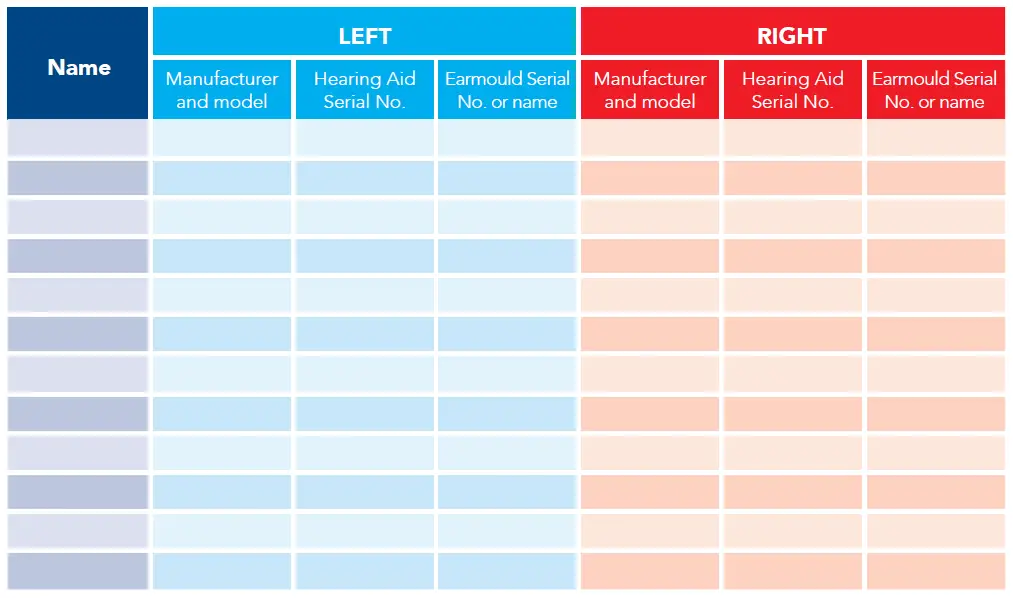
Each hearing aid should have a colour marker for left (blue) and right (red) and also has a unique Serial Number, – usually on the case or inside the battery compartment. The image below shows a Phonak aid.
Earmoulds usually also have the manufacturer’s name and a unique serial number (or the patient’s surname) written on them – usually in blue for the left ear and in red for the right ear.
IF YOU RECORD THIS INFORMATION, YOU CAN MATCH UP A LOST HEARING AID WITH ITS OWNER MUCH MORE EASILY
All hearing aids issued are NHS property and must be returned when no longer required. Please take care of your hearing aids, as lost aids may incur a charge.
Adult Audiology
The Lauriston Building Level 1, 39 Lauriston Place Edinburgh EH3 9HA
Tel: 0131 536 1637
