Runningsnail Weather Radio for Emergency AM FM Flashlight Reading Lamp
RADIO OPERATION
TURNING ON/OFF THE RADIO
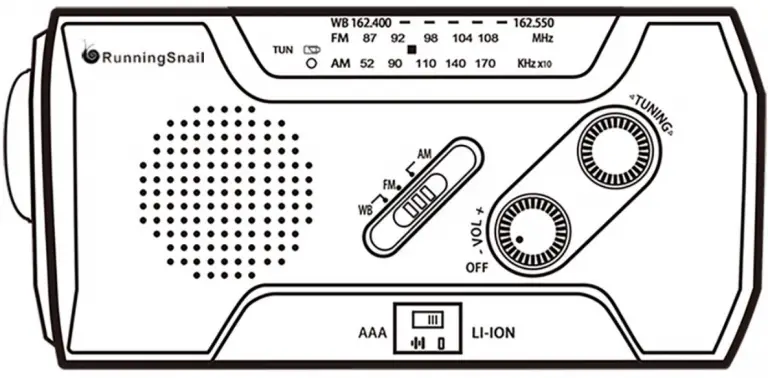
- Rotate the volume control knob to turn on the radio and adjust volume.
- Select FM / AM /WB with BAND selector. Extend the antenna to get better signal.
- Rotate the tuning knob to select channel. Green tuning indicator will turn on when a channel is properly selected.
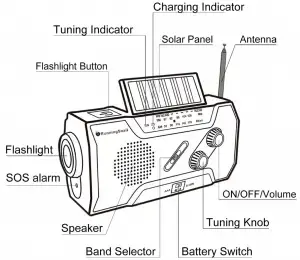
LED FLASHLIGHT: Press the flashlight button to turn the flashlight ON/OFF.
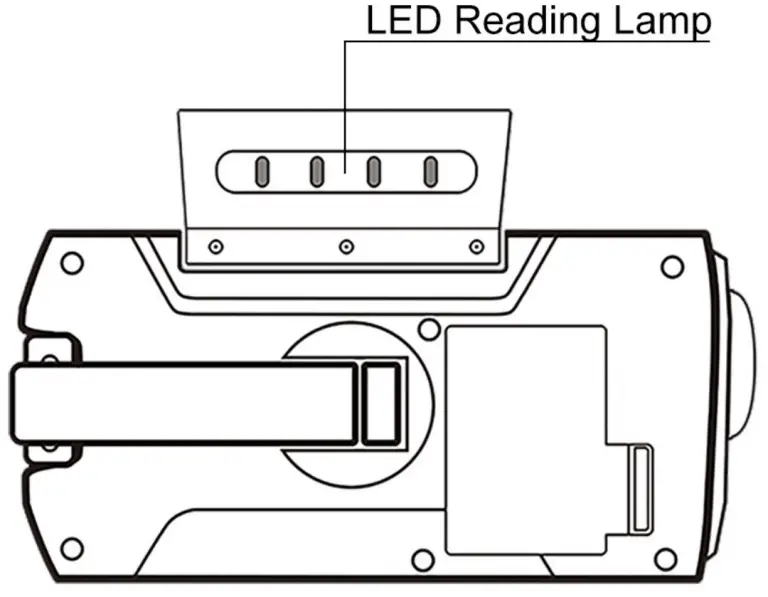
LED READING LAMP: Pull the handle (on the top)to turn on the reading lamp.
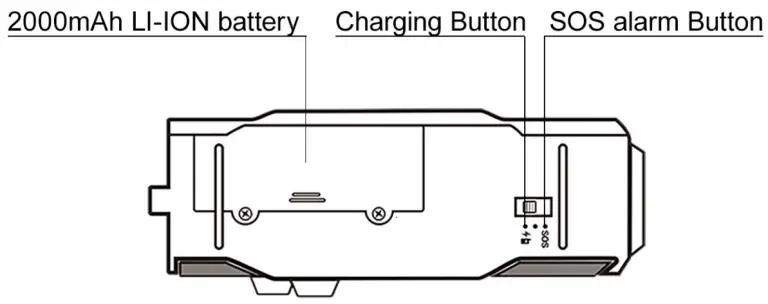
SOS ALARM: Press the SOS alarm button to turn it ON/OFF and the SOS alarm will send a warning sound.

POWER YOUR RADIO
Before you power your radio, make sure to read the SAFETY INSTRUCTIONS.
A. SOLAR POWER
- Place solar panel in direct sunlight.
- Charging indicator will turn red as the battery charges.
- It is difficult to fully charge the unit with solar panel, which is mostly used for maintaining the battery.
- Do not charge the radio in a hot area such as a car. It is also advisable to turn the radio off when charging.
- NOTE: The solar panel has a lifespan of more than 25 years when used for 6 hours per day.
B. USB PORT CHARGING
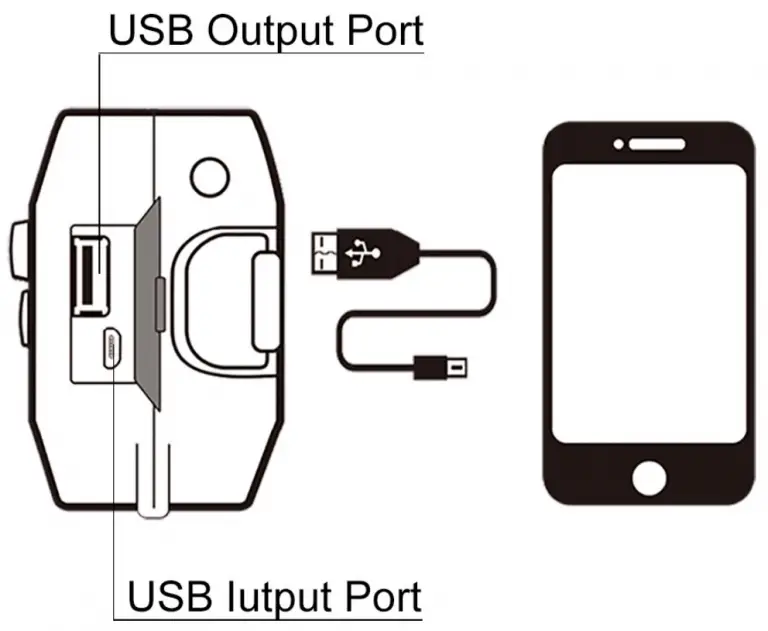
- To charge the radio, insert the supplied USB cable into the USB power source. Plus the Micro USB connector into the input port on the side of the radio.
- The charging indicator will flash red as the battery charges. It takes 4.5 hours for the internal 18650 2000mAh LI-ION battery to be fully charged.
- When completely charged, the battery will deliver 8-10 hours of radio play(depending on the sound volume) or 16-20 hours of flashlight time.
C. HAND CRANK
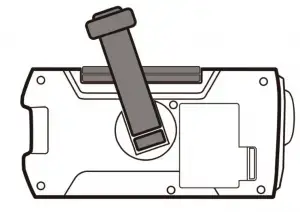
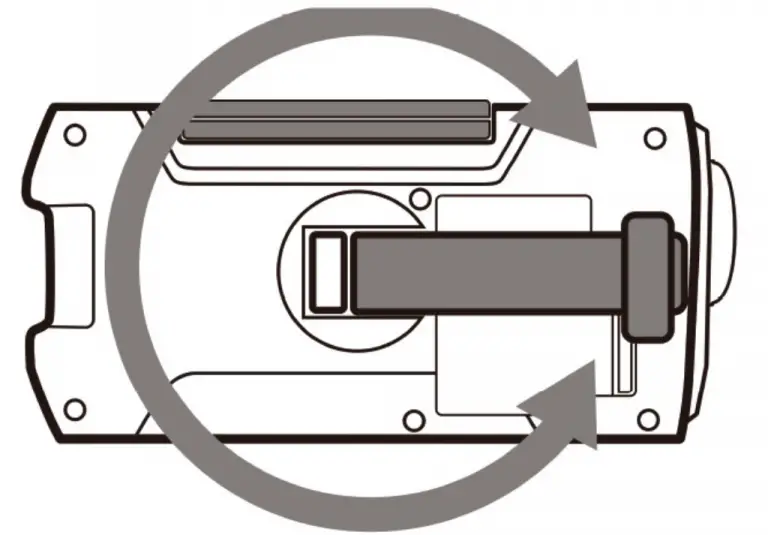
- Unfold the handle from the backside of the radio and rotate it in either direction.
- Turn the hand crank for 3-5 minutes to activate the internal battery for initial use.
- Wind the hand crank at a speed of 130-150RMP/min for power to be generated . Unit will be fully charged in 5 hours.
- One minute of winding gives 15-20 minutes of radio play (at medium volume) and 30 minutes of light.
D. AAA BATTERY
- This radio can also be used with 3 pieces of AAA batteries (not included).
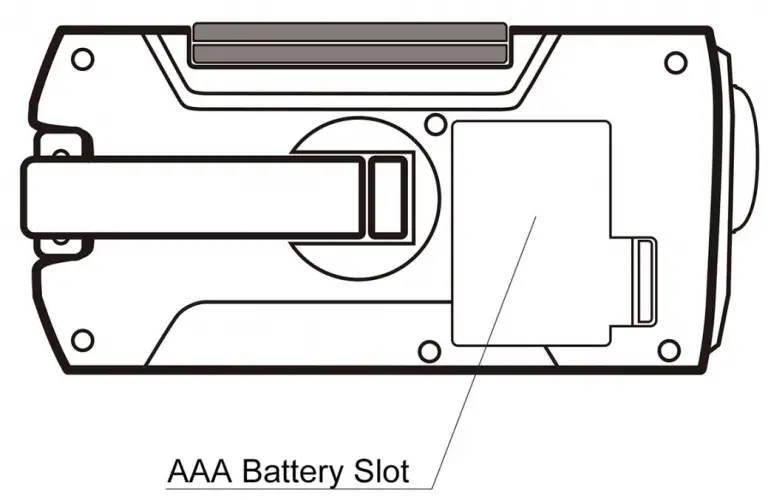
- Remove battery compartment cover (at the back), and insert 3 AAA batteries into the compartment. Ensure the negative(-) end is placed against the spring.
- Replace the battery compartment cover and push the battery switch in ‘AAA’ position to turn the radio on .
- If the batteries are not used for a long time, remove and discard them.
CHARGE EXTERNAL DEVICES
- Push the battery switch in “LI-ION” position (in the front). You can also charge USB devices by loading 3 pcs of batteries on the radio or by cranking at a speed of 130-150RMP/min.
- Insert the USB cable into the USB output port on the side of the radio and connect to the devices.
- The radio will go into charge mode and help to charge your devices.
Note:
- This feature is only for charging the USB devices during emergency. Do not use it as a normal power bank.
- The supplied charging cable is only for charging Micro USB/iPhone devices. Other USB devices should be charged using original charging cable.
SPECIFICATIONS
| Frequency range | AM 520-1710Khz FM 87-108MHz WB 162.400-162.550MHz |
| Dimensions | 188x98vx68mm/7.4×3.9×2.7in |
| Weight | 310q/0.681b |
| Product material | ABS |
| Power consumption | 3W (max) |
| Working voltage | 2.7V-4.2V |
| Output voltage/current | 5.1V/700mA |
| Water-resistant level | IPX-3 |
| LED flashlight | 1W/30LM |
| Power source | 3.7V / 2000mAh 18650 Li-ion |
SAFETY INSTRUCTIONS
- Dropping this radio can cause injury or damage. The unit will not resist strong impact or contact with corrosive liquids.
- This radio is not waterproof, just water-resistant. Keep the unit dry as moisture and liquids can damage it.
- Wind the crank for 3-5 min before use to activate and keep the internal battery healthy.
WARRANTY
- This crank radio has a full 12-month warranty against manufacturing defects.
- The warranty period begins from the date of purchase.
Please contact email: [email protected] if there is any problem with this item and we will try our best to help you out. Thanks for your support.
