
Schneider Electric Electric Drayton Wiser Radiator Thermostat

Prerequisites and accessories
- A Wiser Hub is required, either Wiser Home Touch, Wiser Heat Hub or Wiser Heat HubR. Hereafter these are referred to as Wiser Hub).
- If you have a Wiser Home Touch device, download the Wiser app to your smartphone. If you have a Wiser Heat Hub or Wiser Heat HubR, download the Wiser Heat app. You can use the app to join, set up and control Wiser devices.
Product information is available
More detailed product information is available on the Internet -> Download document http://download.schneider-electric.com/files?p_Doc_Ref=WiserHeat_SUG_EN
Getting to know the thermostat
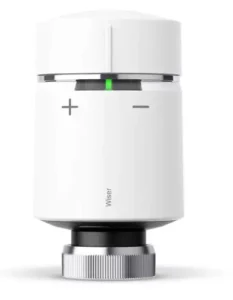
The Wiser radiator thermostat (hereinafter referred to as thermostat) uses integrated temperature sensors to control the flow of water through a radiator, thereby regulating the temperature in a room. The target temperature and switching times are set in the Wiser app or Wiser Heat app (hereafter, both apps are referred to as Wiser app).
Operating elements
- 3 status LEDs
- Twistable cap
- Ring nut (only used with M30x1.5mm valve adapter)

Commissioning the thermostat
Removing the old radiator thermostat
Open the valve of the radiator thermostat to facilitate re-moval.
Inserting/replacing batteries
When inserting batteries, ensure the correct polarity. Dispose of the batteries according to statu-tory regulations. Batteries must not be placed in normal household waste.
Do not use rechargeable batteries
Opening the valve
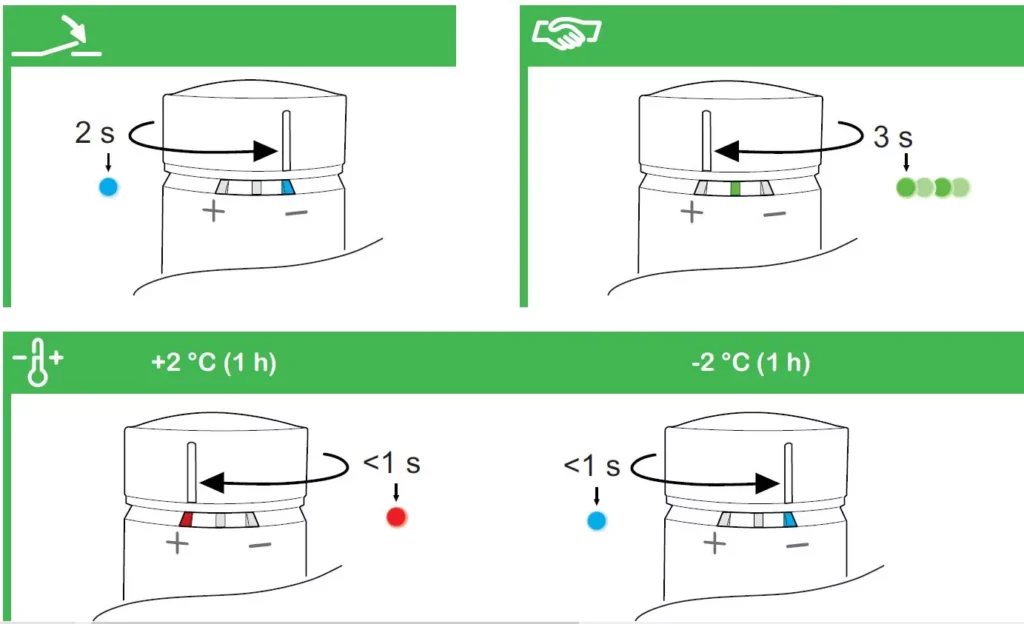
On installing the batteries, the thermostat moves to the “valve open” position. The thermostat is now ready for in-stallation. This process can be done manually:
Install the adapter and thermostat
Risk of damage
- Do not use tools, such as pliers, for installation.
- Make sure that the O-ring is seated firmly on the thread.
- Tighten the ring nut by hand only.
If the thermostat cannot be installed: see instructions under “Calibrating the thermostat”
The valve adapters supplied cover most valves. Should they not fit -> see Product information
- A: Valve adapter
- B: O-ring (pre-installed)
- C: Thermostat
- D: Ring nut
- E: Valve M30 x 1.5 mm

Installation:
1 Place the valve adapter on the valve.
2 Screw ring nut loosely onto the valve adapter.
3 Screw on thermostat and tighten by hand.
Set the LEDs in the desired direction: slightly loosen the ring nut, turn the thermostat to the desired position and tighten the ring nut again.
Danfoss RA
- F: Danfoss adapter
- G: Grub screw
- H: Thermostat
- I: O-ring (pre-installed)
- J: Danfoss valve
Installation:
- Push the Danfoss adapter over the Danfoss valve, narrow end first.
Set the LEDs in the desired direction: Make sure the hole with the grub screw faces away from you. - Tighten the grub screw with a 2 mm Allen key.
- Screw on thermostat and tighten by hand.
Calibrating the thermostat (close valve)
Start calibration following installation:
Calibration starts automatically 5 minutes after the batteries have been inserted. In this position (“valve closed”), the thermostat cannot be in-stalled.
To install the thermostat, move it to the open position:
Operating the thermostat
-> see Product information
More detailed product information is available on the internet
Behaviour of the status LEDs

Technical data
Dispose of the device separately from house-hold waste at an official collection point. Pro-fessional recycling protects people and the environment against potential negative effects
Trademarks
- Apple® and App Store®are brand names or registered trademarks of Apple Inc.
- Google Play™ Store and Android™ are brand names or registered trademarks of Google Inc.
Other brands and registered trademarks are the property of the relevant owners.
EU Declaration of conformity
Hereby, Schneider Electric Industries, declares that this product is in compliance with the essential requirements and other relevant provisions of RADIO EQUIPMENT DI-RECTIVE 2014/53/EU. Declaration of conformity can be downloaded on: schneider-electric.com/docs
Schneider Electric Industries SAS
If you have technical questions, please contact the Customer Care Centre in your country.
schneider-electric.com/contact
Schneider Electric Industries SAS
35 rue Joseph Monier
F – 92500 Rueil-Malmaison
www.se.com
