SK Pang PiCAN-M User Guide
V1.0
July 2020
Product name: PiCAN-M with NMEA 0183 and NMEA 2000 Connection
Model number: RSP-PICAN-M
Manufacturer: SK Pang Electronics Ltd
1. Introduction
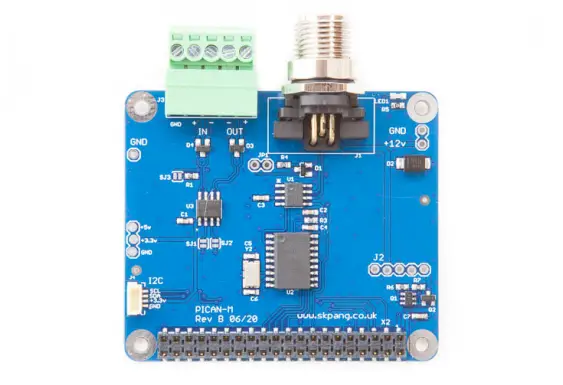
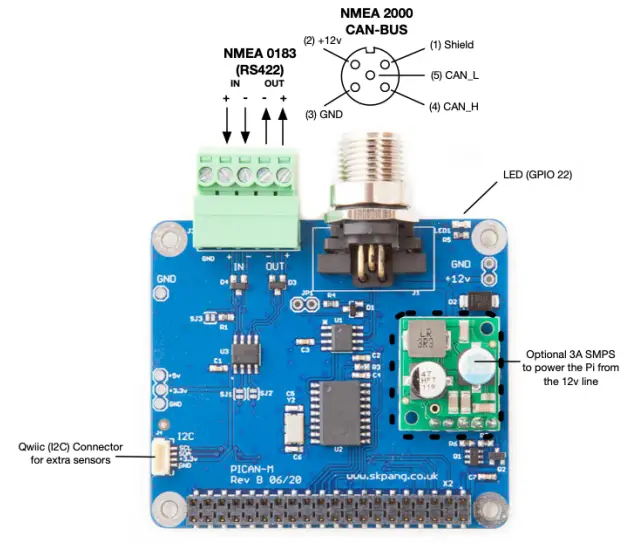
This is a PiCAN-M with NMEA 0183 and NMEA 2000 Connection. The NMEA 0183 (RS422) is via a 5 way screw terminal. The NMEA 2000 is via Micro-C connector.
Extra sensors can be connected via the Qwiic (I2C) connector.
Optional 3A SMPS. The 12v from the NMEA 2000 network can be use to power the PiCAN-M and the Raspberry Pi.
Easy to install SocketCAN driver. Programming can be done in C or Python.
1.1. Features
- CAN connection via Micro-C connector
- 120Ω terminator ready
- SocketCAN driver
- appears as can0 to application
- NMEA 0183 (RS422) via 5-way screw terminal
- appears as ttyS0 to application
- LED indicator (GPIO22)
- Qwiic (I2C) connector for extra sensors
- Optional 3A SMPS.
- Compatible with OpenCPN and Signal K
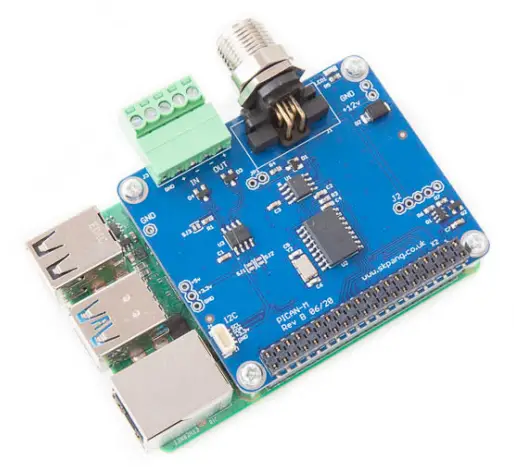
2. Hardware Installation
Before installing the board make sure the Raspberry is switched off. Carefully align the 40way connector on top of the Pi. Use spacer and screw (optional items) to secure the board.

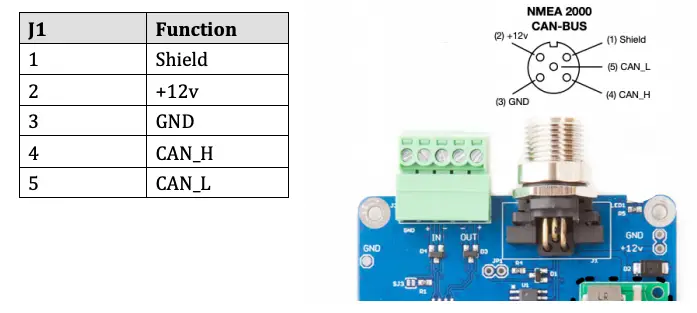
1.2. NMEA 2000 CAN-BUS Connection
The CAN-bus connections are made via J1 a 5 pin Micro-C connector.
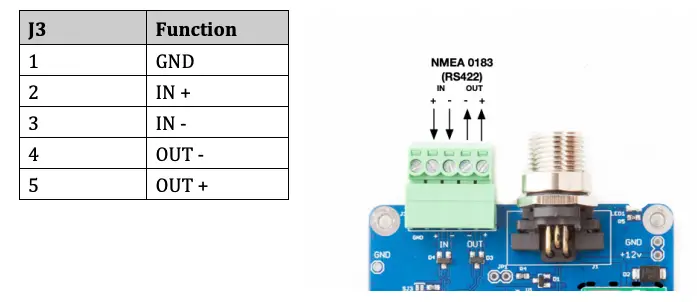
1.3. NMEA 0183 (RS422) Connection
The NNEA 0183 (RS422) connection are made via J3 a 5way screw terminal.
1.4. 120Ω Terminator
There is a 120Ω resistor fitted to the board. To use the terminator solder a 2way header pin to JP1 then insert a jumper.
1.5. LED
There is a red LED fitted to the board. This is connected to GPIO 22.
1.6. Switch Mode Power Supply (optional)
This is an optional 5v 3A module that can power the Pi. It has an input voltage range of 7v to 24v.
3. Software Installation
It is best to start with a brand new Raspbian image. Download the latest from: https://www.raspberrypi.org/downloads/raspbian/
After first time boot up, do an update and upgrade first.
sudo apt-get update
sudo apt-get upgrade
sudo reboot
Add the overlays by:
sudo nano /boot/config.txt
Add these lines to the end of file:
dtparam=i2c_arm=on
dtparam=spi=on
dtoverlay=mcp2515-can0,oscillator=16000000,interrupt=25
dtoverlay=spi-bcm2835-overlay
Reboot Pi:
sudo reboot
1.7. Installing CAN Utils
Install the CAN utils by:
sudo apt-get install can-utils
1.8. Bring Up the Interface
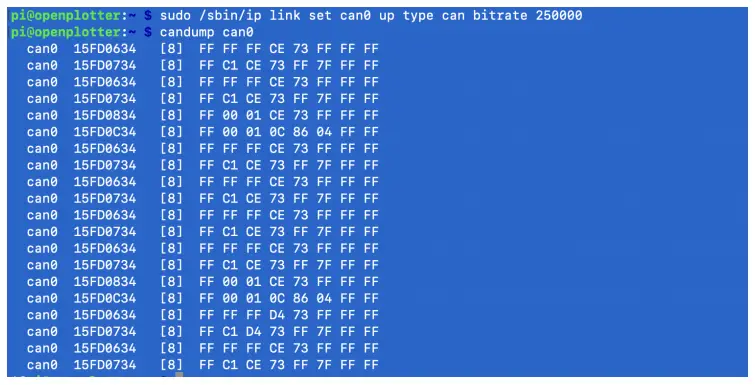
You can now bring the CAN interface up with CAN 2.0B at 250kbps:
sudo /sbin/ip link set can0 up type can bitrate 250000
Connect a NMEA 2000 device to the network and start candump.
candump can0
You should see something like this:
This capture is from a Yacht Devices Digital Thermometer NMEA 2000 YDTC-13N
4. NMEA 0183 (RS422) Installation
The NMEA 01832 (RS422) is connect to the Pi on UART port. This need to be enable first.
On the Raspberry Pi type in:
sudo raspi-config
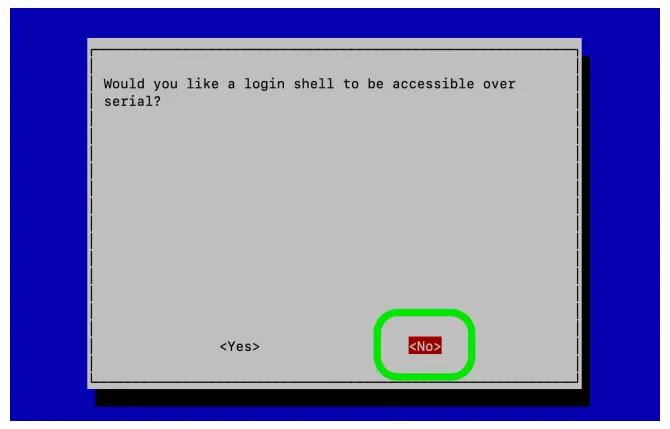
Select 5 Interfacing Options, P6 Serial
“Would you like a login shell to be accessible over serial ?” Select No.
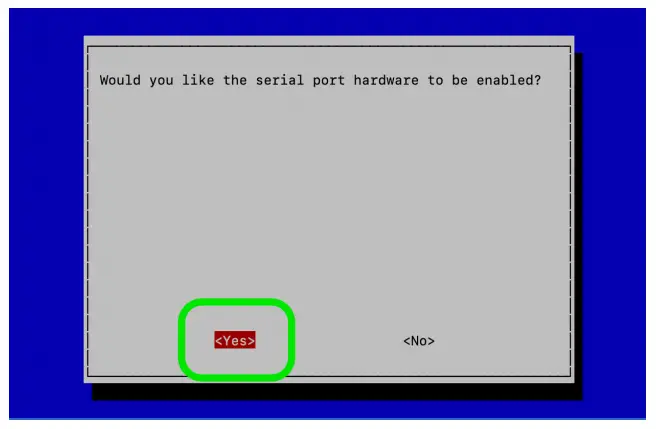
“Would you like the serial port hardware to be enabled ?” Select Yes.
Select finish and reboot the Pi.
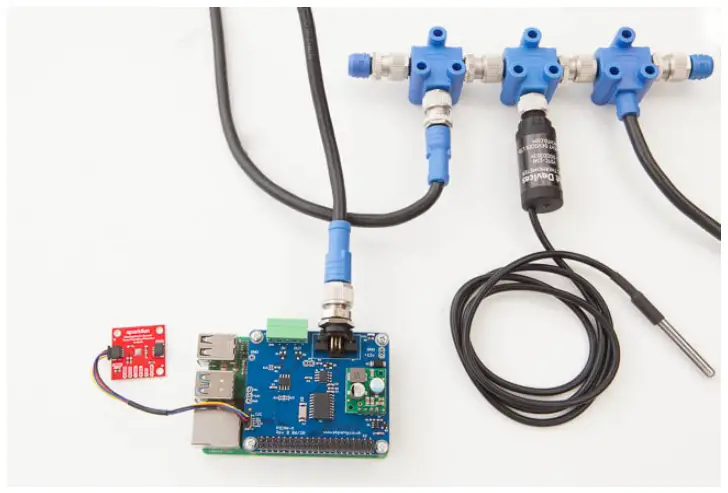
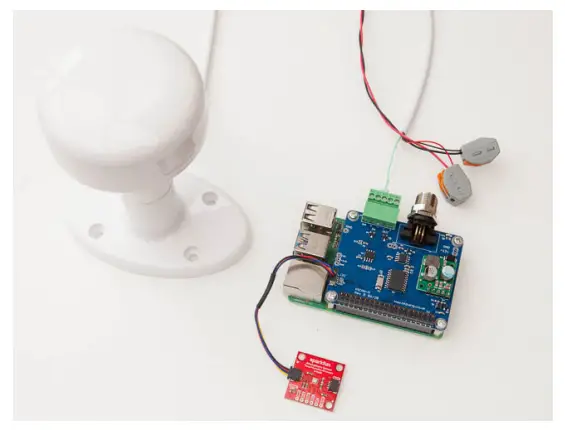
Connect a NMEA 0183 GPS device to the 5 way connect like shown below:
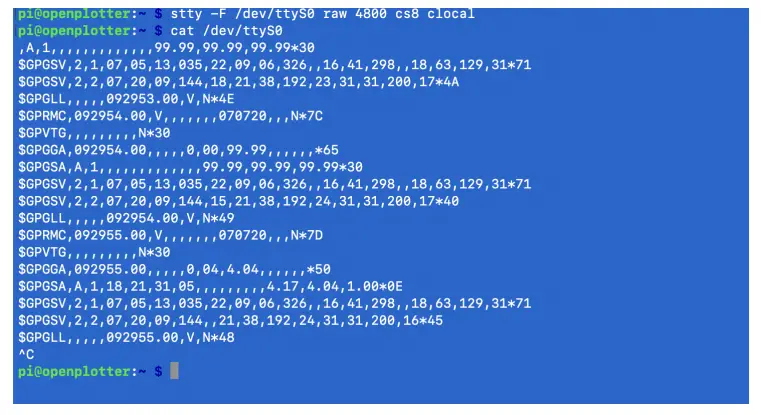
On the Pi terminal type in:
stty -F /dev/ttyS0 raw 4800 cs8 clocal
cat /dev/ttyS0
You should now see the GPS sentences:
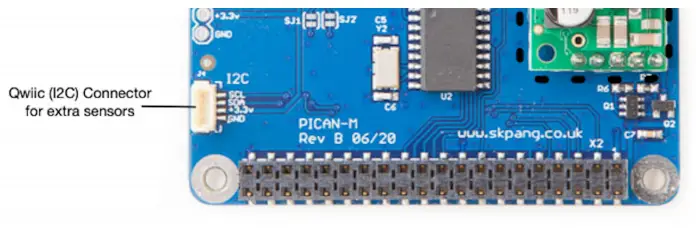
5. Qwiic (I2C) Connector J4
J4 is a Qwiic (I2C) connector. The I2C bus can be use for extra sensors.
6. Third Party Applications
There are many third party applications that can be use with the PiCAN-M board:
- OpenCPN
- Signal K
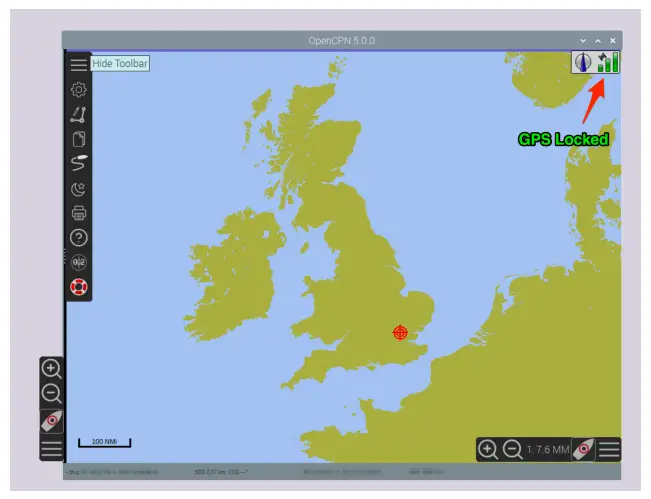
A NMEA 0183 GPS device can be use with OpenCPN. Once there is a GPS lock you can view your location on the map.
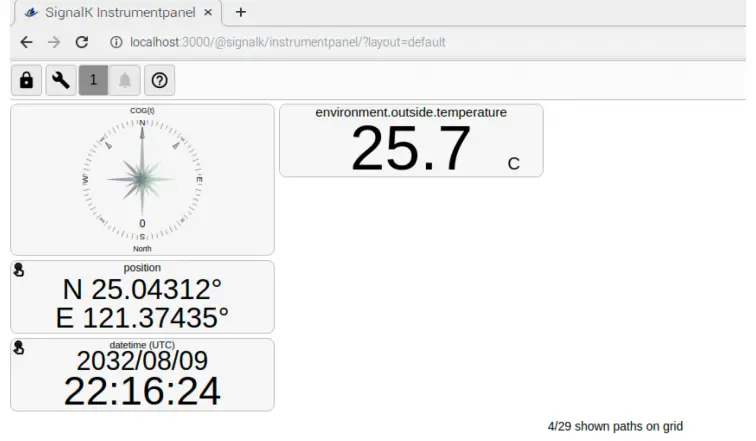
Temperature reading from a Yacht Devices Digital Thermometer NMEA 2000 YDTC13N on Signal K instrument panel.
1.9. Connecting a BME280 Sensor
The Sparkfun BME280 sensor can provide barometric pressure, humidity, and temperature to the Raspberry Pi.
The default address on the board is 0x77 but this gives a problem to Signal K application. This can be solved by changing it to 0x76. To do this cut the track on the 0x77 address solder bridge then solder the bridge for address 0x76. This will change the board address to 0x76.
In OpenPlotter software, I2C. Add the BME280 sensor.
In SignalK software you can view the BME280 readings.
For more information in the setup watch this video: https://www.youtube.com/watch?v=r8CGixMl18k&t=604s