

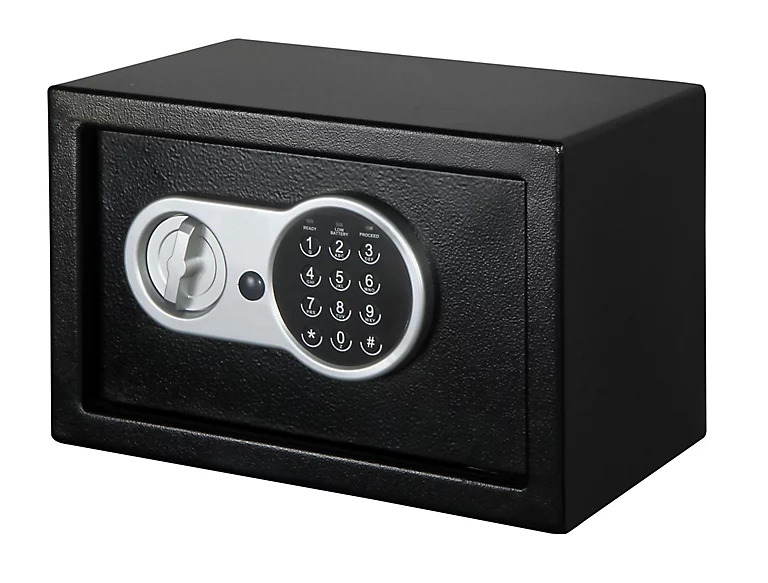
SMITH LOCKE 3663602834731 8.5L Electronic Combination Safe
This is a combined document. Please ensure that the instruction manual and safety manual are split out and printed separately, including blank pages.
PLEASE DO NOT PRINT THIS PAGE.
Safety
These instructions are for your safety. Please read through them thoroughly prior to installation and retain them for future reference.
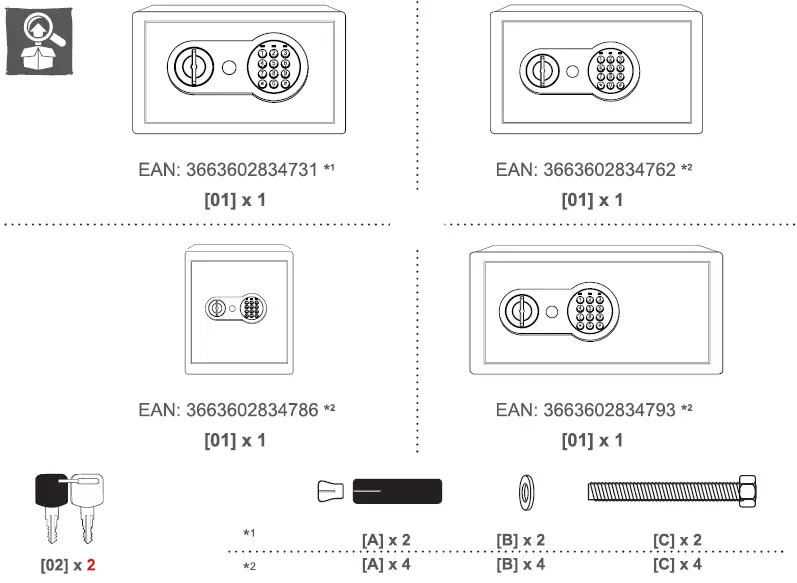
- Check the pack and make sure you have all of the parts listed.
- Remove all packaging, wrap etc. from the product.
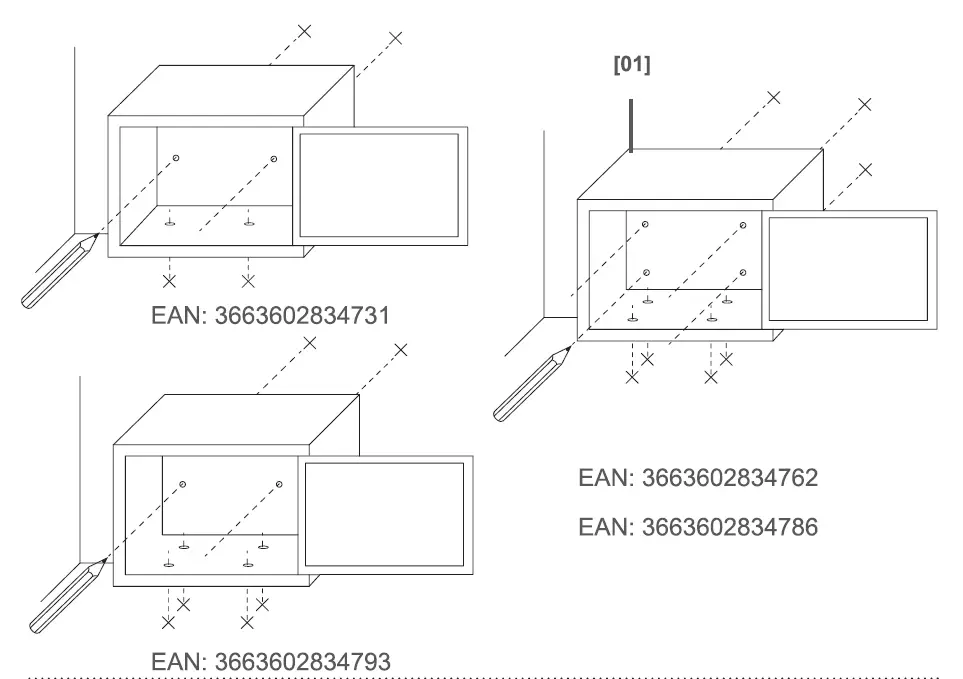
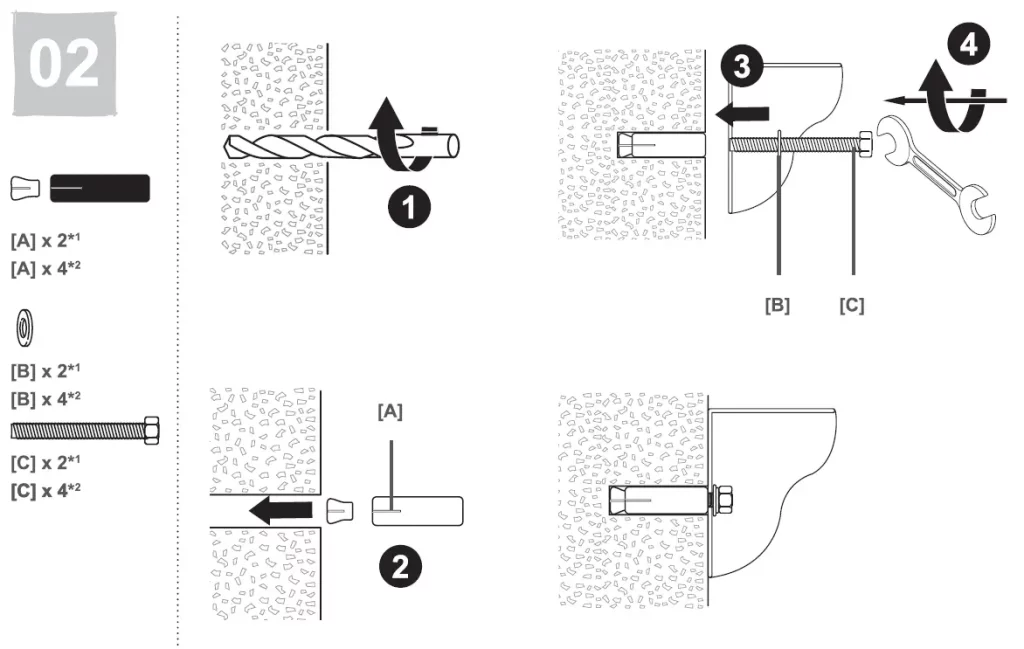
- For maximum security, this product must be securely fixed to a internal wall constructed of brick, concrete blocks or reinforced concrete using provided bolts.
- Consideration should be given to the placing of the product to ensure that it is placed in a discreet location and will not be easily found by intruders.
- Fixing to hollow partition walls is not recommended. If fixed to wood it must be to a solid wooden structure.
- This product is suitable for indoor use only and not for areas constantly subject to moisture such as bathroom.
- Take care not to drill into any pipes or mains cables beneath the surface during mounting holes preparation.
- If you have any doubt about installation / use of this product, consult qualified personnel.
- WARNING! This product is heavy. Care should be exercised during transportation and handling to ensure that no one is injured.
- Do not leave the override key in a place that is easily accessible for strangers.
- If batteries have leaked, remove them from the battery compartment with a cloth.
- Remove the batteries if you will not be using the appliance for an extended period of time.
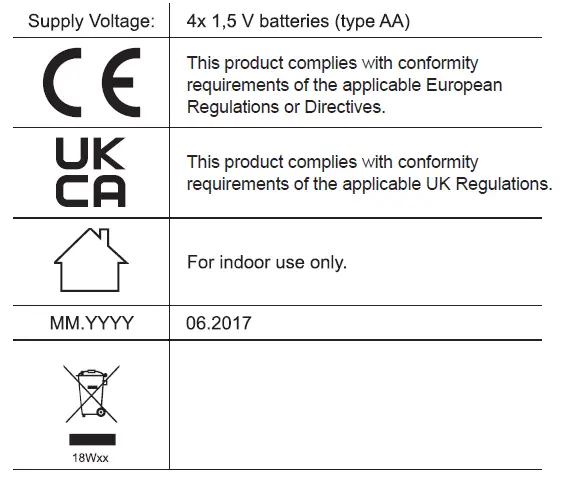
Technical Data
Warranty Period and Conditions
This product is under warranty for 2 years as from the date of purchase, for normal, non-professional household use. The warranty shall only apply upon presentation of the till receipt or the invoice. Keep your proof of purchase in a safe place.
The warranty covers product breakdowns and malfunctions under the condition that the product is used in accordance with its intended use and subject to installation and maintenance in accordance with good practice and the information contained in the user’s manual. This product must be installed so that it maybe later removed without damaging it.
This contractual warranty does not cover defects and damage caused by the natural wear of parts, bad weather, flooding, heat releases, freezing, damage caused by water quality (hardness, aggressiveness, corrosion, etc.), by the presence of foreign bodies transported by water or otherwise (sand, filings, etc.) or the lack of room ventilation, and damages that could be the consequence of improper use, misuse, negligence, accident or maintenance that is defective or does not comply with good practice or the information in the user’s manual.
The following are also excluded from the warranty: harmful consequences due to the use of accessories and/or non-original equipment manufacturer or improper replacement parts, disassembly or product modification.
The warranty is limited to those parts recognized as defective. Under no circumstances shall it cover fringe expenses (travel, labor) and direct and consequential damage.
Guarantee-related queries should be addressed to a store affiliated with the distributor you purchased the product from. This guarantee is in addition to and does not affect your statutory rights.
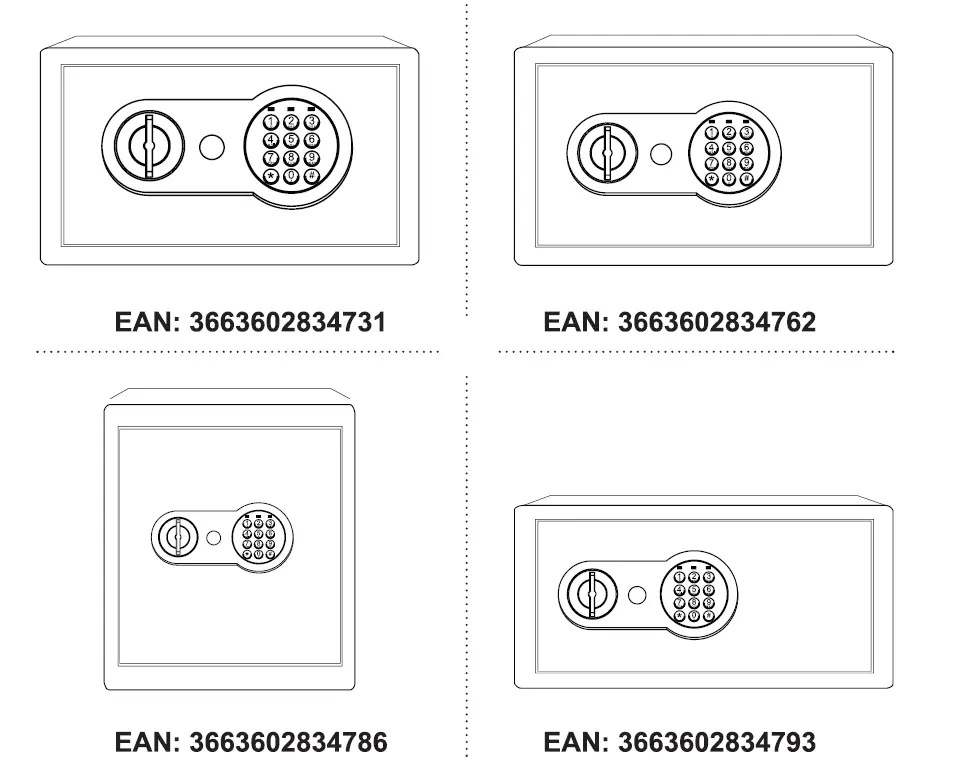
Electronic Safe Models
What’s included in the Box
Preparation
Product description
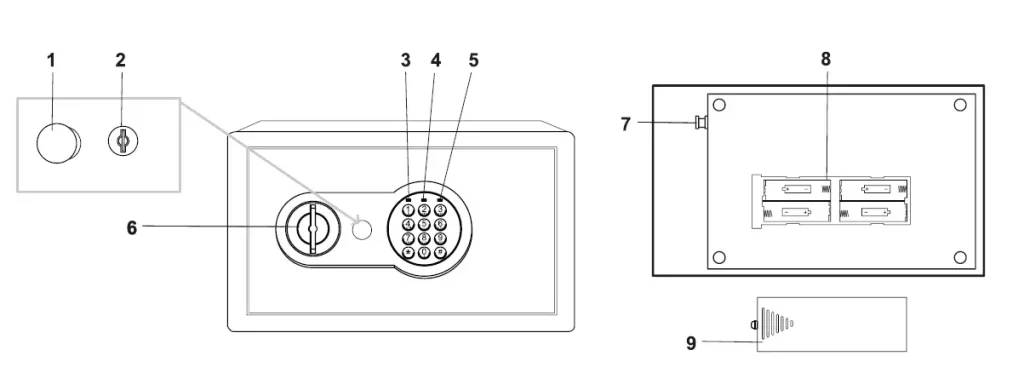
- Override lock cover
- Override lock
- Green light
- Red light
- Yellow light
- Knob
- Password reset button
- Battery compartment
- Battery compartment cover
Installation
USE
Initial Opening
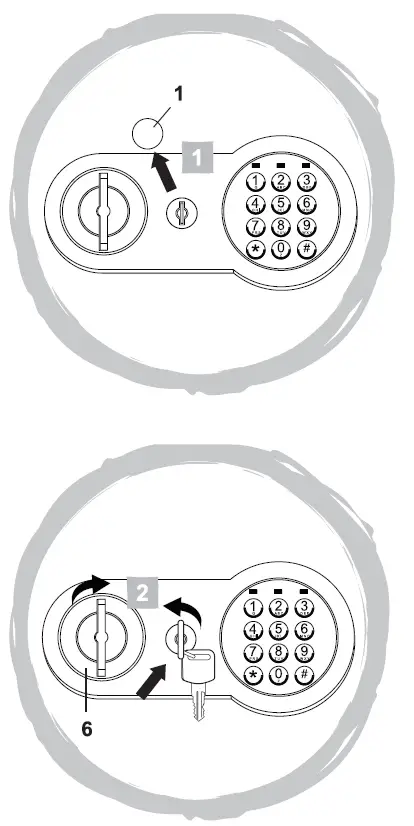
- Remove the override lock cover ( 1) located in the middle of the main control panel using a small screwdriver.
- Insert the key and tum it anti-clockwise. At the same time tum the knob (6) clockwise and open the door.
Batteries
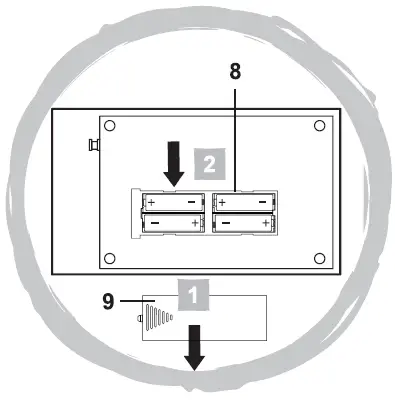
Installing batteries
- Remove the battery compartment cover (9).
- Insert 4 batteries (not included) into battery compartment (8) making sure polarity(+ and-) is correct.
Low battery warning and replacement
- If the red light (4) illuminates this indicates low battery level.
- Replace all batteries with new ones making sure polarity(+ and-) is correct.
- If the keypad does not work because the batteries are exhausted, use the override key to open the safe, and then replace all batteries.
User password
Setting and changing user password
- Press the password reset button (7). The yellow light (5) illuminates.
- Enter new password (3-8 digits) within 30 seconds, then press either “*” or “#” to confirm.
- If after entering a new password the yellow light (5) flash three times the password has not been saved and you must start the procedure again.
NOTE: After entering the correct password (3-8 digits plus “*” or “if’), if you do not open the door within 5 seconds they will re-lock.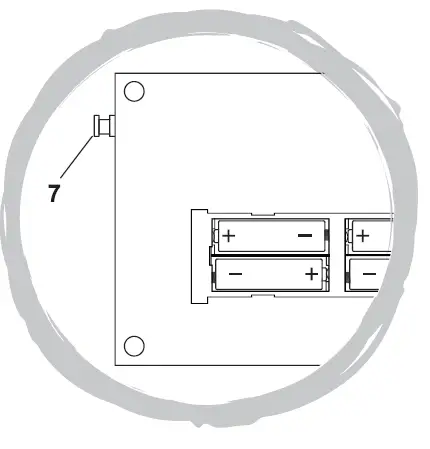
Opening the door using keypad
- Enter personal password followed by either”*” or “#” to confirm. The green light (3) illuminates.
- Turn the knob (6) clockwise on the control panel to open the door within 5 seconds or the door will re-lock.
- Place items to be stored into the safe.
- Close the door of the safe and turn the knob (6) anti-clockwise on the control panel to lock the safe.
NOTE: If the incorrect password is used 3 times the system will freeze for 20 seconds. If again the incorrect password is used 3 times the system will freeze for 5 minutes. Each time the system freezes an audible ‘beep’ will sound.
Using the override key
If you forget your password, you can use the manual override lock (2). Follow the same procedure as described in section “Initial opening”.
WARNING! Do not keep the override key in the safe itself.