![]()
INSTALLATION INSTRUCTIONS
VESSEL BATHROOM SINKS
 CAUTION:
Risk of personal injury or product damage. Handle with care.
The product can break, chip, cause injury, or product damage.
WARNING:
This product can expose you to chemicals, including lead, which is known to the state of California to cause cancer and birth defects or
other reproductive harm.
For more information go to p65warnings.ca.gov
IMPORTANT INFORMATION
- Read these instructions carefully before you begin this installation.
- Observe all applicable local plumbing and building codes.
- Soleil recommends all sinks are installed by experienced and professional installers. To ensure safety and damage-free installation, this sink should be installed by two people. Soleil reserves the right to revise the design of products without notice.
BEFORE YOU BEGIN
- Soleil recommends that all-porcelain sinks be installed by an experienced, professional installer.
- IMPORTANT: The enclosed cutout template is only for reference. It is recommended that you discuss with your installer and agree that the finished appearance is the desired effect. Soleil is not responsible for improper sink or countertop installations.
- IMPORTANT: The cabinet must be installed, secured, plumb, and level. Failure of this step can lead to product damage.
- Soleil porcelain sinks should only be fastened to a solid surface countertop (i.e. granite, Corian® or Silestone®).
- Soleil is not responsible for sink or countertop if damaged during installation. Be sure to inspect the sink for damage prior to beginning installation.
- Follow all local plumbing and building codes.
RECOMMENDED TOOLS

|
|
PORCELAIN SINK INSTALLATION INSTRUCTIONS
BEFORE INSTALLATION, PLEASE NOTE

- Some vessel sinks incorporate a water overflow hole and others DO NOT. Be sure to check your faucet pop-up drain assembly (NOT INCLUDED) before starting to make sure your drain assembly is compatible with your vessel sink.
STEP1: COUNTERTOP PREPARATION
- Unpack the new sink and check the sink.
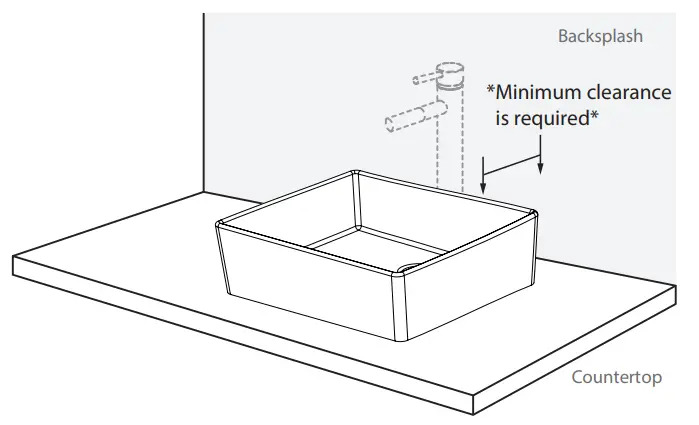
- Place the sink in the desired location on the countertop and mark the drain hole and faucet hole centerline with a pencil.
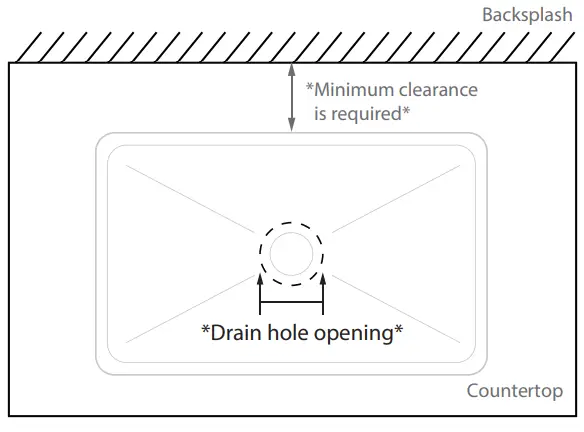
- NOTE: Minimum clearance distance is required for sink faucet.
- Let an experienced installer cut the drain hole opening in the countertop.
- NOTE: The drain hole opening should be big enough to allow the drain assembly go through for later install.


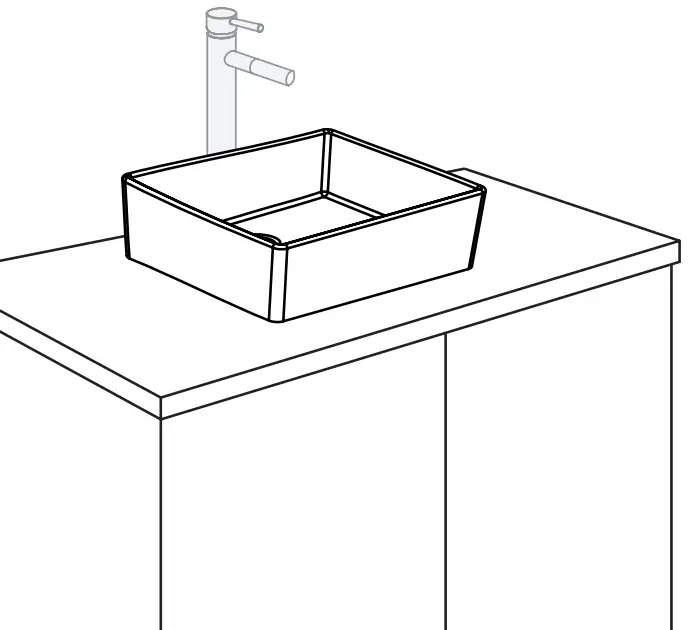
STEP2: SINK INSTALLATION
- Place the vessel sink through the opening on the countertop and check for
- level and fit. Plumber’s putty can be used to level the sink.
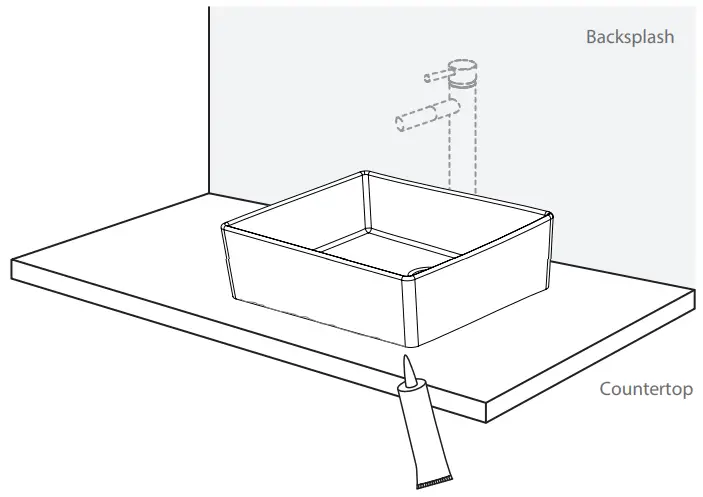
- Apply silicon sealant around the bottom rim of the sink as shown.
- Install the sink and check for alignment. Apply some caulking around the base of the sink to seal any gap between the sink and the countertop.
- Allow sealant to set for 30 – 60 minutes.
- Install the drain (not provided) according to the manufacturer’s installation instructions. Connect trap to drain. Install the waste system, faucet, and the water supply (not provided) according to the manufacturer’s installation instructions. Check for leakage.
Copyright ©2021. All rights reserved