![]()
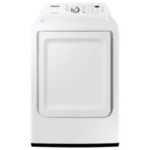
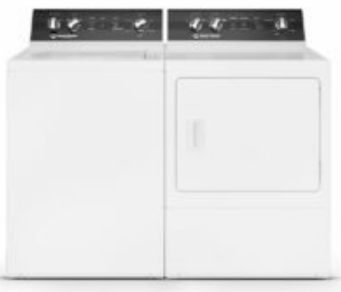
Speed Queen Washers and Dryers (WSQTL3003WN and WSQDL3003WE)

Speed Queen Washers and Dryers
Welcome
Welcome to the Speed Queen® family. Thank you for your support of our truly commercial quality products. Our washers and dryers are expertly engineered to deliver commercial performance, tested to ensure ultimate durability and built with American Pride. For more than 110 years, Speed Queen consumer laundry products have been manufactured in Ripon, Wisconsin, a place where pride of workmanship is not just alive, but thriving and embodied by each individual who designs, tests, assembles or in some way touches a Speed Queen product. A special thing happens when that pride is combined with the highest quality commercial materials and components…it leads to the ultimate reliability… reliability measured in decades, not years. That’s legendary Speed Queen Quality.
Installation

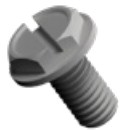
Parts included:
- Three (3) Screws (Electric Models)
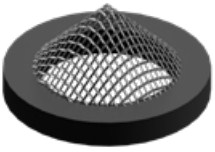
- One Filter Screen Washer (Steam Models)
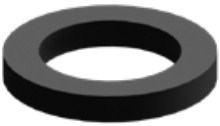
- One Plain Rubber Washer (Steam Models)
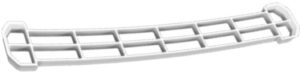
- Lint Filter Guard (Optional)


- Position and level the dryer.
- Recommended rear clearance minimum is 2 in (51 mm) for utility connections and 6 in (152 mm) when venting through rear of unit
- Steam models – connect water inlet hose, flushing lines.
- Turn off water at shut-off valve
- Disconnect cold-water inlet hose from water supply if washing machine is connected
- Insert rubber washer into Y-connector (both sold separately)
- Install Y-connector onto cold-water supply (use extension hose if Y connector cannot be installed directly on water supply)
- Insert filter screen on the faucet end of inlet hose with the screen facing the faucet and the rubber washer on the dryer end of the hose
- Connect filter screen end of the inlet hose to the Y-Connector
- Connect the rubber washer end of inlet hose to the fill valve on rear of dryer
- Connect/Reconnect washer inlet hose to the other end of Y-connector
- Check that Y-connector valves are open (if applicable)
- Turn water on and check for leaks. Wait 30 minutes and check again, some leaks are slow to show up
- Connect exhaust system.
- Dryer must be exhausted to the outdoors
- Use 4 in (102 mm) rigid duct
- Maximum straight duct length = 65 ft (19.8 m). Each elbow deduct 10 ft (3 m)
- Sufficient make-up air must be supplied. The free area of any opening for outside air must be at least 40 in2 (25806 mm2 ) per unit
- Gas models – connect gas supply pipe.
Gas service to a gas dryer must conform with the local codes and ordinances.
Refer to installation instructions, which can be found at speedqueendoc.net- Tighten all connections securely but do not overtighten to avoid breaking or bending the gas valve bracket.
Turn on gas and check all pipe connections (internal and external) for gas leaks by applying a non-corrosive leak detection fluid to the fittings. If bubbles are present then a leak is likely. Retighten connections and recheck for leaks.
- Tighten all connections securely but do not overtighten to avoid breaking or bending the gas valve bracket.
- Electric models – connect electrical cord with three-wire or four-wire plug.
Refer to installation instructions, which can be found at speedqueendoc.net - Wipe out inside of dryer.
- Plug in the dryer.
- Start dryer and check that dryer is heating
Cycle Information
The following cycle descriptions will help determine which cycle to choose depending on the type of laundry being dried. The cycle settings may be modified using the Selections and Options. Cycle availability varies by model.
Auto-Sensing
The Auto-Sensing drying cycle operation is determined by the type of cycle selected as well as the moisture sensing system, which can be set by changing the Dryness setting. Auto-Sensing cycles are Energy Saver cycles that help prevent over-drying. When a wet load is put into the dryer it takes a certain amount of time to reach the desired dryness level. The time will vary with load size, type of fabric, amount of moisture in the load, air flow and the laundry room environment.
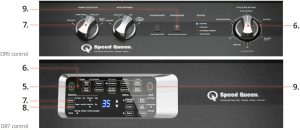
DR7: Select the Auto-Sensing cycle and Dryness setting desired. Temperature is set based on the cycle selected.
DR5: Set Cycle Selection to Auto-Sensing, the Fabric Selector to the desired cycle setting, and Auto-Dryness to the desired dryness level.
Heavy Duty
Dry heavy items such as blankets on this cycle.
Regular
Use for sturdy items like play or work clothes.
Perm Press
Use for permanent press items and synthetics.
Delicates
Dry delicate items on this cycle.
Manual
These cycles will run at the selected temperature for a set number of minutes. Select the temperature based on the fabric care label. The time may need to be adjusted up if the items are still damp or down if the items are overdry.
DR7: Time Dry & Quick Dry – cycle time can be changed using the up and down arrow keypads.
DR5: Time Dry – choose 30 min or 60 min and set the temperature using Fabric Selector knob. Auto-Dryness setting is ignored unless on Dry & Extended tumble is selected. No Heat 60 Min is a 60 minute no heat tumble where the fabric selection and Auto-Dryness setting are ignored unless set to Dry & Extended Tumble.
Sanitize
This is a 75 minute, high heat cycle that sanitizes your laundry by killing 99.9% of common household bacteria*. It is recommended for medium size loads. Not recommended for all fabric types. Be sure to follow fabric care labels and allow the cycle to complete uninterrupted.
DR7: Steam Sanitize combines the power of heat and steam to sanitize your laundry and help keep it soft and wrinkle free. Time can be extended higher than 75 minutes by using the up and down arrow keypads.
DR5: Sanitize with high heat. Set Cycle Selection to Sanitize. Fabric Selector is ignored and will run at high heat. Auto-Dryness is ignored unless set to Dry & Extended Tumble.
Steam Refresh:
The Steam Refresh cycle releases wrinkles and refreshes items. It is recommended for small loads of 1-4 items. There are two preset cycles.
The default cycle applies a medium-temperature heat for 30 minutes to the load. The alternate cycle applies a high-temperature heat for 20 minutes.
DR7: By default the cycle is set to 30 minutes at medium heat. To initiate the 20 minute, high heat cycle, toggle the Temp selection to High.
DR5: Set the Cycle Selection to Steam Refresh. Setting the Fabric Selector to Delicate, Perm Press or Regular initiates the 30 min, medium heat cycle. If the Fabric Selector is set to Heavy Duty, the 20 min, high heat cycle is initiated. Auto Dryness is ignored unless set to Dry & Extended Tumble.
Pet Plus (DR7 only):
The Pet Items cycle dries and refreshes bulky pet items. The default cycle is a 55-minute, high-temperature heat cycle with Anti-Static and Steam Boost on. This cycle can be fully customized to the pet item being dried. Temperature, Time, and Options can be adjusted as needed.
You can save these cycles using the Favorites option to quickly use again.
The Pet Hair Remover cycle is used to remove pet hair from dry items. It is a set 10-minute cycle and can be used stand-alone, or as prewash cycle before putting items in the washer. Anti-Static is on by default but can be turned off.
ENERGY STAR® cycle:
The DR5 and DR7 dryers are ENERGY STAR® certified. To take advantage of these energy saving options use the following cycle selections:
DR7: Regular, Near Dry, EcoDry
DR5: Auto-Sensing, Regular, Near Dry
Options:
Options vary based on the model and may not be available with all cycle selections.
Steam Boost: Use to release wrinkles and soften fabrics. Available with Auto-Sensing Heavy Duty, Regular, and Perm Press cycles as well as Pet Items (DR7 Medium or High heat only) and Sanitize (DR5 only). Dryness/Auto-Dryness must be set to Near Dry or Dry. Cannot be used with EcoDry.
Extended Tumble: Prevents wrinkling by tumbling the clothes load after the end of the cycle every two minutes for up to 60 minutes.
Anti-Static (DR7 only): Use to reduce static build-up. It can be added to Heavy Duty, Regular, Perm Press, Delicates, Pet Items, and Pet Hair Remover cycles. Dryness must be set to Near Dry or Dry on Auto-Sensing cycles. Cannot be used with EcoDry.
EcoDry (DR7 only): The EcoDry option will reduce total energy consumption by decreasing the temperature of the cycle setting by 10% after the initial temperature setting has been reached.
Operating
- Prepare laundry
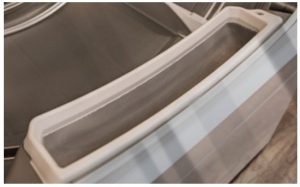
- Clean lint filter by wiping lint out of screen area
(if using lint filter guard, remove first)
- Load dryer half full with laundry
- Close door

- Turn on dryer by pressing power/ cancel
(Electronic control only) - Set cycle
- Set temperature or fabric selector
- Set dryness level
(Electronic control only) - Press start button to start
- Remove laundry from dryer once cycle has ended


Register
- Register your product at www.speedqueen.com to take full advantage of the limited warranty.

Note: This unit includes a limited warranty. Refer to Speedqueendoc.net to download the full warranty bond. - Download full documentation and view installation and operating videos for an immersive experience at Speedqueendoc.net or scan the QR code below.
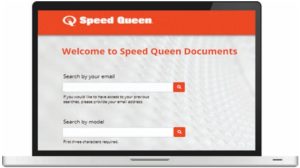

- If you wish to receive printed documents at no cost, please complete the order form online at speedqueen.com/request-printed-documents, or email your request to .


Order Form for Printed Documentation
- Please send me a printed Installation Manual, User’s Guide, and Warranty Bond.
- I understand this card does not register my product. I must go to www.speedqueen.com to register.
Model No.______________________________________________________
Serial No._______________________________________________________
Name_________________________________________________________
Address_____________________________________ City _______________
State______________ Zip Code ______________ Phone No. _________________ Email Address Allow 1-2 weeks for delivery._________________________________________________________
BUSINESS REPLY MAIL
RST CLASS MAIL PERMIT NO. 489 RIPON,WI
POSTAGE WILL BE PAID BY ADDRESSEE
SPEED QUEEN
TECHNICAL DOCUMENTATION
SHEPARD STREET
P O BOX 990
RIPON WI 54971-9967
Part No. D518183R2
February 2021
© Published by permission of the copyright owner – DO NOT COPY or TRANSMIT
Speed Queen by Alliance Laundry Systems

DOWNLOAD RESOURCES
- Speed Queen Speed Queen Washers and Dryers [pdf] User Guide Speed Queen, Washers, Dryers, DR5, DR7
- Read more: https://manuals.plus/speed-queen/speed-queen-washers-and-dryers-manual#ixzz7dDROQ4AT
FAQ’S
Is Whirlpool and Speed Queen the same?
You may even have a Whirlpool home appliance in your home, whether it’s a microwave, dishwasher, or oven. One of the main differences between Whirlpool and Speed Queen is Speed Queen is 100% committed to laundry equipment development and manufacturing industry while Whirlpool is not.
Why is my dryer taking longer to dry?
Check to see if the lint filter is clean. Check to see if the vent is blocked. Check to see if the vent hose is kinked. Check to see if the vent hose is not connected properly.
Why does my dryer make a loud noise?
If your dryer makes a loud noise, check to make sure that there are no kinks in the vent hose. Make sure that the vent hose is not rubbing against other items in your laundry room. Make sure that the vent hose is not touching the wall or floor, or anything else in your laundry room.
Why does my dryer take excessively long to dry?
Check to see if the lint filter is clean. Check to see if you have too many items in your load. Try removing some of your clothes and/or towels from your load. If you still have problems, you may need a larger capacity washer and/or dryer.
Why does my clothes smell like mildew when I remove them from the dryer?
Mildew can be caused by a number of factors including but not limited to: high humidity, a dirty lint filter, or leaving wet clothes in an area where there is no air circulation (such as a damp basement). Try cleaning your lint filter more often and make sure that you are using your dryer within its recommended capacity limits (see user manual). If this problem persists, please contact Speed Queen Customer Service at 1-800-543-8921 for further assistance.
Can I use Tide Pods in Speed Queen?
Yes, you can use all types of HE detergents. Though when using pods on a front load washer we suggest you place the pod in the tub rather than using the detergent dispenser.
Are Speed Queen washers loud?
43 decibels equates to the noise level of a library, a bird call or the agitation of a Speed Queen top load washer. Our top load washing machine is so quiet, you may question whether or not it’s working until you hear the water swooshing back and forth.
Does Speed Queen washer have a filter?
The filter screen is located in the water inlet valve of the speed queen washer. A water inlet valve is also known as a fill hose or an inlet hose. These filter screens prevent debris and other unwanted particles from entering the washer through the water supply.
Can I use vinegar in my Speed Queen washer?
For a front load machine, use 2 cups vinegar and ½ cup baking soda or the recommended washing machine cleaner tablets, such as Affresh tablets. For a top load, set the machine at its hottest and largest setting. When it is filled up with water, add the vinegar and baking soda, and then let it run the whole cycle.
What is the difference between Speed Queen TR5 and TR7?
The TR5 has the same dimensions and drum size as the TR7, but the its display panel is even more basic. Rather than a digital display that lets you know how much time is left on your wash cycle, the TR5 has three knobs for selecting the wash cycle you want, the size of your laundry load and the water temperature.
How long do Speed Queen washers take?
Whatever kind of laundry you have, Speed Queen guarantees a perfect wash. Save time: Speed Queen machines wash your laundry in about 30 minutes and dry in record time. Wash and dry in less than one hour.
How do lincrease the water level on my Speed Queen washer?
So let’s go to somewhere in between small medium okay so the water level didn’t change so what we’re gonna do is we’re gonna reset.