SYKIK® Rider SRTP300 Instruction Manual
Wireless tire pressure and temperature monitoring system

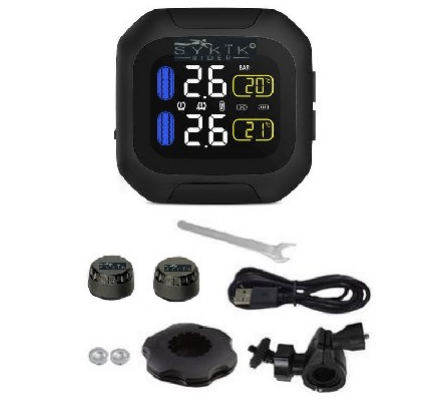
What is in the box
In the box you will find the following:
Waterproof main unit with multi-color display
Set of tire sensors
Set of luck-nuts
Luck-nut tool
Handlebar mount
USB charging cord
Battery changing tool
Instruction manual
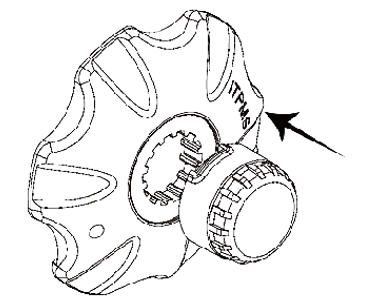
Installation of external sensor
- Screw on the luck-nut to the metal tire stem.
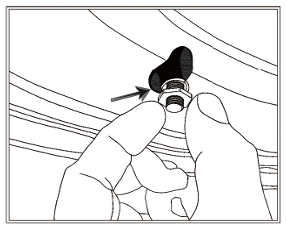
- Place the sensor on the stem and tighten it.
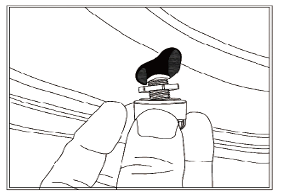
- Tighten the lock-nut counter clockwise, to hold the sensor
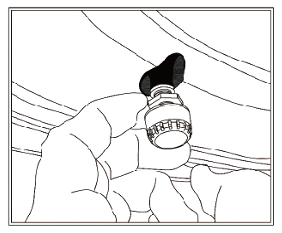
- Using the provided luck-nut tool, tighten the luck-nut counter clockwise


Turning the unit on or off:
Press and hold “<” for 3s to 6s to turn the monitor on or off.
Display icons:
![]()
![]()
Function
Default settings
High pressure 44 PSI (3.0 Bar)
Low pressure 29 PSI (2.0 BAR) 65℃
High temperature 149℉ (65℃)
High Pressure Alert:
When the pressure of any tire is higher than the pre-defined value (44 PSI), the high pressure icon will flash with an audible alarm.

Low Pressure Alert:
When the pressure of any tire is lower than the pre-defined value (29 PSI), the low pressure icon will flash with an audible alarm.
High Temperature Alert:
When the temperature of any tire is higher than the pre-defined value (149℉), the high temperature icon will flash with an audible alarm.

Fast Leakage Alert:
When front sensor detects tire leak, low pressure value and leak icon will flash with an audible alarm.

Sensor Low Battery Alert:
When the sensor battery is low, the low battery icon of corresponding tire will flash with an audible alarm.

Parameter setting
- Maximum pressure alarm value can be set as high as 87PSI (6 BAR).
- Maximum pressure range can be displayed 99 PSI (up to 8 BAR).
High Pressure Setting:
- Press and hold SET button to enter settings.
- Press < to choose “high pressure HI” as below,
- Press SET button to setup high pressure alarm value.
- Press< to adjust the value desired
- Press SET to save.
- Press and hold SET button about 3s to save and exit to standby.

Low Pressure Setting:
- Press and hold SET button to setup
- Press < to choose “low pressure LO” as below,
- Press SET button to setup low pressure alarm value.
- Press < to adjust the value desired
- Press SET to save.
- Press and hold SET button about 3s to save and exit..

High Temperature Setting:
- Press and hold SET button to setup page
- Press < to choose “high temperature HI” as below
- Press SET button to setup high temperature alarm.
- Press < to adjust the value desired
- Press SET to exit. Finally press and hold SET button about 3s to save and exit to standby.

Pairing Sensors:
- Press SET button five times continuously to enter pairing mode, as bellow
- Press < to choose the tire you wish to pair. Pairing tire will start to flash
- For External sensors: Tighten the sensor For Internal sensors : Inflate the tire
- The monitor will look for the sensor and displays the pressure and temperature.
- press and hold SET about 3s to save and exit to standby.

Pressure Unit Setting:
- Press and hold SET button to enter set up.
- Press < to choose “BAR PSI” as below
- Press SET to setup pressure unit.
- Press < to choose the pressure unit you desire
- Press SET to saves.
- Press and hold SET button about 3s to save and exit.

Temperature Unit Setting:
- Press and hold SET button to enter set up.
- Press < to choose “℃℉”as below,
- Press SET to setup temperature unit.
- Press < to choose the temperature unit you wish.
- Press SET to exit setup .
- Press and hold SET button for 3s to save and exit.

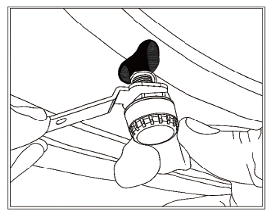
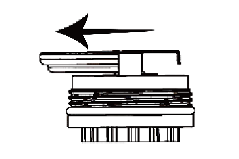
Replace battery of external sensor
Caution: Sensor battery has been installed before delivery. Please do not disassemble unless the battery has to be replaced.
- Remove the safety gasket.
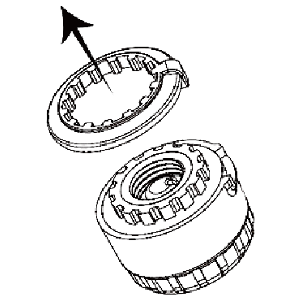
- Place the sensor into the battery changing tool.
- Use battery changing tool to unscrew the sensor case.

- Remove the battery and replace with a fresh battery.
- Use the battery changing tool to close the sensor
- Replace the safety gasket.


