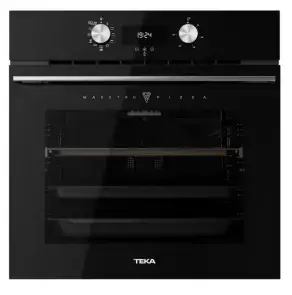
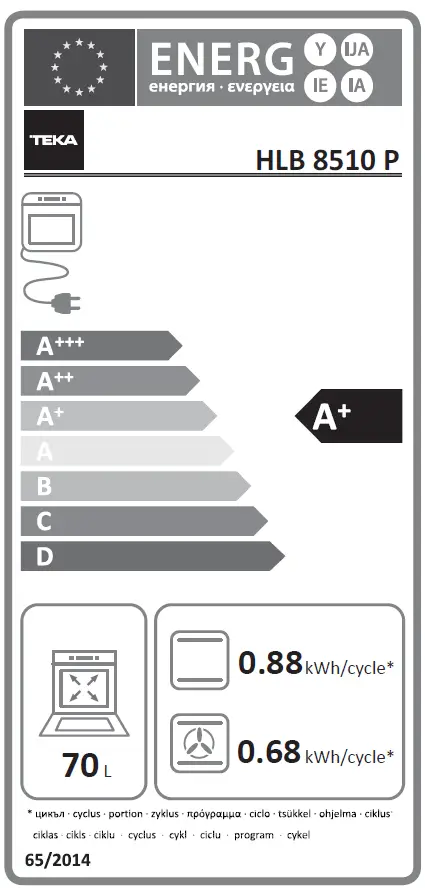
TEKA HLB 8510 P Pyrolytic Oven
Description of the oven
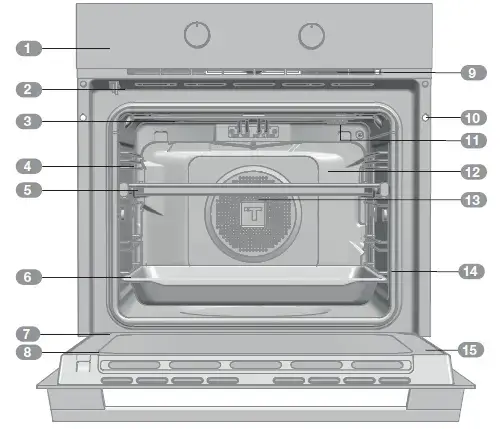
- Front control panel
- Door lock
- Grill heating element
- Tray support
- Pizza stone and oven grid
- Tray
- Hinge
- Inner glass
- Air cooling outlet
- Unit mounting
- Lamp
- Rear Panel
- Fan
- Oven door seal
- Door
Front control panel

- Function control dial
- Electronic clock/timer
- Temperature control dial
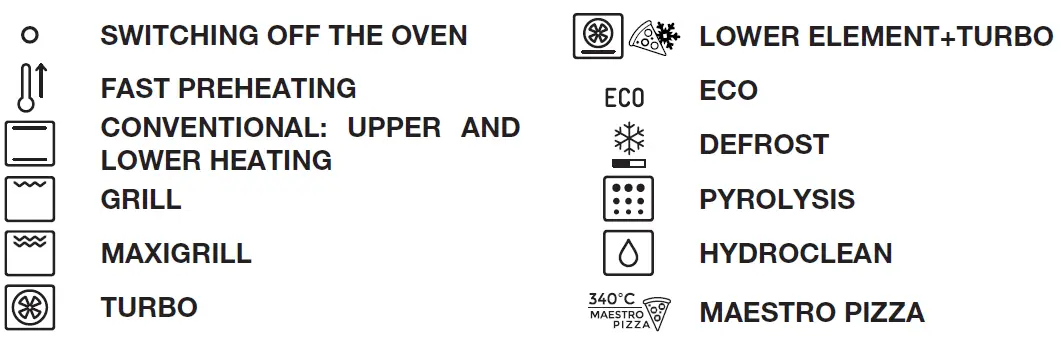
Function control dial symbols
Models HLB 8510 P

Oven functions
INFORMATION
For a description of how to use each of the functions, please see the cooking guide provided with the oven.
Introducing the MAESTRO PIZZA
Your new MAESTRO PIZZA oven will revolutionize homemade pizza making, thanks to the exclusive special heating process at high temperature.
The special heating function combined with the pizza stone also supplied, will allow you to prepare delicious pizzas in just a few minutes, using fresh homemade pizza dough, just like in the best Pizzerias.
The oven is electric and operates at very high temperatures (340 ºC). The special design of the structure and the reinforced insulation prevent the intense heat from the inside of the oven from being transferred to the outside, allowing you to cook at home in complete safety and comfort.
In addition to cooking pizzas made using perfect fresh dough, with your MAESTRO PIZZA oven it is possible to cook all sorts of conventional pizzas, including precooked, ready-made dough,frozen pizzas, etc.
The MAESTRO PIZZA is a state-of-the-art multi-function oven which can also be used to prepare traditional meals as in a traditional oven.
Lastly, cleaning becomes a fast, simple and comfortable task, without the need for chemical products or effort. Select the appropriate pyrolysis cycle depending on how dirty the oven is.
When the cycle has finished, just wipe the surfaces with a damp cloth to remove any traces of ash (see cleaning function).
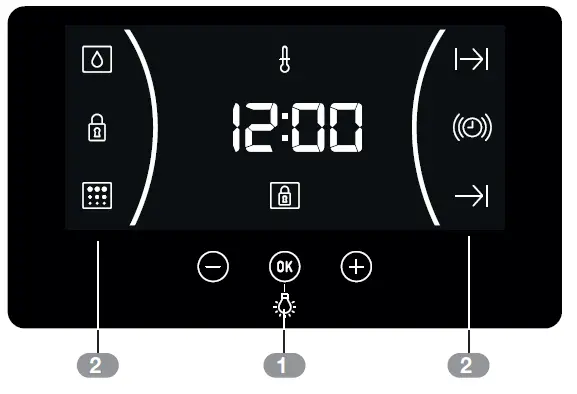
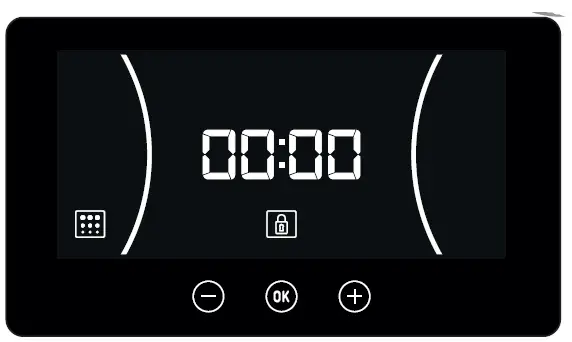
Description of the electronic clock/timer

- KEYS
Permits the programming of the functions of the electronic clock/timer - SYMBOLS
Clock Functions
BUZZER: Lights up on selecting the buzzer function of the clock. Generates an acoustic signal when the time is up. The ovendoes not turn off at the end of the timer period.
This function can also be used while the oven is in use. and PROGRAMMING: Lights up to indicate that the oven is programmed (cooking time, stop time or total).- Cooking Time: This function allows you to programme the cooking time, after which the oven will turn off automatically.
- Cooking Stop Time: This function allows you to programme the cooking stop time, after which the oven will turn off automatically.
- and Cooking Time and Cooking Stop Time: This setting allows you to programme the cooking time and cooking stop time. The oven switches on automatically at the set time and operates for the selected cooking time (Cooking Time). It then switches off automatically at the indicated time (Cooking Stop Time).
CLOCK/TIMER LOCK: Indicates that the touch keys for the clock/timer are locked, preventing modifications by small children.
Other functions
HEATING: Indicates that the oven is transmitting heat to the food.
HYDRO CLEAN: Lights up while the Teka
Hydroclean® function is in progress.
PYROLYSIS: Only for pyrolytic models.
Lights up while the Pyrolytic function is in progress.
DOOR LOCK: Only for pyrolytic models.
Indicates that the door is locked, either manually or automatically while the pyrolytic function is in progress.
WARNING
The sensitivity of the touch keys adapts continually to environmental conditions.
Make sure the surface of the front control panel is clean and free of obstacles when plugging in the oven.
If the clock does not respond correctly when you touch the keys, unplug the oven for a few seconds and then plug it in again.
In this way, sensors adjust automatically so that they will react once more to fingertip control.
SETTING THE TIME
- To set the oven time, the controls on the function and temperature control dials must be turned to position .
- On plugging in the oven, the time 12:00 flashes on the clock.
- Press or to adjust the hours and then the minutes. Two beeps, one after the other, confirm the selected time.
- To change the time, press or until the time starts flashing. Press and follow the instructions in the previous point.
NOTE
The clock light has a night mode so the display light will dim between 00:00 and 6:00 hours.
WARNING
In the event of a power failure, your electronic clock/timer settings will be erased.
If this occurs, turn the function and temperature control dials to position .
The time 12:00 is displayed, and you will then be able to set the time as described above.
If the oven door was locked before the power cut, the locked symbol will be lit up until the door is unlocked.
This may take several minutes, depending on the temperature inside the oven, and during this time you cannot reset the time.
Once the door has been unlocked, you will be able to set the time as described above.
Using your oven
MANUAL OPERATION
- After setting the clock, the oven is ready for use. Select a cooking function and temperature.
INFORMATION
In models with an electronic temperature control, when the selector switch is turned, the clock display will show the temperature.
After selecting the temperature, the clock display will automatically reappear.
To display the temperature during the cooking process, turn the temperature control dial to change the temperature. - You will notice that symbol lights up during cooking to indicate that heat is being transmitted to the food. This symbol disappears when the selected temperature has been reached.
- Set the controls to to turn off the oven.
INFORMATION
When you start cooking, your oven will show the time the oven has been cooking.
OVEN TIMER FUNCTION
- Press or until symbol flashes on the screen and press . The time 00:00 is displayed on the screen.
- Select the time after which you want thealarm to sound by pressing or . You will hear 2 beeps to confirm that the time has been set and the clock will start counting down from the selected time. Symbol flashes slowly.
- Once the time has expired, an acoustic signal will sound for 90 seconds and symbol will flash quickly.
NOTE
With the Buzzer function, the oven will not turn off when the time expires. - Push any key to stop the alarm. Symbol will then disappear.
If you wish to modify the time on the buzzer, repeat the steps shown. Upon entering the timer control, the time currently remaining will appear, which you will be able to adjust.
NOTE
With the Buzzer function, the remaining time will show permanently on the display. With this programmed function, it is not possible to view the time or the total programmed cooking time.
Programming Cooking Time
- Press or until symbol flashes on the screen and press . The time 00:00 is displayed on the screen.
- Select the time after which you want the alarm to sound by pressing or . You will hear 2 beeps to confirm that the time has been set and the clock will start counting
down from the selected time. Symbol flashes slowly. - Select a function and a cooking temperature using the oven commands.
- Once the cooking time is up, the oven will turn off, an alarm will sound and symbol will flash quickly.
- Press any key to stop the alarm and turn off symbol . The oven will switch on again.
- Set the controls to position to turn off the oven.
You can change the remaining cooking time at any time by pressing or until symbol starts to flash quickly. Now press to change the time.
NOTE
With the Cooking Time function, the remaining time will be permanently displayed on the screen. You cannot see the current time on the display when this function is set.
Programming the Cooking Stop Time
- Press or until symbol flashes on the screen and press . You will see the current time on the timer display.
- Select the time after which you want the alarm to sound by pressing or . You will hear 2 beeps to confirm that the time has been set and the clock will start counting down from the selected time. Symbol flashes slowly.
- Select a cooking function and temperature.
- When the cycle is finished, the oven will turn itself off, a buzzer will sound and symbol will flash quickly.
- Press any sensor to stop the alarm and to turn off symbol . The oven will switch on again.
- Set the controls to position to turn off the oven.
You can change the remaining cooking time at any time by pressing o until symbol starts to flash quickly. Now press to change the time.
Programming Cooking Time and Cooking Stop Time
- Press or until symbol flashes on the screen and press . The time 00:00 is displayed on the screen.
- Select the cooking time, by pressing or . Next, two beeps are heard, the remaining time appears on the display and symbol flashes slowly.
- Press or until symbol flashes on the screen and press . You will see the expected completion time on the timer display.
- Select the cooking end time by pressing or . Next, a double beep is heard and the current time is displayed on the screen.
- Select a cooking function and temperature.
The oven will remain disconnected with symbols and lit up. The oven is now programmed. - When it is time to start cooking, the oven will turn on and will operate for the programmed cooking time.
- While cooking, the remaining cooking time is displayed and symbol flashes slowly.
- When the set cooking time has ended, the oven will turn off, a buzzer will sound, and symbol will flash quickly.
- Press any sensor to stop the alarm and to turn off symbol . The oven will switch on again.
- Set the controls to to turn off the oven.
You can change the remaining cooking time at any time by pressing or until symbol starts to flash quickly. Now press to change the time.
Cooking with MAESTRO PIZZA
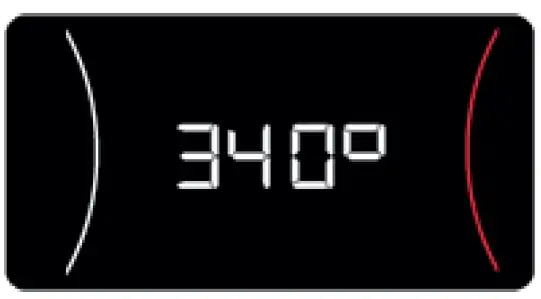
To use your MAESTRO PIZZA , first preheat the oven to the ideal cooking conditions (340 ºC).
To do so:
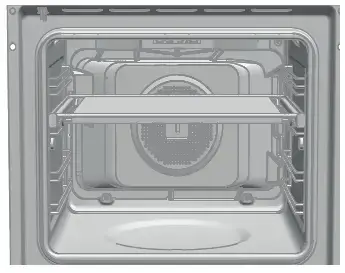
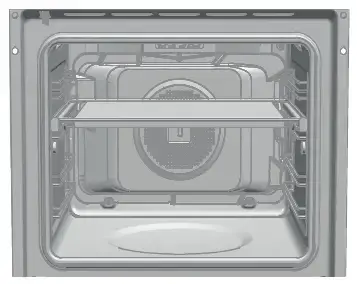
- Place the oven grid on the telescopic rails fitted inside your oven.
- Next, place the pizza stone on the oven grid.
- Remove the enameled tray supplied with the oven and close the door.
WARNING
Remember that it is very important during the preheating to ensure that the pizza stone has been placed inside the oven. This is to guarantee that the pizza stone reaches the correct temperature and the optimum cooking results are obtained. - Turn the cooking control dial to MAESTRO PIZZA .
- The value 340º is displayed on the clock screen.
- When the OK sensor on the glass of the front control panel is pressed, a buzzer confirms the operation and the oven starts to preheat until reaching the optimum working temperature.
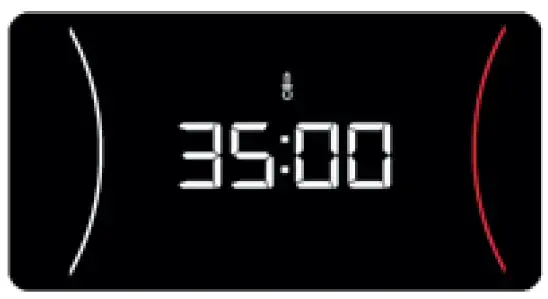
- The preheating lasts 35 minutes. The time remaining for the preheating operation is displayed on the clock.
 WARNINGRemember that you need 35 minutes to preheat the oven before starting to cook the pizzas.
 - At the end of the 35 minute period, the oven emits a buzzing sound and 340º flashes on the clock display.
- Touch the OK sensor to switch off the buzzer.
- Open the door and insert the pizza in the oven using the pizza peel.
- On closing the door, the oven cooking time is displayed in the clock display.
- Leave the pizza to cook for the time required (see table with cooking times for each pizza type).
WARNING
Do not open the door unnecessarily while cooking your pizzas to prevent heat losses.
If the door is opened and closed, the cooking time displayed in the clock display returns to 00:00. - When you have finished cooking your pizzas, turn the control dial to 0 to switch off the oven.
WARNING
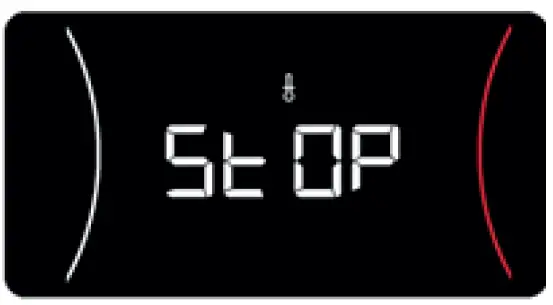
Remember you have 90 minutes to cook your pizzas. After this period, the oven will switch off for safety reasons and the message “STOP” is displayed.
The message STOP in the clock display willonly disappear when the oven has cooled.
 CAUTION
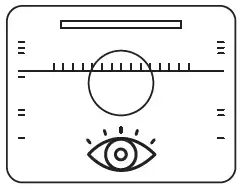
The cooking process is very fast when you use the MAESTRO PIZZA function. Therefore we recommend you monitor the progress and cooking time at all times to guarantee the best results. If you do not monitor the oven, your pizza may dry out or burn.
HOW TO USE THE PIZZA STONE
For the best results when cooking with your pizza stone supplied with the oven, the pizza stone must first be preheated with the oven empty.
This will ensure that the perfect temperature is reached for cooking your pizzas.
Place the pizza stone on the grid supported on the telescopic rails supplied with the oven. This will help you to insert and remove the stone.
COOKING FROZEN PIZZAS
This type of pizza requires different cooking con-ditions. Proceed as follows:
- Do not use the pizza stone.
- Turn the cooking control dial to
- Turn the temperature control dial until the clock displays 200 ºC or the temperature recommended by the pizza supplier.
- Preheat the oven until the required temperature is reached. When this temperature is reached, the thermostat symbol switch-es off.
- Place the pizza on the oven grid.
- Cook the pizza for 10-12 minutes (or the time recommended by the pizza supplier).
LIGHTING INSIDE YOUR PIZZA MASTER OVEN
The lights inside the oven are normally switched off during the cooking process, regardless of the function selected.
If you need to switch on the interior lighting while cooking:
- Touch the OK sensor on the front control panel and the interior light will come on.
- If the OK sensor is touched again, the interior light switches off.
- After 30 seconds, the light will switch off automatically.
- When the oven door is opened, the interior light will come on.
INFORMATION
During the MAESTRO PIZZA preheating function, the lamp remains off and the OK sensor is disabled.
PIZZA COOKING TABLE – TYPES OF PIZZA
You can cook the following types of pizza with your MAESTRO PIZZA oven, using this cooking table:
In short, for the best results:
- Fresh dough and thin-base rolled dough pizzas using the MAESTRO PIZZA function
- Frozen and precooked pizzas with the function
WARNING
- For optimum results when cooking pizzas with fresh dough, roll out the dough as much as possible. If the dough is not correctly rolled out, the results will be uneven.
- When cooking fresh dough pizzas, use the pizza stone at the height shown in the figure.

Safety functions
CHILD SAFETY LOCK
This function can be selected at any time while using the oven.
To activate the function, press and hold until you hear one beep and symbol is displayed on the screen. The clock/timer is locked.
If the oven is off and you activate the child safety function, the oven will not work even if a cooking function is selected.
If this function is activated while you are cook-ing, it will only lock the electronic clock/timer settings.
To activate the function, press and hold until you hear one beep.
MANUAL DOOR LOCK
Available in pyrolytic models only.
This function allows the oven door to be locked.
IMPORTANT
This function can only be selected when the oven control dial is in the rest position . Once the door is locked, you can start cook-ing normally.This function can only be selected when the oven control dial is in the rest position . Once the door is locked, you can start cook-ing normally.
To activate/deactivate the door lock, proceed as follows:
- Press or until symbol flashes on the screen. The current state of the door lock is displayed. “On” if the lock is active and “Off” if it is deactivated.
- Press . A beep is heard and the lock starts to close if it was «Off» and to open if it was «On».
WARNING
Before turning on the lock, check that the oven door is correctly closed. If the door is not correctly closed, it will not lock and an alarm is heard. if this happens, switch off the alarm by pressing any key on the clock, close the door correctly and activate the lock again, following the instructions above. - Once the door has been completely locked/ unlocked, the new state of the door is dis-played on the screen. If the lock is on, sym-bol remains lit on the screen.
IMPORTANT
To unlock the door while cooking, turn the control dial to rest and unlock the door following the instructions above. When the door is unlocked, turn the control dial to the previous position to continue cooking.
Teka Hydroclean® function
This function is used to clean the grease and dirt on the walls of the oven. To make it easier to clean the oven, do not allow dirt to build up. Clean the oven often.
PROGRAM THE TEKA HYDROCLEAN® FUNCTION
WARNING
Do not pour water inside the hot oven. This could damage the enamel on the oven.
Always run the cycle when the oven is cold. If the oven is too hot, the results may be affected and the enamel damaged.
First remove the trays and all the accessories from inside the oven, including the supports for the trays or telescopic guides. Follow the in-structions given in the Installation and Mainte-nance Manual provided with your oven.
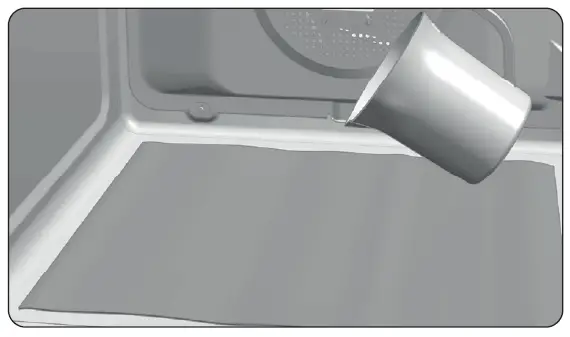
- When the oven is cold, wipe the base of the oven with a cloth.
- Slowly pour 200 ml of water inside the oven chamber.
INFORMATION
For the best results, add a teaspoon of mild washing-up liquid in the water chamber before pouring it over the cloth. - Turn the control dial to
- A beep is heard to confirm that the Teka Hydroclean® function has started, symbol
flashes slowly and the time remaining to the end of the cycle is displayed on the screen.
IMPORTANT
The duration of this function cannot be changed. To end the cycle early, turn the control dial to . - At the end of the cycle, the oven switches off, a beep is heard and symbol flashes quickly.
IMPORTANT
Do not open the oven door un-til the end of the Hydroclean® function. The cooling phase is essential for the correct operation of the function. - Touch any key to stop the beeping and switch off the symbol.
- Turn the control dial to position.
- The oven is ready to remove any remaining dirt and water with the cloth.
The Hydroclean® function runs at low temperature. However, the cooling times may vary depending on the ambient temperature.
WARNING
Before touching the interior surface of the oven, make sure that it has cooled.
If, after running the Hydroclean® function, a more thorough clean is required, use neutral detergents and non-abrasive sponges.
Pyrolysis self-cleaning function
WARNING
Before running the pyrolysis cleaning cycle, please read the safety instructions given at the start of the Installation and Maintenance manual closely.
This function allows you to run a pyrolysis clean-ing cycle during which, due to the high temperatures reached inside the oven, the accumulated grease is carbonized.
As a general rule, a pyrolysis cycle should be run every 4-5 cooking cycles, using the most suitable program for the amount of dirt in the oven. The more dirt, the longer the program.
During the pyrolysis cycle, the light inside the oven remains off.
PROGRAM THE PYROLYSIS FUNCTION
IMPORTANT
Before starting the pyrolysis function, you must remove all the accessories and dishes from the oven, including the supports of the tray and/or telescopic guides. Follow the instructions given in the Installation and Main-tenance Manual provided with your oven.
WARNING
- Remove any spills or excess dirt from the inside of the oven, as these could catch fire during the pyrolysis function with the consequent risks.
- Before starting the pyrolysis check that the oven door is correctly closed.
- Turn the cooking control dial to Pyrolysis:
- After a few seconds, symbol lights up on the clock display and indication P2 is read (pyrolysis program 2).
- Now you can change the pyrolysis program to P1, P2, P3 using keys or :
P1: Mild pyrolysis. One hour.
P2: Normal pyrolysis. One and a half hours. P3: Intensive pyrolysis. Two hours. - After selecting the required program, press . Immediately afterwards, the automatic door lock is activated.
WARNING
If the door is not correctly closed, it will not lock, an alarm is heard and the pyrolysis will not start.
If this happens, switch off the alarm by pressing any key on the clock, close the door correctly, turn the control dial to and select the pyrolysis program again, following the instructions above. - When the door is locked, symbol lights up on the clock display and the time remaining until the end of the pyrolysis function is displayed.
IMPORTANT
At this point, the oven is programmed and runs the pyrolysis cleaning cycle. While this cycle is running, it is not possible to select any of the oven clock functions, except the child safety function.
Do not try to open the oven door as this may interrupt the cleaning process. - When the pyrolysis cleaning ends, a beep is heard, symbol flashes and 0:00 is displayed on the clock.
- Press any key on the clock to stop the beeping.
- Turn the control dial to position
- The oven heating process has ended.
However, the oven is too hot and cannot be used.
The cooling function will continue and the symbol remains lit until the oven has cooled.
IMPORTANT
Due to the high temperatures inside the oven, the cooling times may vary depending on the ambient temperature. - When the oven has cooled, symbol switches off.
- Open the oven door and wipe the inside with a cloth, removing the ashes produced during the cleaning cycle. Use a non-metal scourer to clean parts of the oven interior that are not easily accessible.
- When the inside of the oven is clean, do not forget to replace the supports and accessories.
- The oven is ready to start cooking again.
IMPORTANT
If you encounter any problems with the programming and use of this function, please see the Installation and Maintenance guide included with your oven.
CANCELLATION OF THE PYROLYSIS FUNCTION
The pyrolysis function is automatic and as such it can only be activated using the clock programming function. To cancel an ongoing pyrolysis cycle, it is necessary to de-program the oven, as follows:
- Set the control dial to position .
The following is displayed on the clock:
- Depending on the temperature inside the oven, there are two possible situations:
a) Hazardous interior temperature: In this case, the door remains locked until the temperature reaches a safe value.
b) Safe interior temperature: If the temper-ature inside the oven is safe, the door will unlock immediately. - Once the door has unlocked and can be opened, the time is once again displayed on the clock.
Tips for optimum cleaning of the Pizza stone.
To clean the Pizza Stone, wipe with a damp cloth or sponge and do not use soap or deter-gent.
HAZARD
Never wet the stone under the tap with water as in this case it will absorb too much water and the stone may break when it is heated inside the oven.
WARNING
Remember to always dry the stone before placing it in the oven.
If the stone has traces of solid food attached to it, use a plastic spatula to remove it.
HAZARD
Never use metal spatulas or sharp knives as this may damage the surface of the stone or break the stone.
Remember that after the pizza stone has been used, it will not look the same as before the first time.
Cleaning the Pizza Stone will give you the following benefits:
- Prevent the appearance of ash and carbonized remains on the food.
- Extend the life of the pizza stone.
- Help to obtain better cooking results.
IMPORTANT

teka.com
Cod.3371219-00