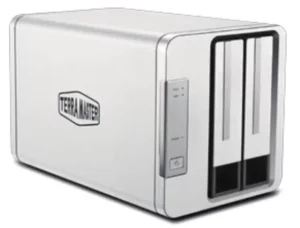

TerraMaster RAID Storage
Model: D2-310
User Manual
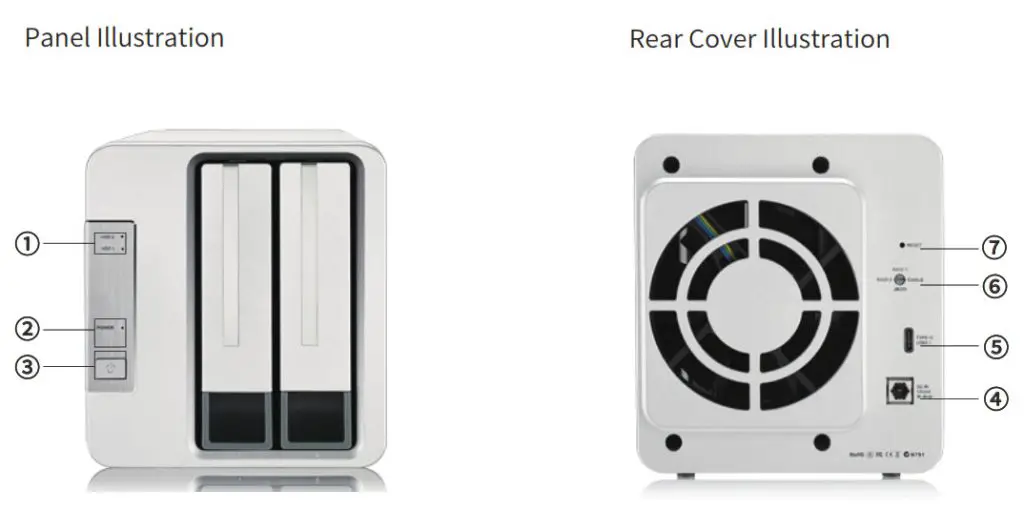
| NO. | Item | Description |
| (1) (HDD1/HDD2) |
Hard Drive Indicators 1 & 2 | Off: Hard drive not detected or hard drive in sleep mode Green: Hard drive is ready Flashing Green: Reading/writing Flashing Red: Hard drive fault or array damage ” Note: During the process of data recovery on RAID 1 mode, one hard drive indicator flashes green while the other flashes yellow. |
| (2) | Power Indicator | On: Powered On Off: Powered Off |
| (3) | Power Button | Short press to power on; long press (for 3 seconds) to power off |
| No. | Item | Description |
| (4) | Power Jack | DC 12V power input Warning: Only use the power adapter originally supplied with your device. Use of any other adapter may result in damage. |
| (5) | USB Type-C Interface | Data transmission interface |
| (6) | Rotary Switch | Used to switch RAID modes. After switching the array mode, you need to press the reset button to make the newly set array mode take effect. |
| (7) | Reset | Reset the device to match its current hardware settings |
Hard Drive Installation
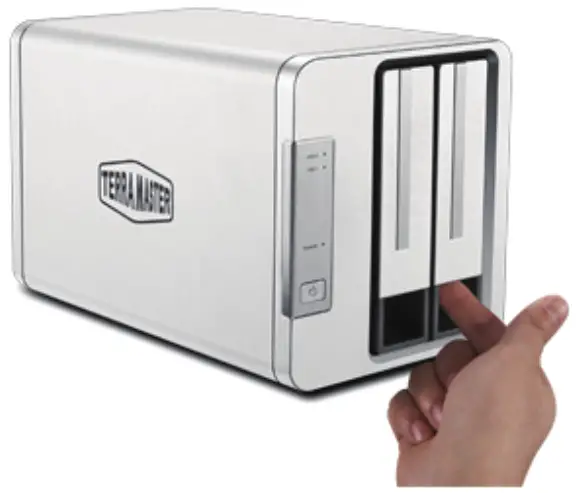
1. Pull the handle out of the hard drive tray, grasp it, and draw the hard drive tray from the device. Fix the hard drive and the tray in place using the screws provided, and insert the tray into the device along the track. When inserting the tray, open the handle and keep the handle in this position. Otherwise, the tray may not be inserted into the device correctly.
2. Once the tray is fully inserted, close the handle. Hard drive installation is now complete. To install additional hard drives, repeat steps 1 and 2.
Warning!
Please take extra care to complete the hard drive installed correctly.
Step 1
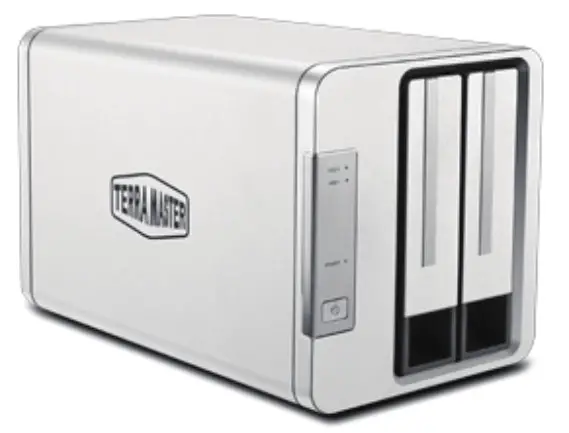
Push the lower part of the hard drive tray to insert the hard drive fully.
Step 2
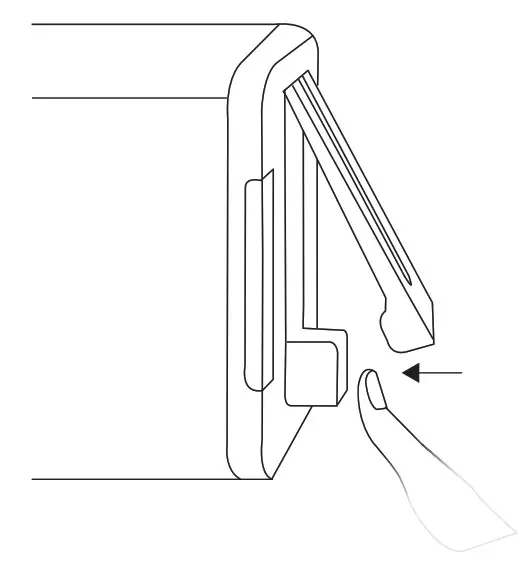
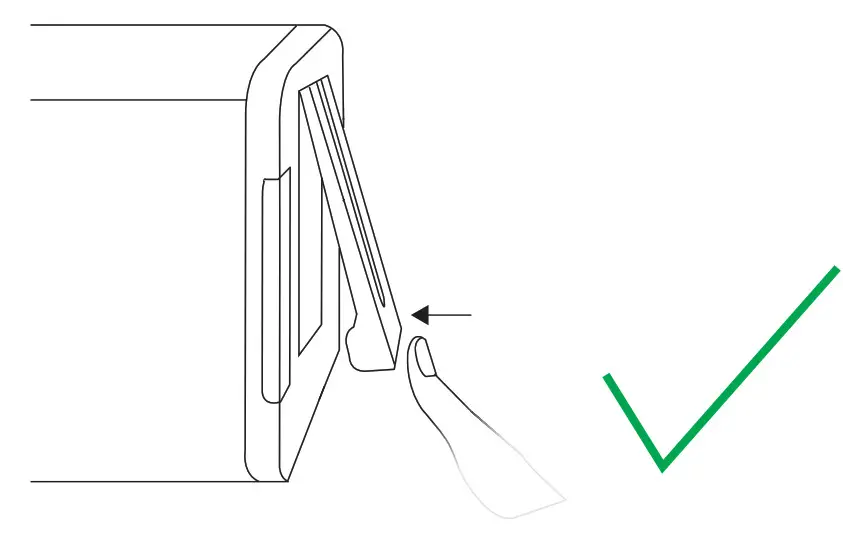
Lock the tray by pressing the handle after the hard drive has been fully inserted into the device.
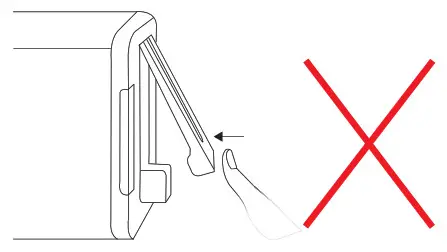
If the hard drive tray locks without fully inserting it into the device, taking out fails or read/write is unstable.
RAID Setup
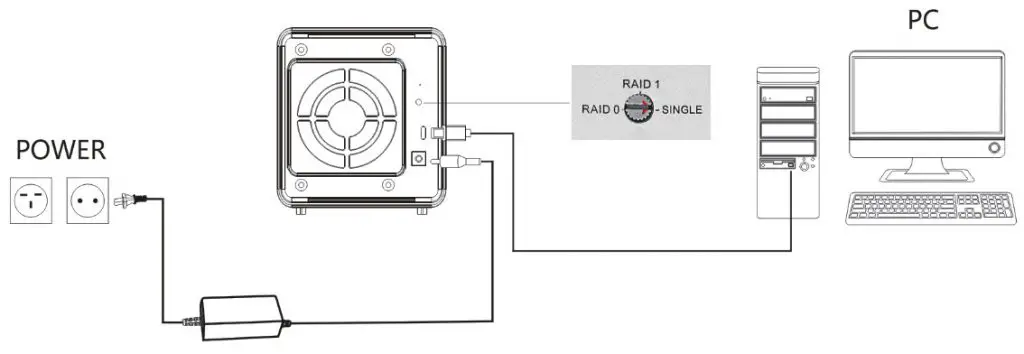
Step 1: Connect the device to your computer using a USB cable. Power on the device.
Step 2: Select a RAID mode. You can do this by using a screwdriver to turn the rotary switch located on the rear cover, moving the pointer to your desired RAID mode.
Step 3: To ensure the newly-selected RAID mode takes effect, use a pin to press and hold the RESET button for 5 seconds.
Warning!
The newly-selected RAID mode must be activated by pressing and holding the RESET button for 5 seconds.
Troubleshooting
This device may not be compatible with hard drives that have been used with other devices. If you run into issues of this kind, try the following countermeasures to initialize our hard drives:
Step 1: Turn the rotary switch’s pointer to any other RAID mode.
Step 2: Press and hold the RESET button for 5 seconds to let the newly-selected RAID mode take effect.
Step 3: Return the rotary switch’s pointer to the desired RAID mode.
Step 4: As before, press and hold the RESET button for 5 seconds to let the newly-selected RAID mode take effect.
Initialize RAID
Before you can use a newly-created RAID, you’ll need to initialize it. Since the initialization process differs depending on your operating system (OS), please follow the instructions that apply to you.
Windows OS
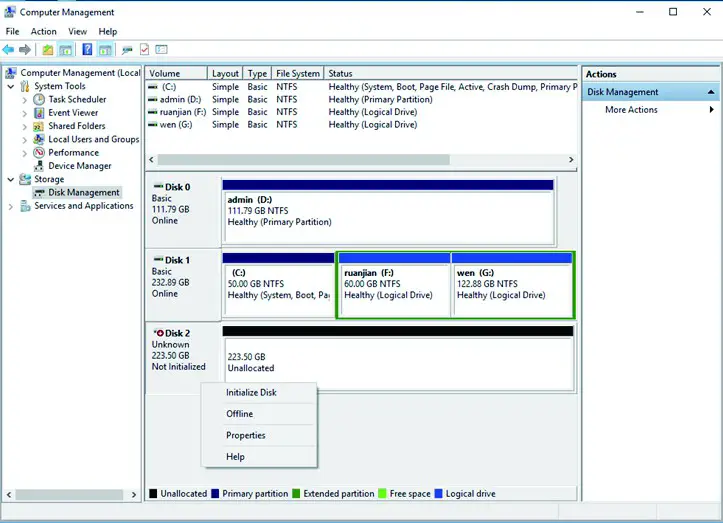
1. Open “Computer Management” and navigate to “Storage > Disk Management”;
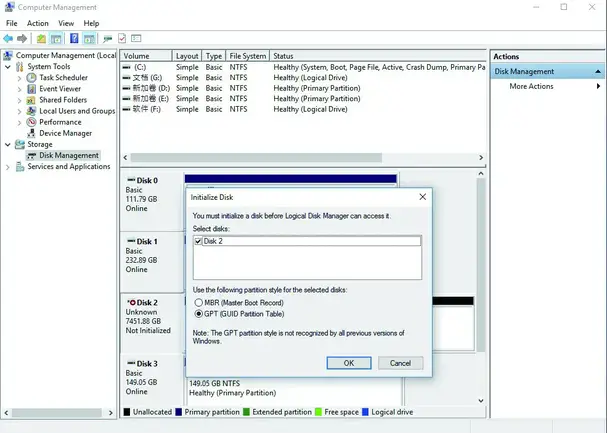
2. Find an unallocated disk in the menu, right-click the disk, and select “Initialise Disk” from the drop-down menu;
3. Complete the setup in the “Initialise Disk” menu and click “OK”. Note: If you don’t select GPT partition, then the maximum partition capacity will be restricted at 2TB);
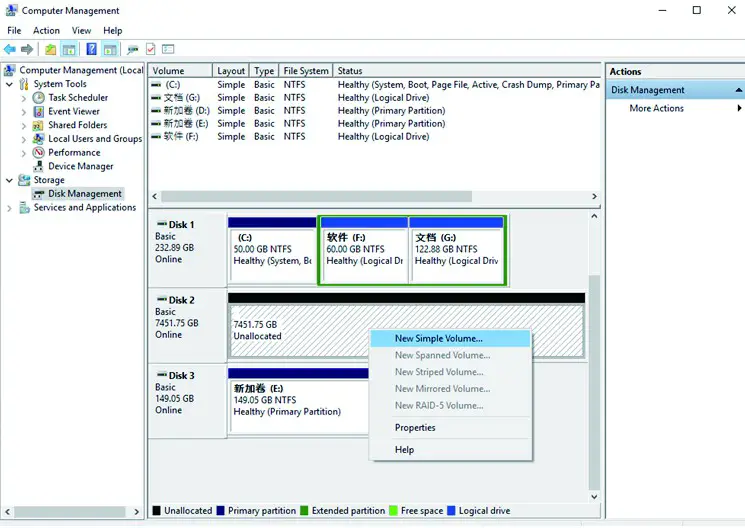
4. Once the disk initialization process is finished, right-click the unallocated disk and select “New Simple Volume” from the drop-down menu;
5. Once you’ve created a new volume, the RAID initialization process is complete.
Mac OS
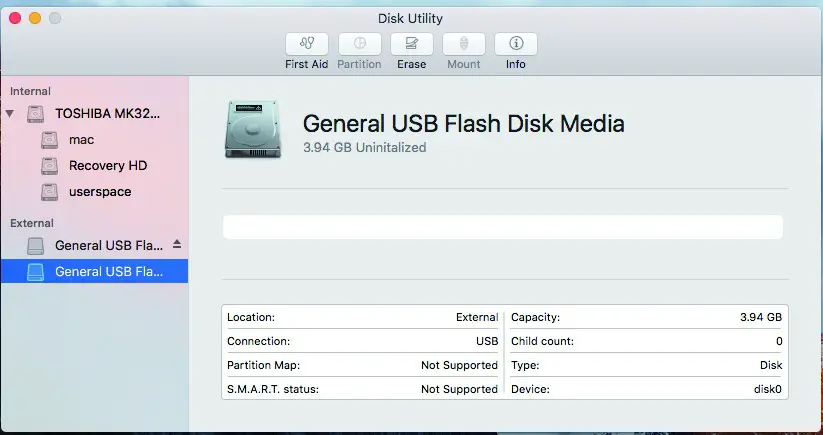
- Go to “Disk Utility > External”;
- Use the menu to find an unallocated disk;
- Select the unallocated disk and click “Erase”;
- Select the relevant “Name”, “Format”, and “Scheme” from the menu and click “Erase”;
- Once the “Erase” process is finished, RAID initialisation is complete.
Warning!
Changing your device’s RAID mode could lead to hard drive formatting, which would delete all data from the hard drives. Therefore, please back up your hard drive data before switching RAID mode.
Data Recovery
RAID 1 comprises a mirror of the data contents held on two or more disks. If a hard drive becomes faulty, you can just replace the defective hard drive. The data will be recovered to the newly replaced hard drive automatically.
How to Recover Data
- Connect the device to your computer and ensure that both are powered on;
- Remove the failed hard drive (please refer to Section 2 of the user manual);
- Insert a new hard drive (please refer to Section 2 of the user manual);
- Wait for approximately 1 minute until (a) the indicator of the newly-inserted hard disk flashes orange, and (b) the indicator of the original hard disk flashes green. This combination of signals shows that the data recovery process is underway;
- Once both hard drive indicators have stopped flashing, the data recovery process is complete.
Note:
- Your device must be powered on for the entire time that you are replacing the faulty hard drive;
- Please ensure that the capacity of the newly-inserted hard drive is greater than or equal to the capacity of the faulty hard drive;
- The data recovery process can last anywhere from several hours to tens of hours. The length of time taken depends on the hard drive capacity;
- Both the device and your computer must be powered on for the duration of the data recovery process, otherwise, data recovery will be interrupted.