
TuyaSmart APP
NO.1 Register/login/retrieve your password
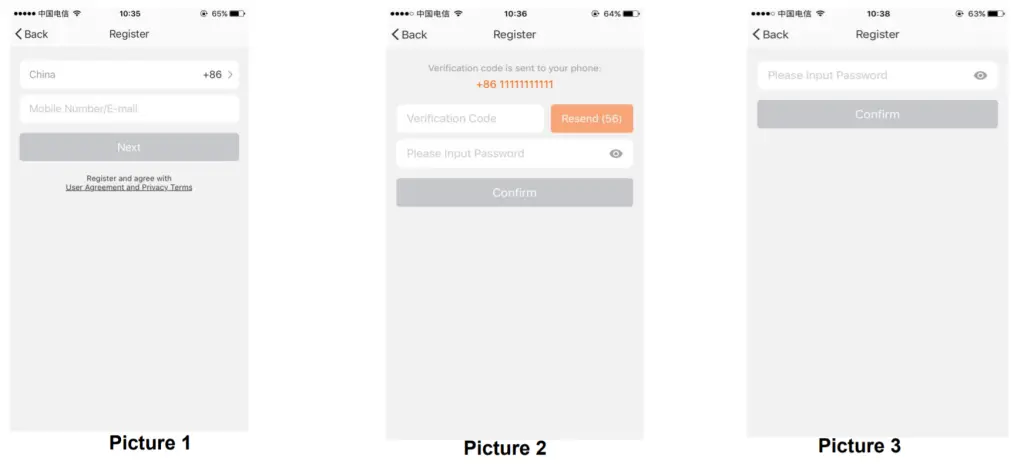
Register If you do not have app account, please choose register .
Introduce the procedure as below.
- Enter the registration page
- The system automatically determines the current country/region, you can also manually select the country/region, enter the mobile phone number or mailbox, and click “next”, as shown in figure 1.
- If you fill in the phone number, fill in the verification code received by the phone in the page shown in figure 2, and enter the password. Click “Confirm” to register successfully.
- If you fill in the mailbox, enter the password in the page shown in figure 3, and click ” Confirm ” to register successfully.

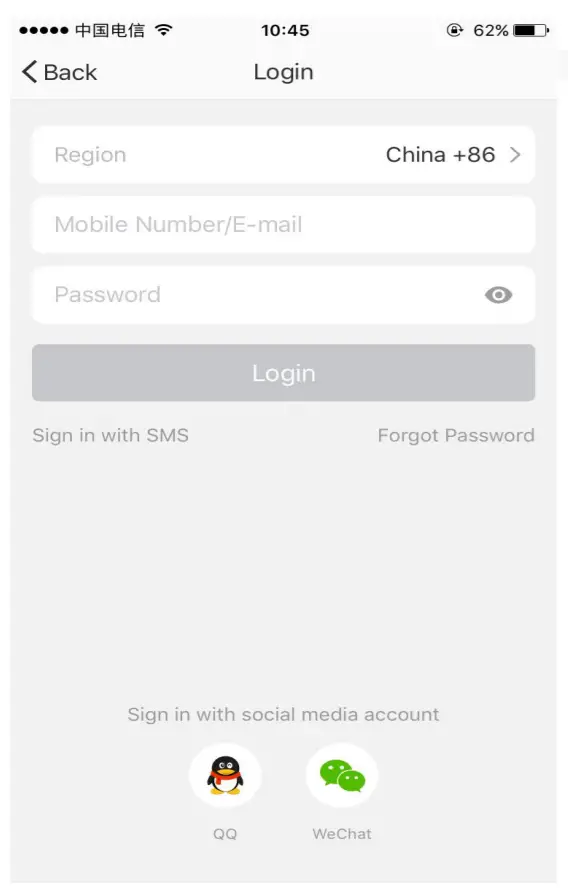
Account + password login.
- The system automatically determines the current country/region, and you can manually select the country/region
- Enter your registered mobile phone number or email address, enter your password, login system.
Third party social account login.
If your mobile phone has been installed with QQ or WeChat, click the QQ or WeChat icon on the social account login area. After the authorized page, you can login the system.
Phone number + verification code login.
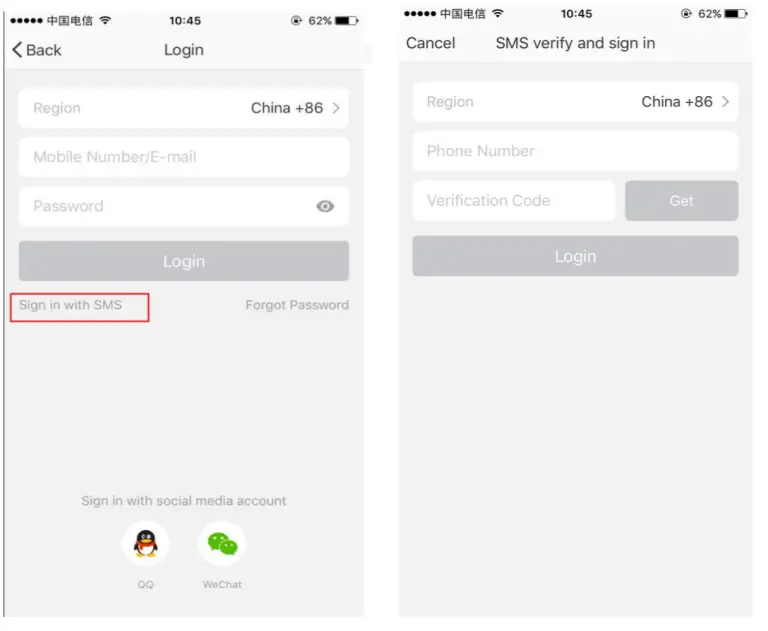
- Click “Sign in with SMS to enter the new page.
- The system automatically determines the current country/region, and you can manually select the country/region.
- Enter the phone number and click the “get” button to get the SMS verification code.
- After entering the verification code in the text message, click “login” button to login the system.
Forgot password
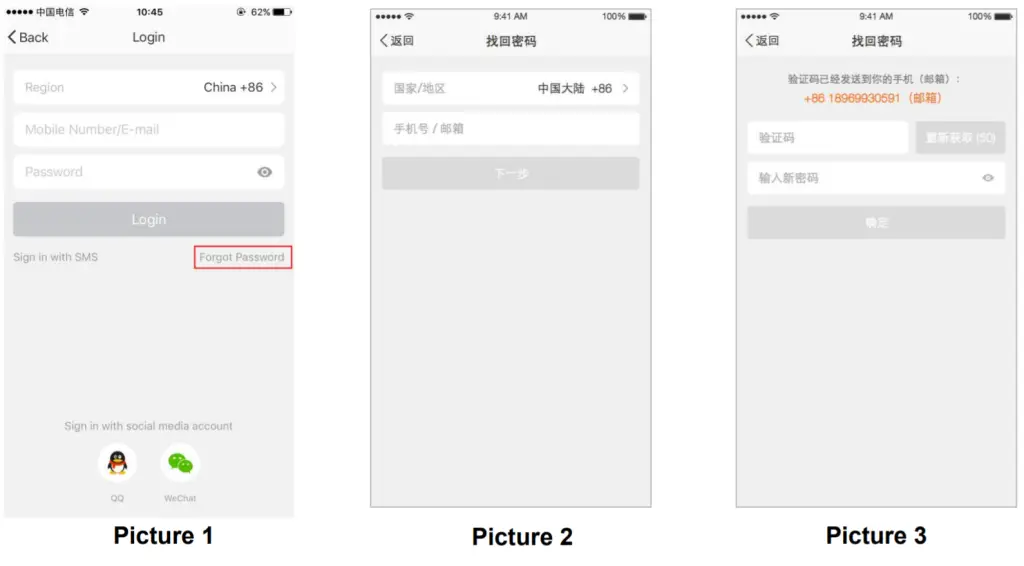
If you forgot your APP’s account login password, you can reset the password by retrieving the password.
- Click “forget password”, as shown in figure 1.
- The system automatically determines the current country/region, and you can manually select the country/region, enter your registered mobile phone number or email, and click “next”, as shown in figure 2.
- Fill in the verification code received by the phone or mailbox in the page shown in figure 3, and enter the new password, and click “ok”.
NO.2 Add device – default mode
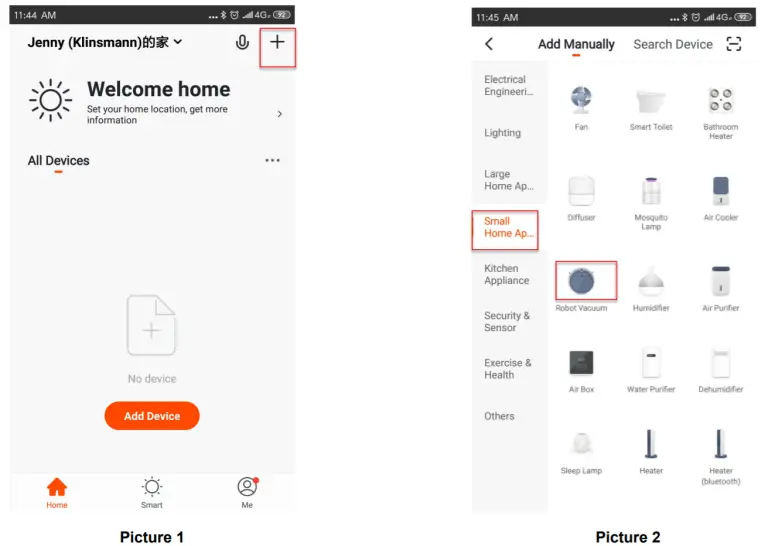
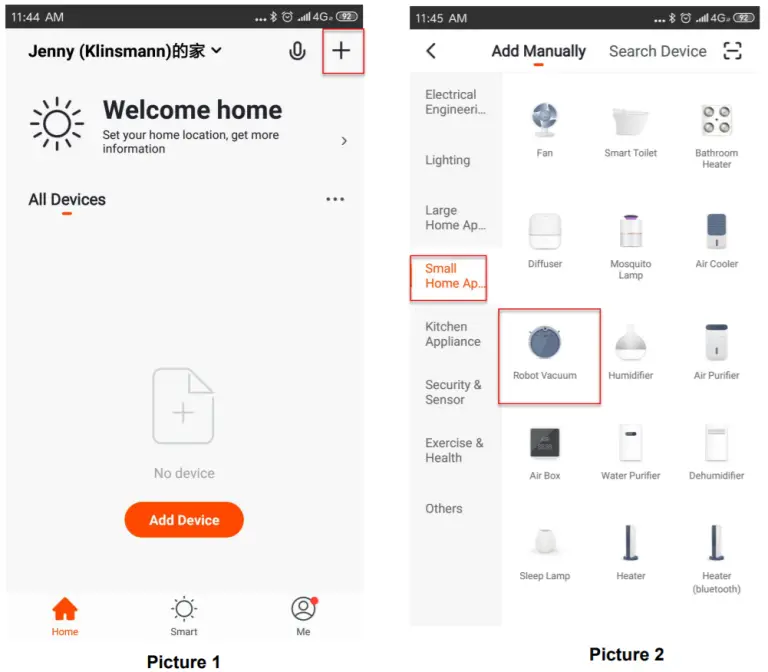
After entering the APP, click “+” on the top right of the home page to add the device, as shown in picture 1, and enter the matching page, as shown in picture 2.
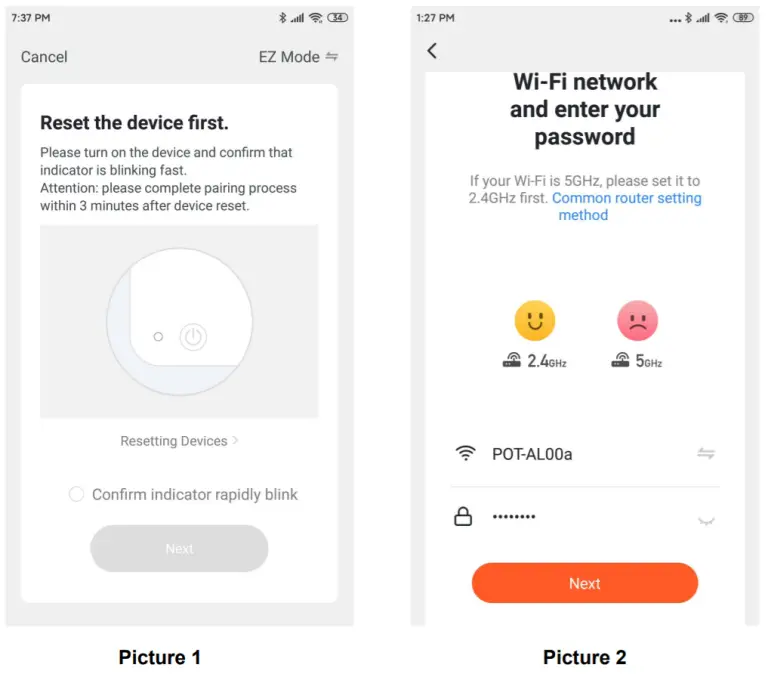
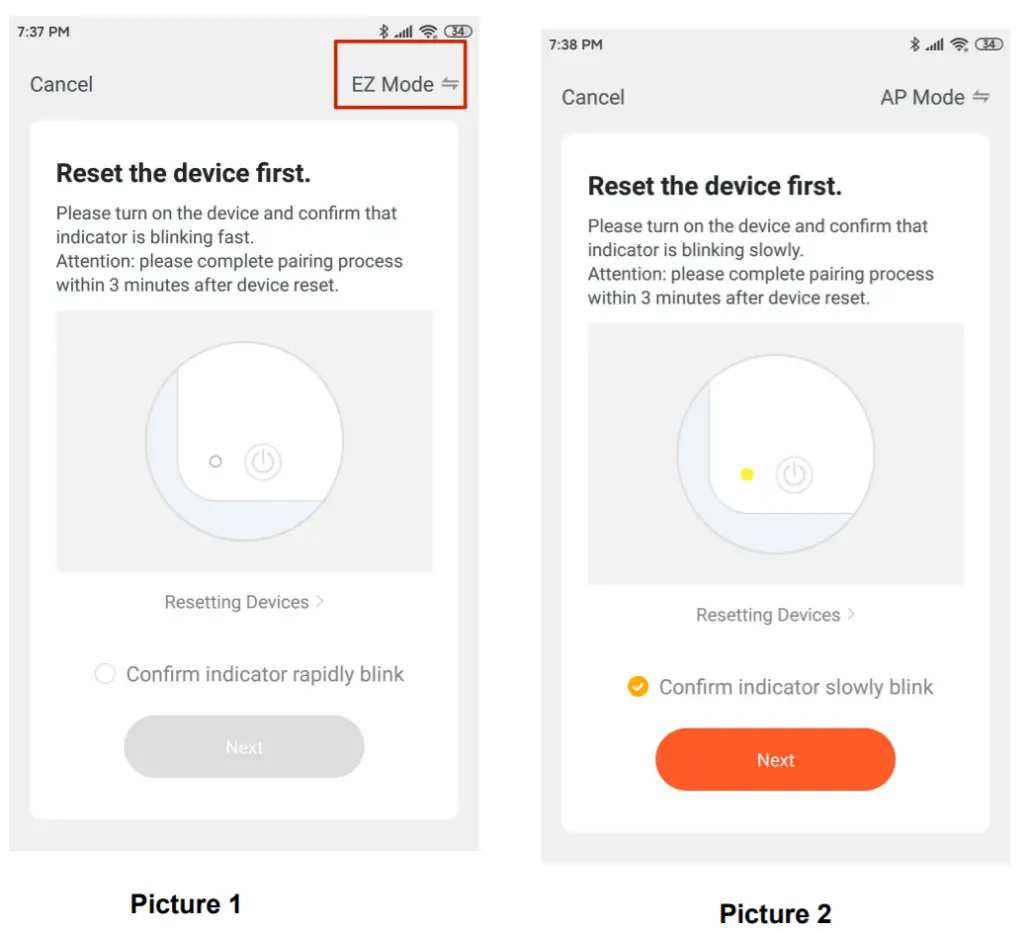
- Turn on machine main power switch at the right side and press & hold the AUTO button on the top cover for about 3-5 seconds until blue indicator fast blink, which means WiFi works under in EZ mode.
- Open Klinsmann APP, after tap the “+ ” icon on the top right corner of APP , select ” Robot Vacuum Cleaner K185″ into “Add device” interface.
- Enter your WIFI password. Adding the device until 100% complete in Klinsmann APP interface and then the blue indicator is normal.
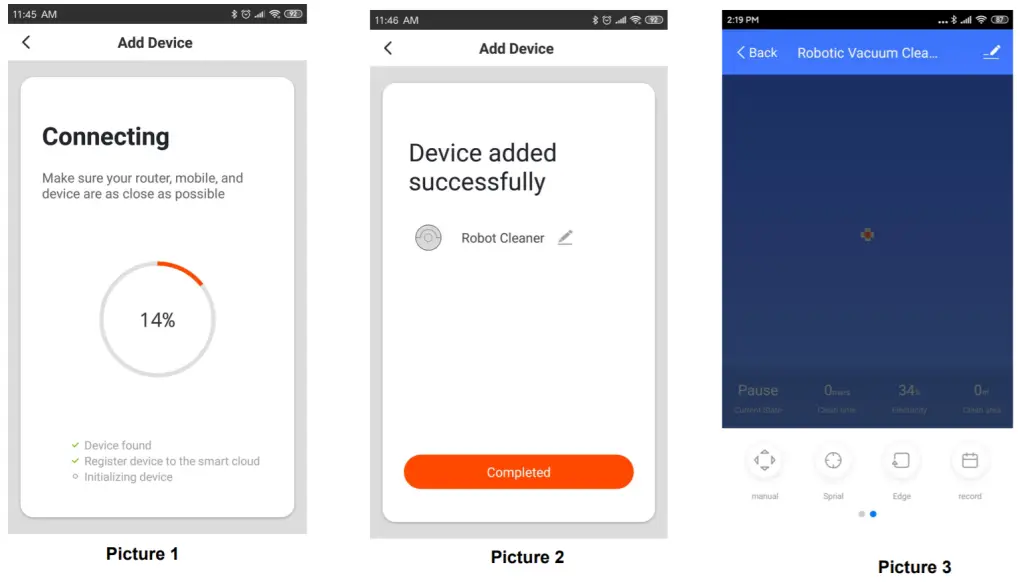
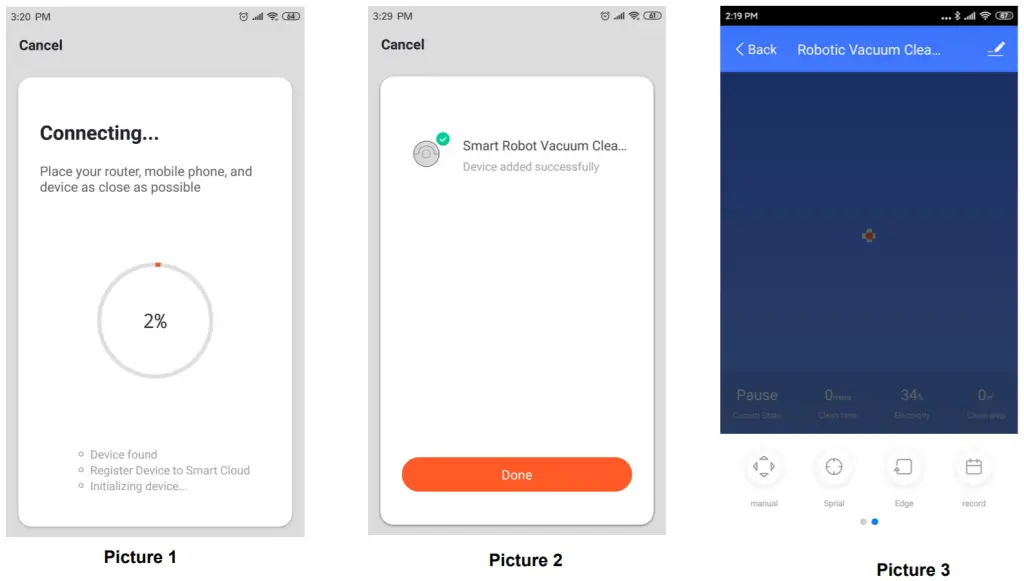
If the default mode distribution network is selected, the network process APP will experience the process shown in figure 1, and the network successfully displays the interface shown in figure 2. Press the app button, start intelligent control, show as figure 3.
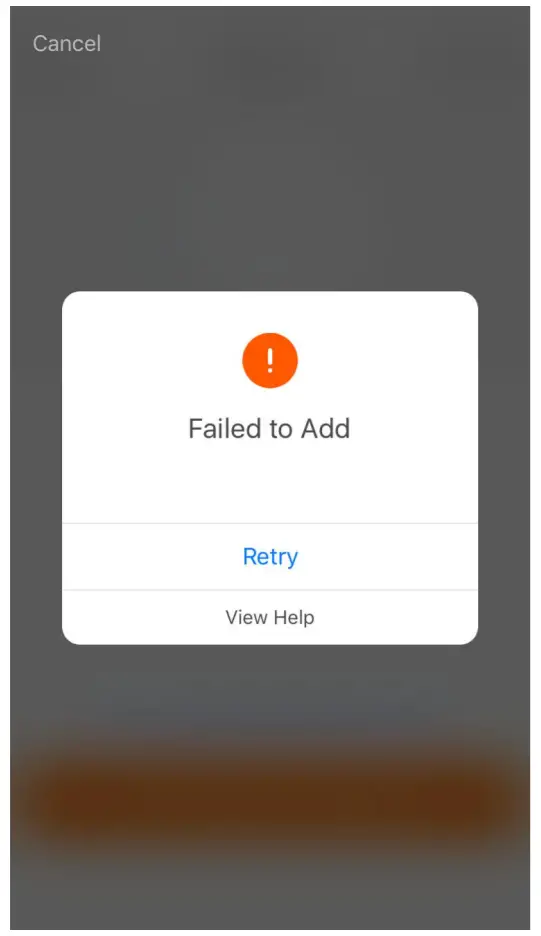
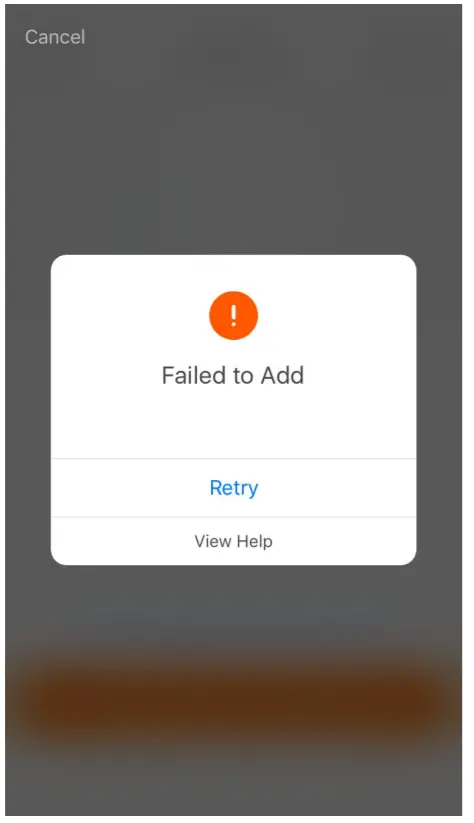
If the network fails, the APP will display the page shown in the figure.
You can choose to re add, try AP mode or view the help.
NO.3 Add device – AP mode
After entering the APP, click “+” on the top right of the home page to add the device, as shown in picture 1, and enter the matching page, as shown in picture 2.
- Turn on machine main power switch at the right side and press & hold the AUTO button on the top cover for about 3-5 seconds until blue indicator slow blink, which means WiFi works under in AP mode.
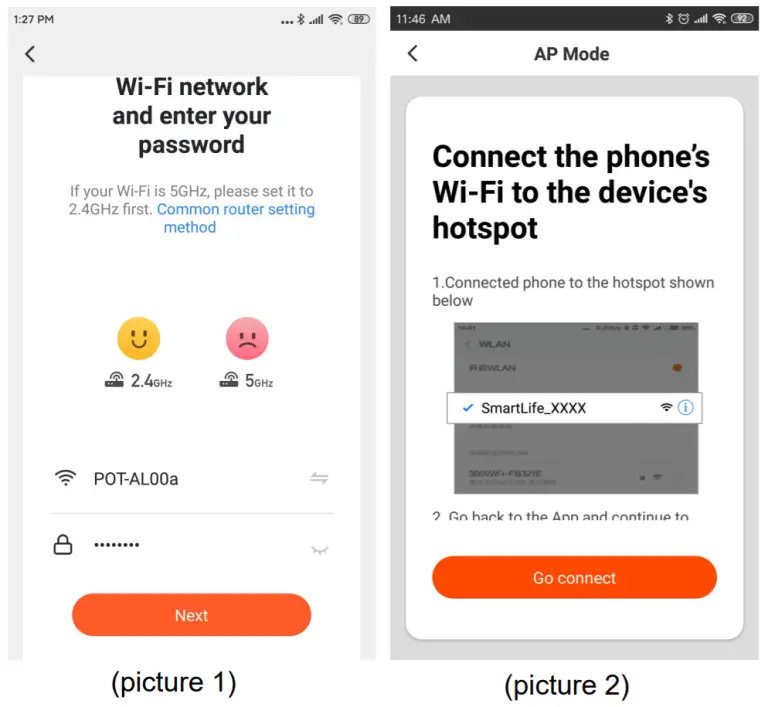
- Open Klinsmann APP, after tap the “+ ” icon on the top right corner of APP , select ” Robot Vacuum Cleaner K185″ into “Add device” interface. Select AP mode on the top right corner and enter your WIFI password.
NO.3 Add device – enter a Wi-Fi password and select the hotspot name”SmartLife_XXXX”.
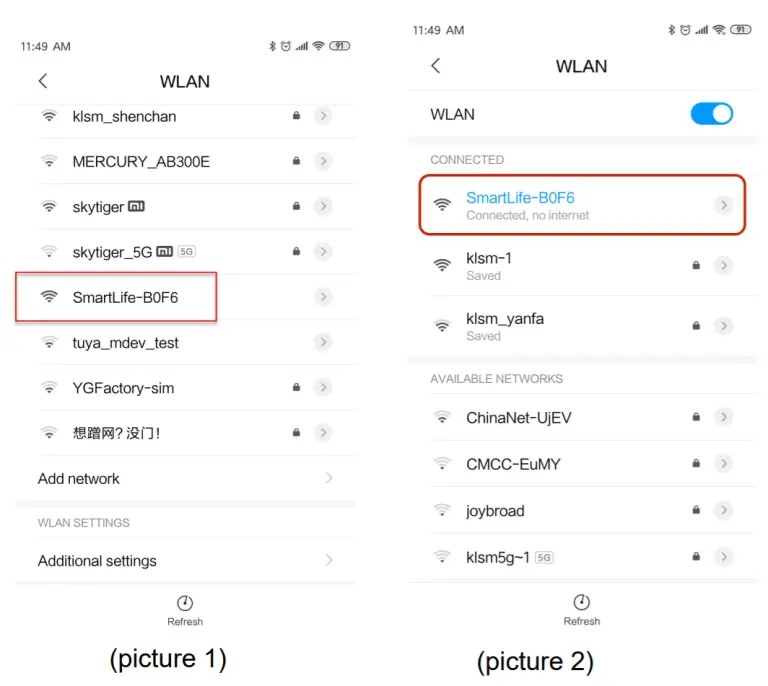
3. Search your mobile with device’s hotspot smartlife_XXXX and choose “Go to connect. Adding the device until 100% complete in Klinsmann APP interface and then the blue indicator is normal.
After connect, press your mobile phone back to TUYA APP directly
NO.3 Add device – mesh process
If the AP mode distribution network is selected, the network process APP will experience the process shown in picture 1, and the network successfully displays the interface shown in picture 2. Press the app button, start intelligent control, show as picture 3
NO.3 Add device – add failure
If the network fails, the APP will display the page shown in the figure. You can choose to re add or view the help.
Note:
This article is an iOS version of the application interface, and the Android version will be slightly different. Products and software are continuously updated. The data and software interface listed in the text are only used to explain the change without notice.
