KSR10-USBN USB Interface voor Robot Arm
Assembly and Instruction Manual
USB INTERFACE KIT FOR ROBOTIC ARM:
1. Product Introduction
This is an optional USB Interface Kit that connects Robotic Arm
to Windows personal computer USB port.
2. Tools You May Need:
- Screwdriver
3. Mechanical Parts List:
| Part | Qty |
|---|---|
| PP11 | 1 |
| USB Wires | 1 |
| PCB Cover | 1 |
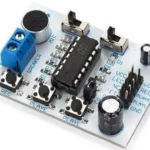
| USB PCB Assembly | 1 |
| CD-R | 1 |
4. Disconnect the wired controller and PCB from Robotic
- Move your Robotic Arm to the position as shown.
- Disconnect the controller.
- Unplug 5pcs black connectors.
- Unscrew yellow cover.
- Unscrew 3pcs PCB screws.
- Unplug 3pcs connectors.
5. Install USB PCB And Cover:
- Fix USB PCB with 3pcs screws.
- Screw P2 PCB cover tightly.
See the enclosed CD-R for operation details.
Note:
- All the five gearboxes equipped with safety gear, when the arm
open, close, up or lower to the maximum position, and user keeps
pushing the buttons, the safety gear will start to work to protect
the gearbox and make ‘da, da, da…’sound. - To extend the life of gearbox, release the buttons once you
hear the safety gear emit ‘da, da, da’ sound. - Please download Adobe Acrobat Reader for the Robotic Arm Use’s
Manual.(www.adobe.com)
Product Usage Instructions:
- Disconnect the wired controller and PCB from the Robotic Arm as
per steps 1-6 mentioned above. - Install USB PCB and cover as per steps 1-2 mentioned
above. - Connect the USB Interface Kit to the Windows personal computer
USB port. - Refer to the enclosed CD-R for operation details.
View Fullscreen
Assembly and Instruction Manual
Contents
USB INTERFACE KIT FOR ROBOTIC ARM:
1. Product Introduction
P.1
2. Tools You May Need
P.1
3. Mechanical Parts List
P.1
4. Disconnect the wired controller and PCB from Robotic Arm
P.2
5.Install USB PCB and cover
P.5
6.How it works
P.8
USB INTERFACE KIT FOR ROBOTIC ARM
1 Product Introduction:
This is an optional USB Interface Kit which connects Robotic Arm to Windows personal computer USB port.
2 Tools You May Need:
Screwdriver
3 Mechanical Parts List:
PP11
USB Wires
P2
Qty
1
PCB Cover Qty 1
1
P3 USB PCB Assembly P4
Qty
CD-R Qty
1
1
4 Disconnect the wired controller and PCB from Robotic Arm:
1 Move your “Robotic Arm” to the position as shown.
2
2
Disconnect the controller. 3
Unplug 5pcs black connectors. 3
4
Unscrew yellow cover.
5
6
Unscrew 3pcs PCB screws. 7
Unplug 3pcs connectors.
4
5 Install USB PCB And Cover:
1
2
Black
Black
Red
Orange
Orange
P3 Fix USB PCB with 3pcs screws.
3
P2
2 1
Screw P2 PCB cover tightly. 5
4
M3
Black M1
L
M4
Black
M2
M3 M2 M1
L
M4
6
5 P1
6 Finished Product
L
7
R
5 How It Works:
See operation details from the enclosed CD-R.
Note:1. All the five gearboxes equipped with safety gear, when the arm open, close, up or lower to the maximum position, and user keeps pushing the buttons, the safety gear will start to work to protect the gearbox and make ‘da, da, da…’sound.
2. To extend the life of gearbox, release the buttons once you hear the safety gear emit ‘da, da, da’ sound.
3. Please download Adobe Acrobat Reader for the Robotic Arm Use’s Manual.(www.adobe.com)
8
4350001511D