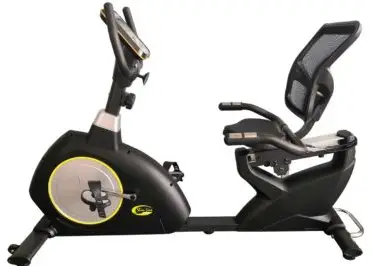
VIVaDIa H121 Recumbent Bike User Manual

Dimensions
110 x51 x134cm
Requires 2x AAA batteries for screen (not included)
- RECUMBENT BIKES ARE EASIER ON THE LOWER BACK (LUMBAR SPINE) DUE TO THE WAY THAT YOU SIT IN THE BIKE. WHILE AN UPRIGHT BIKE HAS YOU HUNCHED OVER THE HANDLEBARS, A RECUMBENT BIKE ENCOURAGES BETTER SPINAL POSTURE. DUE TO THE LOW IMPACT THE RECUMBENT BIKE REDUCES THE RISK OF PAIN AND CAN BUILD STRENGTH
- TARGETS QUADS, HAMSTRINGS, CALVES, HIPS AND BUTTOCKS.
- TAKE CONTROL OF YOUR WORKOUT WITH 8 TENSION LEVELS
- MONITOR YOUR PROGRESS WITH THE LCD DISPLAY MEASURING TIME/SPEED/DISTANCE/PULSE AND CALORIES BURNED
- PULSE MONITOR ON HANDLE BARS
- COMFORTABLE PADDED SEAT AND HANDLEBARS
Important Safety Information
Please keep this manual in a safe place for reference.
- It is important to read this entire manual before assembling and using the equipment. Safe and efficient use can only be achieved if the equipment is assembled, maintained and used properly. It is your responsibility to ensure that all users of the equipment are informed of all warnings and precautions.
- Before starting any exercise program you should consult your doctor to determine if you have any physical or health conditions that could create a risk to your health and safety, or prevent you from using the equipment properly. Your doctor’s advice is essential if you are taking medication that affects your heart rate, blood pressure or cholesterol level.
- Be aware of your body’s signals. Incorrect or excessive exercise can damage your health. Stop exercising if you experience any of the following symptoms: Pain, tightness in your chest, irregular heartbeat,
extreme shortness of breath, feeling light headed, dizziness or nausea. If you do experience any of these
conditions you should consult your doctor before continuing with your exercise program. - Keep children and pets away from the equipment. The equipment is designed for adult use only.
- Use the equipment on a solid, flat level surface with a protective cover for your floor or carpet. For safety, the equipment should have at least 0. 6metres of free space all around it.
- Before using the equipment, please check whether all screws are tightened and whether any parts are loose.
- Please check the equipment regularly, when you are using the equipment. If there is any abnormal situation or abnormal sound, please stop using it immediately.
- When using this equipment wear suitable clothes, especially avoid wearing too loose or too long clothes which might get caught in the equipment. When using the equipment for the first time, please start slowly and hold the handle tightly. Stay seated on the Do not let your body leave the seat cushion at all times.
- The equipment has been tested and is only used for indoor exercise with a maximum load of 120kg.
- This equipment is not suitable for physiotherapy.
- Exercise caution when lifting or moving the device.
EXERCISE INSTRUCTIONS
Using your Exercise Bike will provide you with several benefits, it will improve your physical fitness, tone muscle and in conjunction with calorie controlled diet help you lose weight
The Warm Up Phase
This stage helps get the blood flowing around the body and the muscles working properly. It will also reduce the risk of cramp and muscle injury. It is advisable to do a few stretching exercises as shown below. Each stretch should be held for approximately 30 seconds, do not force or jerk your muscles into a stretch – if it hurts, STOP.
- Side Bends

- Forward Bends
- Outer Thigh
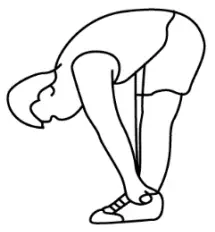
- Inner Thigh
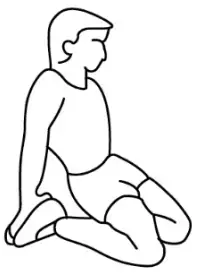
- Calf/Achilles

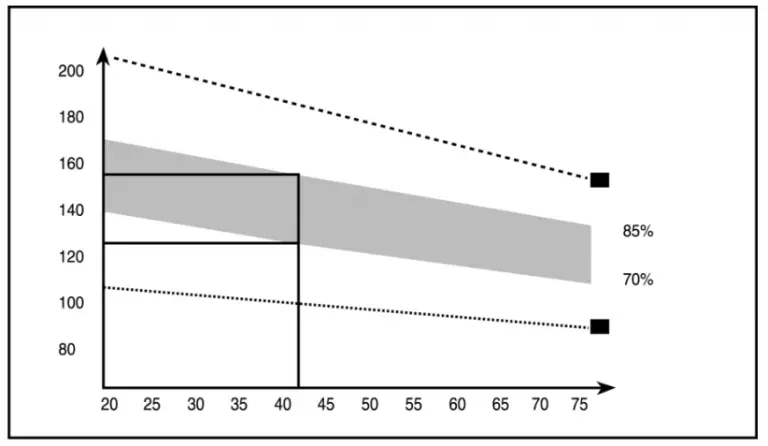
THE EXERCISE PHASE
This is the stage where you put the effort in. After regular use, the muscles in your legs will become more flexible. Work to your own pace but it is very important to maintain a steady tempo throughout. The rate of work should be sufficient to raise your heart beat into the target zone shown on the graph below.
This stage should last for a minimum of 12 minutes though most people start at about 15-20minutes.
THE COOL DOWN PHASE
This stage is to let your Cardiovascular System and muscles wind down. This is a repeat of the warm up exercise e.g. reduce your tempo, continue for approximately 5 minutes. The stretching exercises should now be repeated, again remembering not to force or jerk your muscles into the stretch. As you get fitter you may need to train longer and harder. It is advisable to train at least three times a week, and if possible space your workouts evenly throughout the week.
MUSCLE TONING
To tone muscle while on your Exercise Bike you will need to have the resistance set quite high. This will put more strain on your leg muscles and may mean you cannot train for as long as you would like. If you are also trying to improve your fitness you need to alter your training program. You should train as normal during the warm up and cool down phases, but towards the end of the exercise phase you should increase resistance making your legs work harder. You will have to reduce your speed to keep your heart rate in the target zone.
Components-Parts
Please check you have all the listed below
Note: some of the smaller components may be pre-fitted to larger components.
- Main frame x 1
- Handle bar x 1
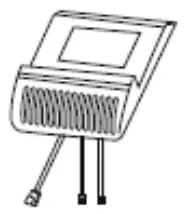
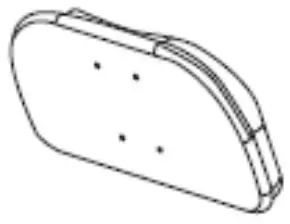
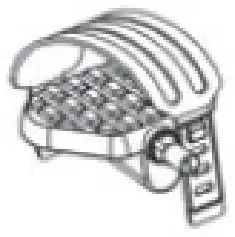
- Exercise Monitor
- Backpack
- Back stabilizer x 1
- Pedal x2
- Saddle stem Insert x 1
- Saddle x 1
- Rear adjustable tube
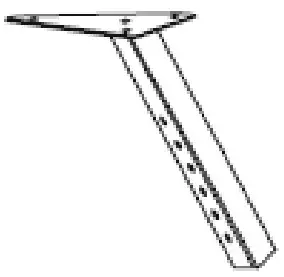
- rear handlebar

Components – Fixings
Please check you have all the fixings listed below.
Note: All the following fixings are pre-fitted to the larger components
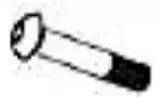
- Screw M8x50 4Pcs
- Curved washer8 8pcs

- M8 4pcs

- flat washer 5pcs
- Nut m8 5pcs

- M8X45 2pcs
- M8X45 2pcs

- M8x45 4pcs

- Spring washer8 6pcs
- M5X10 2pcs

- M8X40 2pcs

Accessories bag:
- M16 ball pin (24) 2pcs
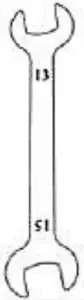
- Allen wrench (L5)
- Allen wrench S13 & S15
List of equipment parts
| PART LIST | |||||
| NO | Description | QTY | NO | Description | QTY |
| 1 | Main frame | 1 | 14 | Backrest rack | 1 |
| 2 | Front stabilizer | 1 | 15 | 15 Screw M8x45 | 2 |
| 3 | Rear Stabilizer | 1 | 16 | Rear handlebar | 1 |
| 4 | Screw Max M8X45 | 4 | 17 | Screw Max M8X45 | 2 |
| 5 | Curved washer M8 | 8 | 18 | Backrest | 1 |
| 6 | Nut M8x62 | 4 | 19 | Screw Max M8X45 | 4 |
| 7 | Pedal(R) | 1 | 20 | Handlebar | 1 |
| 8 | Pedal(L) | 1 | 21 | Spnng washer(M8) | 6 |
| 9 | Seat tube | 1 | 22 | Exercise monitor | 1 |
| 10 | Bat pin | 2 | 23 | Screw M5x10 | 2 |
| 11 | Saddle | 1 | 24 | Screw M8x40 | 2 |
| 12 | flat washer(M8) | 5 | |||
| 13 | Nut M8 | 5 | |||
ASSEMBLY INSTRUCTIONS / INSTRUCTIONS FOR USE:
Unpack the components carefully. Please check all parts have been removed from the packaging.
ASSEMBLY INSTRUCTION
STEP 1 Take the main frame(6) from the carton and fix the ball pin (24).
STEP 2 Attach the Stabilizers (2&3) to the main frame (1) using two sets of nuts (6), washers (5) and M8x62mm(4) bolts Please note stabilizer with wheel is for front.
The fixings 4&5846 are already pre-fitted to the stabilizers (2&3).
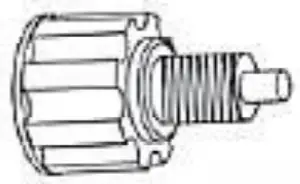
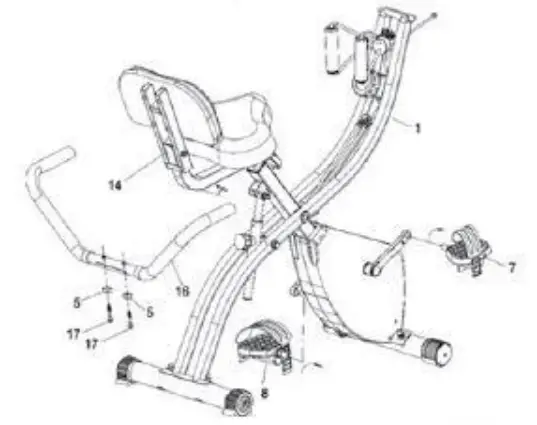
STEP 3 Fix the saddle(11) with the saddle post(9),Adjust the angle of the saddle{11). Fix it tightly with three nylon nuts and flat washer(12,13). Then insert the seat post(9) to the main frame(1).Adjust it to suitable height and tlahten it with the Knob.(10).
STEP 4 Attach the backrest rack(14) to the saddle post (9)with two bolts(15) Mat washers(12) and nylon nut(13).tighten them with /Wen wrench 5138.15. Then fix the backrest (18)to the rack(14) with four bolts(19) and spring washers(21).

STEP 5 Attach the rear handlebar(16) to the backrest rack(14) with two bolts(17) and curved washers(5).Tighten it with #Allen wrench{L5).
The pedals (7)&(8) are marked “L” and “R” • Left and Right. Connect them to their appropriate crank arms. The right crank arm is on the right hand side of the cycle as you sit on it. Note that the right pedal should be threaded on clockwise and the left pedal anti-clockwise.
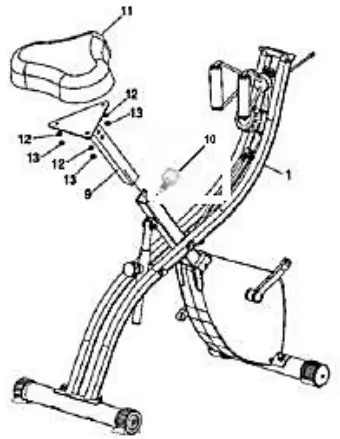
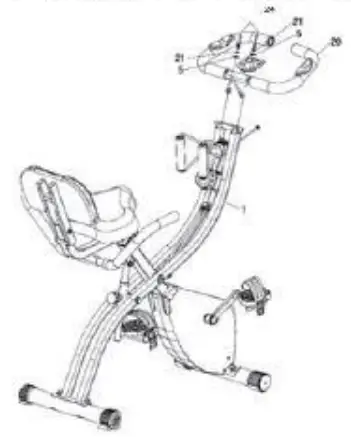
Step 6: Fix handlebar(20) to main frame(1) with two Polts1241. spring washers(21) and curved washers(5). Tighten them with Allen wrench(L5).
STEP 7 Fix exercise monitor (22) to handlebar(20) with two bolts(23).Tighten them with #Allen wrench(L5).Then connect the sensor and pulse line to the correct hole.
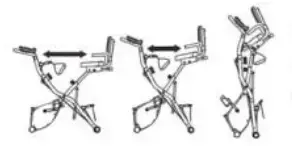
Adjustment Position / Folding away
loosen Bike Angle Adjustment ball pint2411) and pull outward at the same time adjust the Front frame (1) to your preferred position. Then release and Fix the Bike Angle Adjustment ball pin (24) There are 2 positions for work out and 1 position for storage.
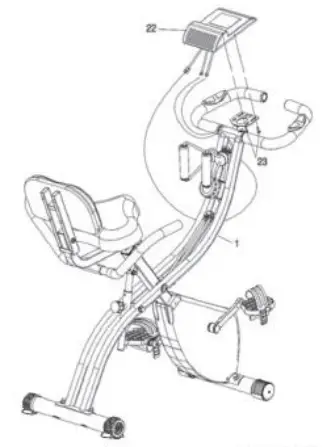
Exploded view
SPECIFICATIONS:
TIME:- 00.00-99.00
SPEED:- 0:0-99.9k MVH or ML/H
DISTANCE:- O-99.5 KPH
ODOMETER (IF HAVE):- 0-999 KM or MI
FULSE*(IF HAVE):- 40-240BPM
CALORIES:- 0-999CAL
KEYFUNCTIONS: MODE: This key lets you to select and lock on to a particular function you want
OPERATION PROCEDURES:
- AUTO ON/OFF: The system turns on When any key it Pressed or When a receives an signal input from the speed sensor.
The system turns off automatically when the sensor has no signal input or no key pressed for approximately 4 minutes - RESET: The unit can he reset by either changing battery or pressing the mode key for 3 seconds.
- MODE: To choose SCAN or LOCK if you do net want the scan mode, press the MODE key when the pointer on the function you want which begins blinking.
- FUNCTIONS:
TIME: Press the MODE key until the pointer advance to TIME. the total working time will be shown.
SPEED:
Press the MODE key will the pointer advance to SPEED. The total working will be show
DISTANCE: Press the MODE key until the pointer advances to DISTANCE The distance of each workout will be display
ODOMETER*(IF HAVE):
Press the MODE key unlit the pointer advancer to ODOMETER The total accumulated distance will be shown.
PULSE*(IF HAVE):
Puss the MODE key until the pointer advance to PULSE. users current heart rote will be displayed in beats per minute.
Place the palms of your hands on both of the Contact pointer pads (to put are-clip to ear), and wait for 30 seconds for the most accurate reading. CALORIES:
Pre the MODE key until the pointer advance to CALORIES. The Calories burned wit be displayed.
SCAN: Automatic of the following functions in the order shown: TIMAE • SPEED • DISTANCE – PULSE (if have) – CALORIES: (repeat) BATTERY:
This monitor uses two AAA batteries,(not Included),
Adjust tension
There are 8 tension levels available. It is recommended to start on the lowest setting and gradually increase resistance.
BATTERIES
- Keep batteries away from children and pets.
- Do not mix used and new batteries.
- Remove the batteries if left for long periods.
- Never dispose of batteries in a fire.
- Battery disposal, spent or expired batteries must be properly disposed of and recycled in compliance with local regulations. For detailed information, contact your local authority.
- Follow the battery manufacturer’s safety, usage, and disposal instructions.
DISPOSAL
- Coopers of Stortford use recyclable or recycled packaging where possible.
- Please dispose of all packaging, paper, cartons, packaging in accordance with your local recycling regulations.
- Plastics, polybags – Contains the following recyclable plastic
| Code & Symbol |  |
| Type of Plastic | Low Density Polyethylene |
| Commonly used for | Shopping bags, bread bags, squeezy bottles, stretch/pallet wrap, bubble wrap, multi-pack can holders |
| Notes | Usually recyclable supermarket deposit points. Check other plastic films as any non-polythene film e.g. cling film, crisp packets film lids. |
- At the end of the product’s lifespan please check with your local council authorized household waste recycling center for disposal.