![]() E-bike User’s Manual
E-bike User’s Manual

CAUTION: READ THIS MANUAL BEFORE USING YOUR EQUIPMENT
Safety Instruction
- Thank you for purchasing the WINICE E-BIKE. The E-BIKE features the most recent innovation in technology.
- For Safety reasons, it is most important that you read this user’s manual before you operate the bike. Improper handling can reduce its riding performance and most importantly, cause danger to your safe and healthy.
- For handling and maintenance of the bicycle, please refer to the E-BIKE user’s manual which is an integral part of this e-bike user’s manual!
- Do not at any time dismantle or disassemble any of the above e-bike components!
- Please check all parts are tightened and locked before riding.
- Please make sure that the battery charger and charging plug are always kept dry and never get wet.
- The charger should only be cleaned with a dry cloth. Never use a wet cloth, oil, or any other liquid.
Meter operation
2.1 Meter instruction

2.2 Meter operation

| To switch on/off the E-Bike system, hold the Full Electric Function (Pure electric mode) |
Press “+” to crease into pedal assist level “Mid”. Full Electric Function (Pure electric mode) |
Press “+” again to move into a pedal assist level “High”. “High” is the maximum power of PAS. Full Electric Function (Pure electric mode) |
Full Electric Function (Pure electric mode): Press”-“, until all the three “low” Mid” and” Hi gh” indicators are off. |
2.3 Operation Cautions
Be careful of the safety use. Don’t attempt to release the connector when charging the battery.
- Avoid the risk of collision.
- Don’t modify system parameters to avoid parameters disorder.
- Make the display repaired when the error code appears.
Battery: further information and maintenance
- How far full charge battery can go? That depends on the loading weight, road condition and battery capacity. But in the same condition, average speeds can continuous longer travel range.
- When storing the battery for a longer time period, (e.g. during winter time) it is important to place the fully charged battery on a flat surface in a dry place.
- Attention: The battery should be re-charged once every 2-3 months when it
is not used. - Warning:
4.1.Keep the battery out of reach for children.
4.2.Never try to open the battery.
4.3.If the battery is damaged because it has been dropped somewhere or because of a biking accident, there might be a risk of electrolytes leakage. Beware of chemical burns! And immediately stop using a damaged battery.
4.4Do not touch the battery without a cloth or gloves and make sure no acid touches your eyes.
Charging
- To charge the battery with the bike, simply place the bike within reach of the power supply and plug it in.
Note: The plug hole is located on the left of the battery. - The battery can either be charged while on the bike or the battery can be removed and charged at a place of your convenience.
- The RED light indicates it is in charging and GREEN light indicates the battery is fully charged. (Please put off the plug from wall) Usually, the charging time is 4-6 hours depending on the battery capacity remaining.
- Warning: Charging time over 10 hours is prohibited please kept it away from a high-temperature environment and store it in a cool place.
Installation Instruction
- Installation video please refer to:
- When open the bike’s carton box, take out E-bike and use tools to cut off
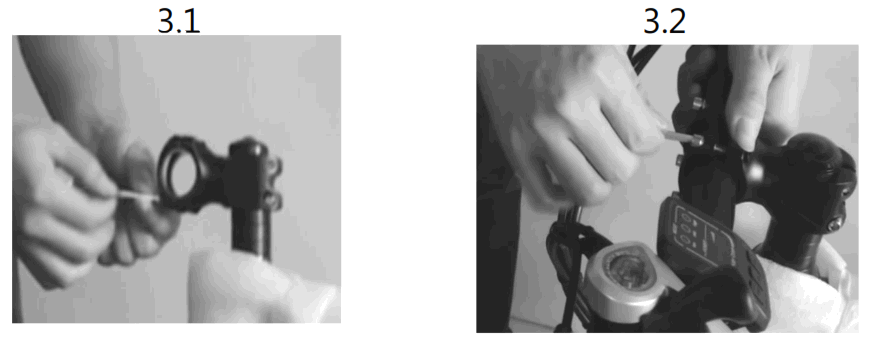
the package strings. - Install the handlebar:
3.1 use the inner hexagon tool to loosen the stem cover and don’t tighten all bolts immediately before adjusting the handlebar in a property angel and position,
3.2 then tighten with tool.
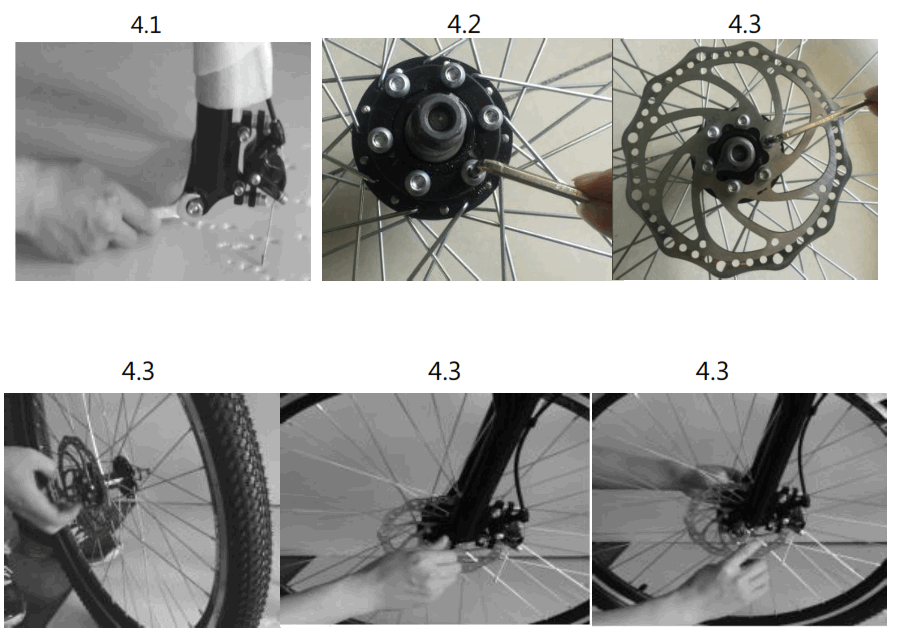
- Install front wheel:
4.1: take out the protection axle the front fork and the front hub, and then take out the front wheel.
4.2 take out the front disc from the toolbox, and install the disc on the hut of the front wheel. Attention: There is indicated sticker showing which surfaces outside!
4.3 make sure the front wheel is in line with the rear wheel and proceed to install. (pull the wheel upwards and insert it in the fork dropouts then, insert the quick release through the axle and tighten bolts)
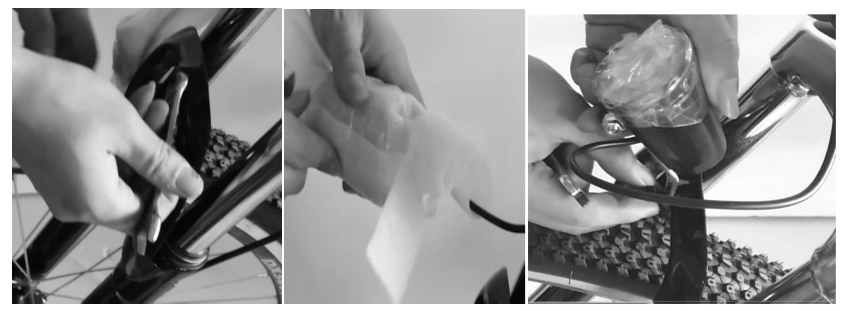
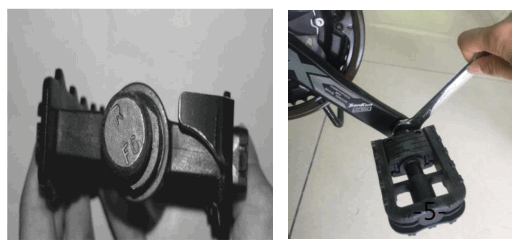
- Install the front light
5.1 Take the screw from the fork;
5.2 Open the lamp
5.3 Install the lamp and used the tool to tighten it.
- Install pedals: Check 2 pedals, the one imprinted “L” should install on left side and “R” on the right side. Please use a wrench to tighten them.
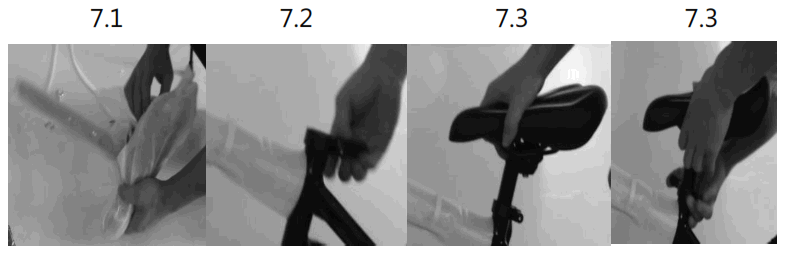
- Install the Seat post.
7.1. Open the seat post and saddle, then install the rear reflector;
7.2 Put the seat post into the frame.
7.3 Adjust seat post to the height that suits your riding position best and tighten quick release. ( Please make sure that the quick release is tightened firmly.)
- Adjust angle of brake lever, meter, gear shifter, throttle, and louder controller on handle bar, then tighten them with tools.
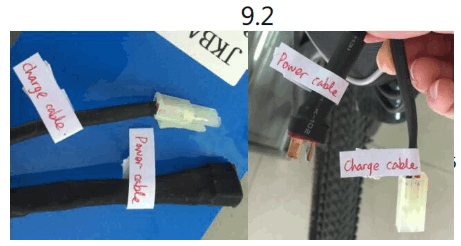
- Install battery
9.1 Open the box of battery
9.2 connect the connectors
9.3 Put the battery in bag and lock tighten the belts
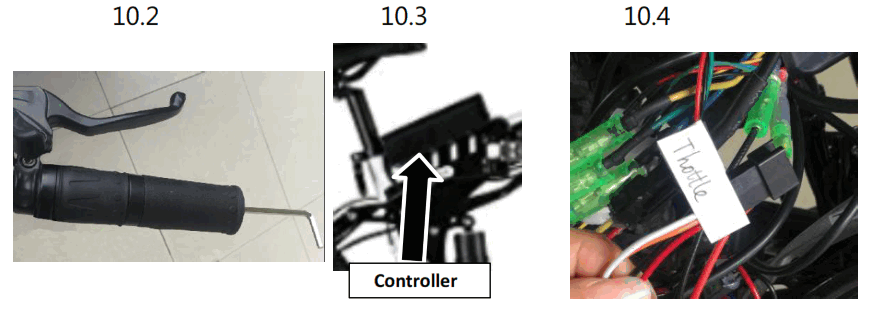
- The throttle of change
10.1 Hold the right side.
10.2 Install throttle, lock the throttle by tools.
10.3 Open the control box and remove the controller.
ATTENTION! Controller box has 4 screws, loosen them with tools, box is easily destroyed by incorrect operation.
10.4 Connect the connector between the throttle and controller, there is a notice sticker display that is correct.
10.5 For more information, see video at


More WINICE electric bike installation and repair instructions Any questions about the item, please contact
| Detail | Packing | List |
| Model | Description | Quantity |
| Bike | 1 | |
| Tool (open-end spanner13-15, | ||
| open-end | 1 | |
| spanner14-17,screwdriver,inner hexagon | ||
| spanner M6, M5,M4) | ||
| Manual | 1 | |
| Key | 2 | |
| Charger | 1 | |
| Battery | 1 | |
| Pedal | 1 | |
| Reflector | 1 |