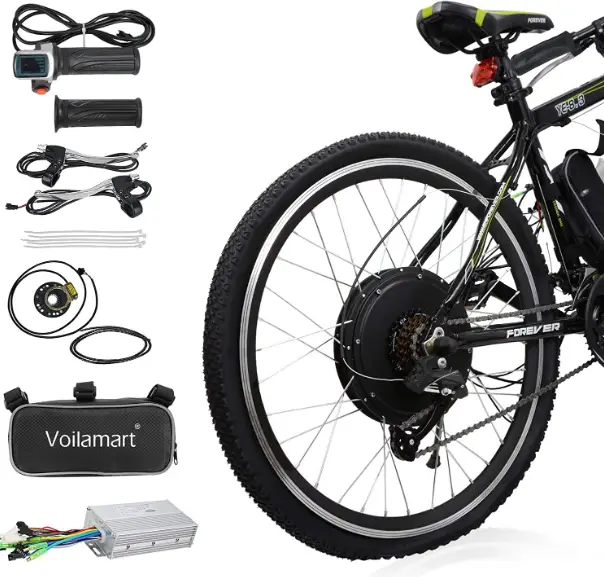
Voilamart 24866915 E-Bike Conversion Kits Rear Wheel

Part One: Getting started
Open the carton, take out all the parts. Check the parts according to the list.
Parts List:
Note: Please check for any damage on the items. Take out the items, put them on the floor and start to build your own E-Bike through following pages.
Part Two: Tools needed
Which Tools do you need for installation?
List:
- A). Adjustable Wrench
- B). Phillips Screwdriver
- C,D,E,F). 4 pcs Socket Head Wrench with diameters 3.0mm, 4.0mm, 5.0mm, 8.0mm
- G). Diagonal Cutting Nipper
- H). Puller
- I). Socket Wrench
Part Three: Removing and installation of the wheel
- Turn over your bike, remove the original rear wheel.
- Install the motorized wheel, fasten nuts on both axles.
Install your own disc brake rotor on motor wheel (6-hole)
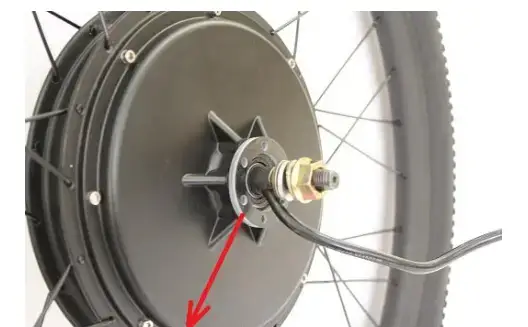
Put the motorized wheel in rear fork, please ensure motor cable shall come out from left side, motor axle must be put inside the socket of rear fork.
Please try the disc brake rotor position, If the distance between rotor and rear fork is less than 15mm, then please put a washer between motor axle and fork to adjust the distance. Fasten all nuts. If you use hydraulic disc brake, the caliper maybe too thick will touch motor cover, then you need to put washer between rotor and motor 6-hole.
Please also put a washer at freewheel side, between freewheel and fork.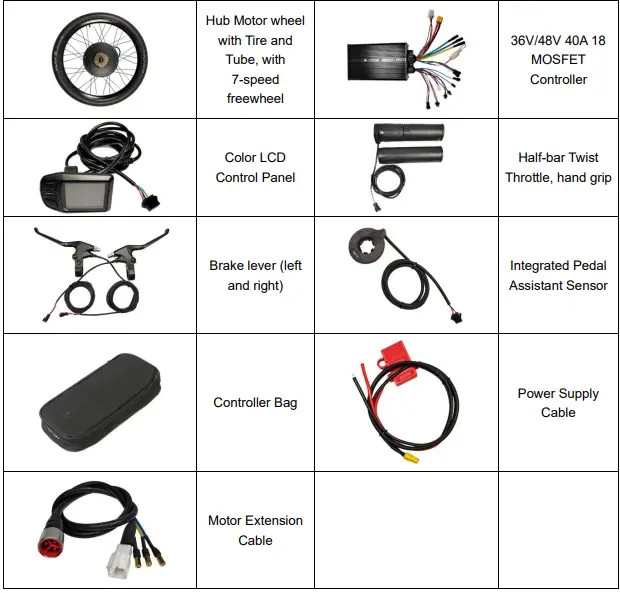

Part Four: LCD Control Panel Installation
LCD Control Panel UKC3:
Installation Guide:
Please install LCD at left side and fasten screw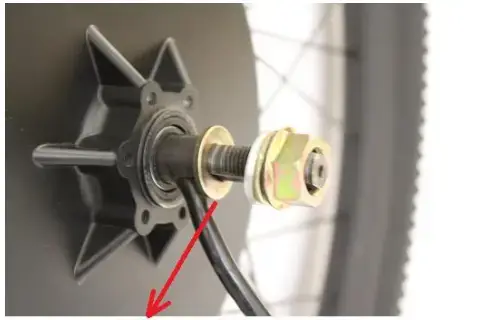
Part Five: Brake Levers Installation
Brake Levers has 2 parts: Left Brake Lever, Right Brake Lever
Installation Guide:
Remove original brake levers and install this new one
Put brake levers on both sides of the handlebar. Try and find a comfortable position then fix them with 5.0mm Socket Head Wrench.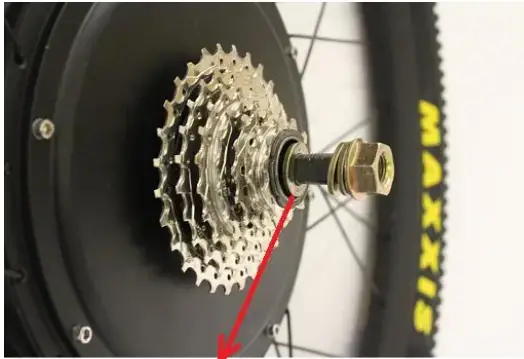
Part Six: Twist Throttle Installation
Twist Throttle has 2 parts: Half-bar Twist Throttle, Right Side Grip
Installation Guide:
Install left side hand grip, install right side throttle and fasten with 4.0mm Socket Head Wrench.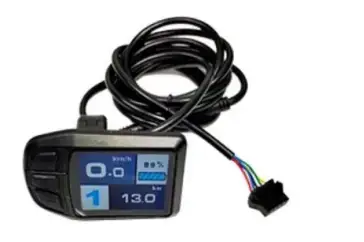
Part Seven: PAS Installation
This is integrated PAS has only one part: PAS Sensor and Magnetic Ring integrated
PAS (Pedal Assistance Sensor), also known as pedelec system, is a necessary component of an electric bike in European countries. PAS controls the power supplied to the motor through the angular velocity pedal. (i.e. the faster the pedal turns, the faster the motor runs.)
Remove your bike left side crank arm with Puller, put the PAS into the Bottom Bracket axle with cable toward back, put crank arm back and fasten screw.
Installation Guide:
Remove left side crank arm
Install this integrated PAS at left side
Install left side crank arm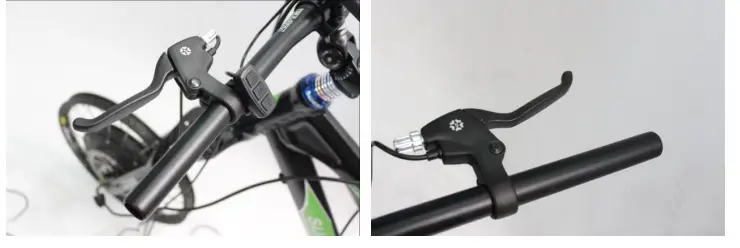
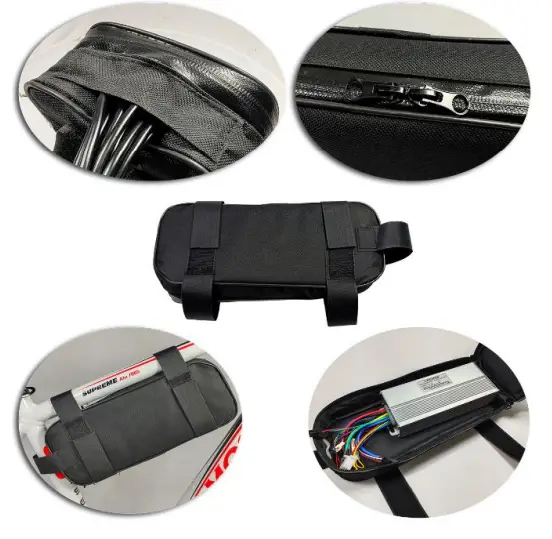
Part Nine: Controller Installation
Please find suitable position to put controller on your ebike. You can also put controller inside our controller bag and hang it under ebike top tube.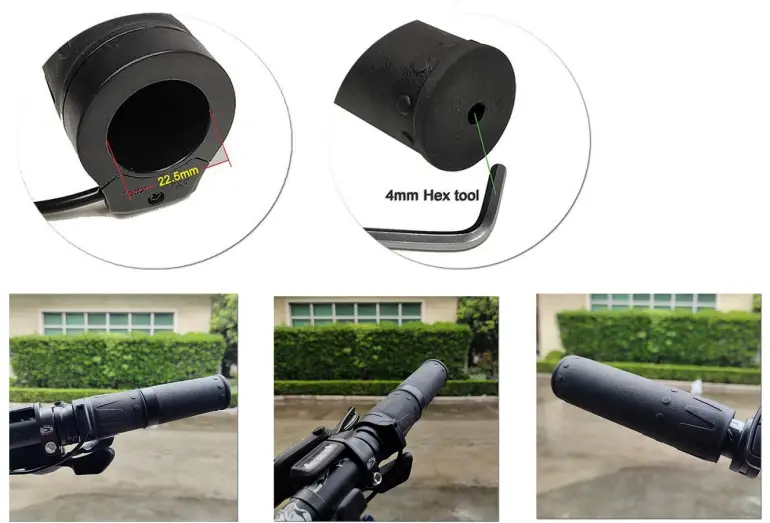
Controller Connection Diagram
Please connect all electronic parts with controller:
- Connect Controller with Motor via extension cable (Hall Sensor Plug, 3-phase Connectors), please make sure same color should connect with same color cable
- Connect Controller with Display
- Connect Controller with Throttle
- Connect Controller with both Brake Levers
- Connect Controller with PAS
- Connect Controller with your battery
- Turn on your battery
- Turn on Display
- Take a test ride (Throttle and PAS) with lower speed level

- PAS
- Thottle
- Light-Battery’s Voltage
- Brake Lever 2
- 25KM/H Limited
- Display
- Electronic lock
- Motor’s Phase Cable 5.5mm
- XT60 Male 12AWG
- Motor’s Hall sensor
Controller Diagram
Congratulations!
You have completed your own DIY eBike!!!