![]()
HIO/SR-4040HIS
HOVER BEATS
U SS A’S NA A NJ U A I_

CAUTION
As with any motorized vehicle, whenever you ride your Hover Beats E-Scooter you may risk death or serious injury from loss of control, collision or falls. All riders should read, understand and take heed of the instructions in this user’s manual when riding.
BEFORE YOU RIDE
- Prior to use, perform a quick visual check to verify that your e-scooter is in good shape and that your equipment is not damaged.
- Make sure the battery is fully charged before your first use. The battery will take approximately 5 hours to charge to full from empty.
- Make sure to wear a helmet and any other protective gear necessary to ride an e-scooter, making sure to comply with the laws of your local municipality.
- Find a safe environment to use the Hover Beats e-scooter. When you are starting out, we recommend a flat or mostly flat surface to get acquainted with the device and its controls. We do not recommend using your e-scooter in the rain or other wet conditions as it is unsafe and may cause damage to the e-scooter.
PLEASE NOTE
- Do not allow riders under 14 years of age to use your e-scooter without adult supervision.
- Do not allow anyone weighing over 185 pounds to ride your e-scooter.
- Improper operation may cause overheating or serious injury.
- Do not tamper with the battery or any of the wiring or attempt to modify the board.
- Please only use official Voyager parts on your vehicle. Other parts are not guaranteed to work and will void your warranty.
- Do not use the e-scooter if it is damaged, has been soaked with water or liquid, or if the battery pack has been damaged.
- Do not charge the e-scooter in abnormally hot, cold or wet conditions, like rain or direct sunlight. Charge in a shaded and dry location outside and away from any kind of combustible fuels.
- When riding your e-scooter, make sure to always follow all traffic and safety rules based on the laws of your local municipality.
- Do not ride your e-scooter while under the influence of any medication which can cause impairment, or when under the influence of drugs or alcohol.
- Do not attempt to do any tricks while riding your e-scooter. Furthermore, do not ride your e-scooter over rough terrain or uneven surfaces.
- Do not allow your e-scooter to be dragged by cars or bikes. Do not use your e-scooter on escalators or in crowded areas.
- Do not use your e-scooter at night or in areas of low visibility.
- Always power off your e-scooter when it is not in use.
INTRODUCTION
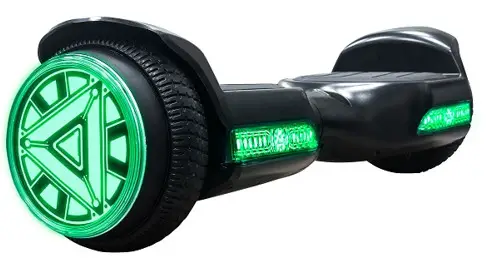
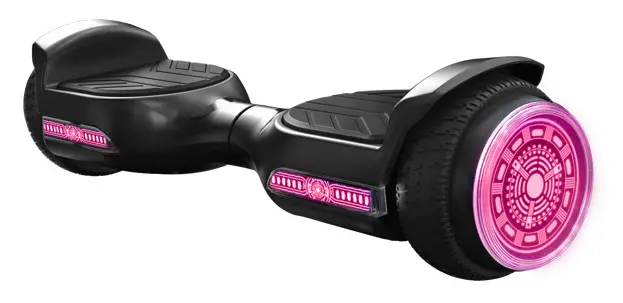
Thank you for purchasing your new Hover Beats Balance E-Scooter and welcome to the Voyager family. We hope that you’ll do plenty of exploring on your new balance e-scooter. The Hover Beats is compact, portable, and packs plenty of power to get you where you’re going. It also has great convenience features like LED lights. Please enjoy your new balance e-scooter responsibly and be sure to read the entire instruction manual before your first use. Have a blast, be safe, and Get Moving!
SPECIFICATION
- Top Speed: 6 mph
- Motor Power: 400W Dual Hub
- Battery Range: 5 Miles Max Distance
- Net Weight: 18 lbs
- Max Rider Capacity: 185 lbs
- Wheels: 6.5 Inch Tires
- Charge Time: -5 Hours
- Battery: 36V, 2Ah (10 Cells) Lithium-Ion
- Dimensions: 25.4″ x 7.48″ x 7.09″
- Water Resistance: IPX4
- Max Climbing Ability: 10°
- Lights: LED
IN THE BOX
- Voyager Hover Beats Balance E-Scooter
- Charging Adapter
- User’s Manual with Warranty Information
THE DEVICE
CHARGING
Your Hover Beals Balance E-Scooter has a built-in rechargeable lithium-ion battery. Before using your e.scooter for the first lime. you need to fully charge the battery. To do so, follow the steps below.
- Ensure the charging port on the book of the device Is clean and dry.
- Mg, the included charger into o grounded wet outlet.
- Connect the power supply to the Hover Beats via the charging port.
- An LEO in(FCO?o( It On yOur Hover Beals will nosh red to indicate that the battery is charging.
- Charging typically takes approximately 5 hours to complete.
- The LED indicator It wit stay red and stop flashing to indicate that the battery is fully charged.
- Unplug your Hover Beats as soon as it is done charging. NOTES: Do not leave your Hover Peals unattended while charging a let your device Charge in excessively hot Or Cad ternteraureS.
–An LED light on your charging adapter will km red while charging and then turn green when charging is complete.
BATTERY INDICATOR
When using your Hover Flow Balance E-5COOter, the battery indicator tells you to know how much power remains in your battery.
- When the LED light is green. the battery has enough power to continue riling.
- When the LED light flashes red, the battery needs to be charged as soon as possible. h addition. the scooter wit slows down and makes an o buzzing sound.
NOTE: When coming to go fa a ride on your e-scooter. note that the battery life we are shorter when king In colder temperatures. Plan accordingly.
CALIBRATION
The Hover Beats Balance E-Scooter should be calibrated out of the box, but if you find that it is not properly responding to your inputs, you can re-calibrate.
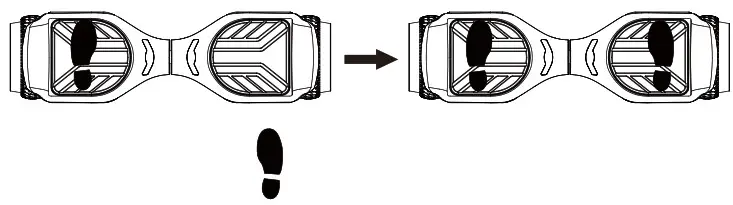
- First, start by placing the e-scooter on a flat. even surface with both footpads level.
- Press and hold the power button until the e-scooter begins beeping continuously (approximately 8 seconds).
- Power off and then turn the power back on. The e-scooter is now calibrated.
BLUETOOTH SPEAKER
In order to use your E-Scooter’s built-in Bluetooth speaker, follow the steps below:
- Power on the Hover Beats Balance E-Scooter by pressing the power button located on the rear of the device.
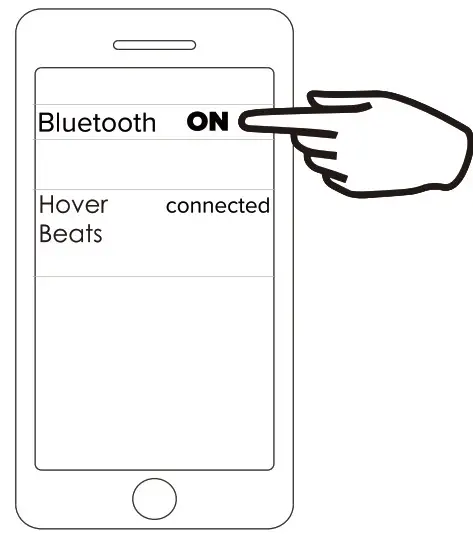
- Go to the Bluetooth settings menu on your phone. Make sure that Bluetooth is turned on. Connect to the device listed as “Hover Beats.”
- Once connected your scooter will emit a beeping sound.
GET MOVING
- First, power on the Hover Beats Balance E-Scooter by pressing the power button located on the rear of the device.
- Start by standing behind the Hover Beats with your feet lined up behind the two footpads.
- Place one foot on the e-scooter, but keep your weight on your other foot until you are ready to get on.
- Once you are ready to mount the Hover Beats, bring your other foot onto the other footpad quickly and evenly.
- You will likely be most successful stepping onto the Hover Beats quickly and confidently. The process is a lot like climbing stairs, where you step on with one foot and then the other.
- Once you are on the e-scooter, you must find your center of gravity and balance yourself. The board is sensitive to motion so keep your feet flat as if you were standing on the ground.
- First-time users should likely have a spotter available to help steady them as they step on the e-scooter.
GET MOVING
- Be sure the Hover Beats Balance E-Scooter is powered on.
- Once you have become comfortable mounting the e-scooter and standing on it comfortably and confidently, it’s time to get moving.
- To control your movement on the Hover Beats, you only need to shift your center of gravity forward or backward.
- To move forward, just lean your body forward slightly and the e-scooter will follow.
- To reverse, lean your body slightly backward and the e-scooter will begin moving backward.
- To turn right, slightly tilt your left foot forward. To turn left, slightly tilt your right foot forward.
- If you need to go over bumps or rough surfaces, be sure to bend your knees slightly to absorb some of the impacts.
- To get off of the Hover Beats, take one foot off first and put it behind the e-scooter. Then follow with your other foot. The e-scooter should be sitting in front of your feet, just like when you first stepped on board.
WARNING:
Your e-scooter will make buzzing sounds and its LED light will flash red when battery power is low. However, it may also do this when there are performance issues, hardware issues or if your scooter is upside down. Safely get off your scooter as quickly as possible if this occurs.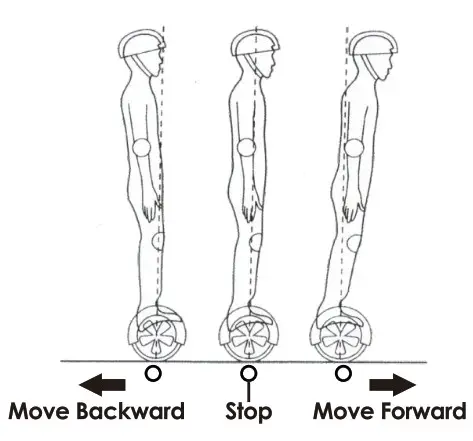
WARRANTY
This warranty covers the original consumer purchaser only and is not transferable.
This warranty covers products that fail to function properly UNDER NORMAL USAGE, due to defects in material or workmanship. Your product will be repaired or replaced at no charge for parts or labor for a period of one year.
What Is Not Covered by Warranty Damages or malfunctions not resulting from defects in material or workmanship and damages or malfunctions from other than normal use, including but limited to, repair by unauthorized parties, tampering, modification or accident.
To Obtain Warranty Service and Troubleshooting Information: Call (877)-444-0345 in the U.S. or visit our website at www.ridevoyager.com.
To receive a Warranty service along with the name and address of an authorized product service center, the original consumer purchaser must contact us for problem determination and service procedures. Proof of purchase in the form of a bill of sale or receipted invoice, evidencing that the product is within the applicable warranty period(s), MUST be presented in order to obtain the requested service. It is your responsibility to properly package and send any defective products along with a dated copy of proof of purchase, a written explanation of the problem, and a valid return address to the authorized service center at your expense. Do not include any other items or accessories with the defective product. Any products received by the authorized service center that is not covered by warranty will be returned unrepaired.
LOCAL LAVS
Prior to purchasing any motorized vehicle, we highly recommend that you research your local regulations and country-specific laws. Ultimately, you are responsible for complying with all applicable laws and regulations. Voyager waives all liability relating to your use of Voyager products.
FCC Warning
This device complies with part 15 of the FCC rules. Operation is subject to the following two conditions: (1) this device may not cause harmful interference, and (2) this device must accept any interference received, including interference that may cause undesired operation.
Changes or modifications not expressly approved by the party responsible for compliance could void the user’s authority to operate the equipment.
NOTE: This equipment has been tested and found to comply with the limits for a Class B digital device, pursuant to part 15 of the FCC Rules. These limits are designed to provide reasonable protection against harmful interference in a residential installation. This equipment generates uses and can radiate radio frequency energy and, if not installed and used in accordance with the instructions, may cause harmful interference to radio communications. However, there is no guarantee that interference will not occur in a particular installation. If this equipment does cause harmful interference to radio or television reception, which can be determined by turning the equipment off and on, the user is encouraged to try to correct the interference by one or more of the following measures:
- Reorient or relocate the receiving antenna.
- Increase the separation between the equipment and receiver.
- Connect the equipment into an outlet on a circuit different from that to which the receiver is connected.
- Consult the dealer or an experienced radio/TV technician for help.
Radiation Exposure Statement
This equipment complies with FCC radiation exposure limits set forth for an uncontrolled environment. This equipment should be installed and operated with minimum distance 20cm between the radiator and your body.