![]()
MANUAL
Welcome to
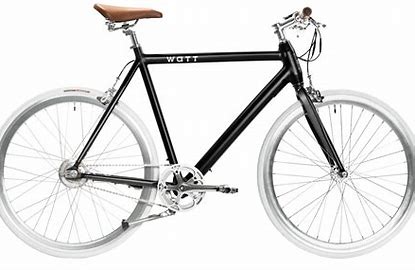
WATT Mobility
Congratulations on your WATT bike, the electric city bike for everyday use. Not only can you cycle longer distances more effortlessly, but you can also go a lot faster with the electric assist. This is how Watt Mobility turns cycling into a celebration every day. We have designed the bike with great care. In case there is something wrong with your bike, please do not hesitate to contact us directly. We offer a two-year warranty on almost all parts, the frame, and the electrical system. Would you like to know more about all the terms and conditions? You can find the full warranty terms and
conditions on our website.
In order to be able to enjoy your new bike to the fullest, it is important to maintain your bike properly. This manual tells you where to turn to for support and what to look out for in order to keep your bike in top condition.
MAINTENANCE
In order to be able to enjoy your new bicycle to the fullest, it is important to carry out proper maintenance. We have designed a bicycle without any unnecessary bells or whistles. This enables you to easily carry out any maintenance yourself. Consider, for example, replacing brake pads, patching up a tire, or oiling your chain. You will find more information, manuals and instruction videos on our website. This will ensure that your bicycle is kept in top condition. Precisely because we have kept our bikes as straightforward as possible, you can buy most parts from a bicycle repair shop. You can easily buy specific parts from our webshop, such as a new battery.
Customer service
We offer support in Dutch and English. If you prefer, we recommend that you contact the nearest service point or retail outlet in your area.
- Email: [email protected]
- Chat: www.wattelectric.bike
- Customer service: +31 85 001 2112
Service points
Would you rather go to a certified bicycle repair shop? Then go to one of our service points. You can find out which one is closest to you via the website.
- Service points: www.wattelectric.bike/shops
Check-up
We recommend that you get a check-up after about three months. This can be done at a bicycle repair shop nearby. Among other things, they will check the tension of
your spokes and whether there is no slack in the hubs, the crankshaft or the steering head.
Warranty
Our bicycles come with a standard two-year manufacturer’s warranty on materials and construction faults of the frame and electrical components. We provide a two-year warranty on the battery, or up to 500 charging cycles. The warranty is not transferable and becomes invalid if the bicycle is transferred to another owner. Assembly costs are at the expense of the owner. The following components, parts and facts are excluded from this warranty or lead to an exclusion from the warranty:
- Damage due to normal wear and tear
- Damage due to weather conditions
- Improper maintenance and damage as a result of incorrect cleaning products, e.g. tools such as high-pressure jets, etc.
- Any parts or accessories not originally supplied or replaced by WATT Mobility
- Parts are prone to wear and tear such as ball bearings, rolling bearings, bearing bolts and bearing screws, tires, brake pads, etc.
- Whenever the bicycle has been technically adjusted without the approval of WATT Mobility
- Consequential damages
- Improper use of the bicycle and the battery
- Consequences of a fall or a collision
- Commercial rental or used for purposes other than personal use.
Please note: your invoice is also your proof of your warranty, so keep it in a safe place!
Instruction manuals
This manual covers the general features of our models. A number of parts may vary per model and have their own manual. These specific manuals can be found on our website under Support: www.wattelectric.bike/us/support/ manual-instructions. They include explanations about:
- Various lighting systems
- Various display systems
- Various braking systems
- Locks
Please note:
- Do not clean your bicycle with a high-pressure jet. This means that you might spray grease or oil out of the parts. This may in turn cause your bicycle to rust or be seriously damaged.
- Use the bicycle for what it is intended. The WATT bike is an electric city bike, intended for asphalted roads in and around city streets. It is not a mountain bike or a racing bike and should not be used as such. Use the bike with care. Riding on and off curbs can cause punctures or damage rims, for example.
WATT Mobility is not liable for improper use of the bicycle, in particular when it comes to failure to observe safety guidelines and any resulting damage. - Make sure that loose clothing does not get caught between moving parts such as the spokes or the pedals.
- Wear and tear is the result of using the bike. If the bike is used very intensively, it will also wear out more quickly. Therefore, replace parts that are subject to wear and tear in good time, such as brake pads and tires. Replacing these parts too late can lead to irreparable damage.
BATTERY AND CHARGING
The WATT Bikes are designed in such a way that the battery is not visible. The battery is fully integrated in the lower tube of the frame and consequently does not stand out. Charging is done via a connection on the side of the frame. The indicator light on the charger changes color when the battery is being charged. When the battery is full, the light turns back to green. A completely empty battery can be charged in about 3-5 hours.
In practice, you will hardly ever drain the battery. If you cycle an average of between 5 and 10 kilometers each day, you can then easily cycle for a few days on a full battery.
The average lifespan of a battery is around 500 charging cycles. Keep in mind that the range of a battery is gradually decreasing. But replacing a battery is done in no time at
all. You can order a new battery on our site and replace it yourself or have it replaced by a bicycle repair shop. Would you prefer to do it yourself? Then you can find an instruction video on our site: www.wattelectric.bike/us/support/manual-instructions.
Here are a few tips to get the most out of your battery:
- FULLY INFLATED TYRES: Make sure your tyres are fully inflated and your bike is kept in good condition. Fully inflated tires allow you to cycle a lot further with the electric assist.
- FIRST USE: If you are unpacking your bike from the box, it is recommended that you charge it fully before you start cycling. Ride your bike until the battery is just half empty
the first few times and then charge it up again. This yields the best long-term performance. - PREVENT CONTINUAL CHARGING: The supplied charger uses energy and the battery sparingly. It is therefore not possible to endlessly charge the battery until it no longer works. However, this does not mean that you need to charge your bike after just ten minutes of cycling. Even if you don’t use your bike for a while, you don’t have
to constantly recharge the bike battery. The charger indicates when the battery is full. Disconnect the charger from the bike and don’t leave it in for too long (e.g. a
whole night) when the battery is charged. - AVOID COMPLETELY DRAINING YOUR BATTERY WHEN CYCLING: Try to avoid completely draining the battery while cycling. This is not only inconvenient for you when you are on the road, but it is also detrimental to the battery’s lifespan.
- WINTER MODE: We recommend that you put the bike inside when it’s freezing and leave the battery at least half charged. If you do not use the bike for a longer period of time, it is wise to recharge the battery from time to time. The battery will not run down quickly, but it can’t hurt to take a ride every now and then in the winter to recharge the battery. Your bike’s range will be shorter in cold weather because the battery has less power than at higher temperatures. Take a reduced range of about 25% into account. If possible, charge the battery in a heated place. This is quicker and your range will be greater.
Range
How far you can cycle with a full battery (the range) is determined by a number of factors. It depends on your own weight, the assistance level you choose and the conditions that you are cycling in. For instance, with strong headwinds and assistance level 5, the range is shorter than on a flat road when the wind is behind you and you’re using assistance level 1. A lot of braking and accelerating, like at traffic lights, also shortens the range. Generally, you can expect to cover a distance of between 40 and 70 kilometers. More than enough for everyday trips around town.
We recommend that you stick to the speed of other cyclists. You will notice that 25 km/hour in inner-city areas is pretty fast Then it’s best to select a lower assistance level. This not only makes cycling safer, but also saves energy and extends the distance that you are able to cycle electrically.
ROTATION SENSOR
The electric motor is located in the rear axle and has a power output of 250 WATT. The drive is activated via a rotation sensor on the crankshaft. With a rotation sensor, the motor is activated as soon as the pedals start turning around. This offers you a more consistent level of assistance. This technique also requires less maintenance. As soon as you stop pedaling, the motor stops providing assistance.
The frame is made of aluminum, which makes the bike lightweight and strong. Our bicycles weigh approximately 17 kilograms. So you can cycle just fine even without any pedal assistance. In order to be able to also ride at faster speeds, a resistance of a minimum of 2.75 is applied. This is the ratio between the front and rear gear teeth, also referred to as the gear ratio. Theoretically, this makes it harder to set off, but since the electric motor provides assistance practically immediately, you will hardly notice it.
Please note:
Switch off the battery when you start to walk with your bike. The pedals will probably turn as you walk with your bike. The rotation sensor will detect this motion, which activates the motor. You can prevent this by turning the bike off or setting the assistant to the “0” level. You can also opt for the walk assist function by pressing and holding down the DOWN (or MINUS) button while you walk. The electric bike will then move at an average speed of 6 km/hour. The display will then show a P. To turn it off again, release DOWN (or MINUS).
No need to calibrate
One of the most frequently asked questions is whether it is technically possible to take off the rear wheel, for example, to change a tyre, without having to recalibrate the electrical system. This is often necessary when using a torque sensor. However, this is not necessary for our bikes that come equipped with a rotation sensor. You can simply disconnect the cable that leads to the motor and remove the rear wheel from the bike.
Please note:
If you have disconnected cables and want to reconnect them, make sure that the arrows on both ends point towards each other. The arrows are on both ends of the cables that need to be disconnected => <=.
LIGHTS
The lights on WATT bikes have their own power supply and are NOT connected to the main battery, which is built into the frame. This means that you always have to switch your lights on and off yourself. LED lights uses very little power, which means you have more than 120 operating hours on a couple of regular AAA batteries. Enough for several months of cycling comfortably in the dark. Even if you run out of battery power, your bike will still be well lit. How you can replace a battery can be found on the website in the relevant manual on lights: www.wattelectric.bike/us/support/manual-instructions.
Please note:
The lighting is NOT connected to the main battery that is built into the frame.
Make sure that you always switch your lights off each time.
LCD-DISPLAY
The electric bike is preconfigured to 5 levels by default. 5 is the highest level with the maximum assistance and 1 is the lowest level. The most important levels are described
below.
Switching on and off
The LCD display will turn on when you press and hold down the “MODE” button for a while. This is where you can see the system’s battery status. You turn the electric bicycle off by holding down the MODE button again for a while. Whenever the e-bike is inactive for more than 10 minutes, the display switches itself off automatically.
Battery status
The battery status will be visible after switching on the LCD display. The charging status is shown with a battery icon which is divided into five bars.
 The battery is fully charged when all five bars light up. When the outer edge of the logo flashes, it indicates that the battery needs to be charged immediately.
Assistance levels
Press UP/DOWN (or PLUS/MINUS) to switch between assistance levels. The default assistance levels are 0-5. Level 0 means no assistance, level 1 minimum assistance, and level 5 maximum assistance. When starting up, the assistance level is always set to 1.
Is your assistance levels at the highest setting? Then the battery will use more energy than if it’s at assistance level 1. The battery uses less energy and you can cycle further on a lower level. The range is then much greater.
Display Backlight
The backlight can be switched on when there is not enough light outdoors. Press and hold UP (or PLUS) down for two seconds to turn on the display backlight. Press UP again for two seconds to turn the LCD backlight off again.
Walk assist function
Press and hold DOWN (or MINUS) to turn on the walk assist function (after two seconds). The electric bike will then move at an average speed of 6 km/hour. The display shows a P. Release DOWN (or MINUS) to turn it off again.
Information
After switching on the display, the standard screen appears indicating the current speed and total distance traveled (in km). Press MODE several times to display alternating information on the current speed (in km/hr), distance traveled during a single trip (in km), trip duration (in hours), highest speed reached (in km/hr), average speed (in km/hr) and power consumption (in Watts).

Self-configuration
If you are not completely satisfied with the default settings, you can configure the settings yourself. See all the options in the online manual:
www.wattelectric.bike/us/support/manual-instructions.
You can always reset the display to the original factory settings. This is also described in the manual.
Error messages
In the unlikely event that something goes wrong, an error code will appear on the display. The meaning of the code and what you have to do to fix the error message can be found in the online manual: www.wattelectric.bike/us/support/manual-instructions.
Please note:
If you have the feeling that the assistance cuts out as soon as you go faster than 25 km/h, it is most likely that the speed limit has not been set correctly. You can easily adjust this yourself. Feel free to set the limit of the bike to 40 km/h. The bike will then keep providing assistance (continuously at 25 km/h) until you go faster than 40 km/h. However, this hardly ever happens and the motor will not cut out once you get up to speed.
BRAKES
The WATT NEW YORK, MONTREAL and BOSTON use rim brakes.
The WATT BROOKLYN uses hydraulic disc brakes.
With rim brakes, you brake using brake pads that press against the rim when you apply the brake. As soon as you apply the brakes, the assistance from the electric motor also stops. If you notice that the braking force is weakening, it is likely that the brake pads are worn out. You can inspect them for wear and tear by looking at the grooves on the brake pads. If the grooves have worn down to the bottom of the pad (half a millimeter), you will need to replace them. Brake pads can be purchased from any bicycle repair shop. Make sure that you fit the left brake pad on the left side and the right one on the right side. After replacing them, check the distance between the brake pads and the wheel rim. Aim for an ideal distance of 2 mm. If the distance is greater, you can reduce this using the adjustment pin on the brake lever.
A hydraulic disc brake is made up of 2 movable brake pads. A reduction in braking force may indicate that there is air in the pipes. If this is the case, go to a local bicycle repair shop or one of our service points.
Please note:
- No oil, grease or wax must be allowed to get into the brake discs!
- If you do see traces of oil on the levers or pipes, this may indicate leakage in the brakes system. You can get this fixed at a bicycle repair shop or one of our service points.
BIKES RECEIVED AS A PACKAGE
Was the bike delivered as a package? Then you still have a number of things to do yourself to make your bike roadworthy. This is also relatively easy to do yourself without any technical expertise. All you have to do is straighten the handlebars and mount the pedals. Make sure that you mount the left pedal (see sticker “L”) on the left side and the right pedal (sticker “R”) on the right. You will find the tools you need in the packaging. For your convenience, we have made an instruction video that explains step-by-step
how to make your bike roadworthy. This instruction video can be found on our website: www.wattelectric.bike/us/support/manual-instructions.
Please note:
Mount the left pedal with the “L” sticker on the left side of the bike. Mount the right pedal with the “R” sticker on the right side. The screw thread on the left pedal runs in the opposite direction to what you would normally expect. This means you also have to screw the left pedal in an anti-clockwise direction. This is to prevent the pedal on the left side from unscrewing while cycling. Incorrectly assembled pedals and any damage resulting from that will not be reimbursed.
CONTACT DETAILS
Do you have any questions concerning this manual?
Please contact our customer service.
Customer service
For the moment, we only provide support in Dutch and English. If you prefer, we recommend that you contact the nearest service point or retail outlet in your area.
- Email: [email protected]
- Chat: www.wattelectric.bike
- Customer service: +31 85 001 2112
Other information
Internet: www.wattelectric.bike
Frequently asked questions: www.wattelectric.bike/support/faq
Manual and instructions: www.wattelectric.bike/us/support/manual-instructions
Service points
For an overview of our service points, please visit: www.wattelectric.bike/shops
![]()