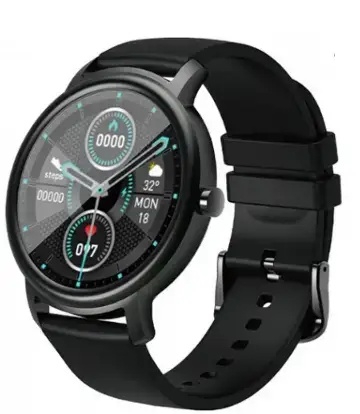
Xiaomi IP68 Mibro Air Smart Watch
Download and Log into APP
- APP installation requires you to turn Bluetooth on;
- APP Download
- IOS: search and download “GloryFit on the APP Store (or you can scan the QR code displayed on the bracelet to download);
- Android: search and download “GloryFit” on the Google Play Store (or you can scan the QR code displayed on the bracelet to download)
- Compatible with IOS10.0 and more advanced systems / Android 5.0 and more advanced systems.
- After a successful installation, please register and log into your account according to the prompts. How to Charge Close the magnetic charging cable to the bracelet, then it will automatically attach to the charging Port to charge ( just as shown right; input voltage: 5V/1A or 5V/2A)
Bluetooth Pairing

How to Operate
- Slide the dial interface from top to bottom to enter the shortcut interface;
- Slide the dial interface from bottom to top to enter the information list interface;
- Slide the dial interface from left to right to enter the menu style interface;
- Slide the dial interface from right to left to enter interfaces such as step counting, heart rate and sleep.
Sports Data
Click the data icon to enter the sports data interface and check the corresponding date for the day: steps, distance and calorie;
Notification
Push Notification: all notifications of your phone will be automatically synchronized to the bracelet after a successful connection between the bracelet and APP (the bracelet can save unread notifications up to 15);
Weather
Push Weather: all whether the information will be automatically synchronized to APP after a successful connection between the bracelet and APP;
Sleep Monitoring
The interface shows your sleep conditions for the day. Data is updated per day and meanwhile synchronized to APP;
Heart Rate Monitoring
After a successful switch, it starts to measure after the bottom green light is on; it takes about 30~60s to measure and the measuring value is based on PPG technology;
Blood Pressure Monitoring
After a successful switch, it starts to measure after the bottom green light is on; it takes about 30~60s to measure and the measuring value is based on PPG technology;
Blood Oxygen Monitoring
After a successful switch, it starts to measure after the bottom green light is on; it takes about 30~60s to measure and the measuring value is based on PPG technology;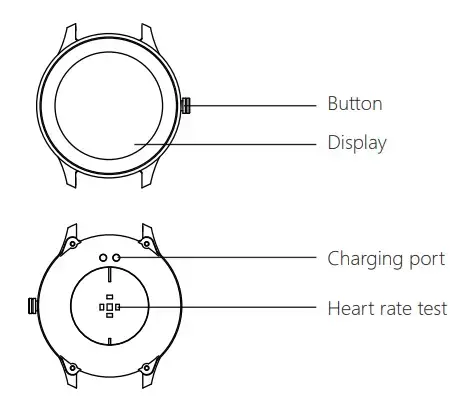
Sports Mode
Enter Sports Mode to enjoy various exercise modes: hiking, running, climbing, cycling, basketball, yoga and elliptical machine;
Stopwatch
Time: click the triangle icon to start and click again to pause (the left icon means resetting);
Music
Play Music: After a successful connection, open music player to control;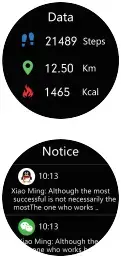
Adjust Brightness
Settings – Brightness – Adjust Brightness (“+” and “-” can be used to control);
Dial Switch
Long press dial plates to switch (4 styles are available); support to push dial plates;
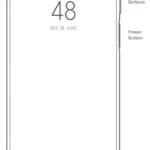
On/Off
Long press the “On/Off” key for 3s to power on. The bracelet will automatically power on when it is charging. Click the “Off” icon to power off;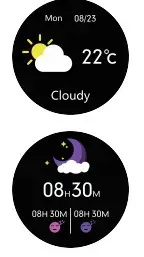
System Information
Check the bracelet’s information such as Bluetooth name, Mac address, firmware version and UI version;
Restore Factory Settings
All personal data will be removed if you confirm to restore factory settings.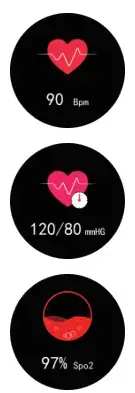
Parameters
Please read the instruction manual carefully, ensuring your safe and correct use.
- All data offered by the product is only a reference for health management. Please don’t take it as medical data! Be subject to all hospital test results in case of any abnormal data.
- Thanks to its IP68 waterproof grade, you can use the bracelet when washing hands or when it is raining. To avoid any damage, please:
- Don’t immerse the product in hot water;
- Don’t press keys underwater or wear them during diving;
- Don’t touch the corrosive liquid.
- The company reserves the right to make changes to the contents of this manual without any notice. Some functions are different in a specific software version, which is normal.
- Waterproof Grade: IP68
- Sensor: 3 Axis G-sensor
- Battery Capacity: 210mAh
- Synchronizing Method: Bluetooth
- Resolution ratio: 240*240
- Display: 1.28” TFT Full-touch Color Screen Working Period: About 5-7 Days
- Working Temperature: -10℃~ 50℃
- Packing List: Host, Charging Cable
- Compatible Systems: IOS 10.0 and More Advanced Systems; Android 5.0 and More Advanced Systems
FCC Caution:
Any changes or modifications not expressly approved by the party responsible for compliance could void the user’s authority to operate this equipment.
This device complies with Part 15 of the FCC Rules. Operation is subject to the following two conditions:
- This device may not cause harmful interference, and
- this device must accept any interference received, including interference that may cause undesired operation.
The device has been evaluated to meet general RF exposure requirements. The device can be used in portable exposure conditions without restriction.
NOTE: This equipment has been tested and found to comply with the limits for a Class B digital device, pursuant to Part 15 of the FCC Rules.
These limits are designed to provide reasonable protection against harmful interference in a residential installation. This equipment generates, uses and can radiate radio frequency energy and, if not installed and used in accordance with the instructions, may cause harmful interference to radio communications.
However, there is no guarantee that interference will not occur in a particular installation. If this equipment does cause harmful interference to radio or television reception, which can be determined by turning the equipment off and on, the user is encouraged to try to correct the interference by one or more of the following measures:- Reorient or relocate the receiving antenna.
- Increase the separation between the equipment and receiver.
- Connect the equipment into an outlet on a circuit different from that to which the receiver is connected.
- Consult the dealer or an experienced radio/TV technician for help.