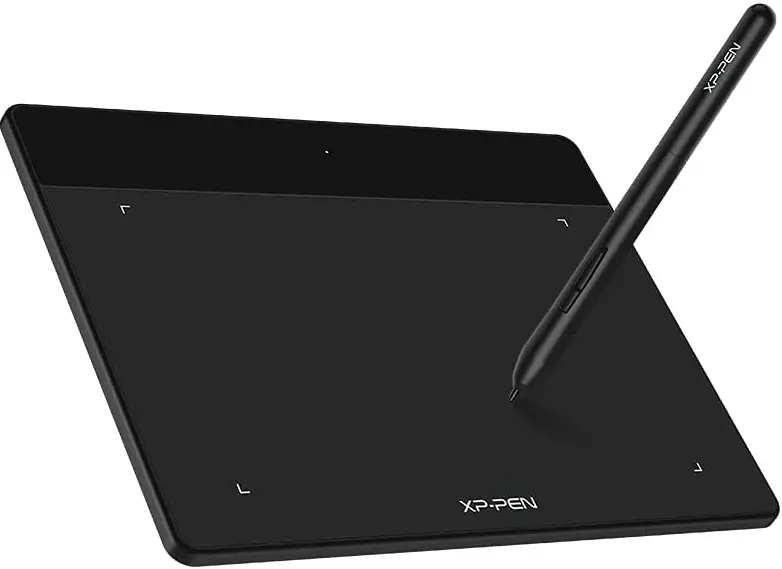
XP-PEN StarG640 6×4 Inch Ultrathin Tablet Drawing Tablet
The supported product models are as follows:
Graphics Tablet
| Star series | Star G430, Star G430S, Star G540, Star G640, Star G640S, Star G960, Star G960S, Star G960S Plus, Star 03 V2, Star 05, Star 06 |
| Deco series | Deco 01, Deco 01 V2, Deco 02, Deco 03, Deco mini4, Deco mini7 |
| Deco Pro series | Deco Pro Small, Deco Pro Medium |
Graphics Display
| Innovator series | Innovator 16 |
| Artist series | Artist 12, Artist 15.6, Artist 22 |
| Artist Pro series | Artist 12 Pro, Artist 15.6 Pro, Artist 16 Pro, Artist 22 Pro, Artist 22E Pro, Artist 22R Pro, Artist 24 Pro |
Connection Mode
Please follow the quick guide that came with your purchase to connect your device.
Support System
Windows 7 and above Mac OS X 10.10 and above
Download
Please download the corresponding driver according to the model of the product you purchased from the XP-PEN official website (https://www.xp-pen.com).
Installation
After downloading is completed, please unzip the folder and operate the 11.exe11 file (Windows) or 11.dmg11 (Mac) file, and then follow the prompts until installation is completed.
Notes:
- Before installation, please temporarily close the antivirus software and firewall, as well as all opened
- If other drivers have been installed on the computer, please uninstall them
- It is recommended to restart the computer after installation is
Introduction to Driver
After the driver is installed, connect your device to your computer, and then open the driver to start customizing your device.
Notes:
This document describes all the functions of the driver, but your functions in the actual use process will vary due to different connected devices. Please refer to the equipment you actually purchased and used for specific functions.
Store Configuration
If you need to make the changed configuration still valid when you use it next time after exiting the driver, please click the “OK” button on the left side of the driver interface to save the settings after changing the configuration. If the settings are successfully saved, prompt “Configuration saved successfully” will be given; otherwise, the changed configuration will be valid only when it is currently used.
Work Area
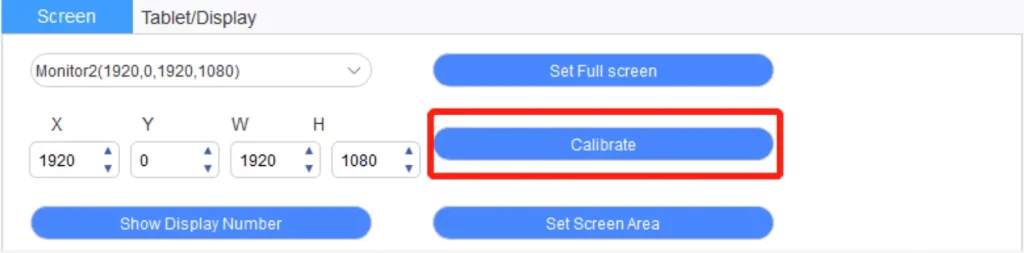
Screen

If multiple monitors are used in extended mode, it is necessary to select the work area of the device on the driver interface to map to the corresponding monitor.
If multiple monitors are used in copy mode, the working area of the device will be mapped to all monitors. When the pen moves in the work area, the cursor on all displays will move at the same time.
The driver provides three modes to set the display area of the screen:
- Set full screen: Set the screen area of the selected monitor to the maximum.
- Set screen area: Use the mouse to manually set the display area of the screen. Click the first position (top left) of the display area of the screen with the mouse, and then click the second position (bottom right).
- Customize: Manually enter coordinates in the corresponding input boxes below X, Y, Wand H to customize the size of the display area of the screen, or use the mouse to drag on the screen icon of the driver interface to adjust the display area of the screen.
Calibrate:
Using the function of screen calibration can avoid the problem of the distance between your stylus and the cursor.
This function only supports graphics display.
Show Display Number:
Identify all connected monitors, and numeric identifiers will be displayed in the lower left corner of each monitor.
Tablet / Display
Set any part of the work area of the device to be mapped as the display area of the screen, The driver provides four modes for selection:
- Full tablet area: Maximize the work area of the device.
- Tablet proportion: Scale the work area of the device and your screen in equal proportions.
- Set tablet area: Use a stylus to click the positions of “top left corner” and “bottom right corner” to be selected.
- Customize: Manually enter coordinates in the corresponding input boxes below X, Y, Wand H to determine the size of the work area of the device, or use the stylus to drag on the device icon on the driver interface to set the size of the work area.
Rotation Setting:
You may set the device to 0°, 90°, 180° & 270°, After finishing settings, you also need to rotate the device to the corresponding direction.
Rotating 180° means to change to the left-handed mode.
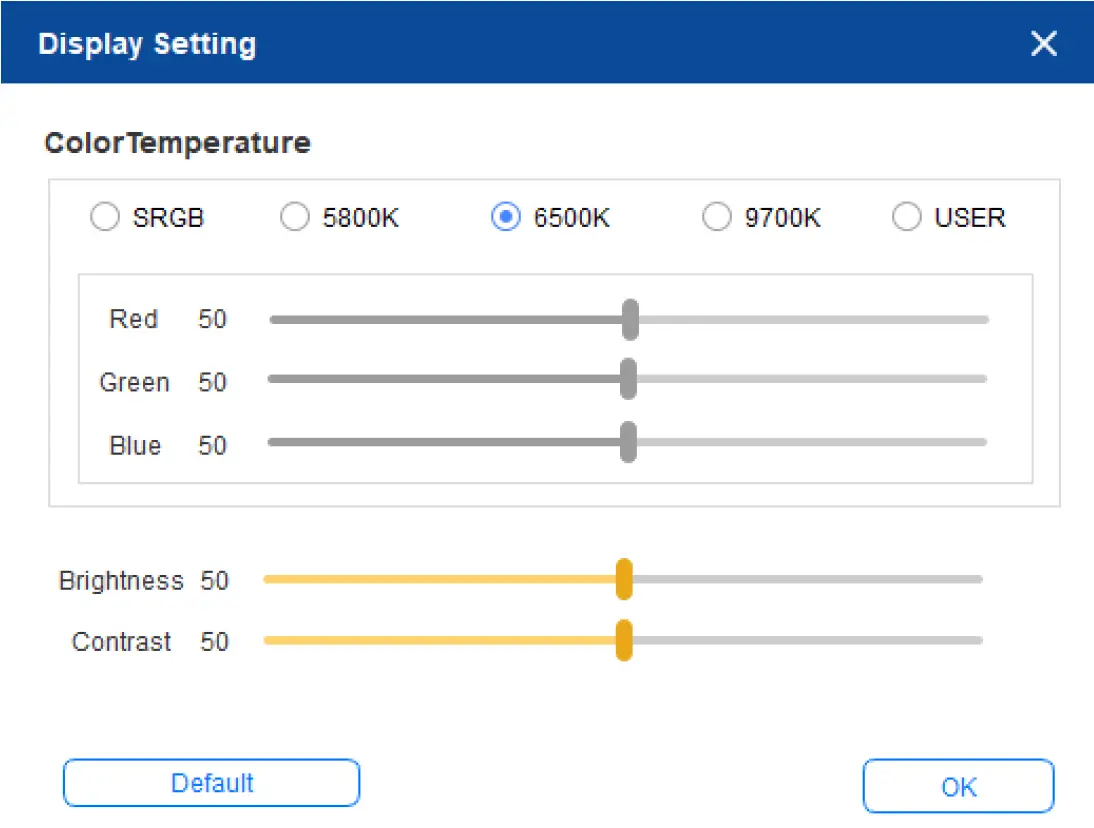
Display setting:
This function only supports graphics display. Set the “color temperature adjustment”, “USER”, “brightness” and “contrast” of the graphics display.
When you are connected to a graphics tablet, you can adjust the brightness of the four corner lights here, Only some models of graphics tablet are supported. Please refer to the actual product.
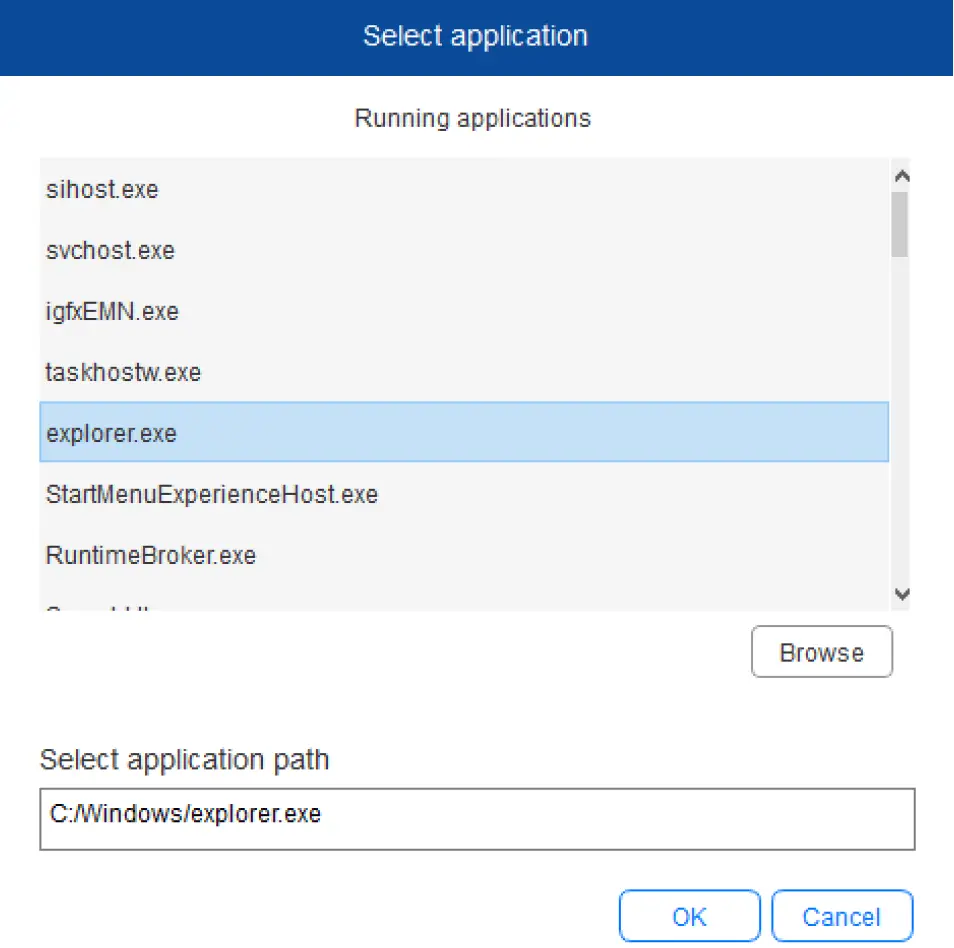
Application
After selecting the application, set the function you want for this application.
- Click the”+” on the top right of the application bar to open the application selection interface.
- Select software to be added from the running program or click the “browse” button to add from the installed software; after the application is selected, the path of the selected application will be displayed at the bottom.
- Click the “OK” button at the bottom of the interface, and the application just selected will be added to the application bar.
Pen Settings

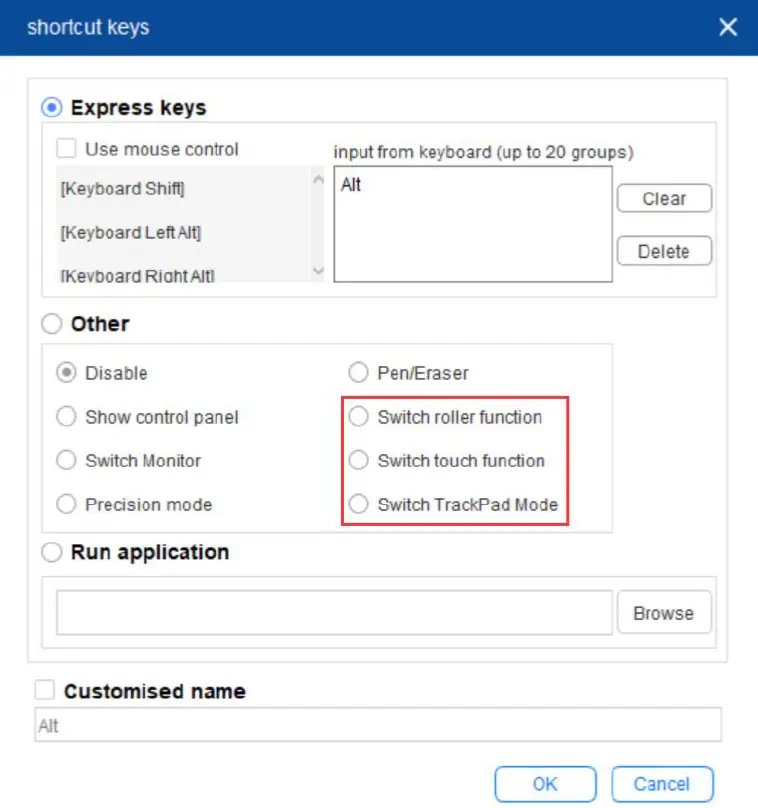
Pen Keys:
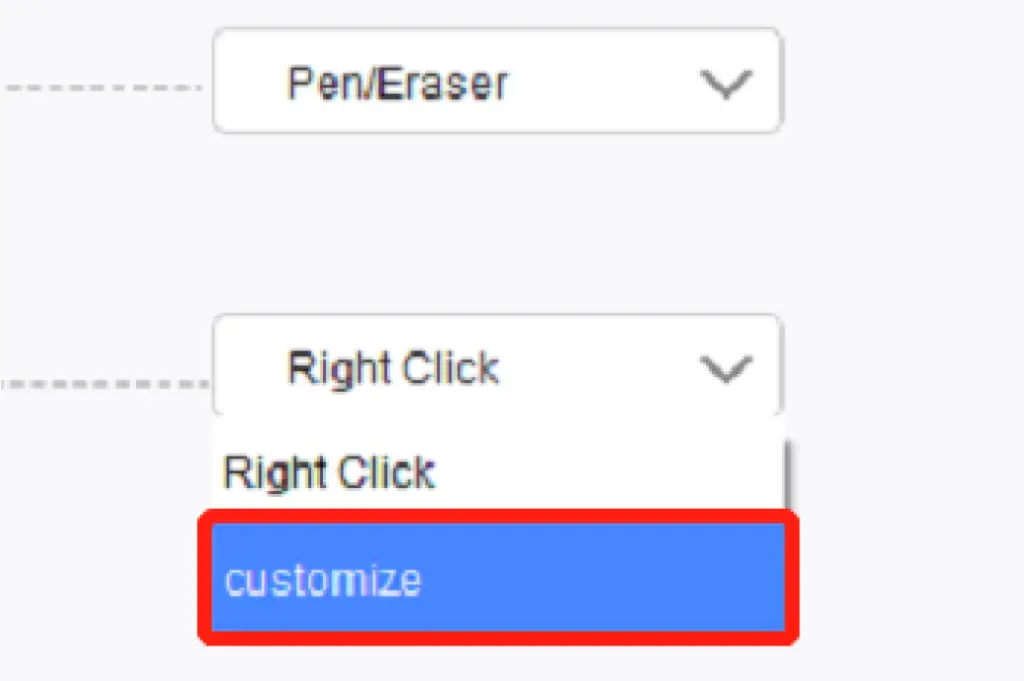
Set functions of the pen keys here. You may click the drop-down menu to use “Customize” to do so.
Notes:
When the digital pen is within the working range of the device, click the key to switch the pen or eraser mode. When other functions are switched, the current switching mode will be displayed at the bottom of your screen.
Selecting input from the keyboard in the custom function allows you to customize functions of the combination key.
Input From the Keyboard:
You may configure keyboard shortcuts here. With the mouse, you may use functions such as rotation in 3D software; for example, set it as the Alt key in 3D MAX software, and you may rotate the view with the middle mouse button, etc.
You may set multiple sets of keyboard shortcuts here. When you press the button, all the shortcut functions you set will run again. Different devices, the red area display function will be different.
Use mouse control:
Check here to set mouse operation and some keyboard keys.
Precision mode:
Precision mode is to limit the work area of the device to a small area. This function may allow you to make more detailed drawings for some areas.
Pressure adjustment:
The sensitivity of pressure may be adjusted by adjusting the “output” and “pen pressure” curves or moving the slider on the progress bar. Current pressure can test your current pen pressure.
Mouse mode:
The mouse uses the absolute mode by default. Check this to use the relative mode. After selecting it, you can adjust the speed of the mouse.
Absolute coordinate (pen mode):
Absolute coordinate is to scale down the display area of your screen to the work area of the tablet/display.
Relative coordinate (mouse mode):
The operation method of this mode is the same as that of a normal mouse.
Windows Ink:
Some drawing software can support Windows Ink pen pressure, and you can select or cancel “Windows Ink” to open or close this function, which is opened by default.
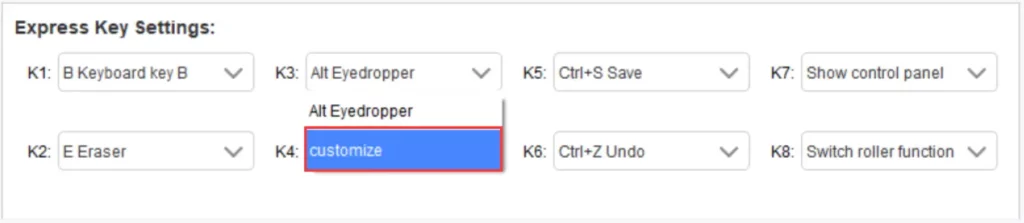
Express Keys
To use the express key of the device, set the input method to English mode. Setting to another mode may not function correctly.
The express key of the device is the command key of Photoshop as the default value. You can customize express keys according to your personal needs, different devices have different number of express keys.
If the device has a roller or a touch, it is recommended that you set one of the express keys to switch roller or touch function.
Customize Express Key
Select “customize” from the drop-down menu to customize the function of each express key. The setting steps are the same as those of digital pen keys.
Roller / Touch
According to different connecting devices, the functions displayed here are also different. The functions of “scroll” and “touch” are introduced respectively below. For other settings, please refer to “scroll”.
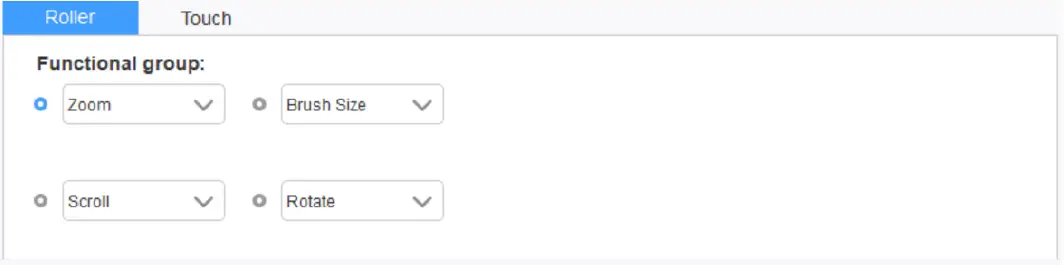
Roller
Select the function you want to use from the default four groups of functions. You can customize or set this function to have no effect.
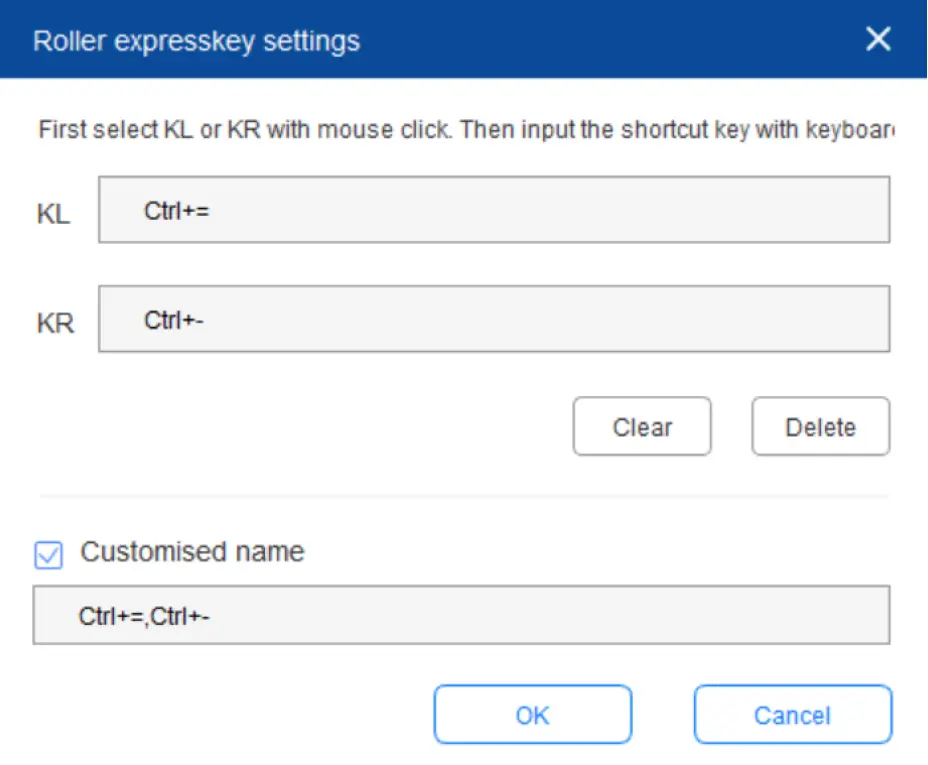
Customize:
In the custom settings, you can set KL and KR to corresponding key combinations and use custom naming.
Touch
You can set the touch to mouse mode or scroll mode.
Scroll Mode:
The setting procedure is the same as that of the scroll.
Mouse Mode:
You can use the touch as a mouse.
Settings
Disable Express Key:
Check this function to close functions of all express keys.
Disable Message:
When the express key is used, no message will be displayed at the bottom of the screen when this function is checked.
Disable Pressure:
After checking this function, you will not feel the pressure of the stylus when using this stylus.
Disable tilt:
Checking this function will disable the tilt effect of the stylus.
Diagnostic tool:
When there is any problem during your use of the driver, you can use diagnostic tool.
Import & export config:
You can import and export the configured express keys and other functions to store and read their settings.
Notes:
When you need to import & export the changed functions, please click the “OK” button on the left side of the driver interface to save the configuration.
If you have any questions, please contact us at:
Web: www.xp-pen.com
Email: [email protected]
![]()
