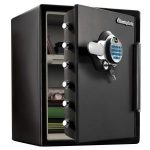
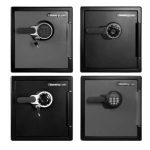
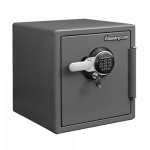
SentrySafe Lock Code Programming Instructions are an easy way to make sure that your SentrySafe is secured. This article will cover the basics of programming a new combination lock code for your safe, as well as other safety precautions you can take.
Sections in this Manual
Manufactured by SentrySafe

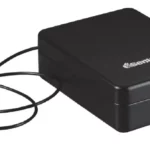
Depository Safes
OWNERS MANUAL
Thank you for purchasing this security safe from Sentry®Safe. This guide is designed to maximize the user and security features of this project.
Getting started
Installation of the batteries (keep the door open during setup):
- Turn the keypad housing counterclockwise and carefully pull away from the mounting plate to expose the battery compartment.
- Install four new AAA Alkaline batteries (not included). Caution: Hold onto the keypad housing to avoid pulling wires.
- Carefully position the keypad into the inserts on the mounting plate and turn clockwise. Ensure that there are no wires or cables trapped between the keypad and the mounting plate. Pinched cables result in a short circuit.
- Enter: * – Master or Manager Code (from the front of the booklet) – # The lock will indicate a valid code entry with a single signal and the open light will stay green for five (5) seconds.
- Turn the handle clockwise before the green light disappears.
Programming your lock codes
The SentrySafe electronic lock is shipped from the factory with a factory set master code & manager code (see the front of the booklet). You should set the lock to your own unique master & manager code immediately. Keep notes on which code belongs to which user (Master (User 1), Manager (User 2), User 3, User 4, User 5, User 6 and User 7).
A single signal (LED fl ashes and beeps once) response from the lock indicates valid entry.
A double signal (LED fl ashes and beeps twice) response from the lock indicates an invalid entry.
- If three incorrect entries are entered in a row, the keypad will shut down for a period of fi ve minutes. During this shut down period you will not get a response from the keypad.
Changing the Master Code
(Code length: 1 to 10 digit code) Always perform this operation with the door open.
- Enter: # – Existing Master Code – #
- The set light will stay orange for ten (10) seconds.
- Enter: 1 – * – New Master Code – # – New Master Code – #, before the orange light disappears.
If a mistake is made during the change, wait thirty (30) seconds and repeat steps 1 thru 3.
Test the new code several times before closing the door: Enter: * – Code – #
- The lock will indicate a valid code change with a single signal.
- The lock will indicate an invalid code change with a double signal and the old code is still valid.
Changing the Manager Code
(Code length: 1 to 10 digit code) Always perform this operation with the door open.
- Enter: # – Master Code or Manager Code – #
- The set light will stay orange for ten (10) seconds.
- Enter: 2 – * – New Manger Code – # – New Manager Code – #, before the orange light disappears.
If a mistake is made during the change, wait thirty (30) seconds and repeat steps 1 thru 3. Test the new code several times before closing the door: Enter: * – Code – #
- The lock will indicate a valid code change with a single signal.
- The lock will indicate an invalid code change with a double signal and the old code is still valid.
Activate user codes
(Code length: 1 to 10 digit code) Always perform this operation with the door open.
- Enter: # – Master Code or Manager Code – #
- The set light will stay orange for ten (10) seconds.
- Enter: User ID Number (3-7) – * – New User Code – # – New User Code – #, before the orange light disappears.
If a mistake is made during the activation, wait thirty (30) seconds and repeat steps 1 thru 3.
- The lock will indicate a valid code entry with a single signal.
- The lock will indicate an invalid code entry with a double signal and the old code is still valid.
Example: # – Master Code or Manger Code – # – 5 – * – New User Code – # – New User Code – #. This will activate User Five (5).
Changing the user code
Always perform this operation with the door open
- Enter: # – User Code – #
- The set light will stay orange for ten (10) seconds.
- Enter: New User Code – # – New User Code – #, before the orange light disappears.
If a mistake is made during the change, wait thirty (30) seconds and repeat steps 1 thru 3.
Test the new code several times before closing the door: Enter: * – Code – #
- The lock will indicate a valid code change with a single signal.
- The lock will indicate an invalid code change with a double signal and the old code is still valid.
The Master and Manager can also change the user codes by following the “Activate user codes” section steps 1 thru 3.
Deleting user codes
Always perform this operation with the door open.
- Enter: # – Master Code or Manager Code – #
- The set light will stay orange for ten (10) seconds.
- Enter: User ID Number (3-7) – * – # – #
Dual user mode
When you want two people to open the safe; set your safe to dual user mode. One person enters their code and within sixty (60) seconds, the second code is entered. Always perform this operation with the door open.
Any Code + Any Code to unlock
- Enter: # – Master Code – # – 1 – # – 1 – #
- The lock will indicate a valid setting change with a single signal.
Master or Manager Code + User Code to unlock
- Enter: # – Master Code – # – 2 – # – 2 – #
- The lock will indicate a valid setting change with a single signal.
Opening your safe in dual user mode
- Enter: * – 1st Code – # – 2nd Code – #
- The lock will indicate a valid code entry with a single signal and the open light will stay green for fi ve (5) seconds.
- Turn the handle clockwise before the green light disappears
Returning to single user mode (Single code to unlock)
- Enter: # – Master Code – # – 0 – # – 0 – #
- The lock will indicate a valid setting change with a single signal.
Time delay mode
Always perform this operation with the door open. This function will delay both the opening and programming of the lock.
Activate time delay
- Enter: # – Master Code – # – (01-99) – # – (01-99) – #
- The lock will indicate a valid setting change with a single signal. Example: # – Master Code – # – 05 – # – 05 – #, this will set a fi ve (5) minute time delay.
- Press * or # to initiate the Time Delay.
When time delay is set
(During the time delay period the keypad will not respond to any entries)
The lock will flash once every five (5) seconds during time delay and will flash once every second during the last ten (10) seconds of the time delay ending with a double signal.
The lock will flash twice every five (5) seconds during the open period. The open period length is two (2) minutes.
During the open period, you can open your safe (see “How to open your safe, Step 1) or program your safe (following the steps of any programming procedure).
Deactivate time delay
- Enter: # – Master Code – # – 00 – # – 00 – #
- The lock will indicate a valid setting change with a single signal.
Floor Mount (optional)
This kit contains:
- Four (4) Masonry Anchors
Required tools:
- Powered Drill
- Adjustable Wrench
- 1/2 in. (M12) Masonry Drill
Instructions:
- Unlock safe and open door.
- Remove safe floor carpet.
- Look on the bottom of safe for four (4) holes with cap plugs.
- Remove the cap plugs.
- Position the safe in the desired location.
- From inside the safe mark the location of the four (4) bolt down holes.
- Move the safe aside to the clear marked spots for drilling.
- Using the ½ in. masonry drill, drill a 4 in. deep hole in the marked locations.
- Replace the safe in the desired location with the holes in the safe aligned with the
drilled holes in the floor. - Pass each masonry anchor through the safe floor into the drilled holes; making contact with the safe floor.
- Tighten each masonry anchor with the adjustable wrench.
- Replace safe floor carpet.
Customer Care
Troubleshooting
Low battery warning
The green LED light will signal in red when opening your safe. The lock is giving you a valid signal but is not unlocking.
Changing your batteries
- Turn the keypad housing counterclockwise and carefully pull away from the mounting plate to expose battery compartment.
- Remove the four AAA Alkaline batteries and replace. Caution: Hold onto the keypad housing to avoid pulling wires.
- Carefully position the keypad into the inserts on the mounting plate and turn clockwise. Ensure that there are no wires or cables trapped between the keypad and the mounting plate. Pinched cables result in a short circuit.
The lock has no response (no fl ash, no beeps)
- Make sure the wires in the keypad housing are not pinched and are securely connected. (See “installation of batteries” on page 2)
- Check to make sure the batteries are correctly and securely inserted into the battery compartment. (See “installation of batteries” on page 2)
- Lock can possibly be in the lockout penalty, wait fi ve (5) minutes, and check if the lock responds.
- Replace the existing batteries with new ones. (See “changing your batteries” in troubleshooting)
The lock is responding but does not unlock
- Make sure you are getting a valid response.
- Make sure you get a signal with every key stroke.
- Make sure you are not in time delay mode. (See “time delay mode” above)
- Replace the existing batteries with new ones. (See “changing your batteries” in troubleshooting)
If the lock still does not open, contact Sentry Group Customer Care: 1-800-828-1438 or 585-381-4900 (Available Mon – Fri, 8:00 am – 6:00 pm EST). Follow the instructions carefully to get the best possible use from your lock.


