![]()
Read all instructions BEFORE assembly and USE of product.
KEEP INSTRUCTIONS FOR FUTURE USE.
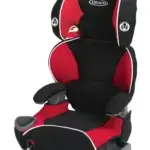
Take-A-Seat™
3-in-1 Travel Seat
Owner’s Manual
 WARNING Failure to follow the warnings and the instructions throughout this booklet could result in serious injury or death. Each mode has specific warnings, make sure to read and understand the warnings in each mode.
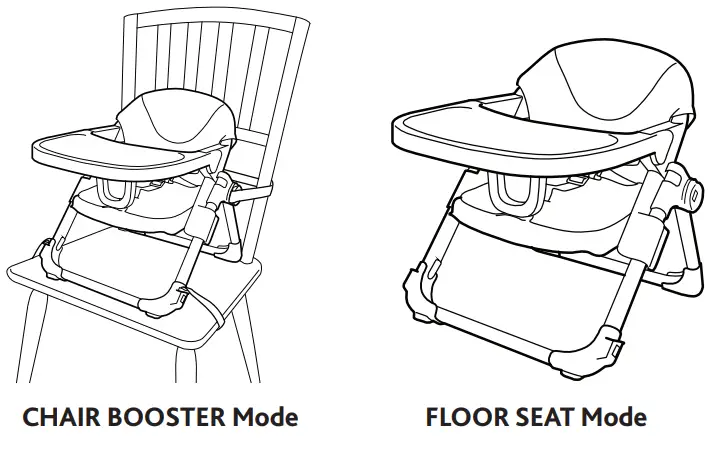
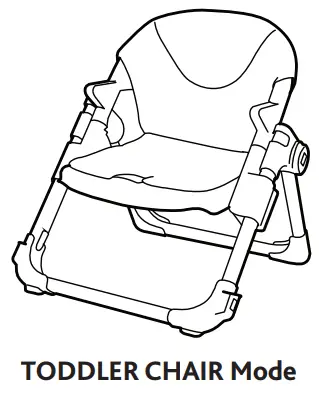
This product can be used in the following modes:
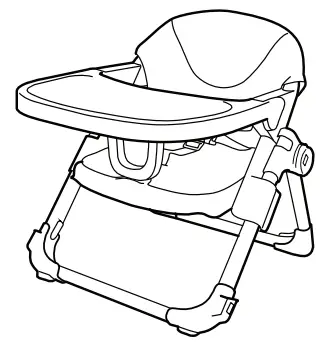
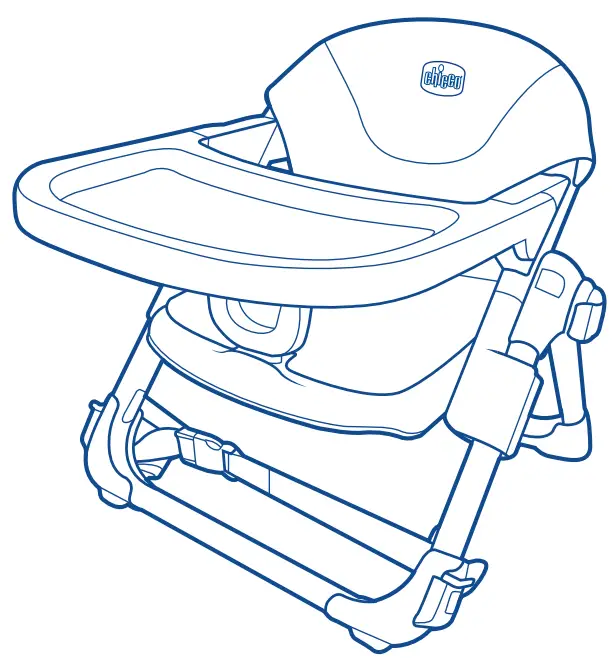
Parts List
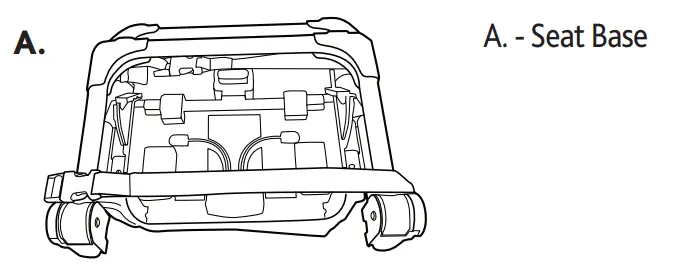
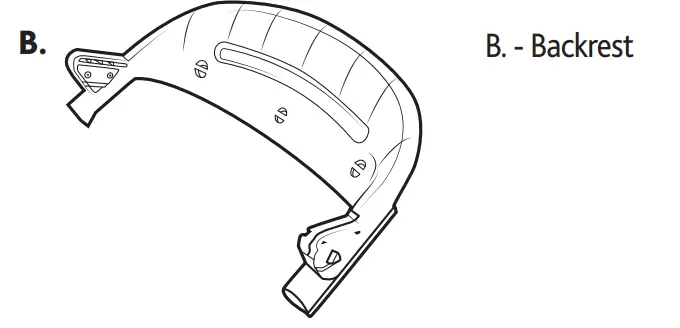
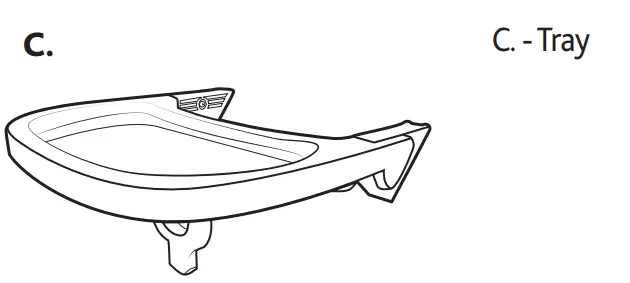
Components
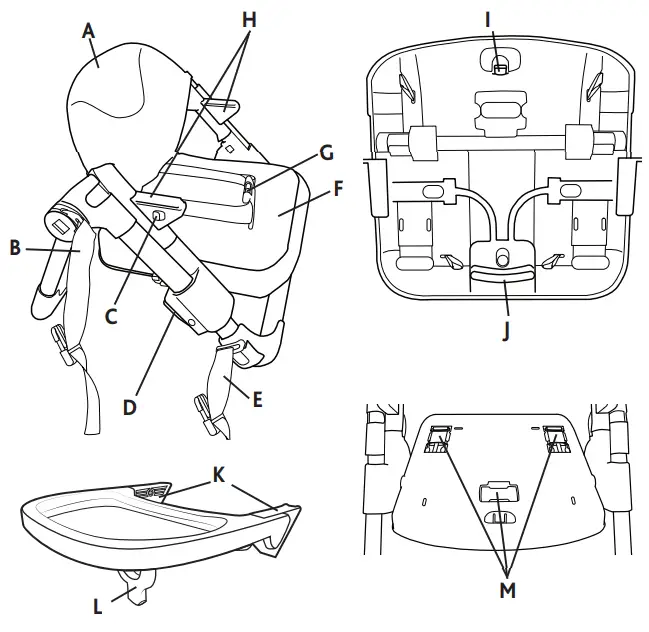
| A – Backrest B – Rear Attachment straps C – Tray Release Buttons D – Seat Height Adjustment Buttons E – Lower Attachment straps F – Seat Pad G – Harness Straps |
H – Tray Supports I – Horn Release Lever J – Seat Release Lever K – Tray Attachments L – Tray Horn M – Harness Strap Storage |
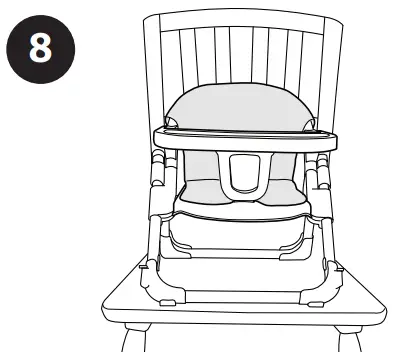
Assembling the Seat
- Unfasten the Rear Attachment Straps.
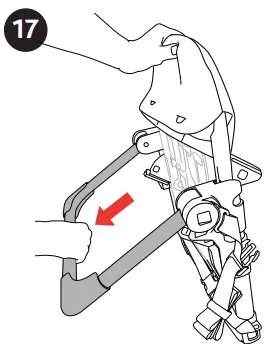
- Rotate the Rear Legs out until they click into place.
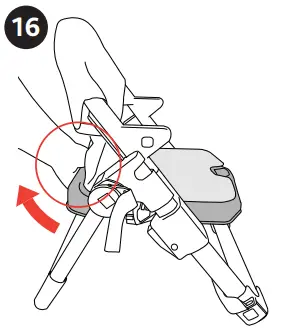
- Flip the chair upright and locate the Locking Lever on the bottom of the seat base as shown. Squeeze the Locking Lever and rotate the seat base up until it clicks into place.
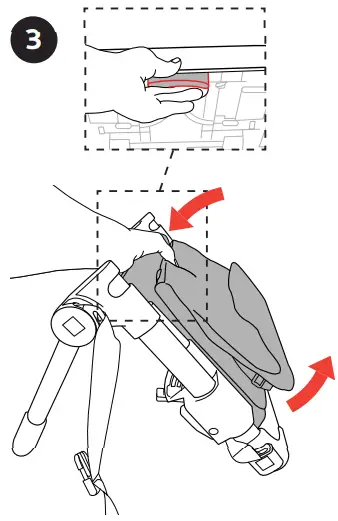
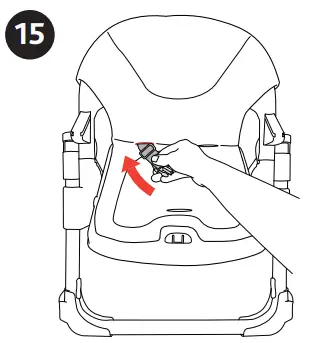
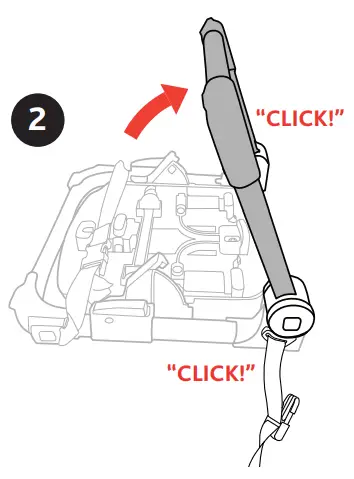
- To attach the Backrest to the seat frame, first, line up the seat frame down tubes with the corresponding openings on the Backrest. Next, guide both Backrest openings onto the top of the down tubes. Then line up the plastic side tabs with the grooves on the Seat Frame, as shown.
Press down on the Seat Backrest until both snap buttons click into place.
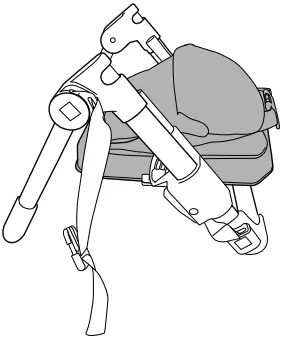
Pull up on the Backrest to make sure it is securely attached.
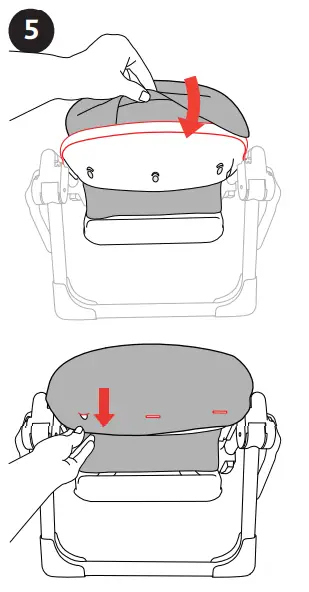
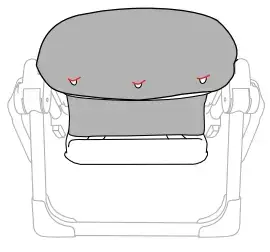
- Pull the Seat Fabric sleeve up and over the Backrest and hook the fabric buttonholes over the 3 Backrest Tabs, as shown.
 WARNING
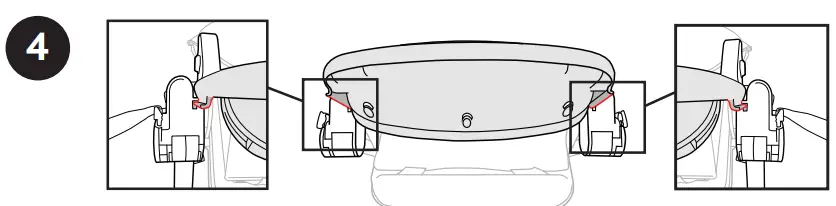
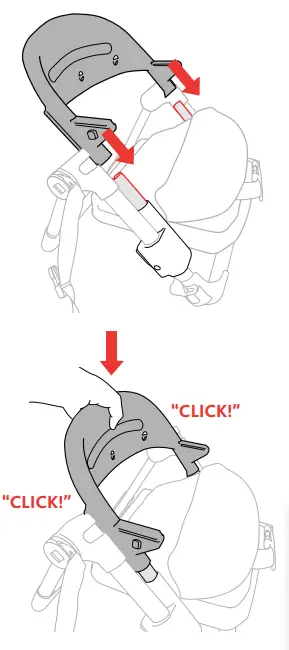
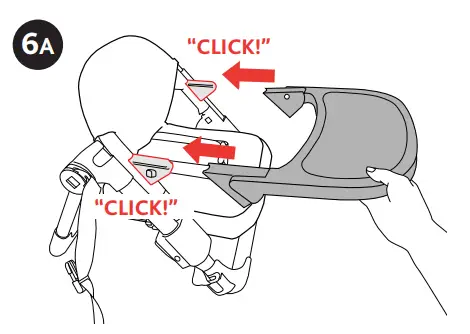
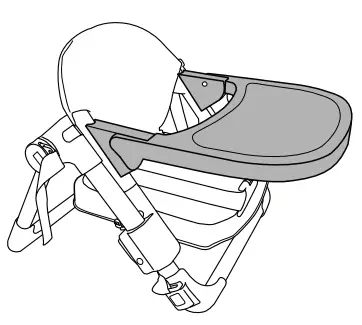
The tray is not designed to hold the child in the chair. - A. To attach the Tray to the seat frame, line up the Tray Hubs with theTray Supports. Slide both Tray Hubs onto the Supports until they click into position. Pull out the tray to make sure it is securely attached.
 WARNING
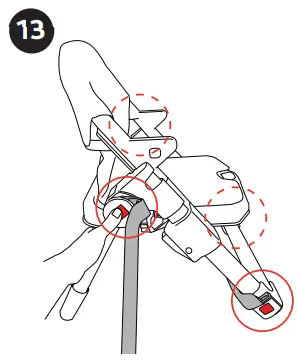
IMPORTANT FOR YOUR CHILD’S SAFETY – Always insert the Tray Horn into the Seat Base before using the Tray.
6B. Lift up on the front edge of the Tray and locate the Tray Horn on the bottom of the Tray. Flip the Tray Horn down and insert the Tray Horn into the front of the Seat Base, as shown.
Make sure the Tray Horn clicks into Place. Pull up on the tray to make sure it is securely attached.
Adjusting the Height of the Seat
WARNING
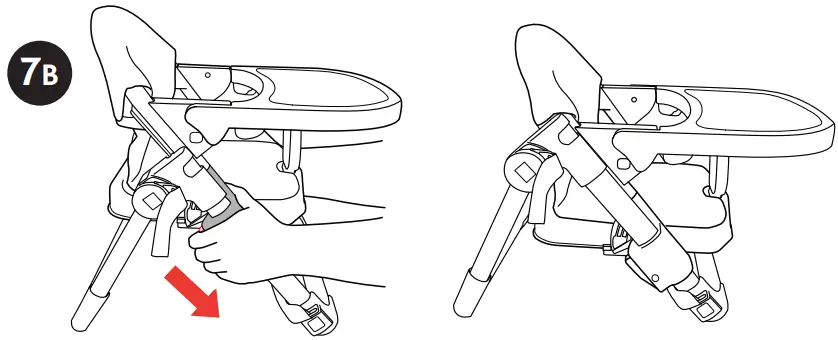
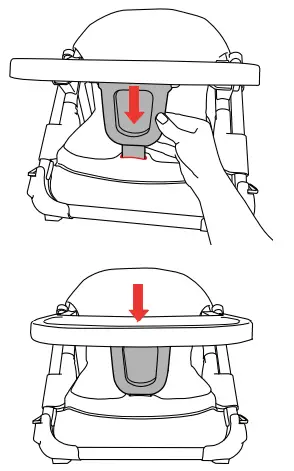
Do Not adjust the seat height with the child sitting in the seat. Keep your child at a safe distance when adjusting the height of the seat. Make sure that both side locks have locked into place and are at the same height, before placing your child in the seat. - A. To adjust the seat height to a higher position, pull up on the Backrest to the desired height.
 7B. To adjust the seat height to a lower position, squeeze both side adjustment locks and slide the seat down to the desired height.
Make sure the seat locks into one of the 3 positions.
 WARNING
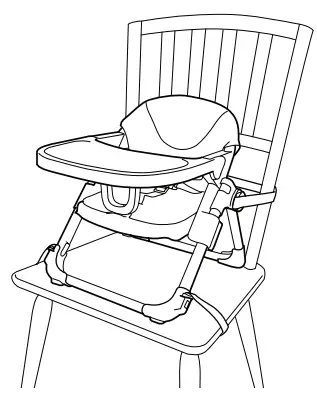
BOOSTER SEAT USE
Children have suffered severe head injuries, including skull fractures, after falling with or from boosters.
• Check that the booster seat is securely attached to the adult chair before each use.
• Always use restraints until the child is able to get in and out of the booster seat without help. Adjust to fit snugly.
• Never allow the child to push away from the table.
• Never lift and carry a child in a booster seat.
• Stay near and watch your child during use.
• Until the child is able to get in and out of the booster seat without help (about 2 ½ years old), the child should be secured in the booster seat at all times by the restraint system. The tray is not designed to hold the child in the chair.
• Never allow the child to sit in unsecured chair. Always secure the booster seat to the chair using both attachment straps. Always check that the attachment is secure before each use.
• Prevent serious injury or death. Do not use in motor vehicles.
• Use this booster only for children capable of sitting upright unassisted.
• Do not use for children weighing more than 50 lbs (22.7 kg).
• Do not use on any elevated surface other than a full-sized dining room chair.
• Never fit the booster seat to damaged or unstable chairs, folding chairs, pedestal chairs or bar stools.
• Only use on chairs with a seat at least 14 inches wide, 15 inches deep, and a backrest at least 13 3/4 inches high.
• Always check that the surface of the floor is even and the chair is stable before fitting the booster seat to the chair.
• Do not use the product if any part is broken, torn, or missing.
• Ensure that all components are correctly fitted and adjusted before use.
• To avoid the danger of suffocation, remove all plastic covers before using the product.
• Do not leave the product near walls, curtains, or windows, where the child can become entangled.
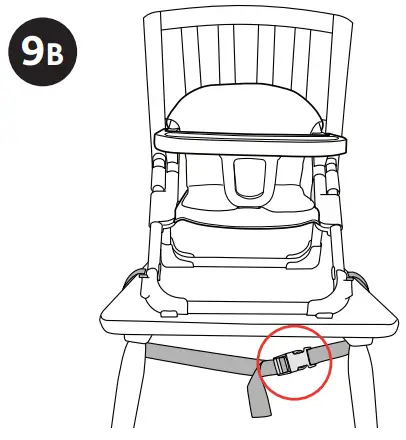
• Do not attach any parts to the product that is not supplied or expressly approved by Chicco. - Center the seat on the chair, making sure the back of the seat is against the seatback.
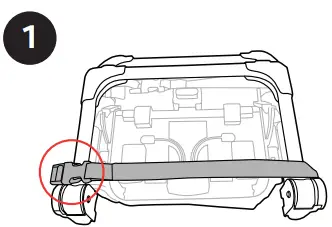
- A. Fasten the Rear Attachment Straps, passing them behind the ackrest of the chair. Pull the Rear Attachment Strap snug – Do not fully tighten.
9B. Then fasten the Lower Attachment Straps, passing them underneath the seat of the chair. Pull the Lower Attachment Strap snug – Do not fully tighten.

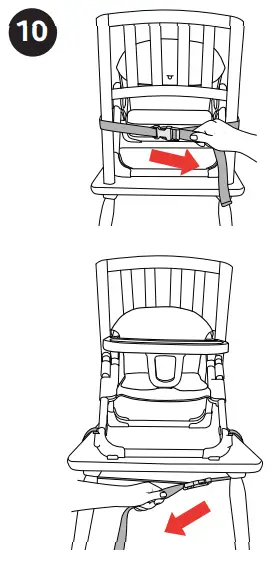
- To ensure the seat is securely attached to the chair, tighten the Rear and Lower Attachment Straps as shown.
Once tight, pull on the seat and make sure attachment straps do not become loose. If they become loose, reposition the straps and retighten to make sure the straps do not become loose.
Removing the Tray
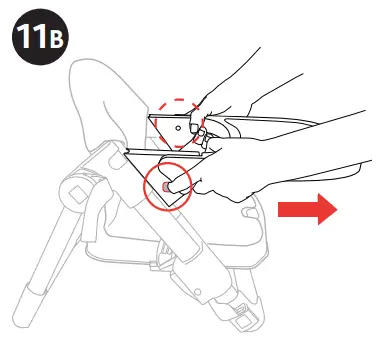
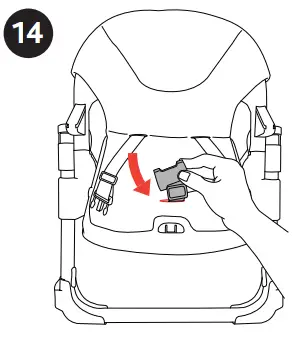
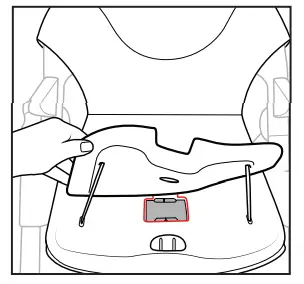
- A. Locate the locking tab under the front of the seat base. Push the tab back and pull up on the Tray Horn to remove it from the seat. Flip the Tray Horn up to store and lay flat under the Tray.
 11B. To remove the Tray from the Seat Frame, locate the release buttons on both sides of the Tray Hubs. Press both release buttons at the same time and pull on the tray to remove it from the Tray Supports.
Note: the tray must be level to expose release buttons.
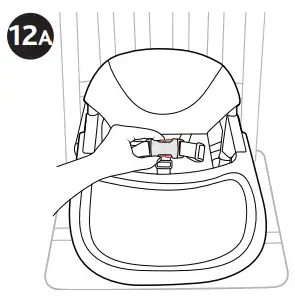
Using the 3-point Harness
- A. Unfasten the 3-point harness by squeezing the prongs on both sides.
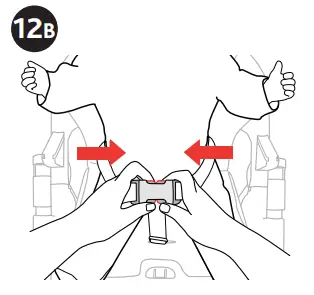
12B. Slide both Waist Clips into the Crotch Strap Buckle. Pull-on both sides to make sure the Clips are secured to the Buckle.
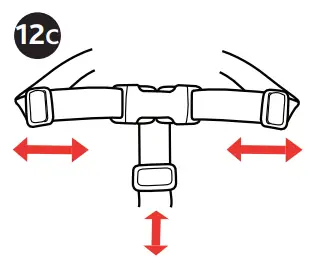
 12C. Adjust the 3-point harness to fit your child.
 WARNING
FLOOR SEAT USE
FALL HAZARD: Infants have suffered skull fractures falling while in and from floor seats.
• Use ONLY on the floor.
• NEVER use on an elevated surface.
• ALWAYS use restraints. Adjust to fit snugly.
• NEVER lift or carry a child in the product.
• Use ONLY with a child that is able to hold their head up unassisted.
• Do not use for children weighing more than 50 lbs (22.7 kg).
• STOP using a floor seat when the child can climb out or walk.
• ALWAYS keep the child in view while in the product.
• Do not use the product if any part is broken, torn, or missing.
• Ensure that all components are correctly fitted and adjusted before use.
• To avoid the danger of suffocation, remove all plastic covers before using the product.
• Do not leave the product near walls, curtains, or windows, where the child can become entangled.
• Do not attach any parts to the product that are not supplied or expressly approved by Chicco.
DROWNING HAZARD: Infants have drowned when a floor seat has been placed in a bathtub or pool.
• NEVER use in or near water.Removing the Attachment Straps
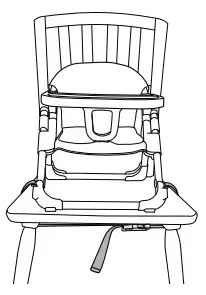
- To remove the Rear and Lower Attachment Straps, press in on the release button and at the same time, pull out the Attachment Strap buckle.
Repeat for the other 3 Attachment Strap buckles. Store the straps for later use.
 Refer to the previous section for tray removal (steps 11A and 11B).
Refer to the previous section for restraint use (steps 12A, 12B, and 12C).
WARNING
TODDLER CHAIR USE
• Use ONLY on the floor.
• NEVER use on an elevated surface.
• Do not use for children weighing more than 50 lbs (22.7 kg).
• ALWAYS keep the child in view while in the product.
• Do not use the product if any part is broken, torn, or missing.
• Ensure that all components are correctly fitted and adjusted before use.
• To avoid the danger of suffocation, remove all plastic covers before using the product.
• Do not leave the product near walls, curtains, or windows, where the child can become entangled.
• Do not attach any parts to the product that are not supplied or expressly approved by Chicco.
• DROWNING HAZARD: NEVER use in or near water.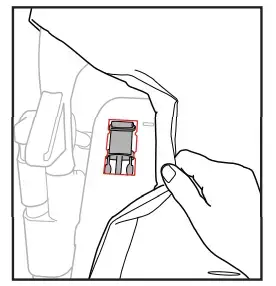
Storing the 3-point Harness
Refer to the previous section for tray removal (steps 11A and 11B).
- Undo the harness buckle. Pull the Crotch Strap through the opening on the seat fabric. Fold the strap and place it into the storage compartment under the fabric, as shown.
Chair Mode
- Pull a Waist Strap through the opening on the seat fabric. Fold the strap and place it into the storage compartment under the fabric, as
shown. Repeat for other Waist Strap.
Refer to the previous section for attachment strap removal (step 13).


Closing and Transporting the Seat
- Squeeze the Locking Lever on the rear of the Seat Base and rotate the Seat Base up.
- Stand the Seat up as shown. Pull down on the Rear Legs to release the locking pins and rotate the Rear Legs forward to fold.

- To store the excess Attachment Strap length, fold up the strap and secure it with the hook and loop straps.

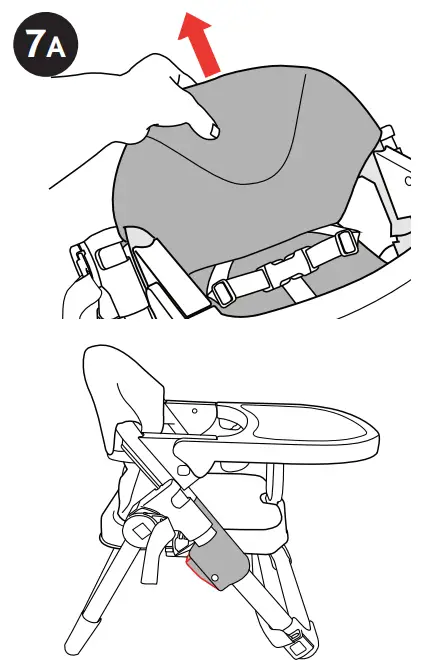
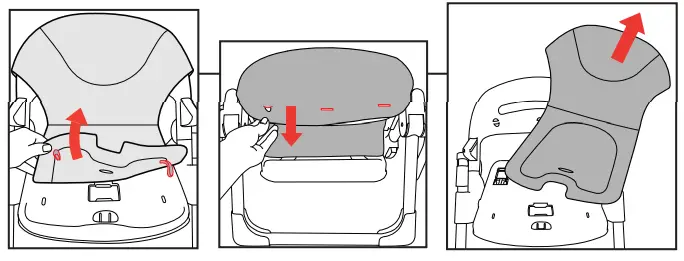
Removing the Seat Fabric
- To remove the Seat Fabric, undo the 4 elastic straps on the bottom of the seat base. Unhook the Seat Fabric from the back of the Backrest.
Unbuckle the Harness Buckle and pull the waist belt straps and the crotch strap through the seat fabric. Remove the Seat Fabric from the Booster Frame. Repeat this step in reverse to reattach the seat fabric.


Cleaning and Maintenance
This product requires regular maintenance. The cleaning and maintenance of the product must only be carried out by an adult.
CLEANING
Refer to the Care Label for instructions on cleaning the fabric parts of the product. You can spot clean the seat pad with a damp cloth and mild detergent.
Do not use bleach, spray, or wipes on the Pad or plastics parts on this product.
Periodically wipe clean plastic parts with a soft damp cloth. Always dry the metal parts to prevent the formation of rust if the product has come into contact with water.
- Do NOT fully submerge Tray in water.
- Tray is NOT dishwasher safe.
MAINTENANCE
Periodically check the product for loose screws, worn parts, torn material or stitching. Replace or repair the parts as needed. Use only Chicco replacement parts. To avoid friction that may prevent the correct operation of the product, ensure that all the movable plastic parts placed along the metal frame are clean of dust and dirt. Keep the product in a dry place. Prolonged exposure to direct sunlight may cause the fabric to fade and plastic parts to warp.
For More Information
For USA customers :
If you have any questions or comments about this product or are missing any of the parts, please do not return this product to the store. Contact us in one of the following ways:
 (877)-424-4226
 [email protected]
 www.chiccousa.com
![]() 1826 William Penn Way
1826 William Penn Way
Lancaster, PA 17601
![]()