
H-7690
ERGO MESH CHAIR
1-800-295-5510
uline.com
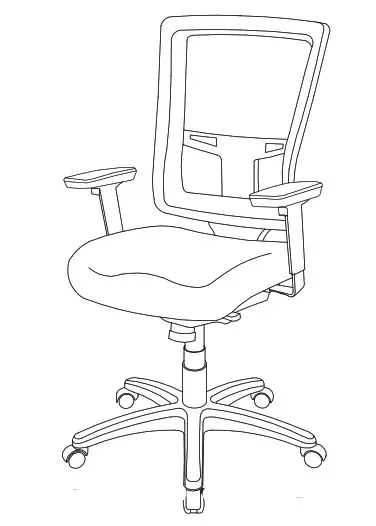
PARTS
ASSEMBLY
1.Sert casters into legs of five-star Turn base right side up. Insert gas lift into the center of base and place dust cover over gas lift. (See Figure 1)

2. Insert post into a slot in back Use one 8 x 10 mm screw to secure. (See Figure 2)
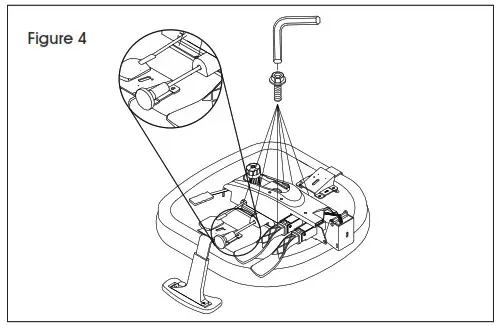 NOTE: Install post so side marked “outward” will face away from seat cushion.
 NOTE: Use Allen wrench to tighten screws.
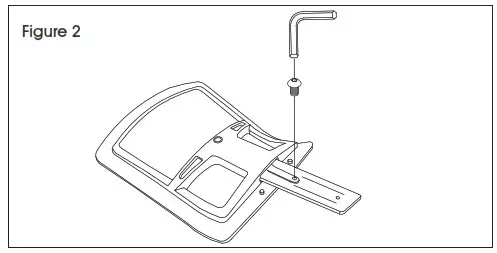
3. Align armrest with holes on the bottom of the seat cushion. Use four 6 x 24 mm screws to attach. Repeat on the opposite side. (See Figure 3)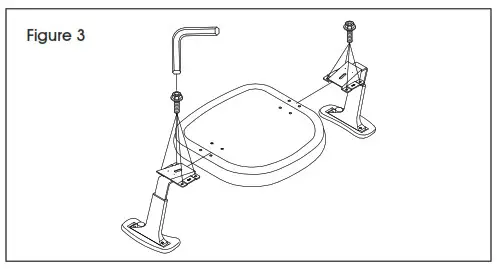
4. Align mechanism with holes on the bottom of the seat cushion. Use six 6 x 24 mm screws to attach. (See Figure 4)
 NOTE: For clearance to tighten screws, pulling out the seat slider lever and moving mechanism forward or backward may be necessary.
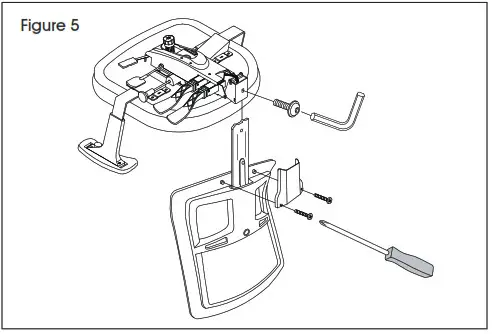
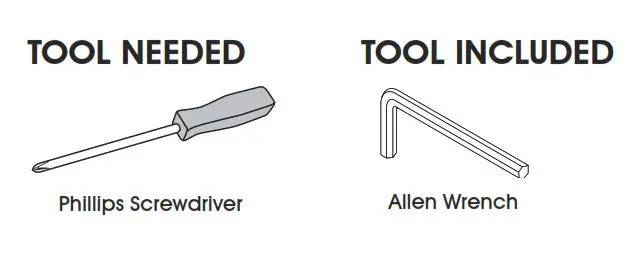
5. Insert back support post into a socket in mechanism on the bottom of the seat cushion. Use one 10 x 23 mm screw to secure. Place cover over a post and use two 4 x 20 mm screws to attach using a Phillips screwdriver. (See Figure 5)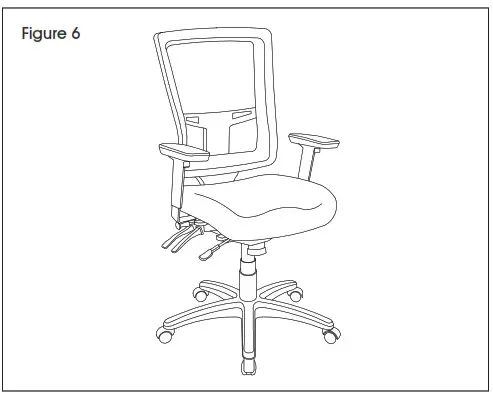
6. Slowly lower assembled chair, setting mechanism onto the gas liff. Press down on seat cushion to secure. (See Figure 6)
CHAIR ADJUSTMENTS
- Back Angle – To tilt the back, lift the lever and move freely. To lock tilt position, push the lever down while sitting at the preferred angle.
- Seat/Back Tilt – To adjust seat/back angle, lift the lever up. The chair has a standard tilt; the seat and back tilt simultaneously at the same ratio.
- Adjustable lilt Lock – To lock seat/back angle, press lever down at the desired angle.
- Seat Depth (Seat Slider) – To adjust the seat depth, pull the lever out and slide the seat forward or back while sitting. Release lever to lock in the desired position.
- Seat Height Adjustment – To raise seat height, lift the lever up with little to no weight on the seat. To lower seat height, lift the lever up while sitting.
- Forward Tilt – To use forward tilt, the back angle lever (1) must be down, and the seat/back tilt lever (2) must be up. Once levers 1 and 2 are incorrect position, sit all the way back in the seat, lean back, pull back on lever (6), and then lean forward. To stop forward tilt, lean back and push lever (6) toward the front of the chair.
- lilt Tension – To increase tilt tension, turn the knob clockwise. To decrease tilt tension, turn the knob counterclockwise.
- Back Height Adjustment – To raise the back, lift the back until it clicks into the desired height. To lower the back, lift the seatback to its tallest height to release the ratchet mechanism. Then, push it down to the lowest height setting.
- Armrest Adjustment:
• Height – To adjust arm height, press the button under the front of each armrest and move the arm up or down.
• Width – To adjust arm width, push armrest pad in or out.
• Depth – To adjust arm depth, push armrest pad forward or backward.


1-800-295-5510
uline.com

