Step 1. Charge
Charge the headphones with the included micro-USB cable. The micro-USB charging port is located on the right side of the headphones (as worn) and enclosed by a small protective hinged cover. The hinged cover can be lifted by using a fingernail. When the hinged cover is lifted, the Micro-USB charging port is revealed. The LED indicator will turn blue when charging is complete.
Step 2. Pair
While off, press and hold the power button for 5 seconds to enter pairing mode. The LED indicator will flash blue and red repeatedly while in discovery.
Step 3. Connect
Enable the Bluetooth® settings on your device and select “Trekz Air by AfterShokz”. The LED indicator will turn blue once connected.
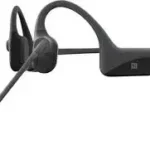
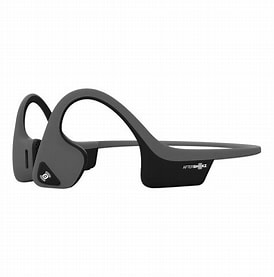
Begin by holding the headphones horizontally, with the transducer side facing up, closest to your body. Lift the headphones over your head, so the back of the wraparound headband sets in place at the base of the head, and the transducers rest on your cheekbones in front of your ears (not nested inside or covering your ears).
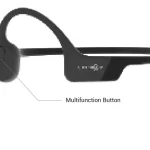
(The multifunction button is a triangle button located on the outside of the left transducer)
Play/pause music:
Click the multifunction button once.
One beep.
Skip to next song:
Double-click the multifunction button while music is playing.
One beep.
Answer/end call:
Click the multifunction button once.
One beep.
Answer call waiting and put the current caller on hold:
Click the multifunction button once to switch between callers.
One beep.
Answer call waiting and hang up on current caller:
Press and hold the multifunction button for 2 seconds.
One beep.
Reject a call:
Press and hold the multifunction button for 2 seconds.
Two beeps.
Voice dial:
Press and hold the multifunction button for 2 seconds.
“Voice dial”.
Redial last number:
Double-click the multifunction button.
“Last number redial”.
(The volume/power buttons are located on the underside of the right arm of the headphone. The volume up button has a raised dot on it. The volume up button also acts as the power button. The volume down button is the button next to the volume up and power button.)
Power on/off
Press and hold the power button for 2 seconds
Four beeps and “welcome to Trekz Air”
Mute
Press and hold both for 2 seconds while on a call
“Mute on” or “mute off”
Change EQ setting
Press and hold both for 2 seconds while music is playing
“Equalization changed”
Check battery status
Click the volume up or down while music is paused
“Battery high, medium, low, or charge me”
Adjust volume
Click the volume up or down button to adjust volume
One beep
Part number
AS650
Speaker type
Bone conduction transducer
Frequency response
20Hz~20KHz
Sensitivity
100 ± 3dB
Microphone
-40dB ± 3dB
Bluetooth version
Bluetooth® v4.2
Compatible profiles
A2DP, AVRCP, HSP, HFP
Wireless range
33 ft (10m)
Battery
Rechargeable lithium ion
Continuous play
Up to 6 hours
Standby time
Up to 20 days
Charge time
2 hours
Weight
1.06 oz
Warranty
2 years
Step 1. Enter pairing mode
Step 2. Press Multifunction button + volume up/power button for 2 seconds (Audrey SaysTM“multipoint enabled”)
Step 3. Pair first device (Audrey SaysTM “Connected”)
Step 4. Shut down
Step 5. Re-enter pairing mode
Step 6. Pair second device (Audrey SaysTM “second device connected”)
Step 7.Turn the device off, then power back on
Solid red: Charging
Solid blue: Charging complete
Flashes red and blue: Pairing mode
Flashes blue: Incoming call
Flashing red every 2 minutes: Low battery
Start with your headphones off
Enter pairing mode, by pressing and holding volume+ until Audrey says “Pairing” and the LED light flashes red and blue. Then press and hold the multifunction button, and both volume+ button and volume- button (all three buttons) simultaneously for 3-5 seconds until you hear two beeps or feel vibrations. Turn your headphones off. Trekz Air is now reset and can be re-paired to your device.
To validate your 2-year warranty, register your product at http://bit.ly/RegisterMyTrekz
Only purchases from authorized resellers are supported by our warranty policy.
Fitband
Silicon rubber bands provide adjustability to accommodate smaller head sizes.
Step 1. Slide Fitband over the right transducer and along the right arm to rest over the charging port.
Step 2. Slide the second Fitband over the left transducer and along the left arm to align evenly with the right arm.
Step 3. Rotate the Fitbands around the arms until the desired fit is achieved.
Use with headphones in environments where it is safe to block out ambient noise, such as on an airplane or train.
Step 1. Roll earplugs firmly between fingers and place in ears.
Step 2. To adjust EQ settings to reduce or enhance bass while wearing earplugs, press and hold volume up and down buttons simultaneously.
Step 3. Switch EQ to normal condition when you take out the earplug.